In this knowledgebase tutorial, we are going to learn about the option to configure Sitemap settings in Rank Math.
The sitemap is one of the most important pieces in your website’s SEO puzzle as it helps search engines navigate your website most efficiently by offering a hierarchical view of your content.
Before we get into the specific settings about sitemaps in Rank Math, it’s wise to understand what sitemaps really are, and what they can do for your website.
You can watch the below video if you prefer that to the text:

Table of Contents
- What is a Sitemap?
- Reaching the Sitemap Settings
- Before We Begin – Important Sitemap Things You Should Know
- Different Sections to Configure Sitemap Settings
- Saving Your Settings
- Submitting Your Sitemap
- Resetting Your Settings
- Fixing 404 Error in Sitemap_Index.xml
- Adding Custom URLs to Sitemap
- Frequently Asked Questions
- Conclusion
1 What is a Sitemap?
As we mentioned, a sitemap is an index of all the content on your website, which helps search engines easily discover your content.
But you might think – do I really need a sitemap? Can’t Google just go through my website and index what it finds.
It can, but it’s not efficient, and it doesn’t give you any control. Also, posts that are buried deep inside your site may never be indexed by search engines–no matter how important that page is.
Think of it like this. If you’re reading a big book, and you have to find a specific section of the book, how difficult would it be without an index? If you had an index to refer to, finding any content would be a piece of cake.
With a sitemap, you can be sure that Google and other search engines will know about all the content on your website, whether they index it or not.
Also, sitemaps give you the ability to prioritize your pages. That’s like saying to the search engines, “Hey, this page is important, index it first”. Google uses priority as a guide, not as a rule, so it might or might not work. But surely, it sends a strong message of what content you want to be indexed first.
That’s a good basic understanding of Sitemaps and what they do.
2 Reaching the Sitemap Settings
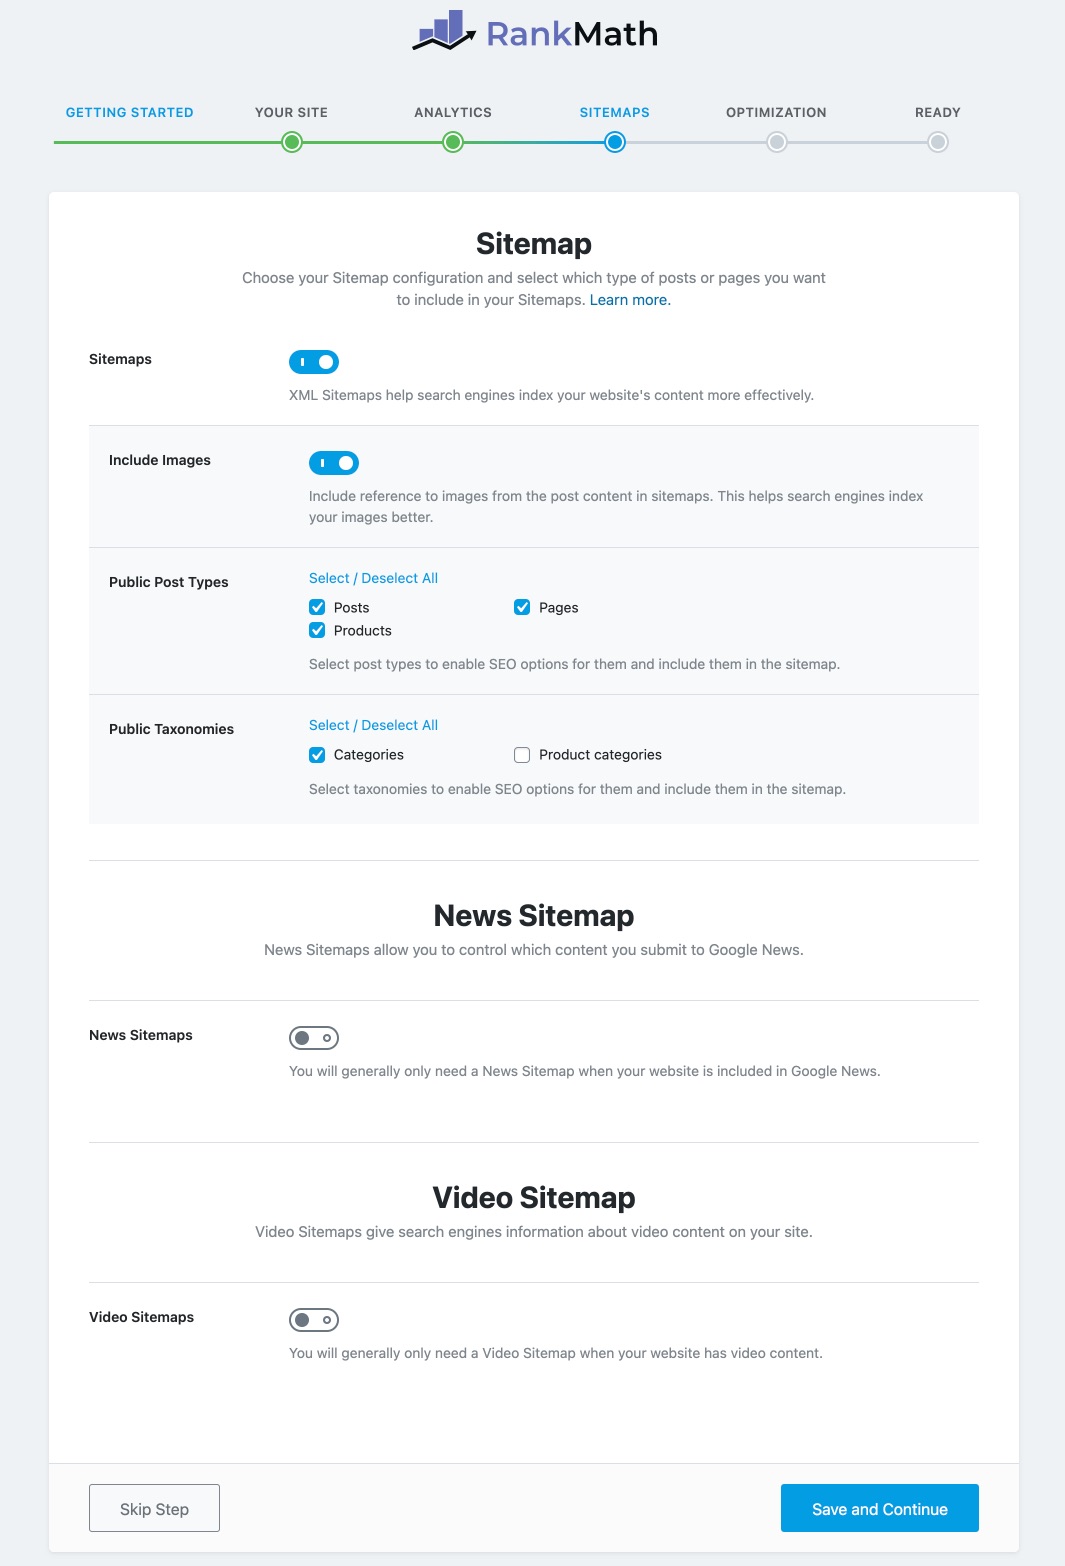
If you’re configuring Rank Math for the first time, our Setup Wizard will include Sitemap settings, and that would look like this.
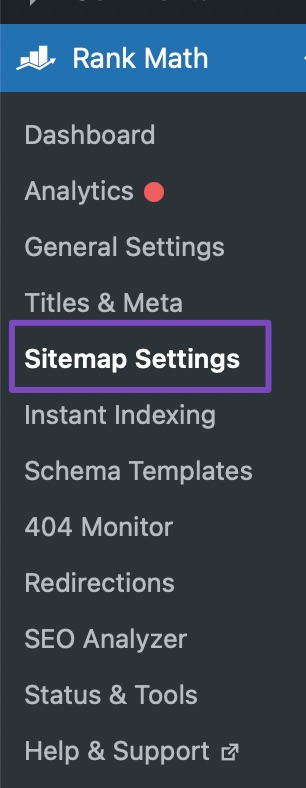
You can also reach the Sitemap settings in Rank Math using Rank Math’s WordPress menu. Hover over the menu with your mouse, and then click the Sitemap Settings to reach the settings.
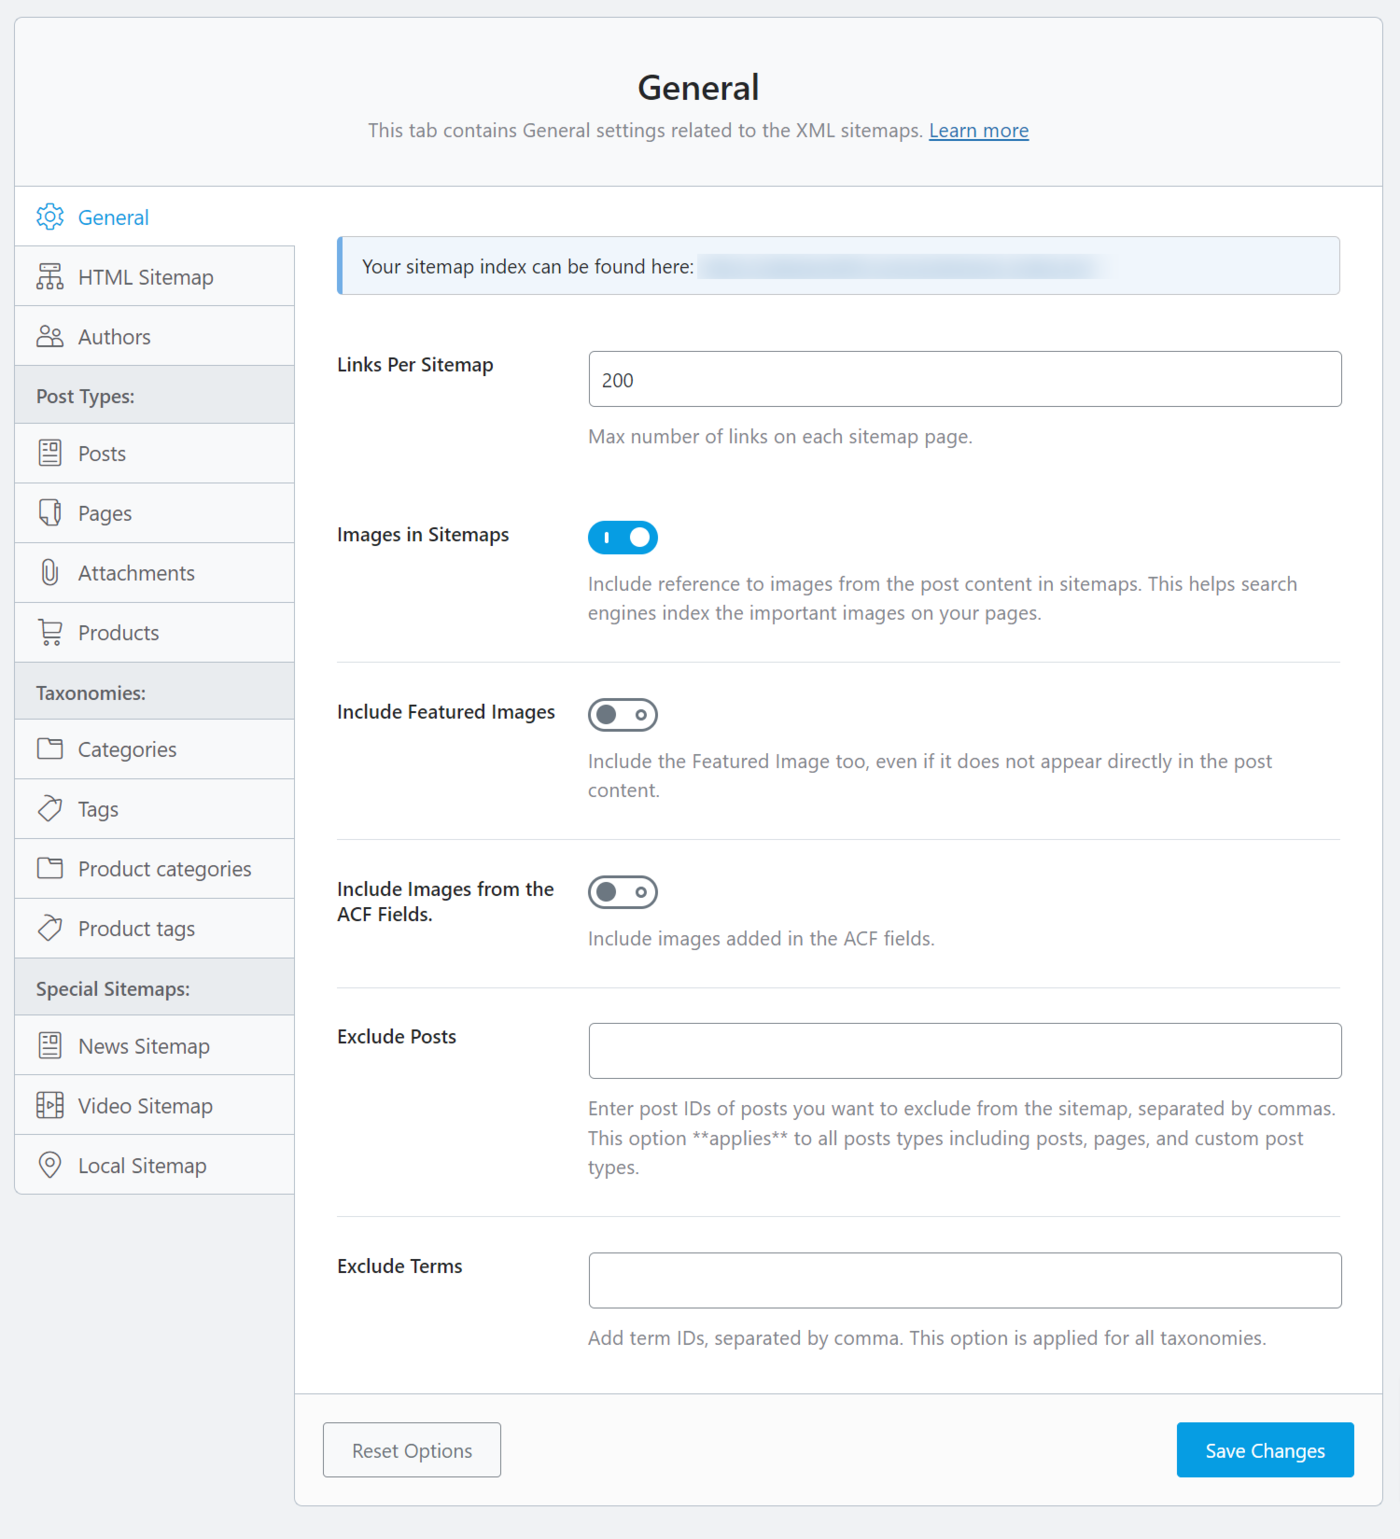
As is the case with all the settings, the Sitemap settings in Rank Math have been divided into tabs to organize them better. Here is how the settings should appear.
3 Before We Begin – Important Sitemap Things You Should Know
With so many Sitemap settings, you might get confused about what Sitemaps you should enable in Rank Math, and even submit to Google and other search engines. Let us try to give you some guidance around it.
First, your website can have multiple sitemaps. Yes, you can have a sitemap for posts, another one for images, tags, etc. When we get into the settings, we will explain those and what they achieve.
Second, the goal of sitemaps is to help search engines find your content. Whether it be through your categories sitemap, your posts, authors, or anywhere else, it doesn’t matter. What does matter is that search engines find all the content on your website, once? There is no advantage in pushing a sitemap with all your posts laid out, and then another one with your tag archives since the content will be the same.
This raises another question. Why are there so many settings to configure if I need to share my posts with Google? The answer is “controls”. The bigger and more complex a website gets, the more specific configuration is required for it to function well. You might not need to configure all the options, but it does not hurt to know that if the situation arises, you do have the option to do so.
Third, take note of how we configure the settings related to the sitemap. Websites are complex creatures, and no 2 websites are the same. It is not possible for us to recommend the settings that will be perfect for your website, and that is why our recommendations are very generalized when we talk about the settings. Do not use them at face value. Another important thing to remember is that do not take just the screenshots as a reference to our recommendations. Rank Math hides a lot of settings based on other settings, so sometimes we have to enable certain settings to show the related settings, even if most websites will never need to enable the primary setting in the first place.
Now that you understand the philosophy behind sitemaps let us get started with discussing each of the tabs and the options available to configure in Sitemap settings.
Different Sections to Configure Sitemap Settings:
5 General
The General Section is the home for all the Global Sitemap settings. Here you will configure how the sitemaps will be structured along with some basic settings about how the sitemaps will function.
Here are all the settings in the General Section.

Let us explain all the settings one by one.
5.1 Links Per Sitemap
Your sitemap can be divided into multiple pages for better organization, and this setting controls the maximum number of sitemap items per page.
Google restricts per sitemap to 50,000 URLs but we suggest not to use such a high number unless you’re on a dedicated server which can take that much load. Splitting the Sitemaps into several sitemaps is the best approach and also helps search engines to crawl the URLs better and faster.
Earlier, the default value for this setting was 1000. But, we’ve observed that Google responds better to smaller pages in sitemaps. Thus, we’ve reduced the value to 200, which is our recommended setting.

5.2 Images in Sitemaps
This setting enables or disables the inclusion of images in the sitemap. Having your images indexed is important, as they can show up in the image results. And, with more rich content appearing in the SERPs, it is a good idea to have some visual assets indexed in Google. The default setting is ON, and we recommend that you keep it enabled.

5.3 Include Featured Images
This option sets if the featured images of posts are included in the sitemap or not. As you know, the featured image may or may not show up in the post depending on how you set it up, and this setting lets you control if you want to include them in the sitemap. We recommend that you enable this setting.

5.4 Include Images from the ACF Fields PRO
Advanced Custom Fields plugin allows you to add custom fields anywhere on your site such as posts, pages, users, taxonomy terms, media, comments, etc.
With Rank Math, you can now include images from the ACF fields to the sitemap very easily. Simply navigate to Rank Math SEO → Sitemap Settings → General and enable the Include Images from the ACF Fields.

Note: This option will be only visible if you have installed the Advanced Custom Fields plugin and enabled the ACF module under Rank Math SEO → Dashboard → Modules.
5.5 Exclude Posts
If you would like to exclude a few of your posts from being included in the sitemap, you can enter the Post IDs of those posts in the field separated by commas.
Please note that this setting is not limited to posts. You can enter IDs of posts, pages, and even custom post types to exclude them from your sitemap.

In case you didn’t know, the ID is a number that is assigned to each post, page, and custom post inside WordPress. You may remember your posts by their URLs, but WordPress uses IDs to work with them internally. You need to enter the numerical ID into this field for the exclusion to happen.
Here is how you find the ID of your posts. Open the post that you want to find the ID for in a new tab, and check the URL. Here is an example.

From the URL yourwebsite.com/wp-admin/post.php?post=1&action=edit, extract the post= part. In this case, it would be:
post=1
The number after the “=” sign is the post ID. Enter that in the Exclude Posts field to exclude them from the Sitemap.
5.6 Exclude Terms
This section lets you exclude entire taxonomies. To exclude a taxonomy, enter the ID of the taxonomy in the field. All taxonomies, including categories, and tags, are supported.

The ID is a unique number that WordPress assigns to each taxonomy to track it internally. Here is how you find the ID of a taxonomy.
From the Posts menu, head over to the Categories Page.
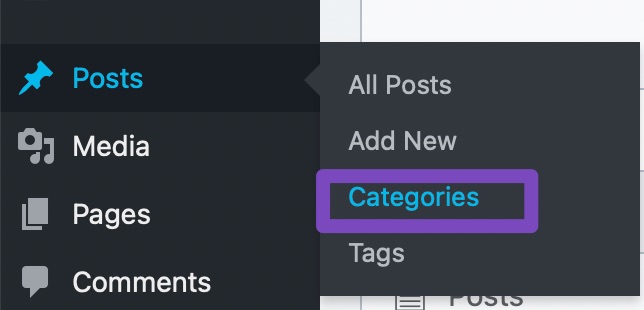
Open the category you want to find the ID for.

Observe the URL of the page that opens up in your WordPress admin.

In this case, it is:
yourwebsite.com/wp-admin/term.php?taxonomy=category&tag_ID=4&post_type=post
Notice the term tag_ID, in this case, it is:
tag_ID=4
The number after the “=” sign is the ID of the category. You can repeat the same process for any taxonomy to find its ID.
To exclude the taxonomies, enter all the IDs in the Exclude Terms field separated by commas.
6 HTML Sitemaps
This section comprises all the options to configure the HTML sitemap. Once you enable the HTML Sitemap option, you’ll notice a list of all the other options.
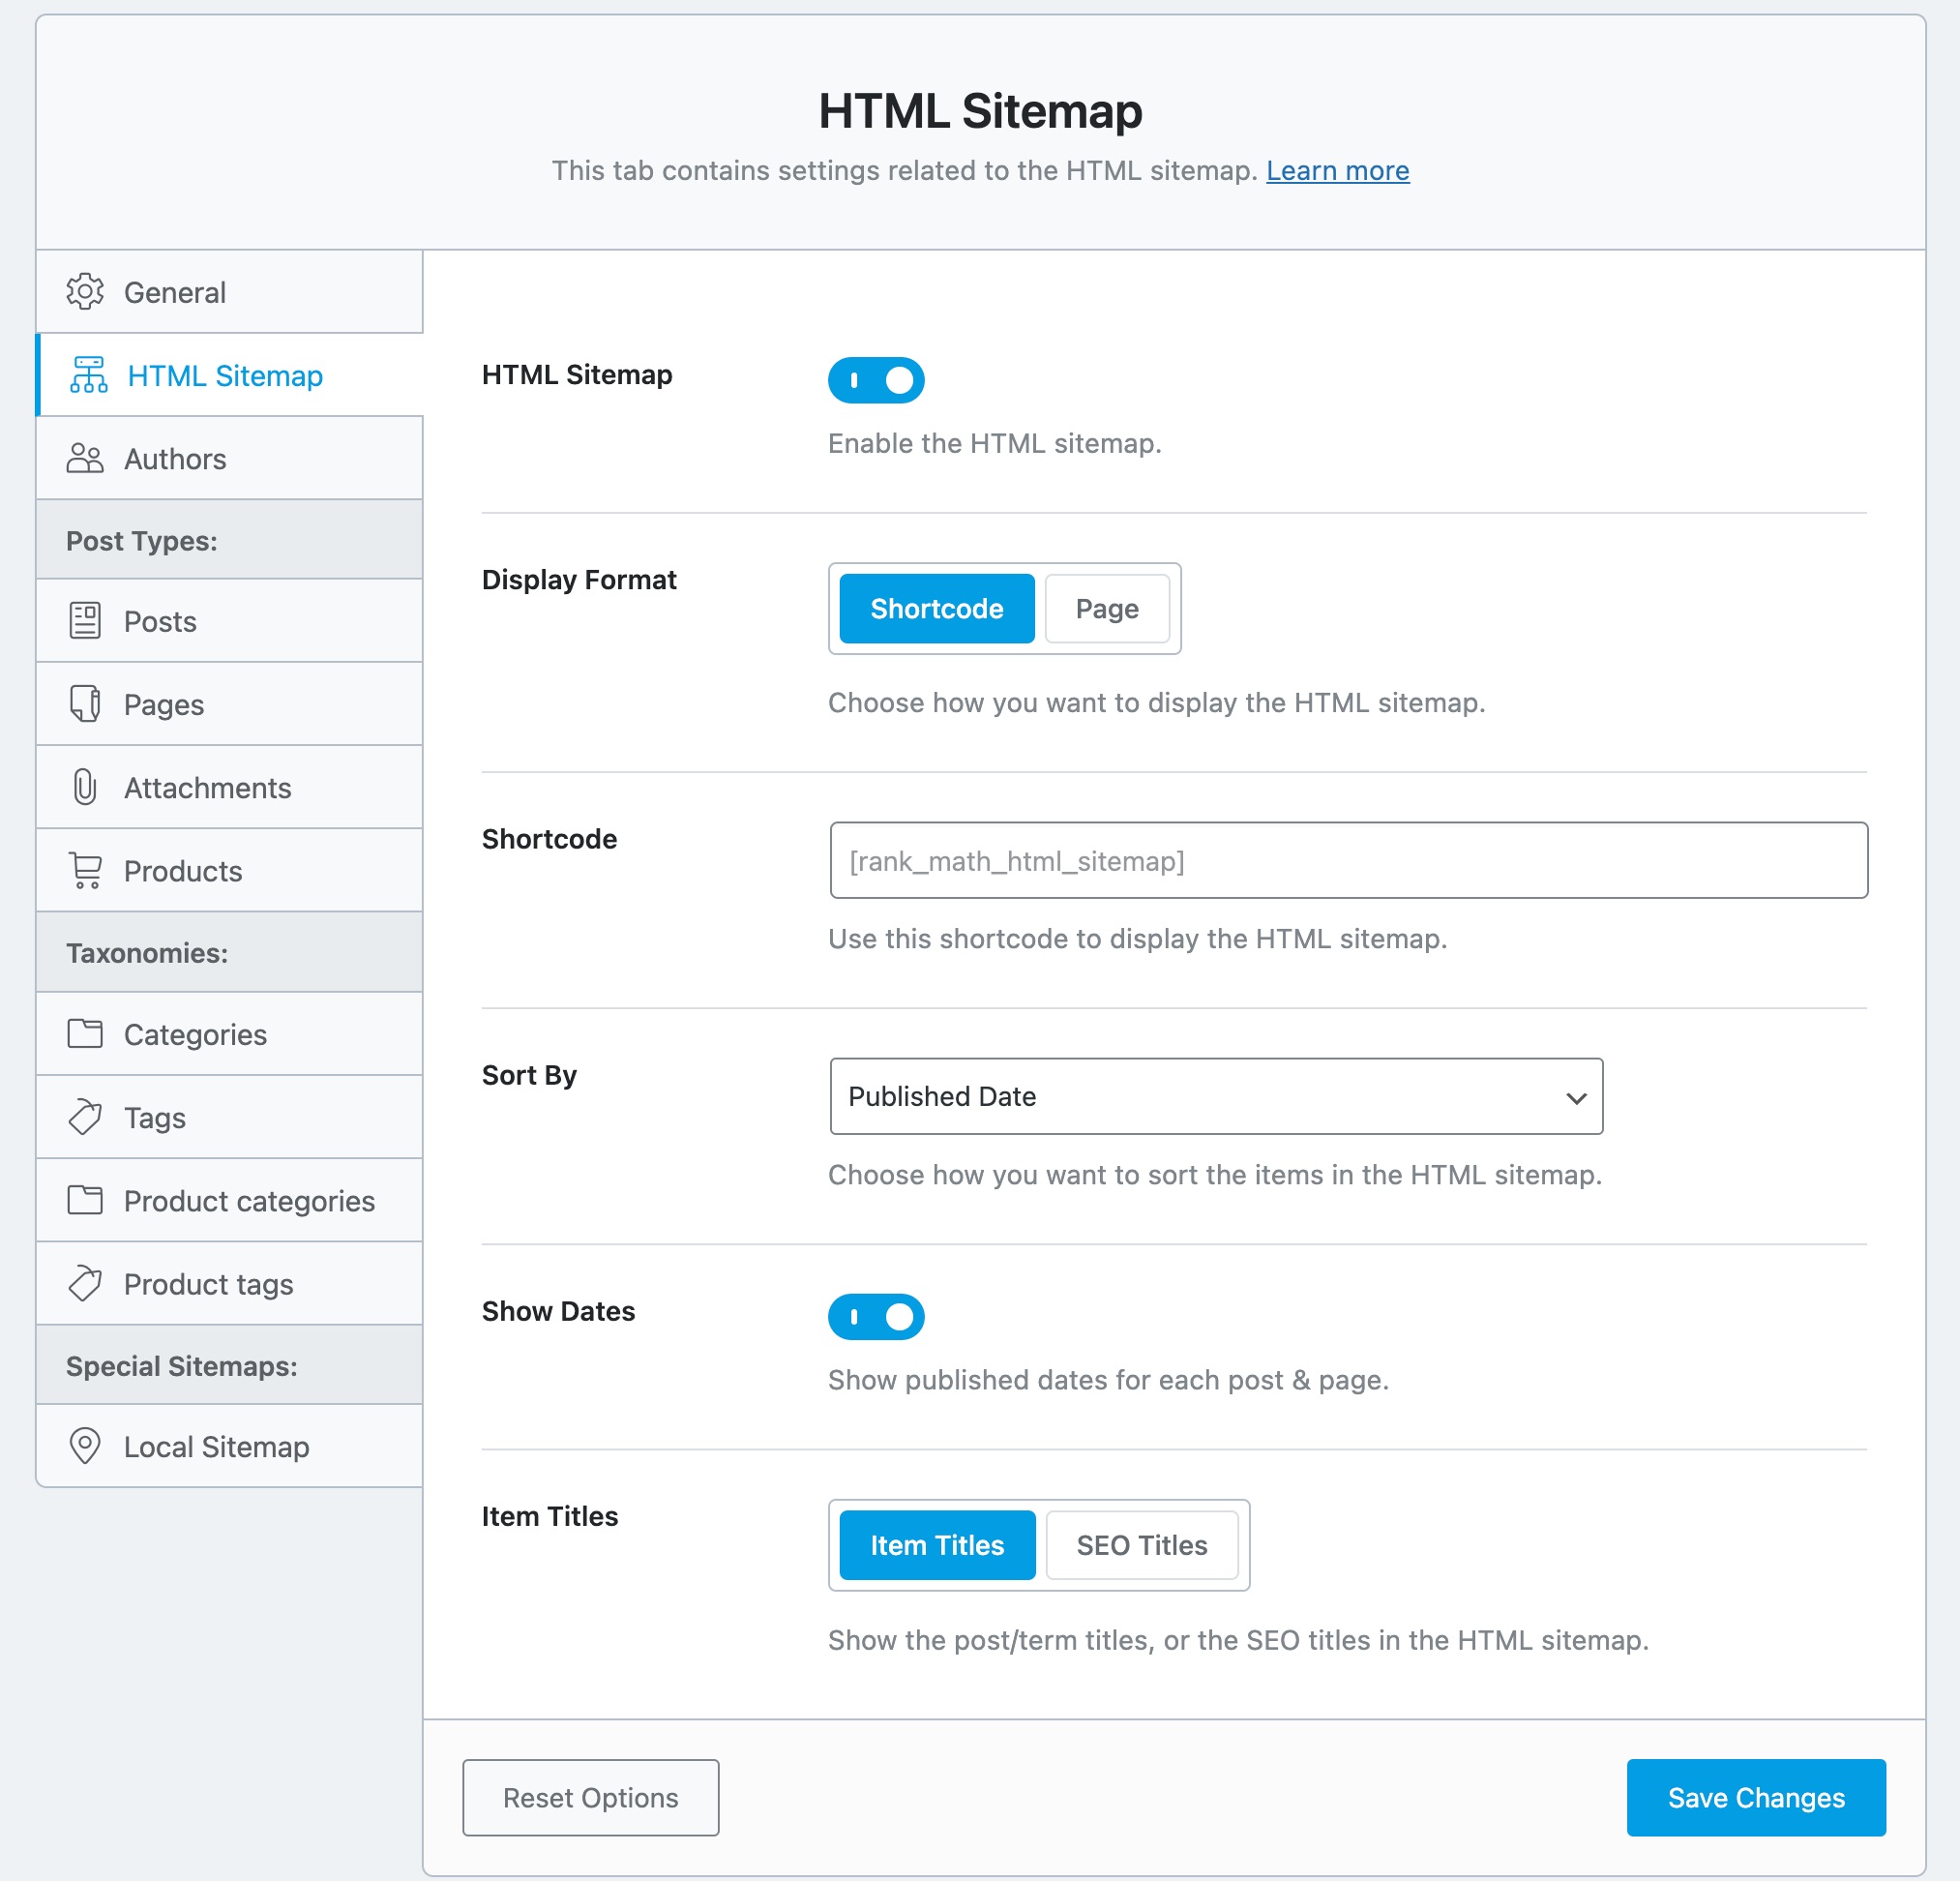
6.1 Display Format
This option lets you choose how you want to display the HTML sitemap. The available options are Shortcode and Page.

6.2 Shortcode
You’ll find this option if you’ve selected the Shortcode option in the Display Format. Copy and paste the shortcode where you want to display the HTML sitemap.

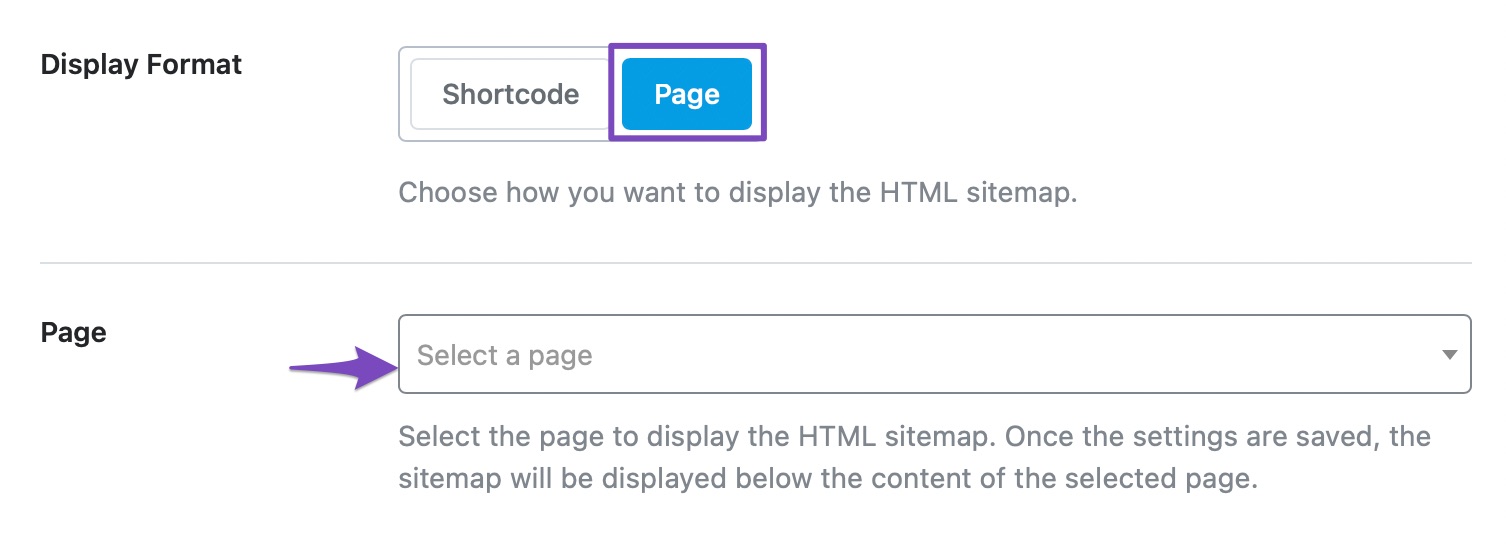
6.3 Page
You’ll find this option if you’ve selected the Page option in the Display Format. Select a page from the drop-down where you want to display the HTML sitemap.
6.4 Sort By
Choose how you want to sort the items in the HTML sitemap. The available options are Published Date, Modified Date, Alphabetical, and Post ID.

6.5 Show Dates
Enable the toggle to display the publish date for each post.

6.6 Item Titles
This option displays the titles for each post. Available options are Item Titles and SEO Titles.

7 Authors
As you might have guessed by now, the Authors Tab contains all the sitemap settings that affect the Author Archives. The Authors tab will be available only if the Author Archives are enabled in Rank Math and are set to Index. You can enable the author Archives at WordPress Dashboard → Rank Math SEO → Titles & Meta → Authors.
Note: You should only enable the Author Archives option if multiple authors publish on your site. If you are the only one publishing on your site, it is recommended that you set the Author Archives option to Disabled. When disabled, your author URL will be redirected to your homepage. To ensure your changes take effect, you should clear your browser, site, plugin, and server-level caches after enabling/disabling the Author Archives option.
Here is a preview of all the settings available in the Authors Tab.
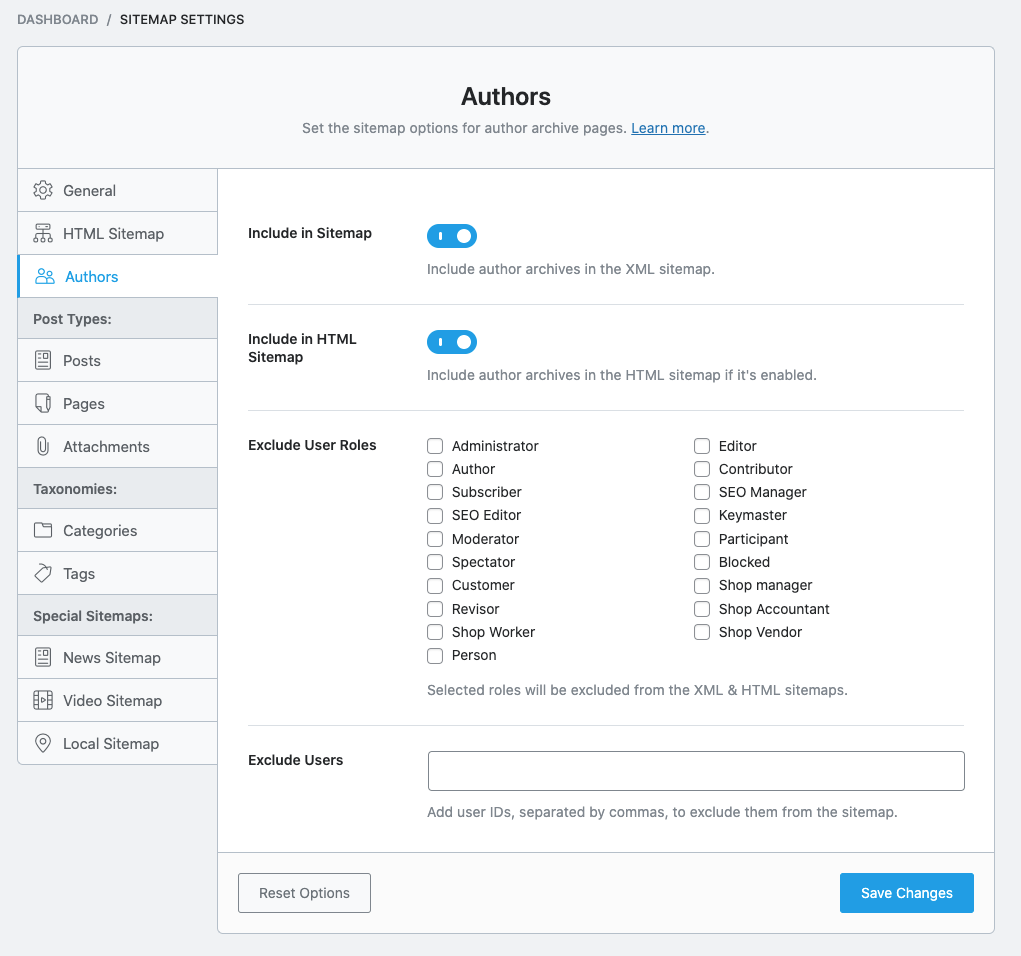
7.1 Include in Sitemap
Toggle this option if you want to include the author archives in the sitemap.

7.2 Include in HTML Sitemap
Toggle this option if you want to include the author archives in the HTML sitemap.

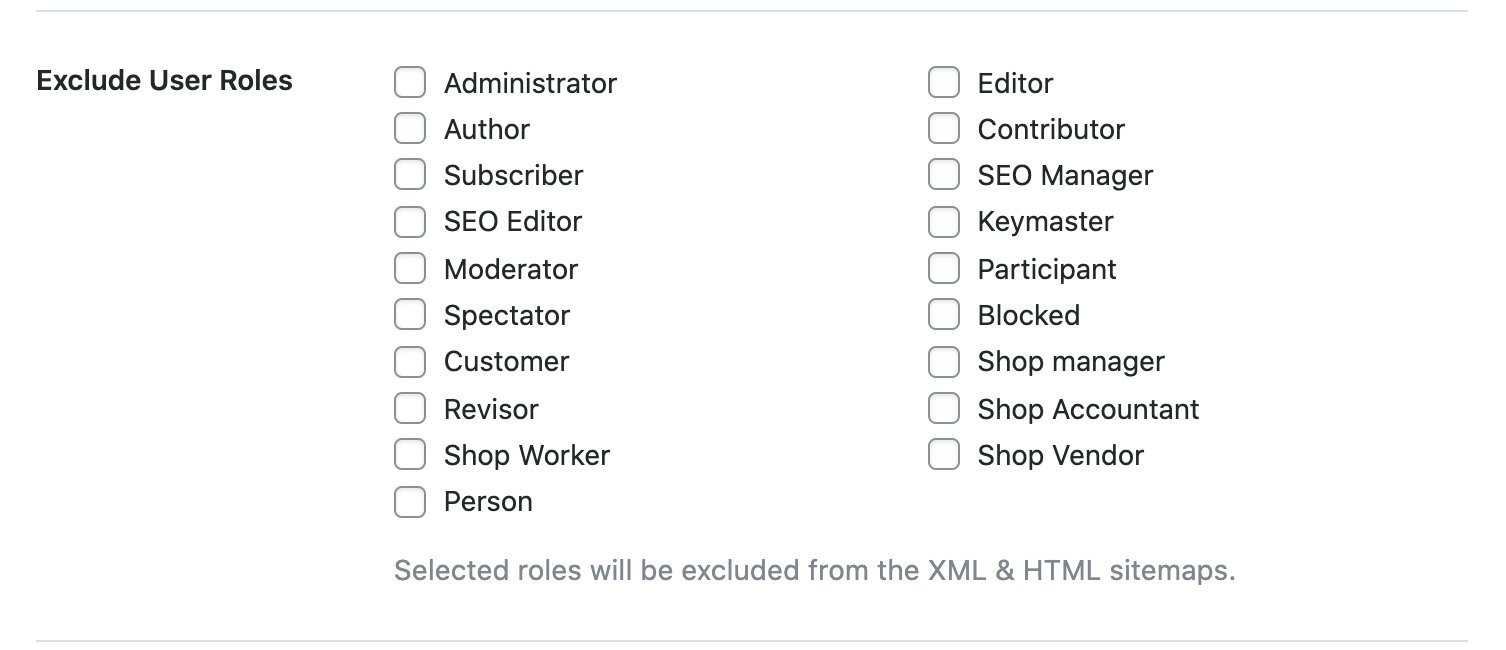
7.3 Exclude User Roles
If you want to exclude certain user roles from appearing in the XML and HTML sitemap, then you can use this option. This option lists all the current user roles present on your website. The user roles that you select will be excluded from the sitemap.
7.4 Exclude Users
If, instead of user roles, you’d like to exclude certain users from the sitemap, you can enter the user IDs of all the users here, separated by commas.

Here is how you find the ID of a user. From the WordPress menu, head over to Users → All Users.
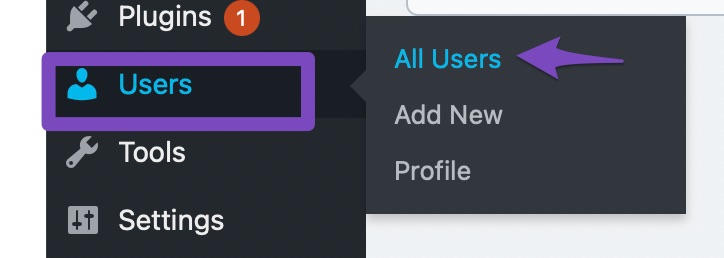
From the list of the users, open the profile of the user you wish to exclude.

Note the URL of the page that opens up.

In this case, the part of the URL that is useful is:
yourwebsite.com/wp-admin/user-edit.php?user_id=2&wp_http_referer=
Notice the term user_id. In this case, it is:
user_id=2
The number after the “=” sign is the ID of the user. You can add that, and the ID of other users you want to exclude from the sitemap.
That concludes all the settings in the Authors Tab. Let us move to the next section, the Posts Tab.
8 Posts
The Posts tab contains all the settings that affect the sitemap settings for your posts. Here is a preview of all the settings available.
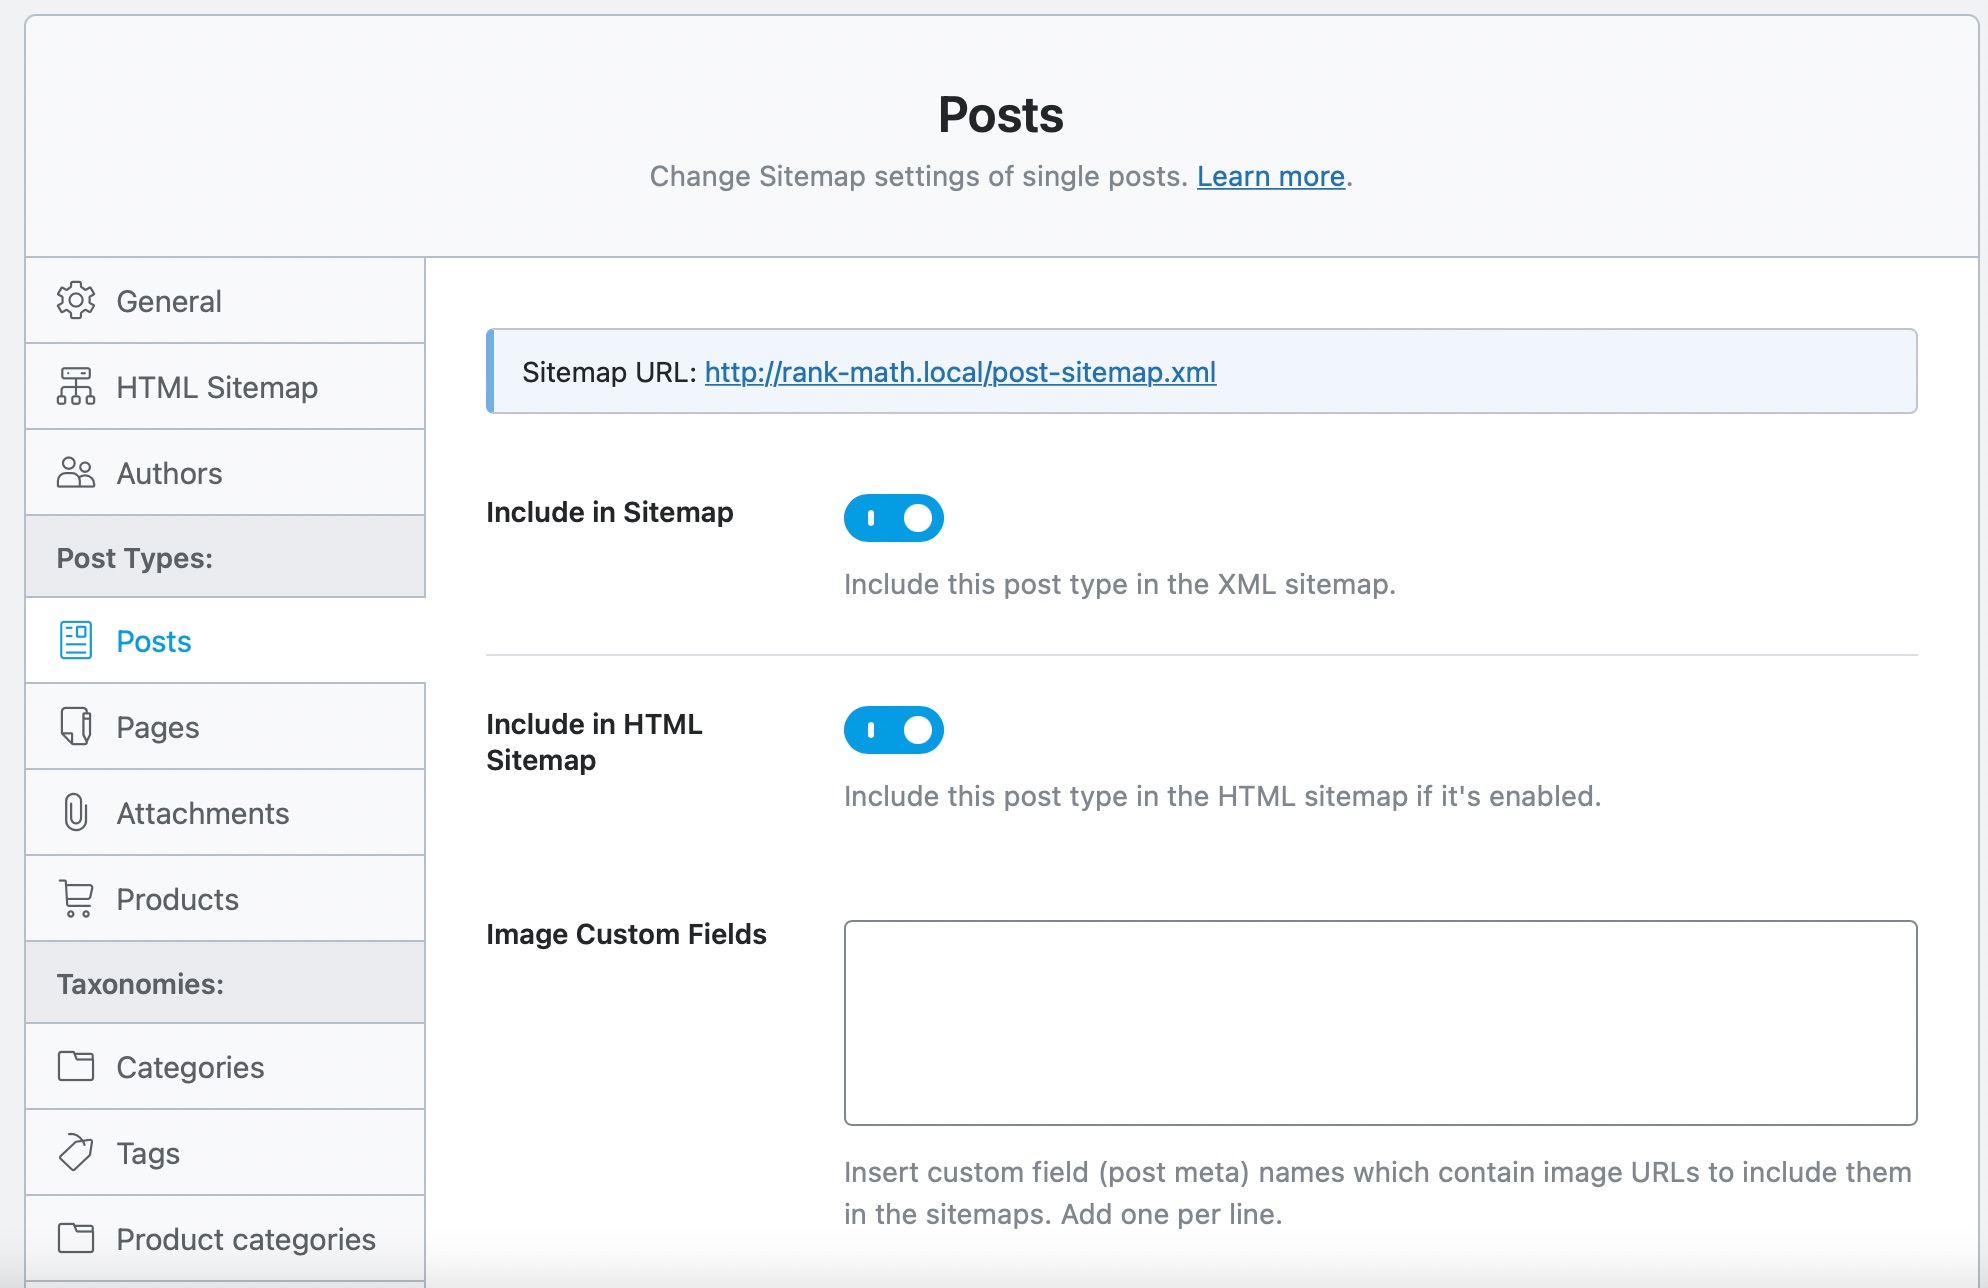
Let us understand the impact of each of the settings one by one.
8.1 Include in Sitemap
This option controls the inclusion or exclusion of your posts in the Sitemap. We recommend that you enable this setting so that all your posts are included in the sitemap.

8.2 Include in HTML Sitemap
If this option is enabled, it’ll include the post type in the HTML sitemap.

8.3 Image Custom Fields
You may include custom fields in your posts with image URLs. If you wish to include those images in the Sitemap, you can enter the custom field’s names in this field. Make sure to add only one entry per line so Rank Math can understand them better and include them in your sitemap.

8.4 Finding Your Posts Sitemap
After you’ve made your changes, you’d want to find the URL of your Posts Sitemap, and the URL is available right on the top of the page. Copy it and save it somewhere to submit it to Google, or just access it from this page.

That covers all the settings in the Posts tab. Let us move on to the Pages tab.
9 Pages
The Pages tab contains all the settings that affect the sitemap settings for your pages. Here is a preview of all the settings available.
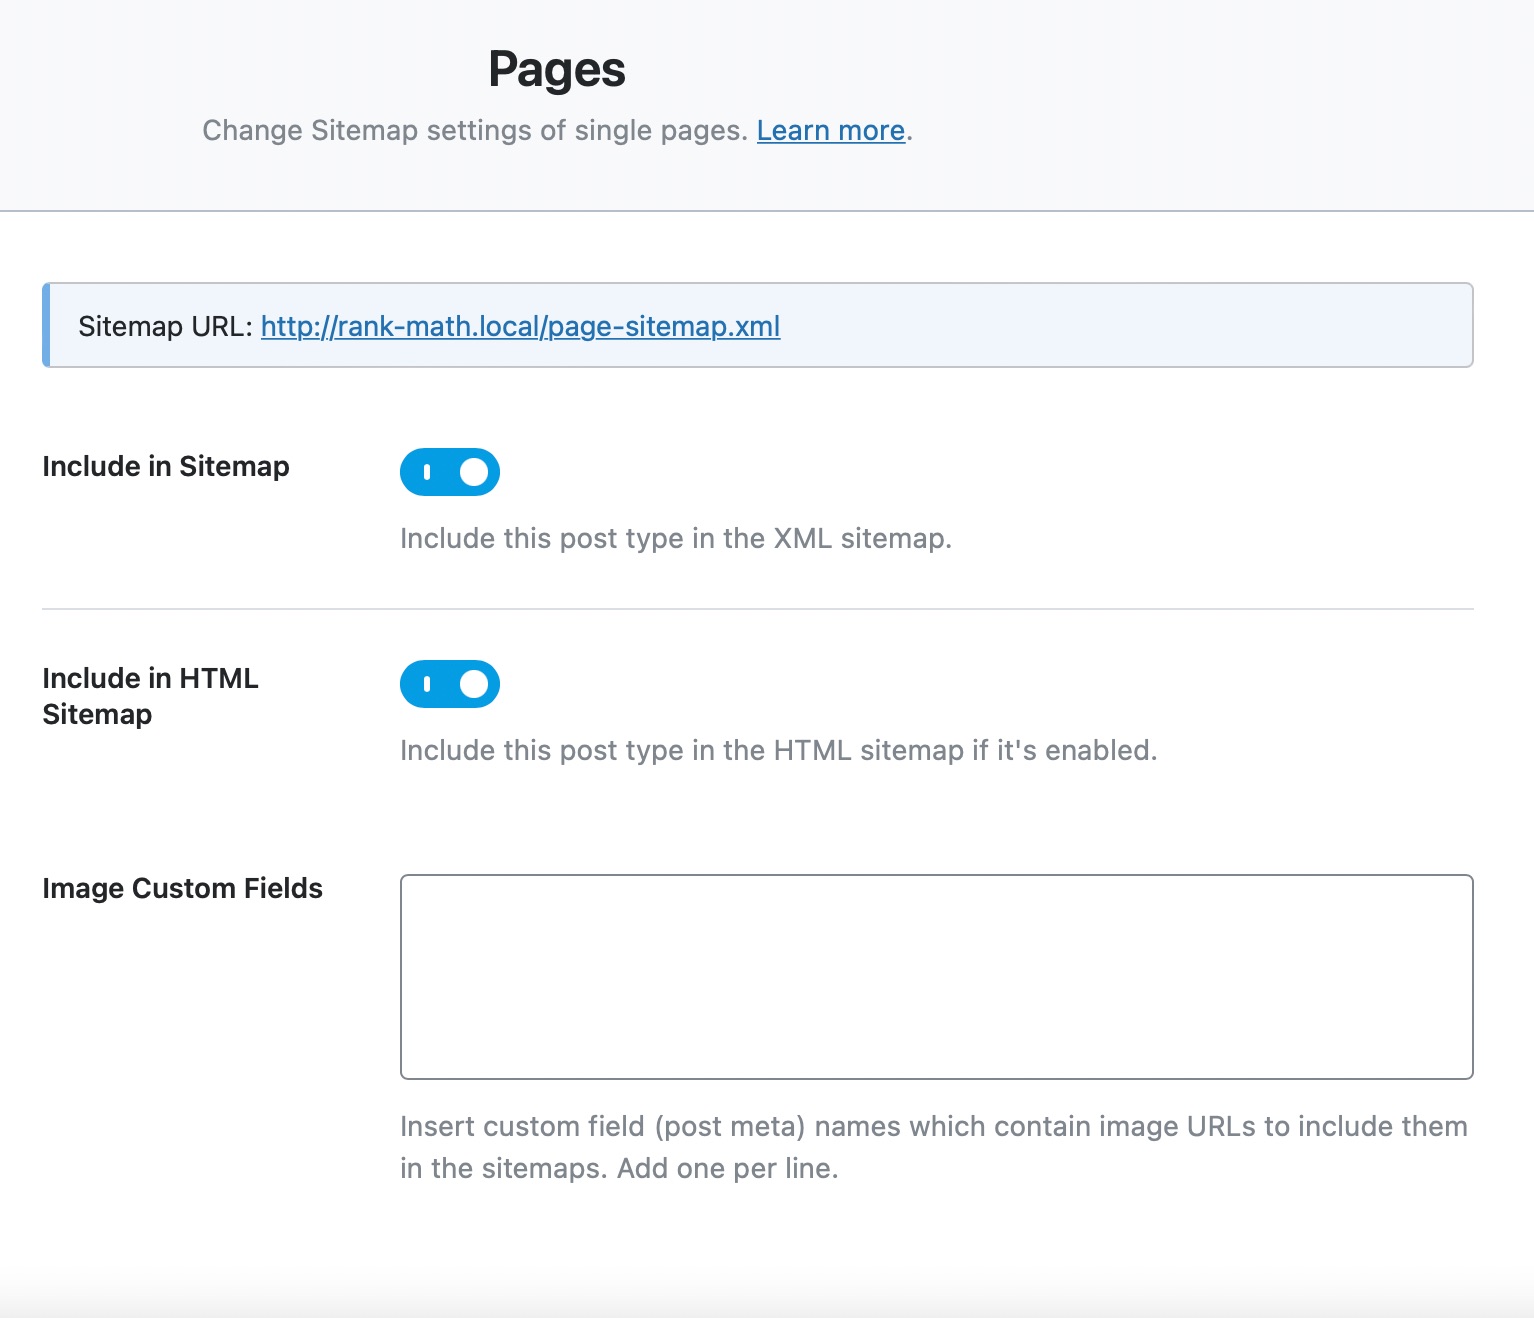
9.1 Include in Sitemap
This option controls the inclusion or exclusion of your pages in the Sitemap. We recommend that you enable this setting so that all your pages are included in the sitemap.

9.2 Include in HTML Sitemap
If this option is enabled, it’ll include the page type in the HTML sitemap.

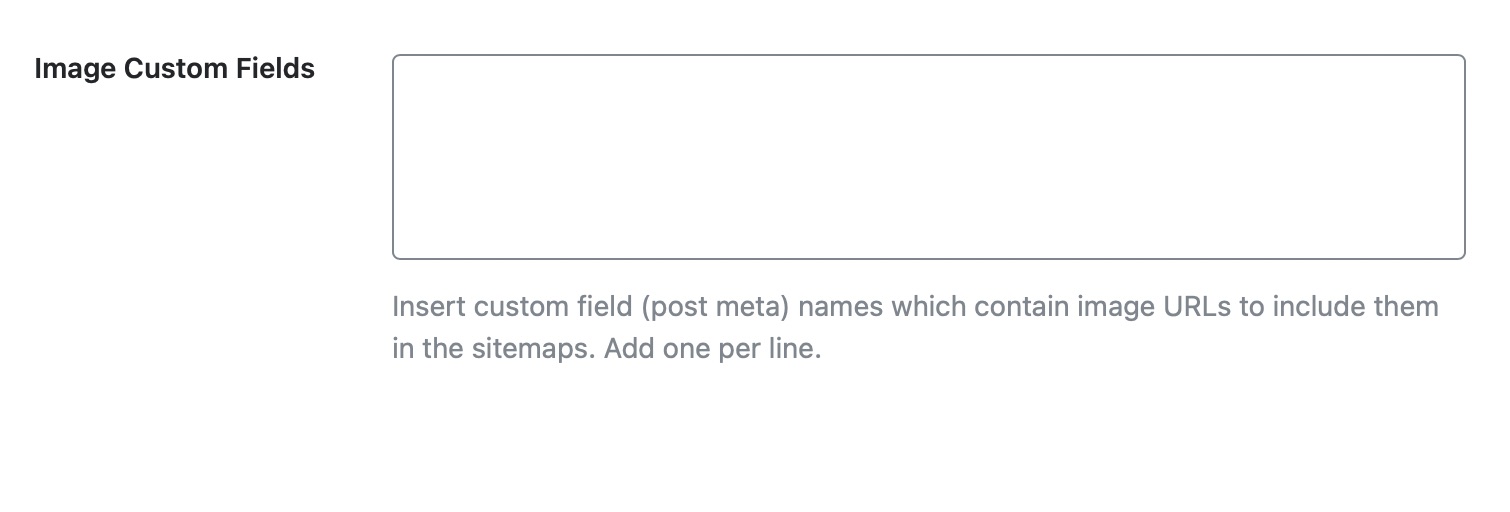
9.3 Image Custom Fields
You may include custom fields in your pages with image URLs. If you wish to include those images in the Sitemap, you can enter the custom field’s names in this field. Make sure to add only one entry per line so Rank Math can understand them better and include them in your sitemap.
9.4 Finding Your Pages Sitemap
After you’ve made your changes, you’d want to find the URL of your Pages Sitemap, and the URL is available right on the top of the page. Copy it and save it somewhere to submit it to Google, or just access it from this page.

That covers the Pages Tab. Let us now cover the Media Tab.
10 Attachments
The Attachment tab contains all the settings that affect the sitemap settings for your attachment pages. Here is a preview of all the default settings available.
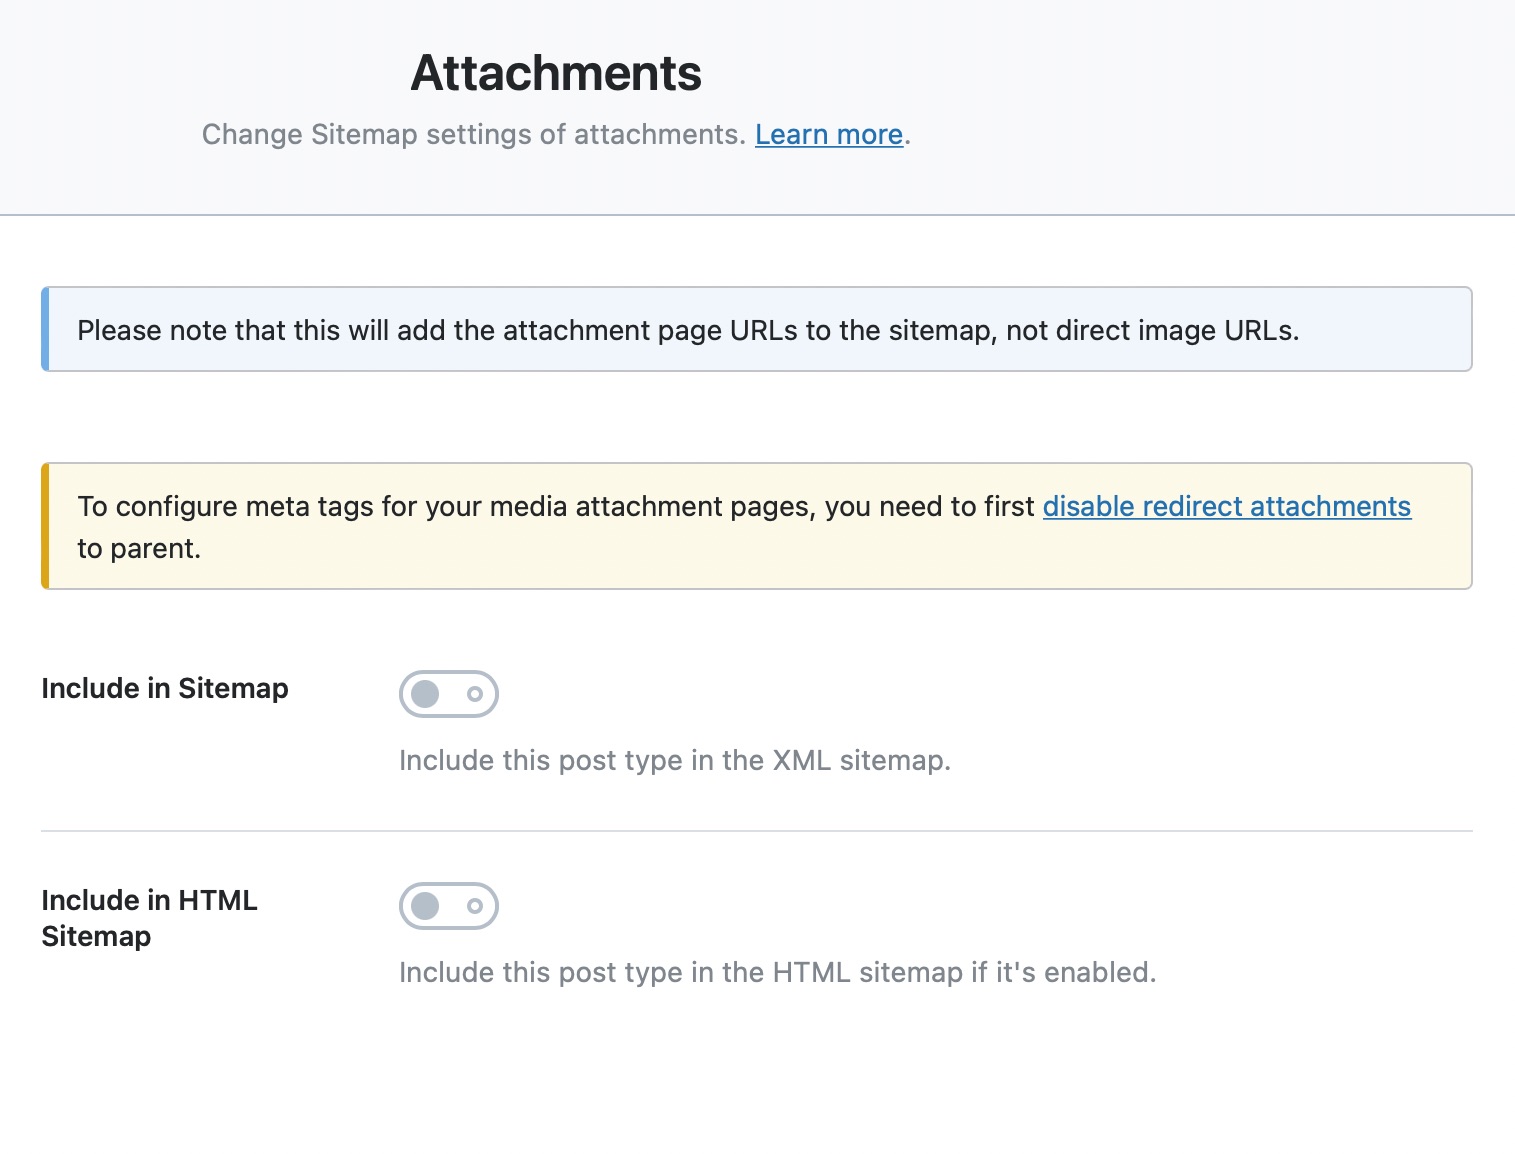
This is the default setting and is the recommended one. Attachment pages are thin content pages and should not be indexed in most cases unless there is some edge use case.
As the warning says, that is because the Redirect Attachment to Parent setting is turned on. What that does is redirect all your attachment pages to the posts that it is attached to or the homepage in the default case.
If you want to change the settings and index the attachment pages, then navigate to Rank Math SEO → General Settings → Links Section. The second setting should be about Redirecting Attachments.
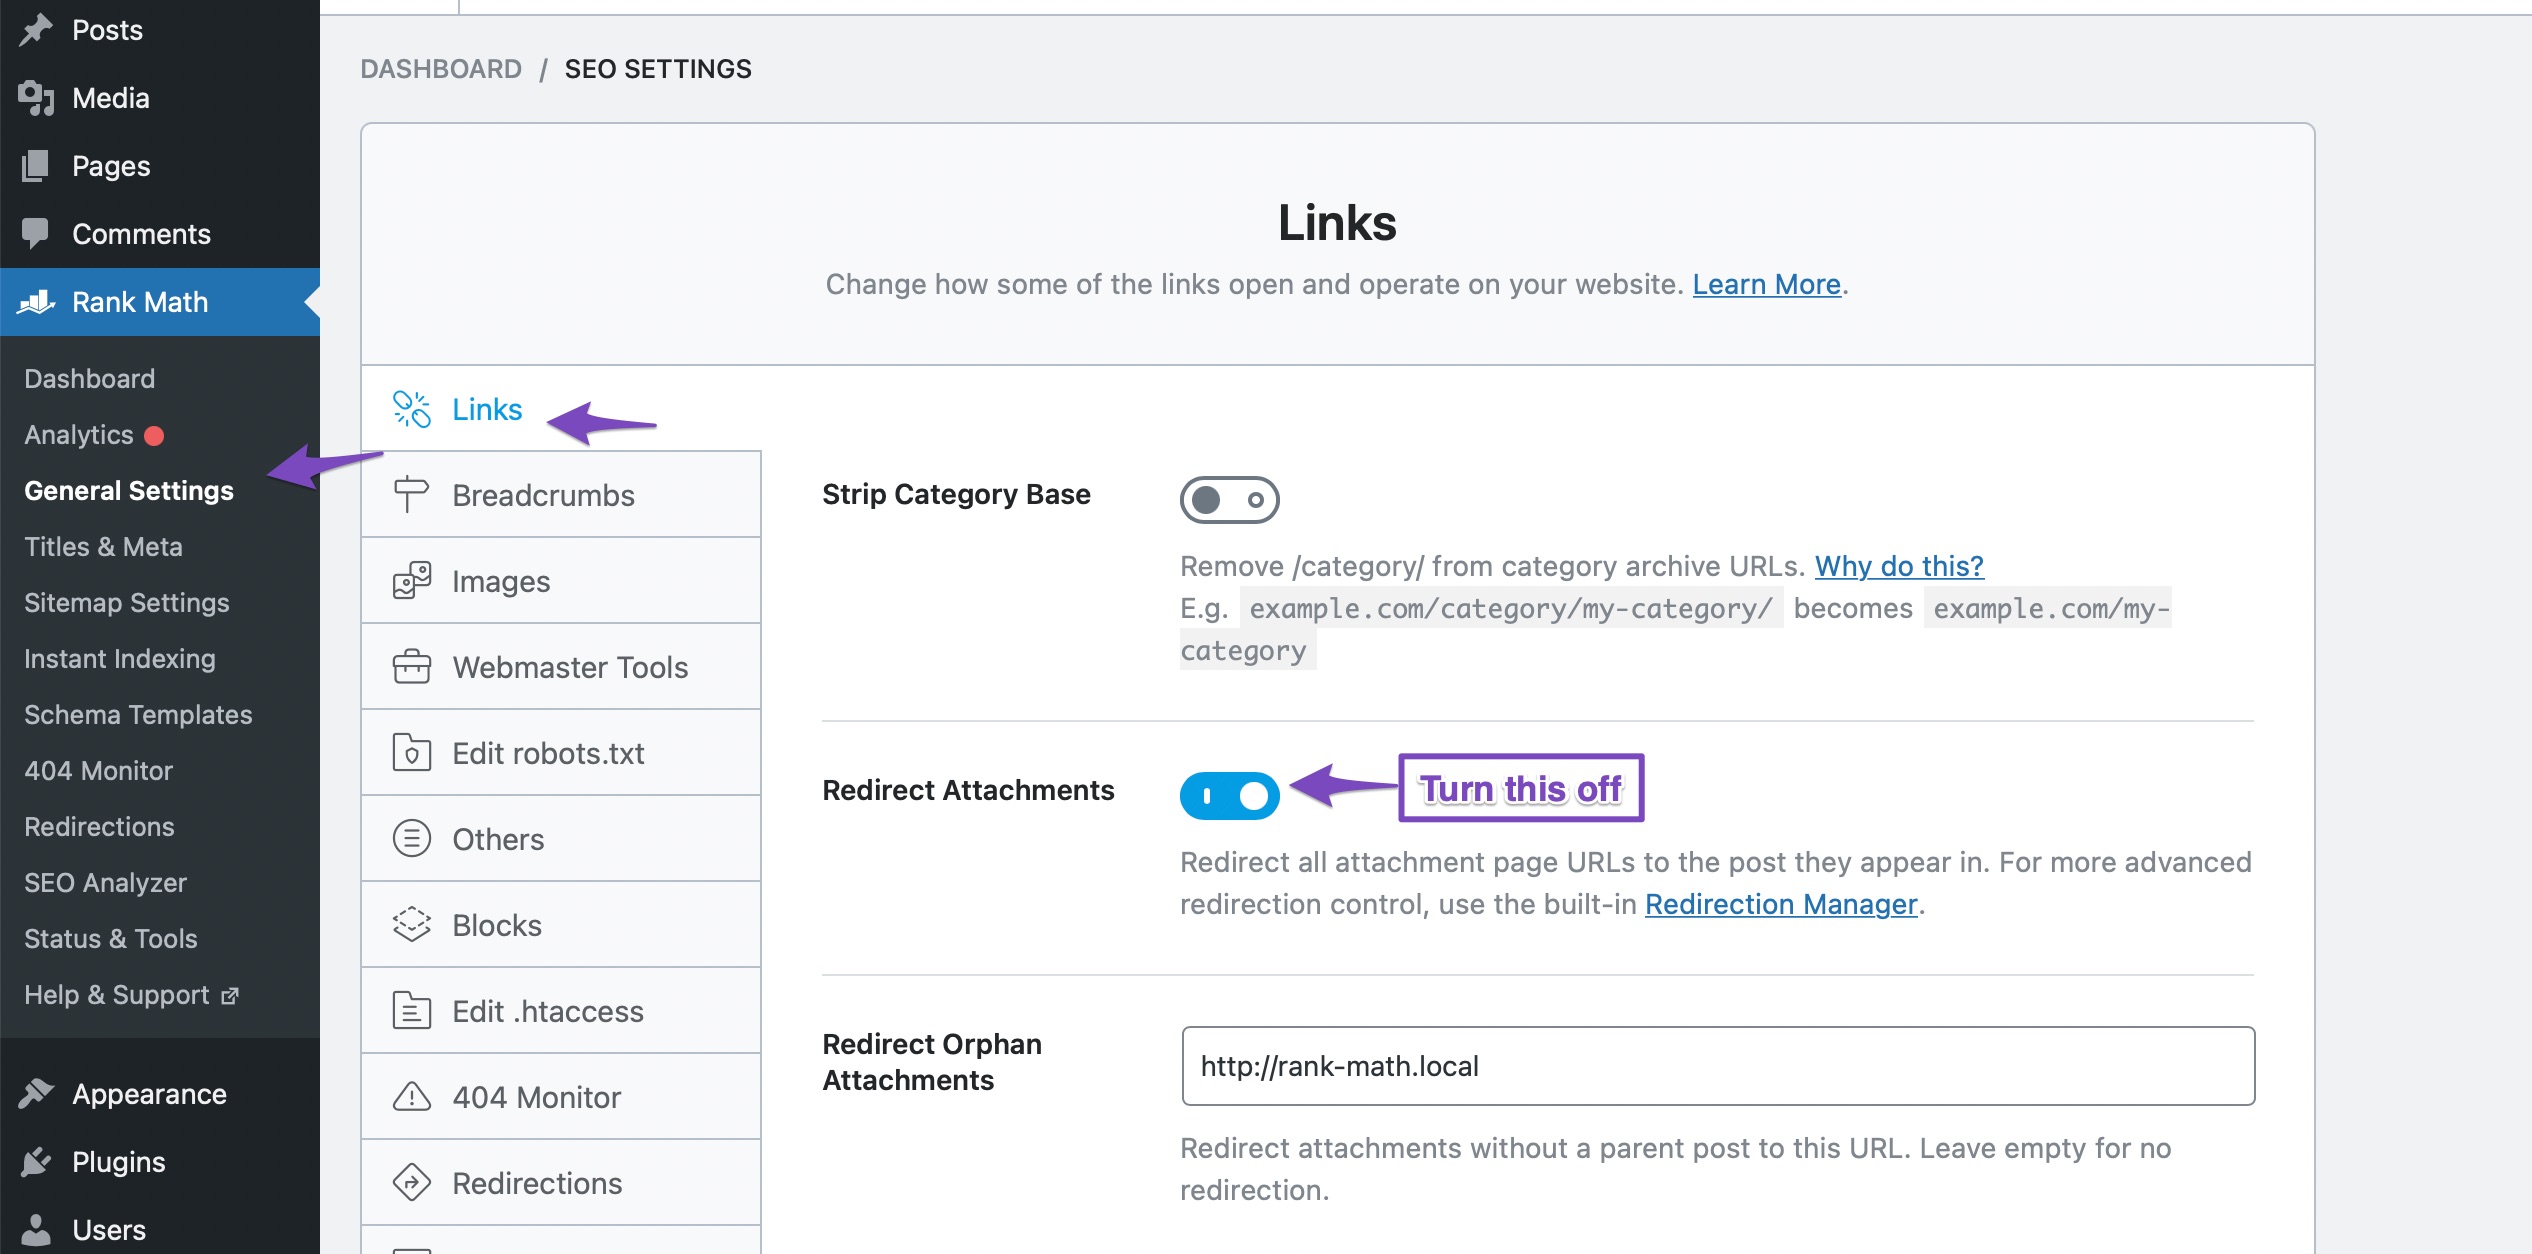
Don’t forget to save your settings.

Then, when you go back to the Media Sitemap Section, you will see that you can enable it.
10.1 Include in Sitemap
This is the only option available in the Attachment Sitemap section, and it lets you enable or disable the Media aka Attachment pages Sitemap.

10.2 Include in HTML Sitemap
This option will include the attachment in the HTML sitemap if enabled.

10.3 Exclude Attachment from Media
Rank Math includes an option in the Media Library to exclude attachments from the sitemap. You can have access to this feature only if, you’ve at least one image and have already enabled the sitemap module.
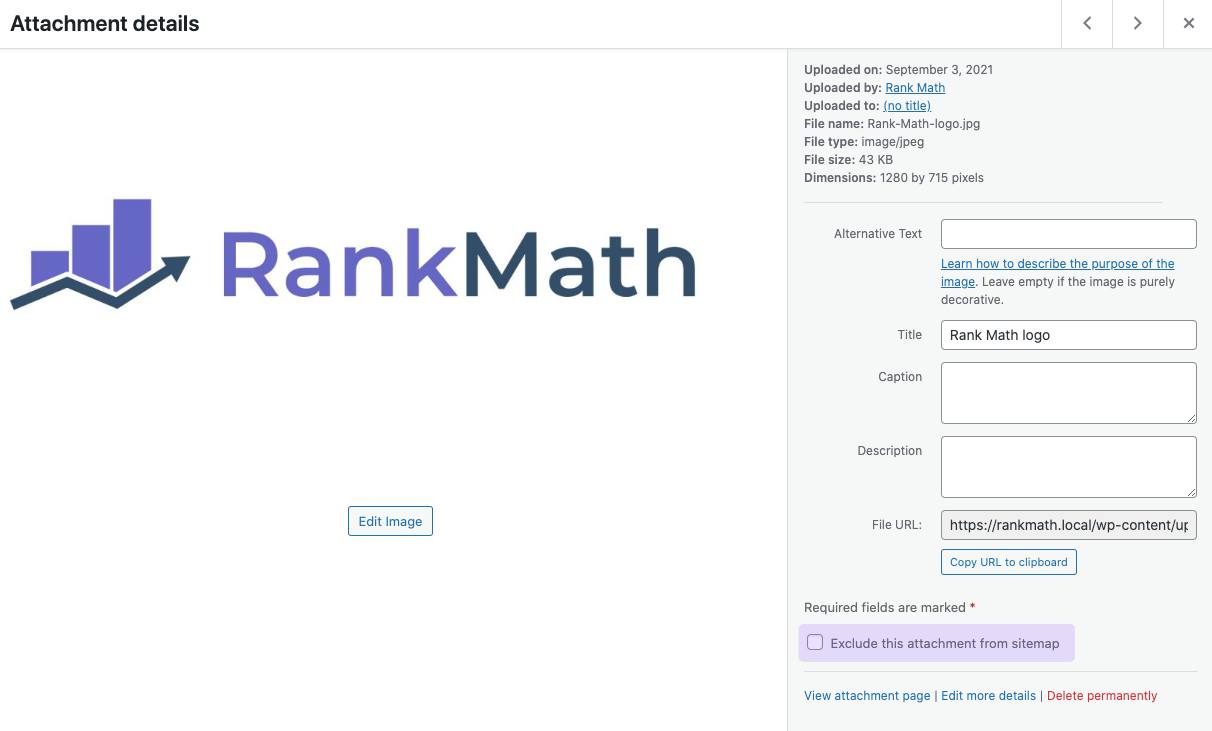
That covers the Attachments tab. Let us look at the Forums tab next.
11 Forums
The Forums Sitemap section is dedicated to Forums, and if you don’t have a forum on your website, then you won’t see this section in your settings. If you do, then here are the settings that you would see in the section.
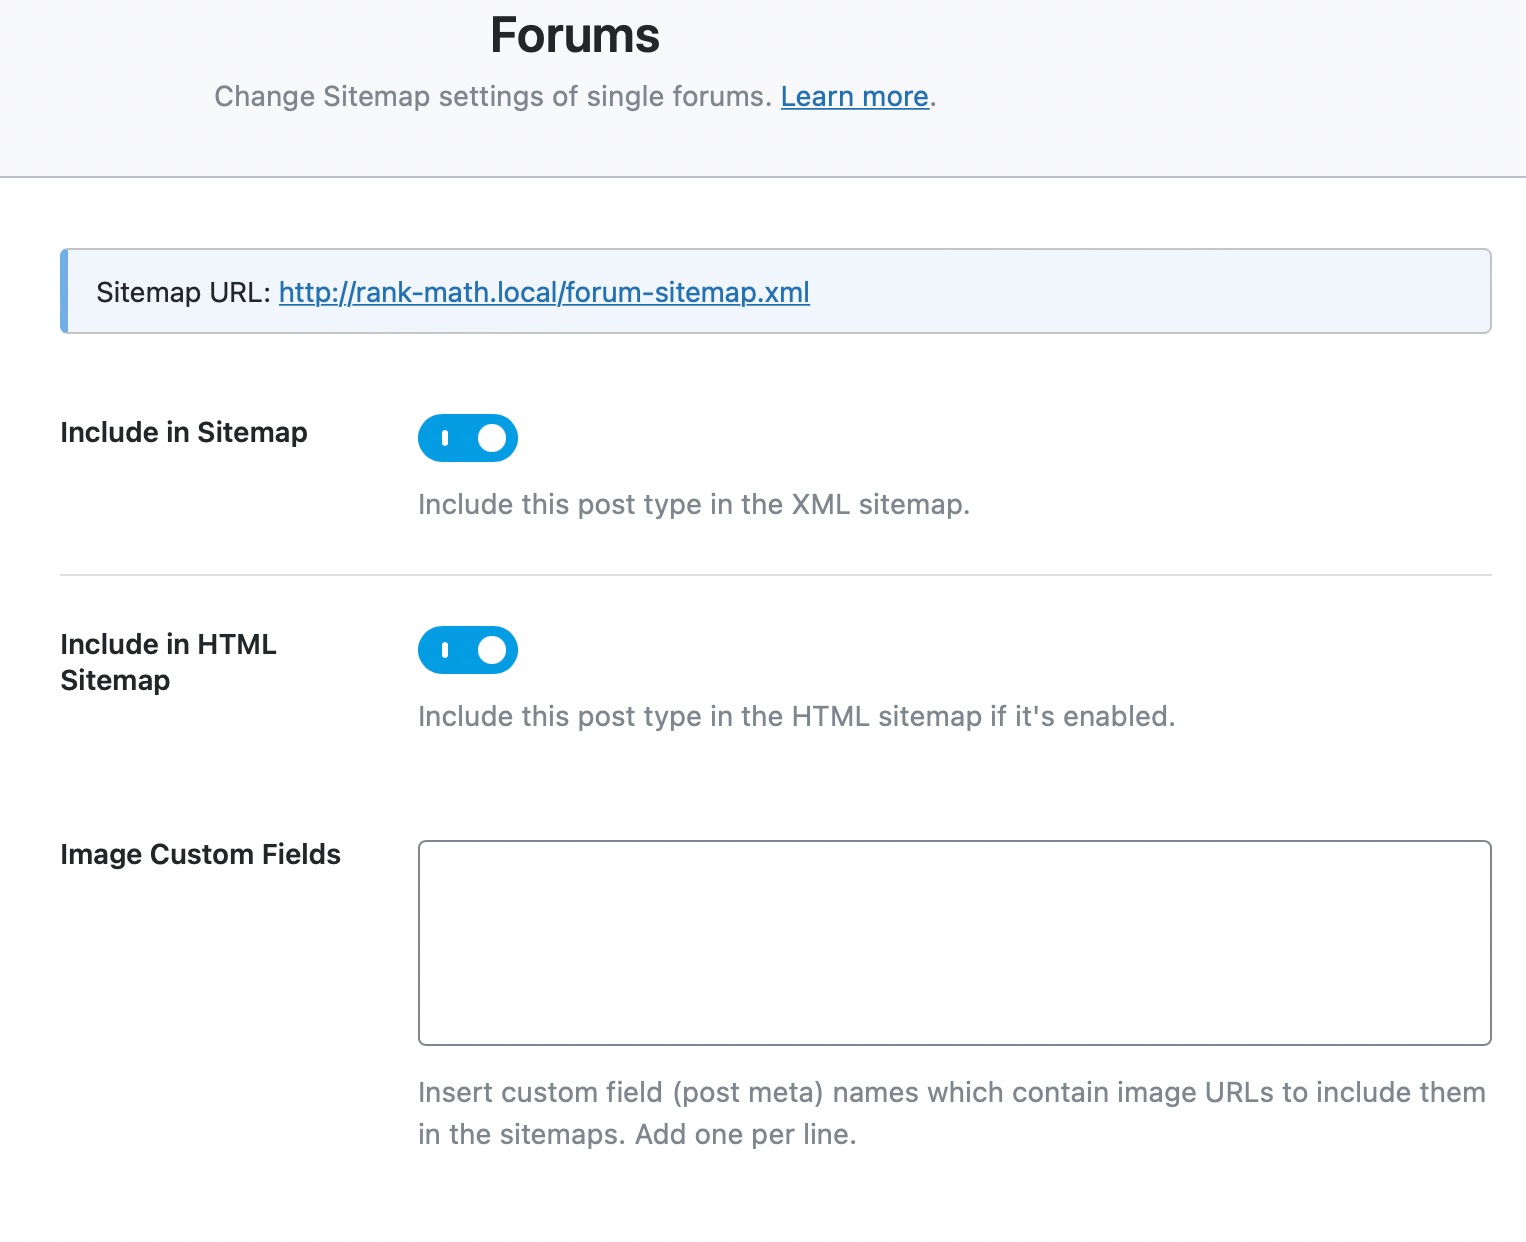
11.1 Include in Sitemap
This option will let you enable or disable the inclusion of Forums in your sitemap. Since Forums can be a great source of traffic, we recommend that you enable this option.

11.2 Include in HTML Sitemap
This option will let you enable or disable the inclusion of Forums in your HTML sitemap.

11.3 Image Custom Fields
User-uploaded images in the Forums are saved as custom fields in WordPress, and if you’d like those images to be indexed, then add the custom field(s) in this area to be included in the sitemap. Only add one custom field per line.

11.4 Finding the Sitemap URL
If you’d like to find, copy, or submit your Forum Sitemap, then all you have to do is look at the top of the page, and the URL will be right there.

That covers all the settings available with the Forums tab. Let us move on the next tab, the Topics tab.
12 Topics
Each question in a Forum can be qualified as a topic, and the Topic Section deals with the Sitemap of topics. Obviously, this section will also be visible to you only if you have a forum plugin installed on your website.
Here are the options you should see in this section.
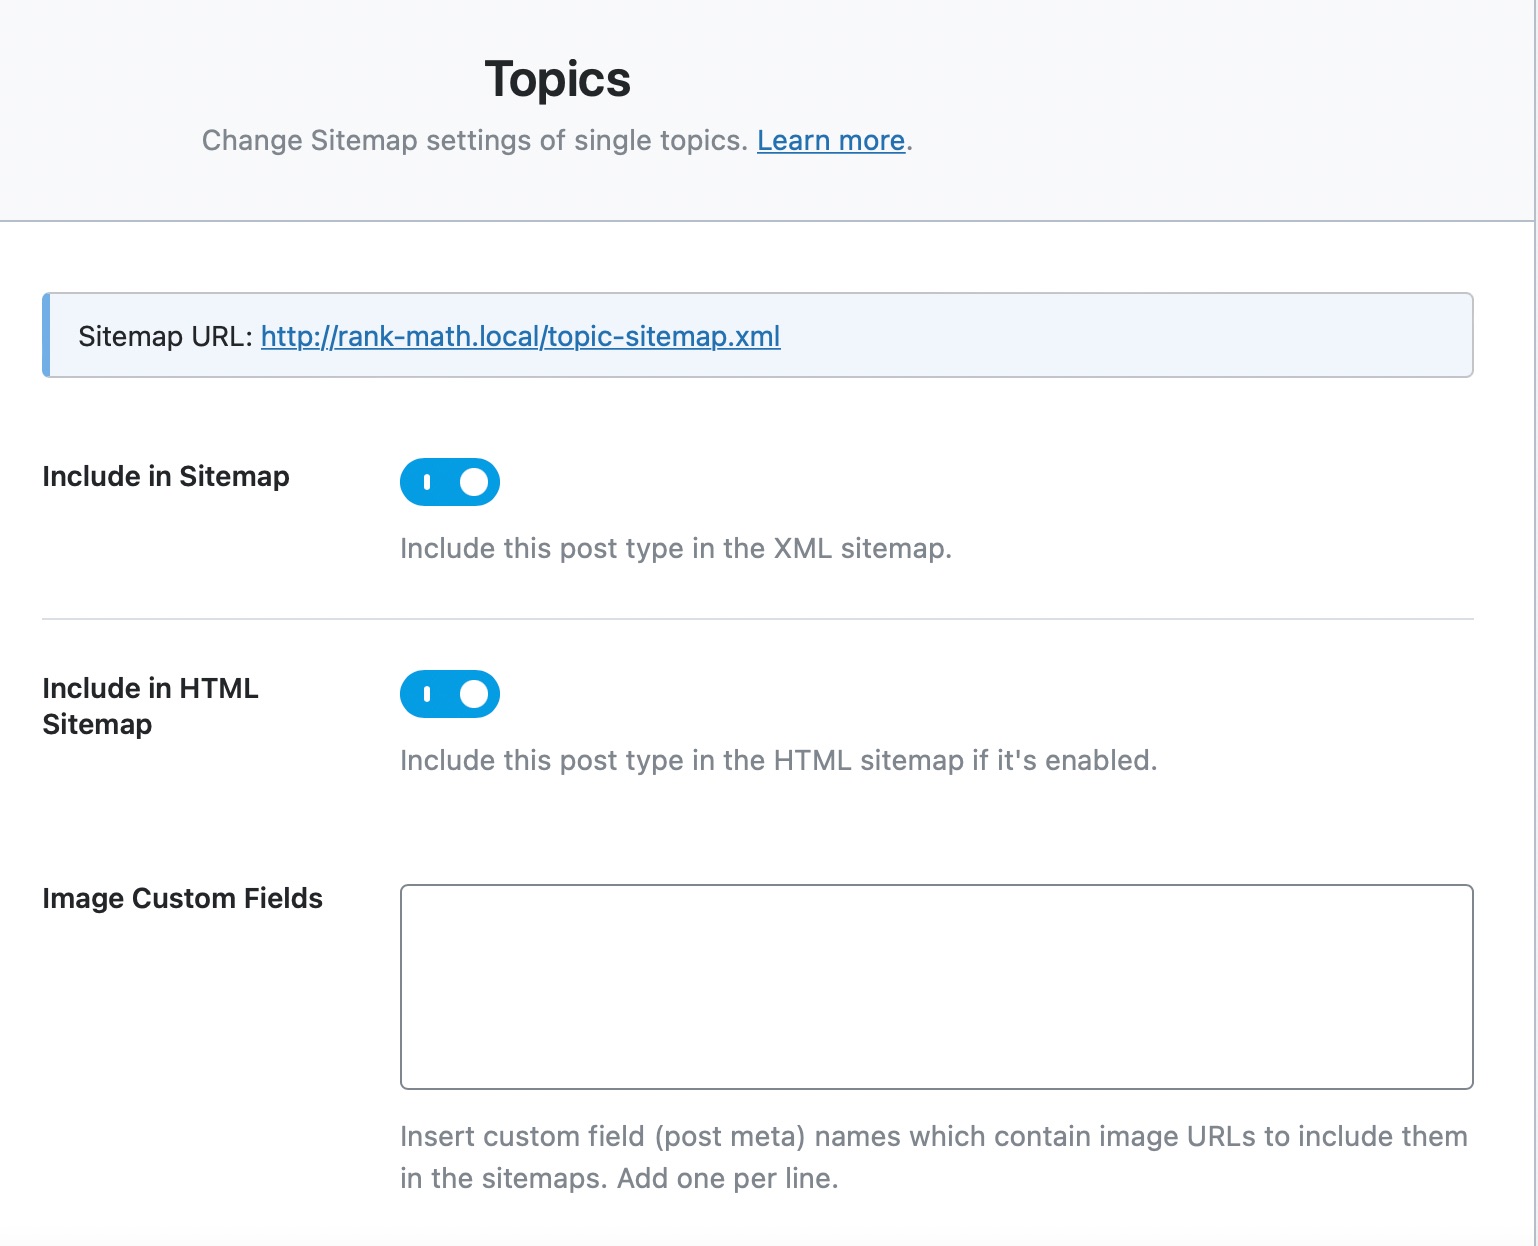
12.1 Include in Sitemap
This option lets you enable or disable the Topic Sitemaps. Since topics can be a great source of traffic, we recommend that you enable this feature.

12.2 Include in HTML Sitemap
This option will let you enable or disable the inclusion of Topics in your HTML sitemap.

12.3 Image Custom Fields
Topics can have lots of images uploaded by users, which are saved using custom fields. If you want to include those images in the sitemap, then add the names of the custom fields to the Image Custom Fields section, and they will be included in the sitemap. Only add one custom field per line.

12.4 Finding Your Topics Sitemap URL
To submit the Topic Sitemap to Google, you will need the URL to the sitemap. Look no further as the URL to the Sitemap should be present on the top of the page.

These are the settings available in the Topics tab and now we’ll cover the Replies tab.
13 Replies
Every response to a topic in a forum is classified as a reply, and the Replies section deals with the Sitemap settings of Replies. Here are the settings you will see in this section.
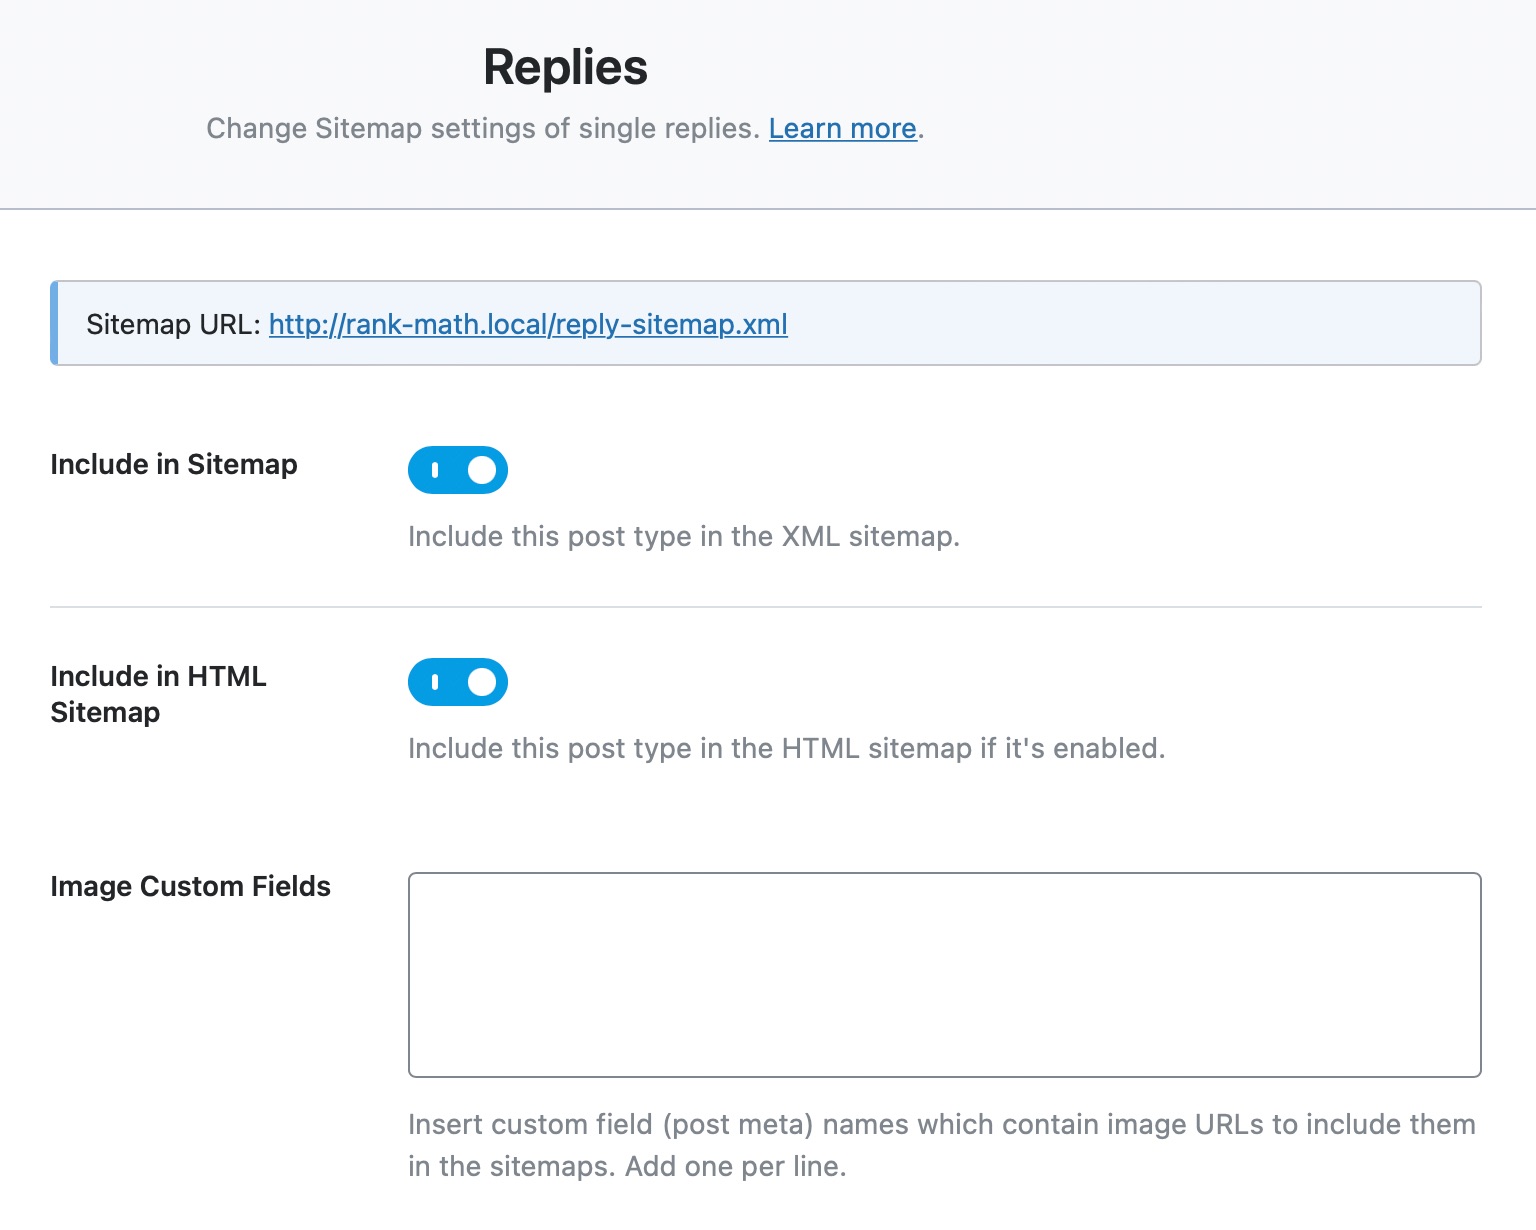
13.1 Include in Sitemap
This section lets you control whether you want to include Replies in your Sitemap or not. Turning it off will disable the Replies Sitemap. Since indexed replies can be helpful to fetch new traffic, we recommend that you enable them.

13.2 Include in HTML Sitemap
This option will let you enable or disable the inclusion of Replies in your HTML sitemap.

13.3 Image Custom Fields
If you want images in your replies indexed, enter the custom fields that those images are saved in this setting. Using the custom fields, Rank Math will include the images in your sitemap.

13.4 Find the Replies Sitemap
If you’ve enabled the replies sitemap, then you should see the URL to the replies sitemap on the top of the page.

You can save the URL to submit it or access it from the settings page when you need it.
14 Products
If you use WooCommerce to manage an online store, the Products tab will be relevant to you as it contains all the settings that affect the sitemap with respect to products. Here is a look at all the settings available in this tab.
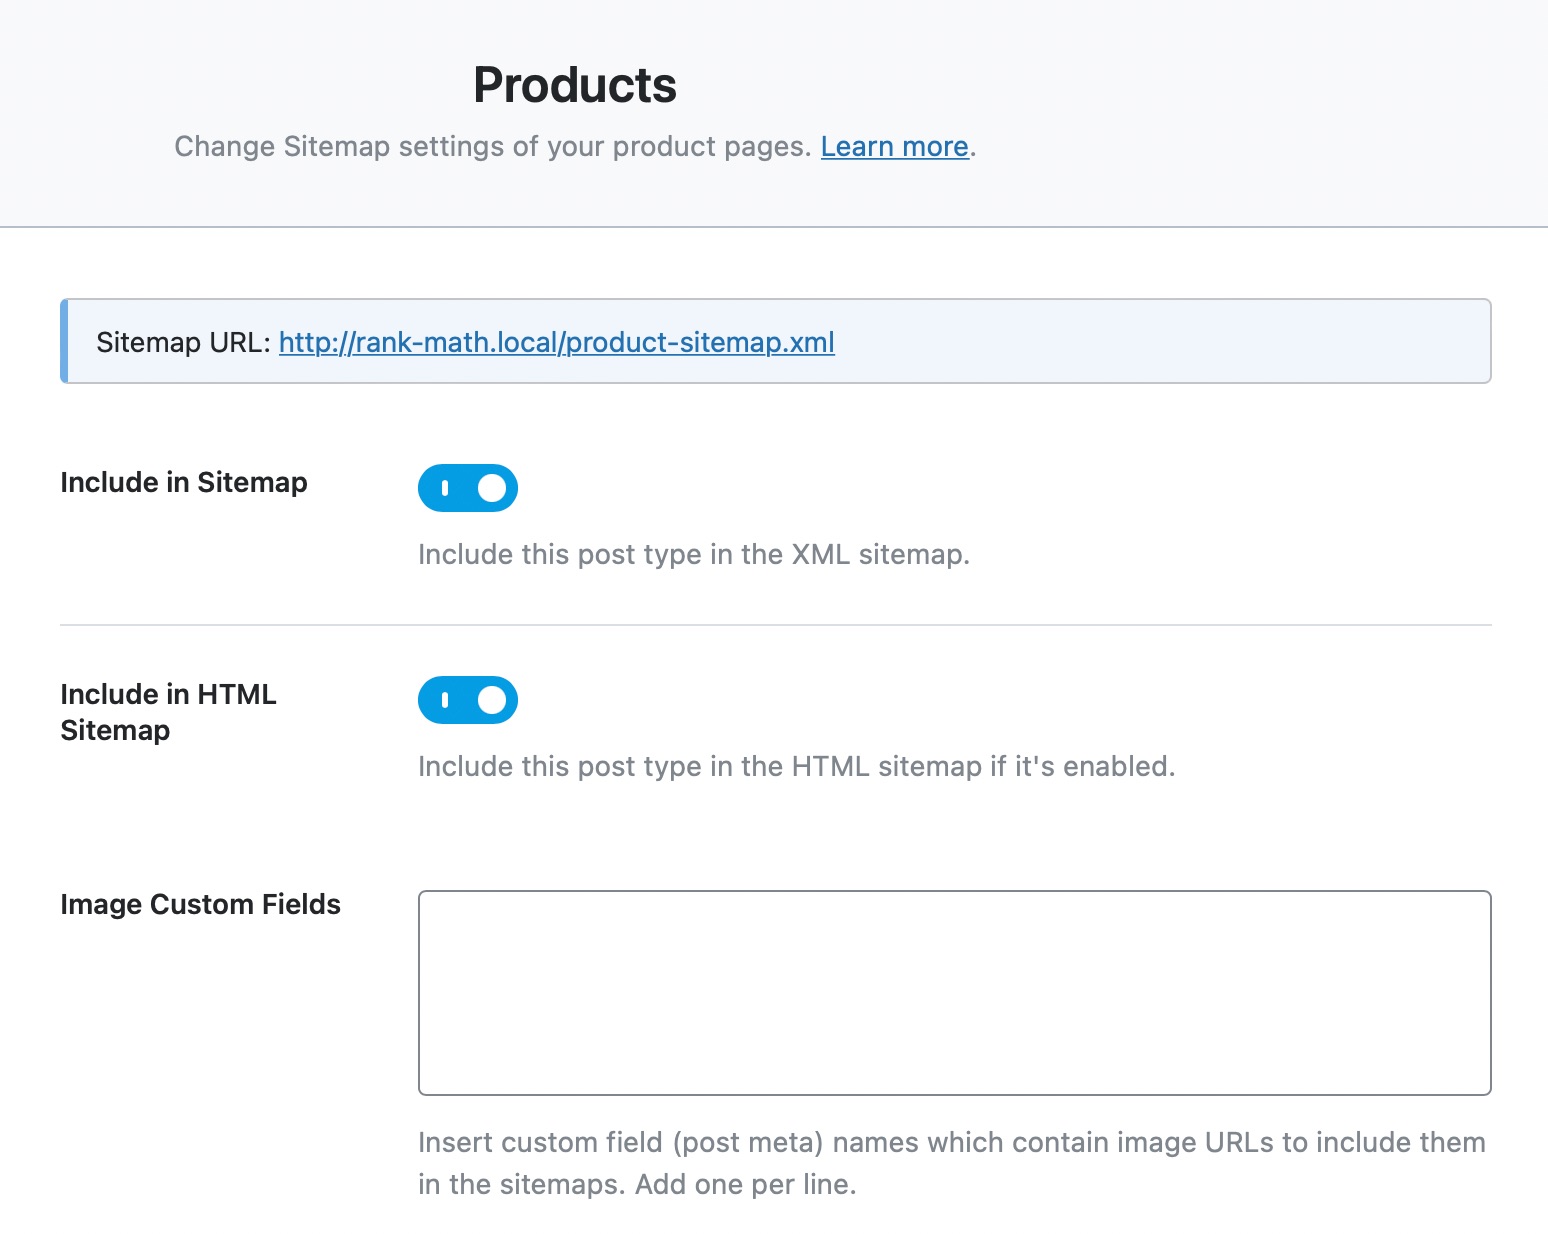
14.1 Include in Sitemap
This option enables or disables the inclusion of product pages in the Sitemap. We recommend that you enable this setting.

14.2 Include in HTML Sitemap
This option will let you enable or disable the inclusion of products in your HTML sitemap.

14.3 Image Custom Fields
WordPress gives you the option to include custom fields in your pages with image URLs. If you wish to include those images in the Sitemap, you can enter the custom field’s names in this field. Make sure to add only one entry per line so Rank Math can understand them better and include them in your sitemap.

14.4 Finding Your Products Sitemap
If your Products Sitemap is enabled, then you will be able to see the URL to the sitemap on the top of the page.

15 Categories
The categories tag contains settings related to sitemaps for WordPress categories.
Indexing Categories & tag pages/archives are not recommended unless you have got a reason for it. They strictly do not add any value to search engines as they are considered thin or duplicate pages.
Although it is good to have such archives to help your visitors easily navigate your site, it does not add any value for the searchers looking for a detailed resource on the topic, as they’re likely to contain only snippets of various articles.
You can consider indexing the archive pages only if you’re publishing high volumes of articles on a topic each day.
Here are all the settings that you should see in this section.
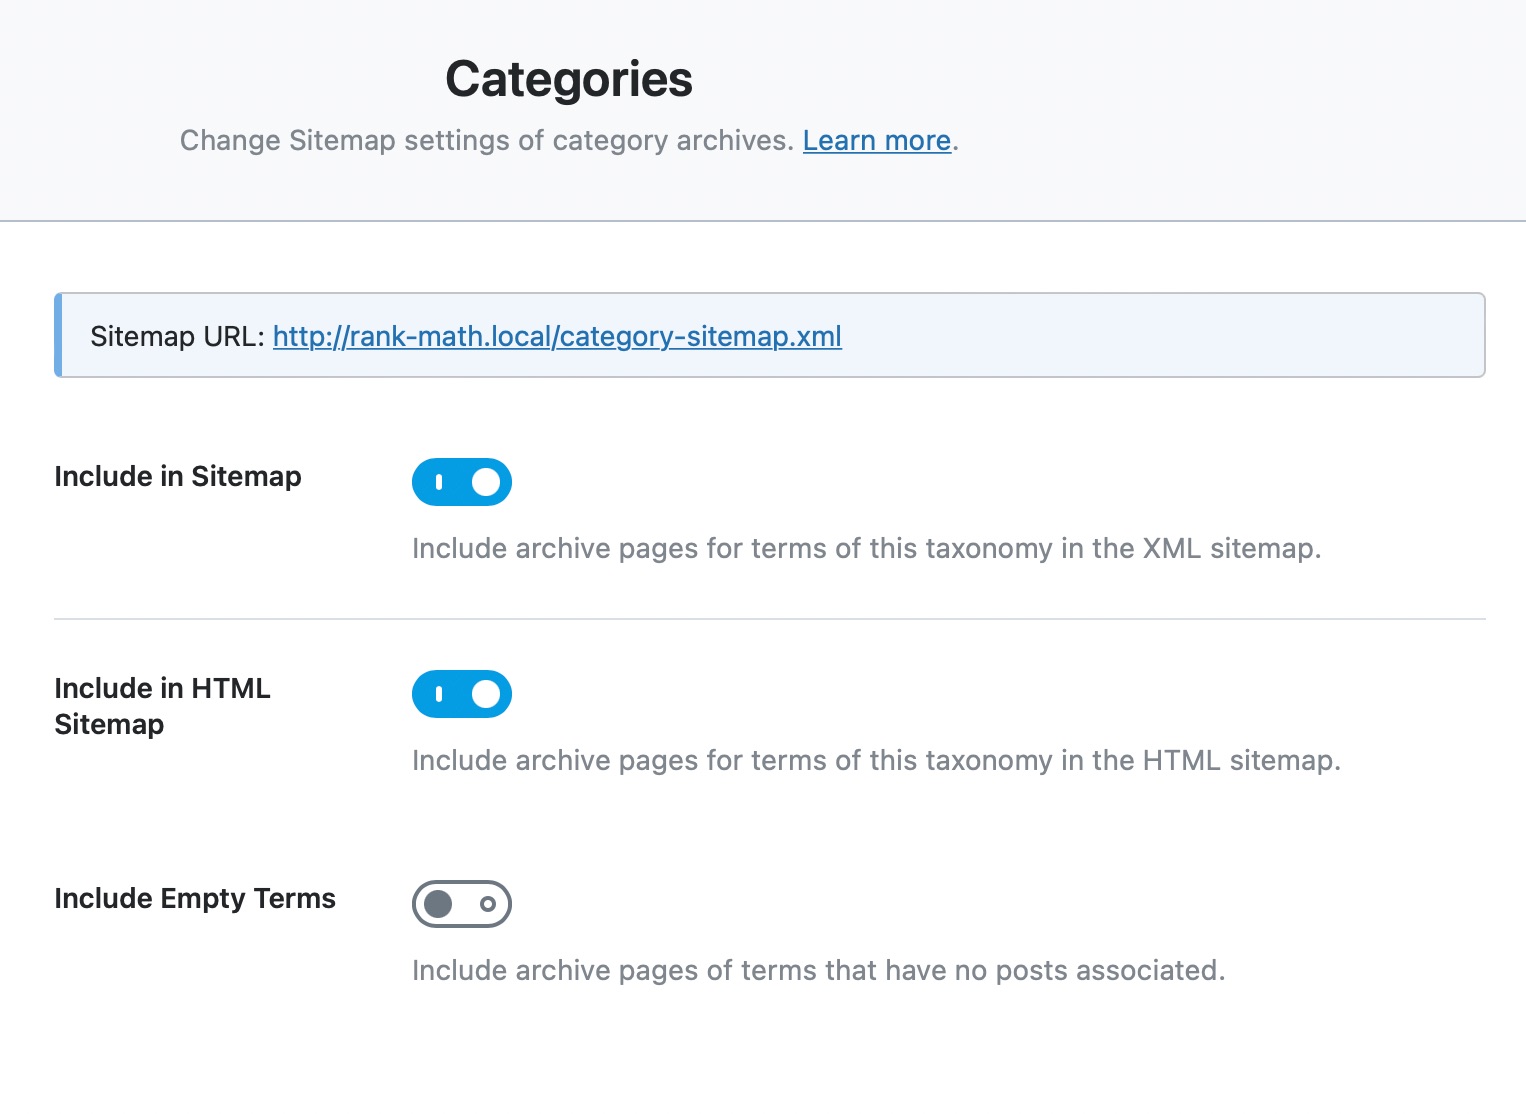
15.1 Include in Sitemap
This option configures whether your category archives are included in your sitemap or not. Since categories give structure to your overall website, we recommend that you enable this setting.

15.2 Include in HTML Sitemap
This option will let you enable or disable the inclusion of category archives in your HTML sitemap.

15.3 Include Empty Terms
If you have empty categories (categories with no posts or pages in them) on your website and want to include their archives in your sitemap, then enable this setting.

Caution: We do not recommend enabling this option unless you know what it does and are sure of what you are doing.
15.4 Finding Your Categories Sitemap

If you’ve enabled the Categories sitemap, then you’ll find the URL of the sitemap on the top of the page. You can then save the URL to submit to Google later or access it anytime from the settings page.
16 Tags
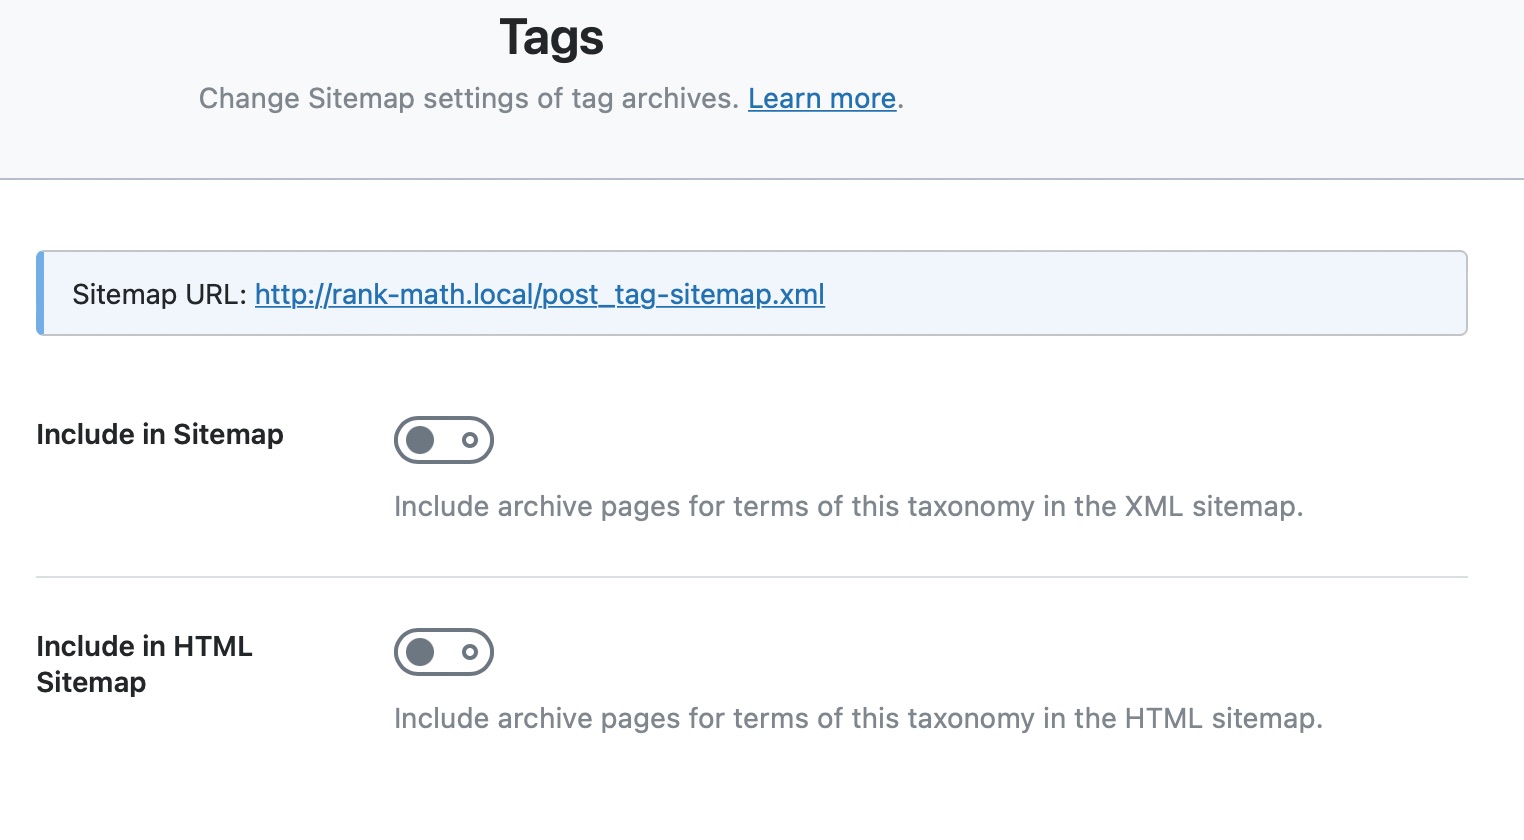
Just as the Categories Tab above affected how category archives appeared in sitemaps, the Tags tab affects the tag archives’ inclusion in the Sitemap. Here is a preview of all the settings in the tab.
16.1 Include in Sitemap
This option configures whether your tag archives are included in your sitemap or not. We recommend that you enable only one taxonomy archive in your sitemap. So, if you’ve enabled the Category Archives, then there is no need to enable Tag Archives.

16.2 Include in HTML Sitemap
This option will let you enable or disable the inclusion of tag archives in your HTML sitemap.

16.3 Include Empty Terms
If you have empty tags (tags with no posts or pages in them) on your website and want to include their archives in your sitemap, then enable this setting.

Caution: We do not recommend enabling this option unless you know what it does and are sure of what you are doing.
16.4 Finding Your Tags Sitemap
Once you’ve configured your settings, you can find your Tags Sitemap on the top of the page. You can then save the URL to submit it later or refer to it from this page anytime in the future.

17 Topic Tags
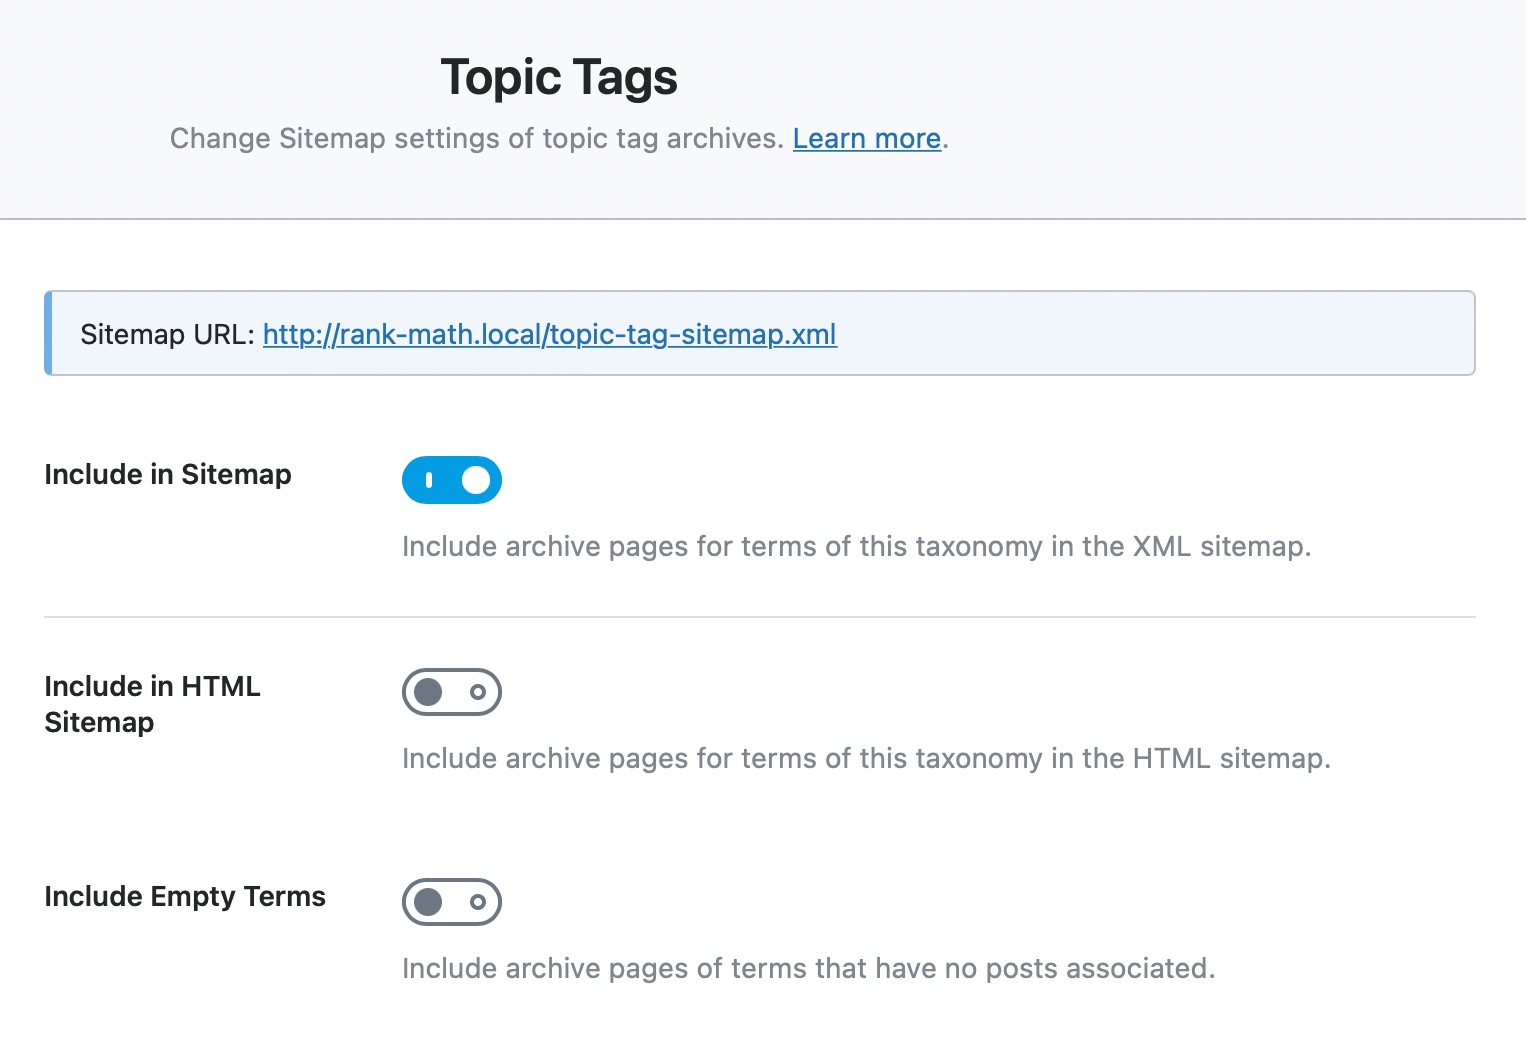
Similar to posts and pages, Topics can be organized in Forums, or via tags. The Topic Tags option holds all the settings related to the Sitemaps of Topic Tags. Here are all the options available.
17.1 Include in Sitemap
This option lets you enable or disable the Topic Tags Sitemap completely. If you’re using Tags to organize your content on your forum, then you may enable this option, otherwise, leave it disabled.

17.2 Include in HTML Sitemap
This option will let you enable or disable the inclusion of Topic Tags in your HTML sitemap.

17.3 Include Empty Terms
If you’d like to include empty tags (tags that do not have any topics associated) in the sitemap, then you can enable this option.

Caution: We do not recommend enabling this option unless you know what it does and are sure of what you are doing.
17.4 Finding Your Topic Tags Sitemap
Once you’ve configured the sitemap, you can then use the sitemap URL that is visible at the top of the page. You can save the URL to submit it to Google, or reference it from this page anytime you need it.

18 Product Categories
The Product Categories Tab is where you configure how your product category archives are configured in the sitemap.
In the case of eCommerce sites, “Product Categories” archives can be indexed because they consist of 10s of different products along with the variations and it helps the searchers as well as the search engines to categorize the search results in a better way.
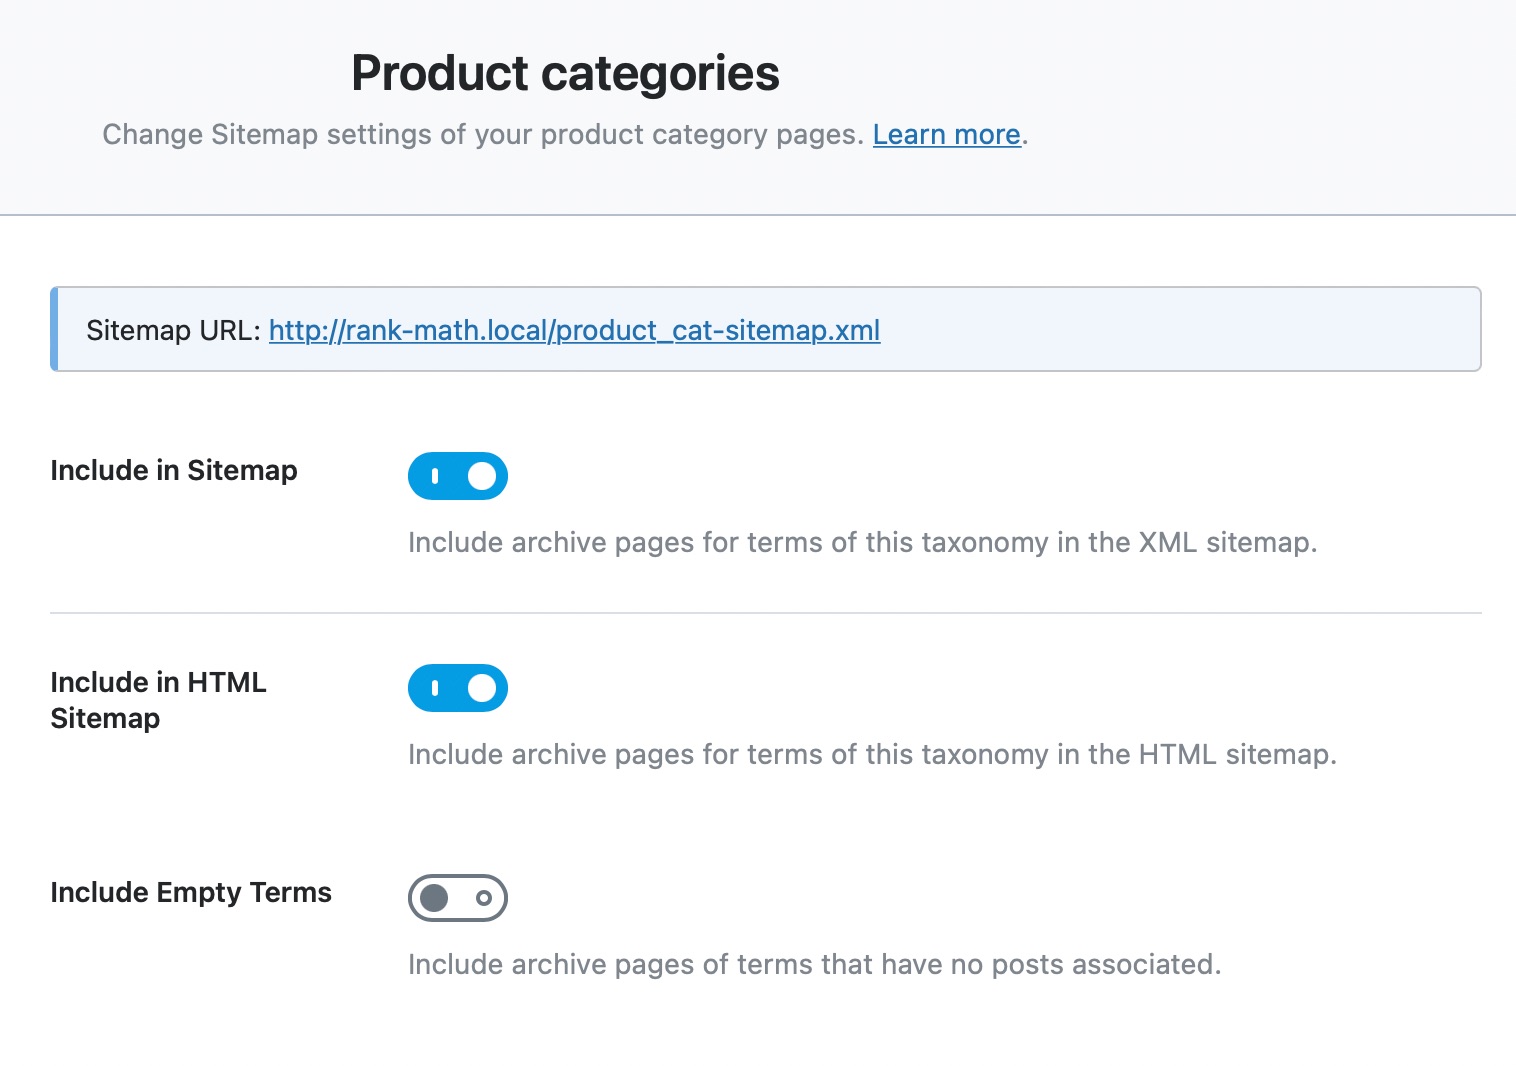
The tab has only 2 settings.
18.1 Include in Sitemap
This option configures whether your product category archives are included in your sitemap or not. Since product categories give structure to your overall website, we recommend that you enable this setting.

18.2 Include in HTML Sitemap
This option will let you enable or disable the inclusion of product category archives in your HTML sitemap.

18.3 Include Empty Terms
If you have empty product categories (product categories with no products in it) on your website and want to include its archives in your sitemap, then enable this setting.

Caution: We do not recommend enabling this option unless you know what it does and are sure of what you are doing.
18.4 Finding Your Product Categories Sitemap
Once you’ve configured your sitemap settings, you can copy the URL of the sitemap to submit to Google from the top of the page. You can either save the URL somewhere or reference it from this page anytime you need it.

19 Product Tags
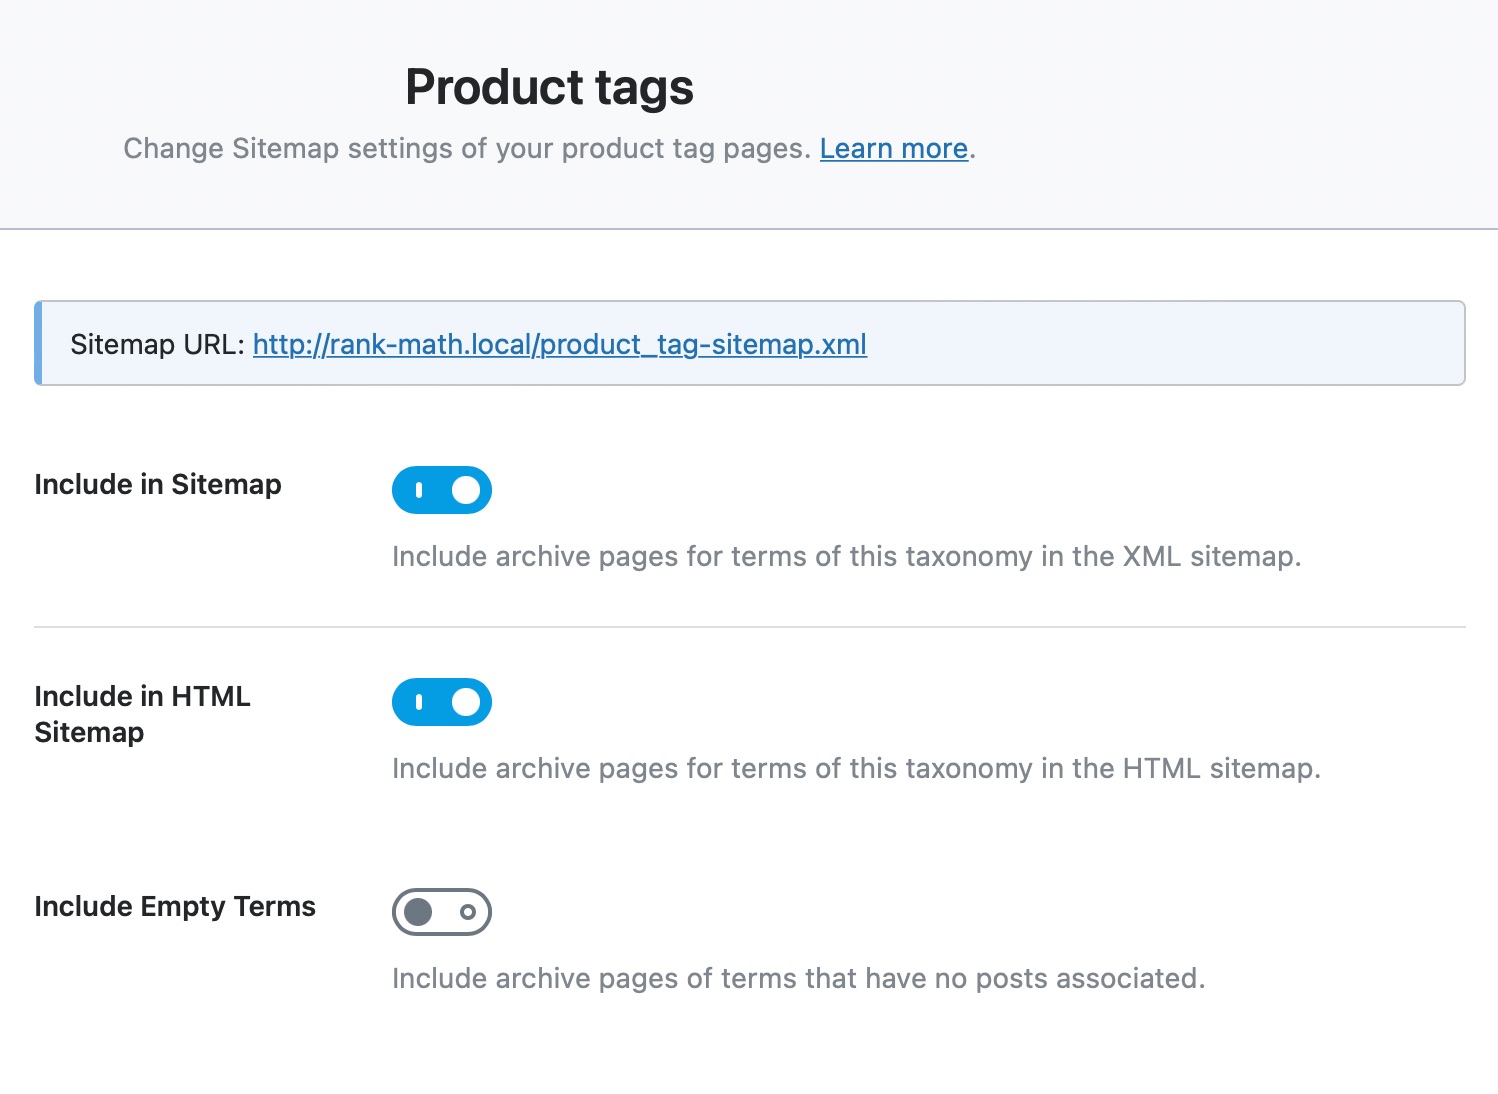
The Product Tags Tab affects the product tag archives’ inclusion in the sitemap. Here is a preview of all the settings available in the tab.
19.1 Include in Sitemap
This option enables or disables the Product Tag Archive Sitemap. As we mentioned earlier, you only need to create a sitemap of one of your taxonomies to have your products indexed. So if you have already have created another taxonomy sitemap for your products, you can disable this option. However, if you’re using tags on your website to categorize products, then this option should be enabled.

19.2 Include in HTML Sitemap
This option will let you enable or disable the inclusion of product tags archives in your HTML sitemap.

19.3 Include Empty Terms
If you have empty product tags (product tags with no products in it) on your website and want to include their archives in your sitemap, then enable this setting.

Caution: We do not recommend enabling this option unless you know what it does and are sure of what you are doing.
19.4 Finding Your Product Tags Sitemap
Once your settings are configured, you can find the URL of your Product Tags Sitemap on the top of the page. You can then copy this URL and save it somewhere to submit it to Google or reference it from this page.

That covers all the settings available in the Product Tags sitemap. Now, we’ll move to the News Sitemap tab.
20 News Sitemap PRO
If you’re using the Rank Math PRO version and enabled the News Sitemap module, you can notice the News Sitemap tab available under the Special Sitemaps section. This tab contains all the settings related to your News sitemap to choose the content you’ll need to submit to Google News.
Note: You can enable the “News Sitemap” module only if the “Sitemap” module is enabled before.
Here is a look at all the settings that are available under this tab.
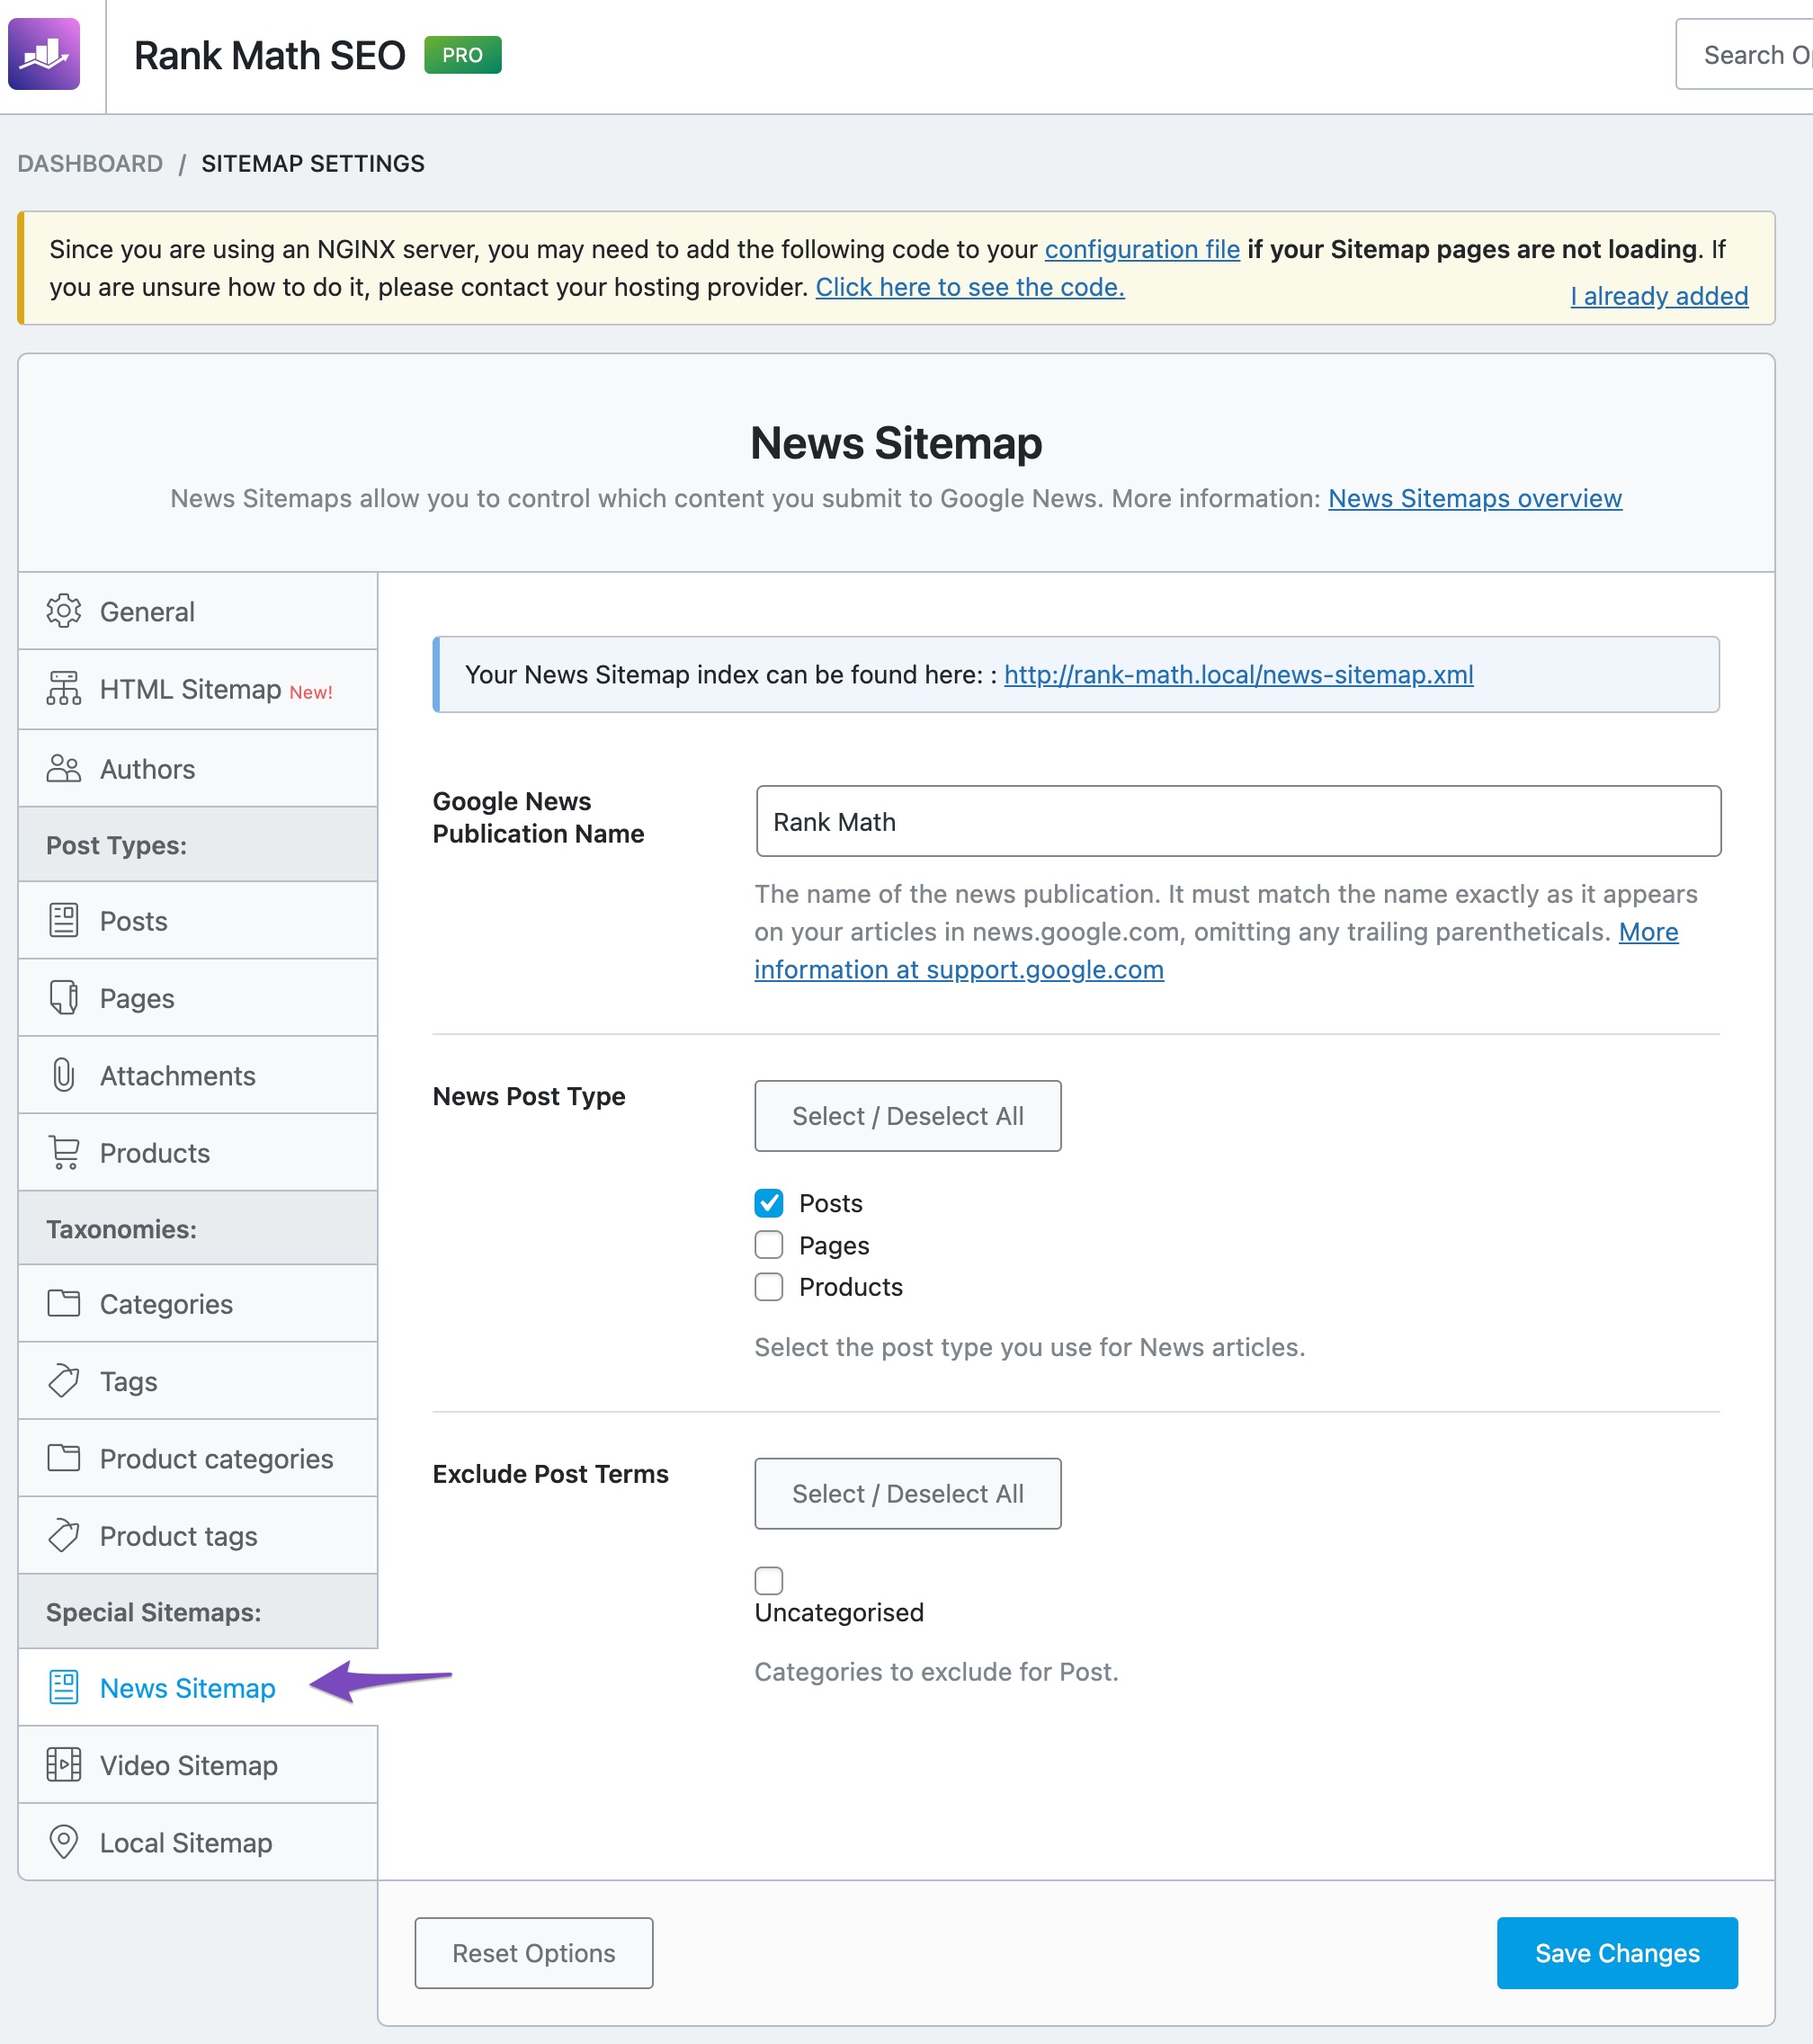
Now, let’s check the impact of each setting one by one.
20.1 Google News Publication Name
This option allows you to add your Google News Publication Name to include in your News Sitemap. Make sure to add the name exactly as it appears on your articles in Google News.

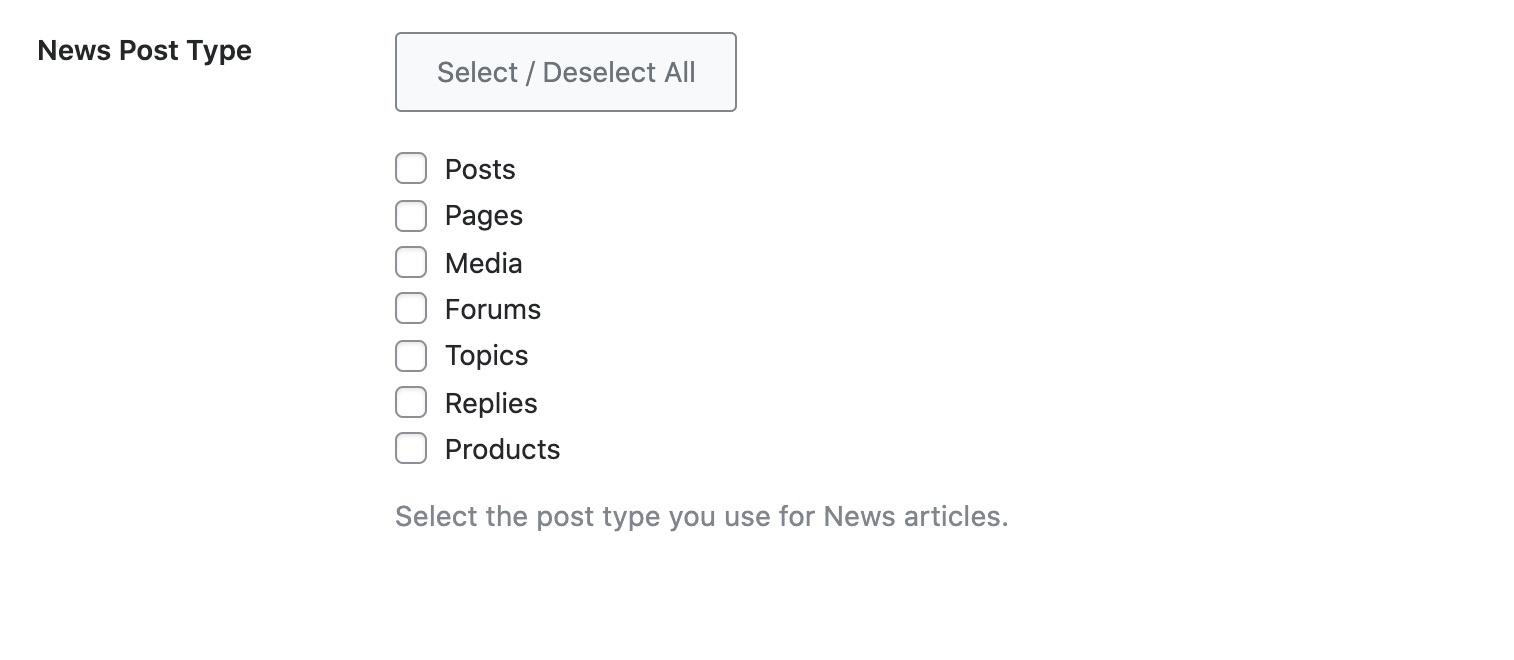
20.2 News Post Type
This option lets you select all the post types for which the news sitemap should be enabled by default. You will be able to further change the settings for the individual articles, only for the post types you select here.
20.3 Exclude Post Terms
Here you can find all the post terms (non-empty terms) available for the post types you’ve selected in the previous option. You can use this option to exclude posts belonging to specific post terms (categories and tags) from being featured in the news sitemap.
Note: This option will appear when you select the Posts News Post Type. Only categories and tags assigned to a post will be included in the dropdown.

20.4 Finding Your News Sitemap
After you’ve made the changes, you’d want to find the URL of your News Sitemap and it is available right on top of your page, which you’ll need to submit it to Google.

That covers the News Sitemap tab. Now let’s move to the Video Sitemap tab.
21 Video Sitemap PRO
If you’ve enabled the Video Sitemap module under WordPress Dashboard → Rank Math SEO, then the Video Sitemap tab will appear on your Sitemap settings page. This page lets you control all the settings related to your Video Sitemap, which will help the search engine bots find the videos’ location easily and rank them for video search.
Note: The Video sitemap module can be enabled only if you have already enabled the Schema and Sitemap module.
Here is a preview of the settings available for Video Sitemap.
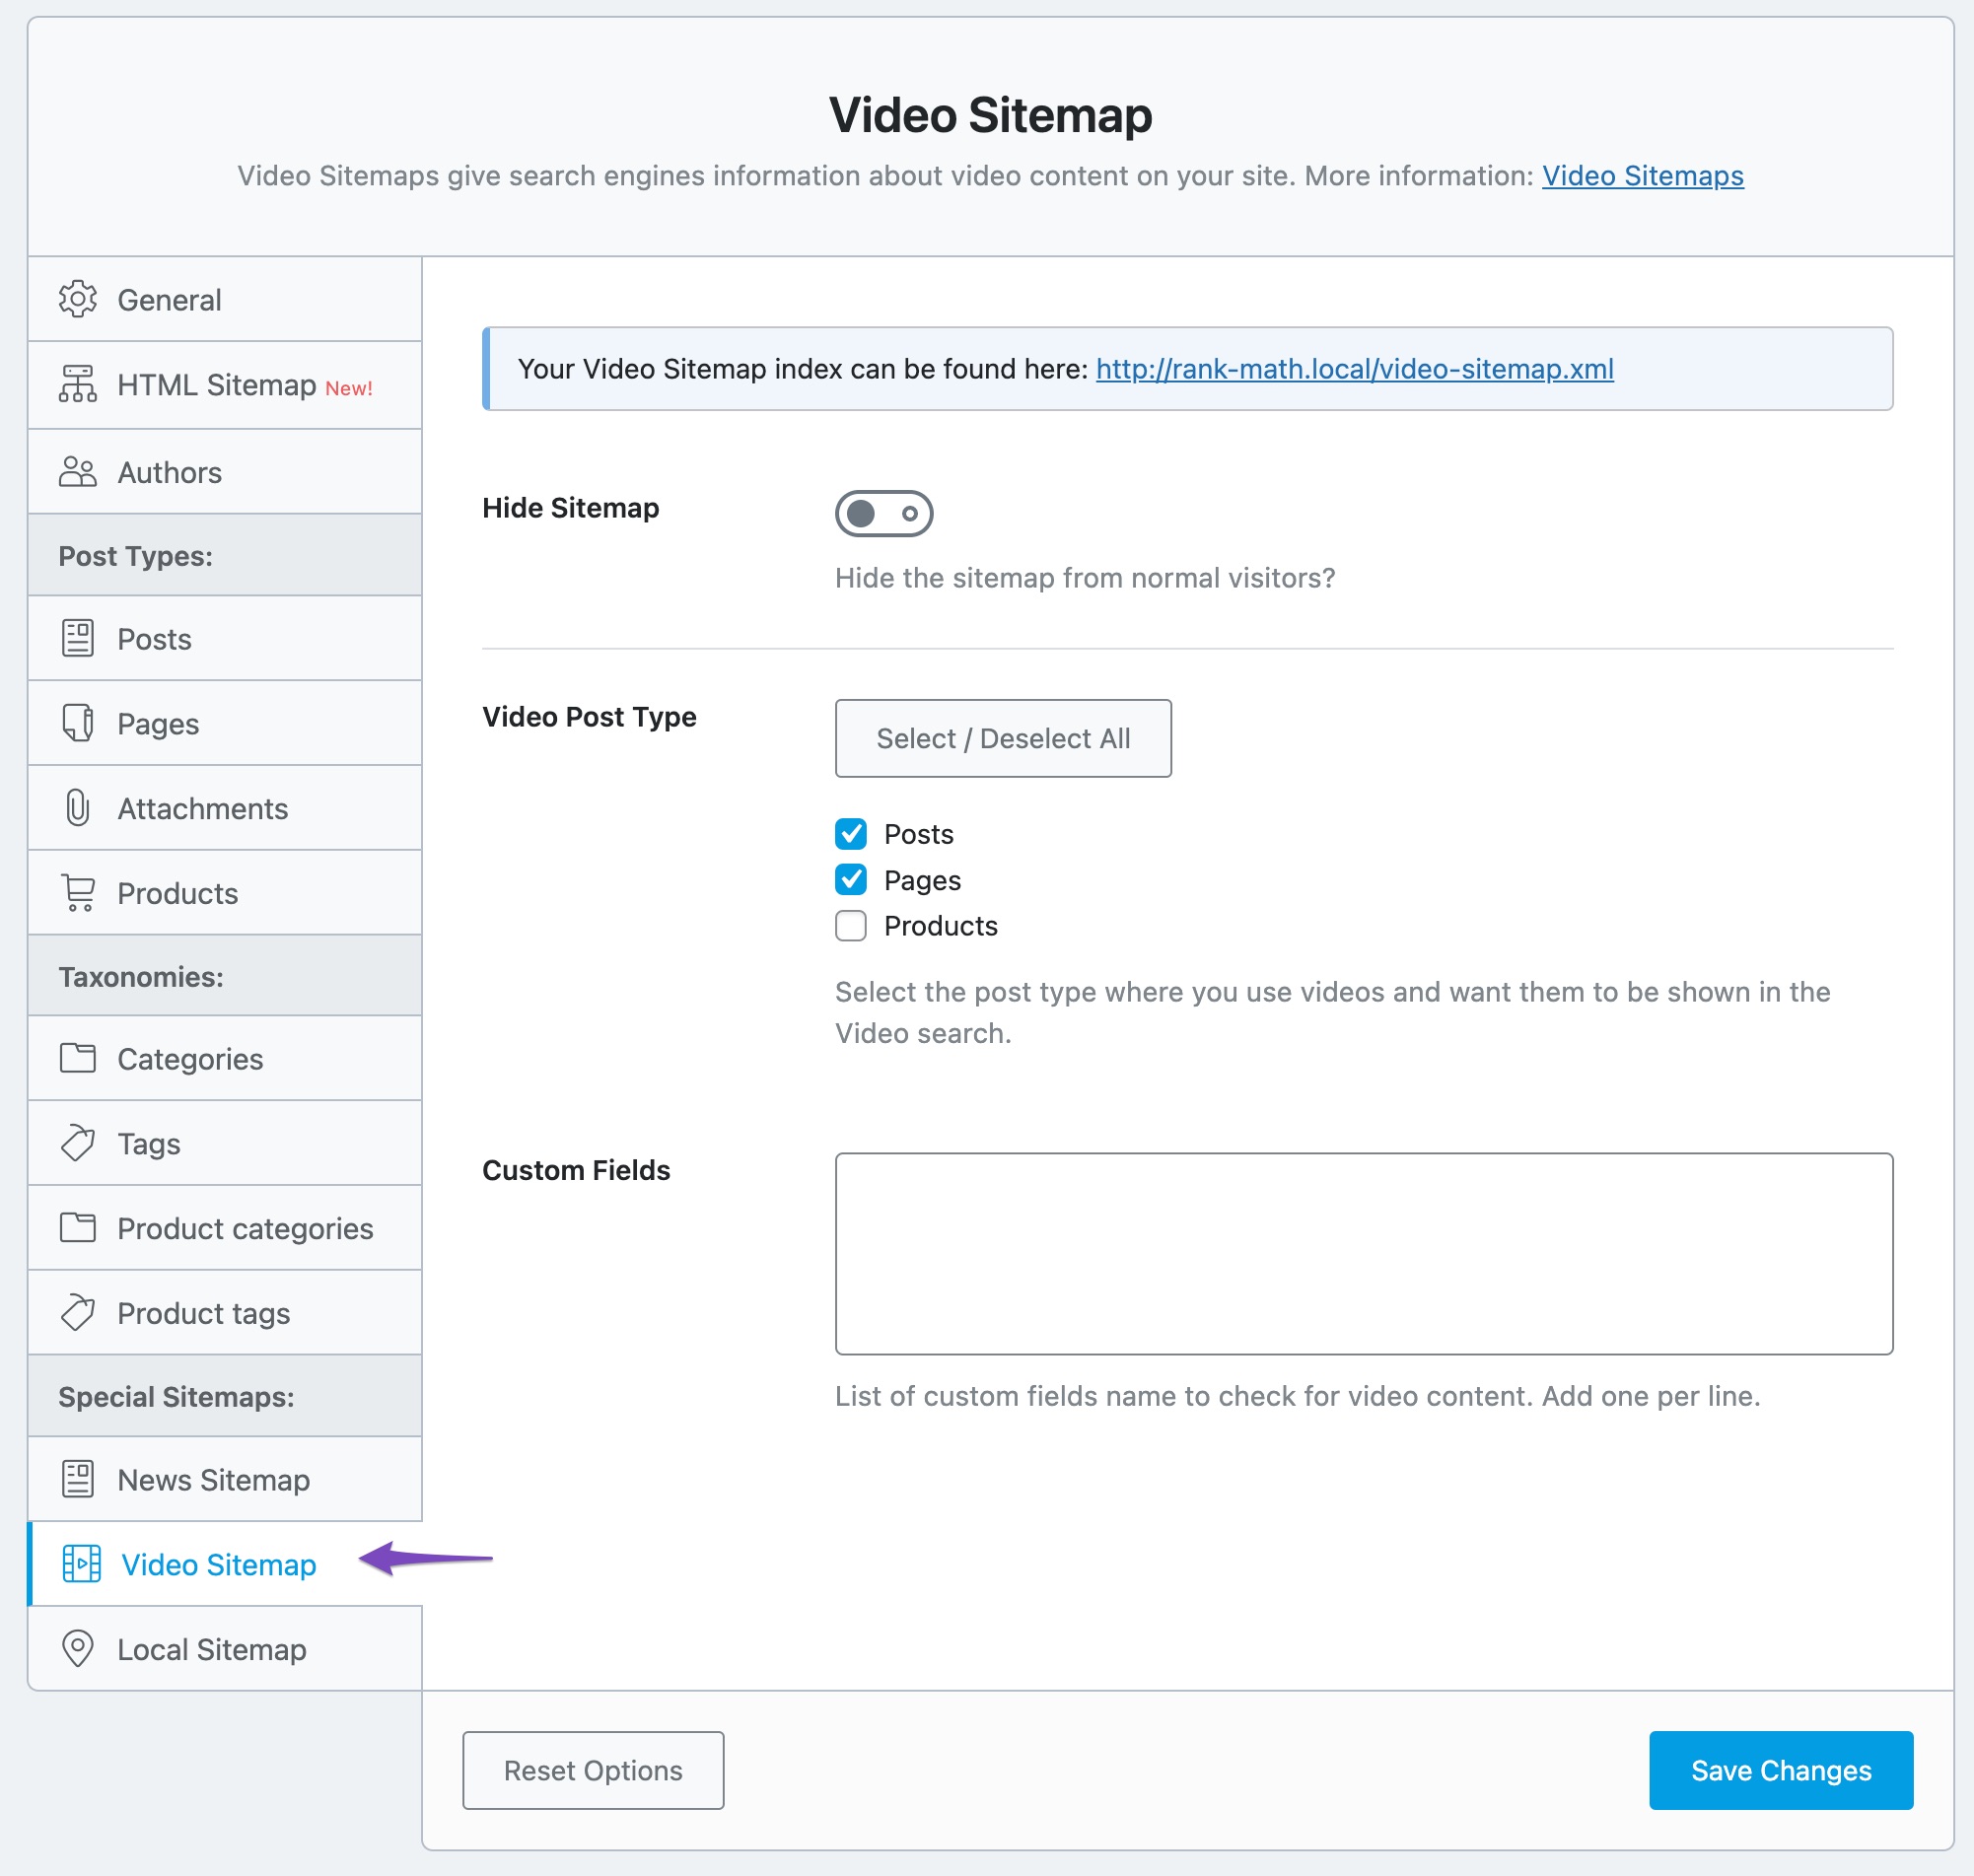
Let’s check the impact of each setting one by one.
21.1 Hide Sitemap
By default, this option to hide the sitemap for visitors is disabled. If you enable this option, then your sitemap would be hidden for normal visitors and displayed only for bots.

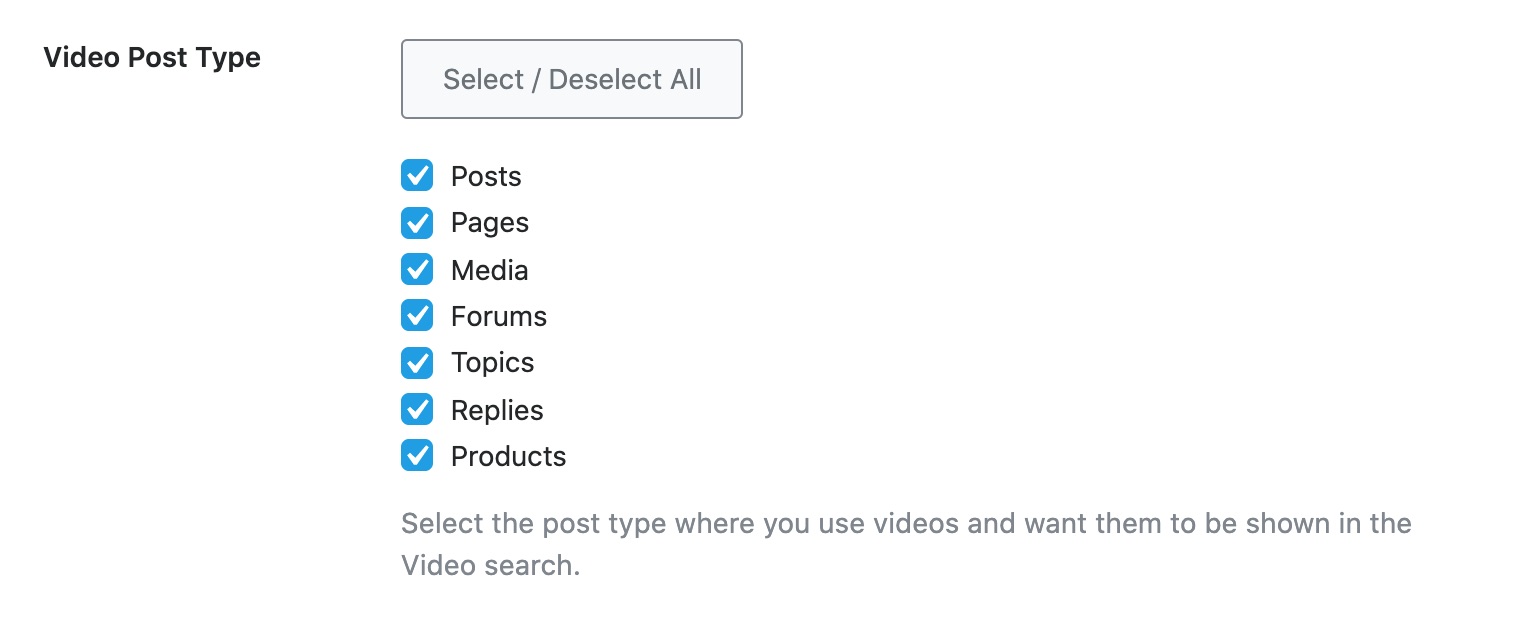
21.2 Video Post Type
This option allows you to select the post types where you want Rank Math to detect the presence of videos and include them automatically in the Video Sitemap.
21.3 Custom Fields
You may include custom fields inside your posts to add videos. If you want Rank Math to look for videos inside your custom fields and add them to the sitemap, then you can enter the custom fields’ names in this field. Be sure that you add only one entry per line so that Rank Math can understand them and include them in your sitemap.

21.4 Finding your Video Sitemap
After making the changes, you may want to find the URL of your Video Sitemap, and the URL is available right on top of your page. You can copy the URL to submit it to search engines or just access it from this page.

That covers all the settings available with the Video Sitemap tab. Now, we’ll move on to the Local Sitemap tab.
22 Local Sitemap PRO
Local Sitemap is available for PRO users when they enable the Local SEO & Knowledge Graph module in WordPress Dashboard → Rank Math SEO. This tab has the option to include a KML file to your Local Sitemap. The KML is a file format used for sharing geographic locations. Google uses this KML file to verify your business listing and location. Here is a preview of all the settings available on this page.
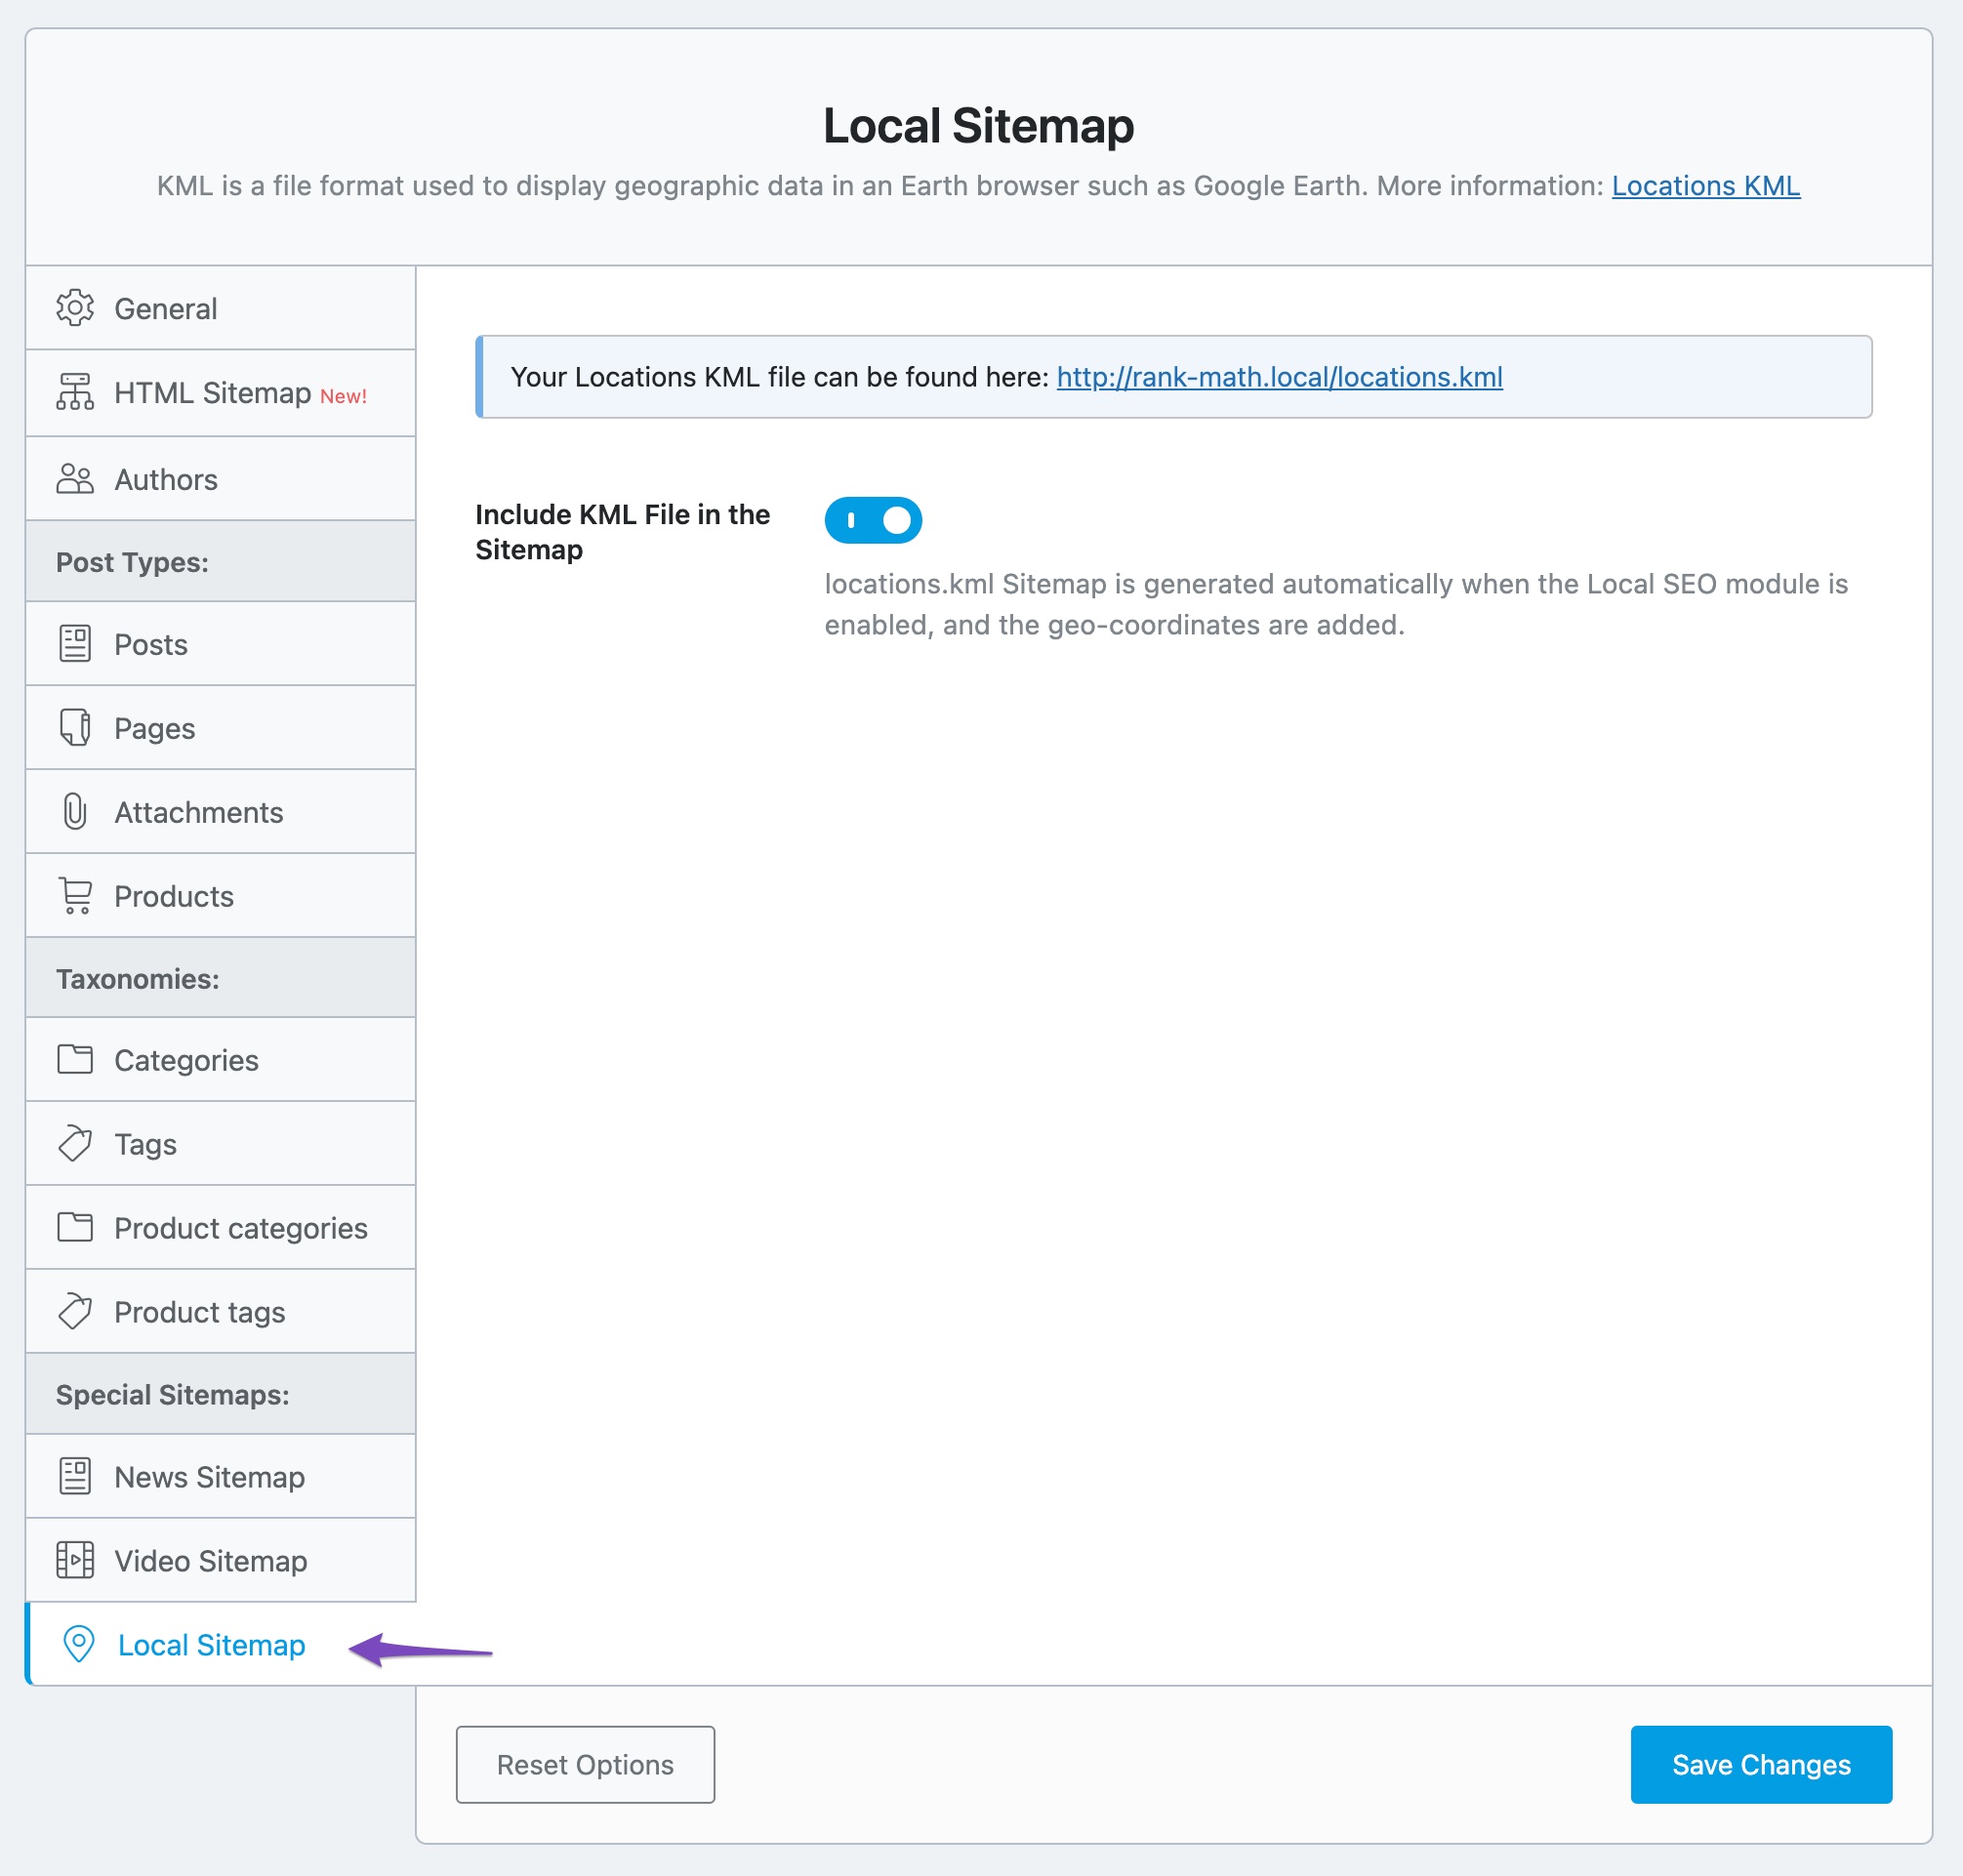
22.1 Include KML File in the Sitemap
Rank Math automatically creates a Location KML file when you activate the Local SEO module. We recommend keeping this option enabled if you want to feature your business for local search results. If you disable this option, your KML will not be included in your sitemap for engines to crawl them.

22.2 Locations KML File
Once you create locations using the multiple locations CPT, Rank Math automatically creates the locations KML file for your location and adds it to the main Sitemap. You can go through our guide on how to create multiple locations with the help of Rank Math if you’re creating multiple locations for the very first time.
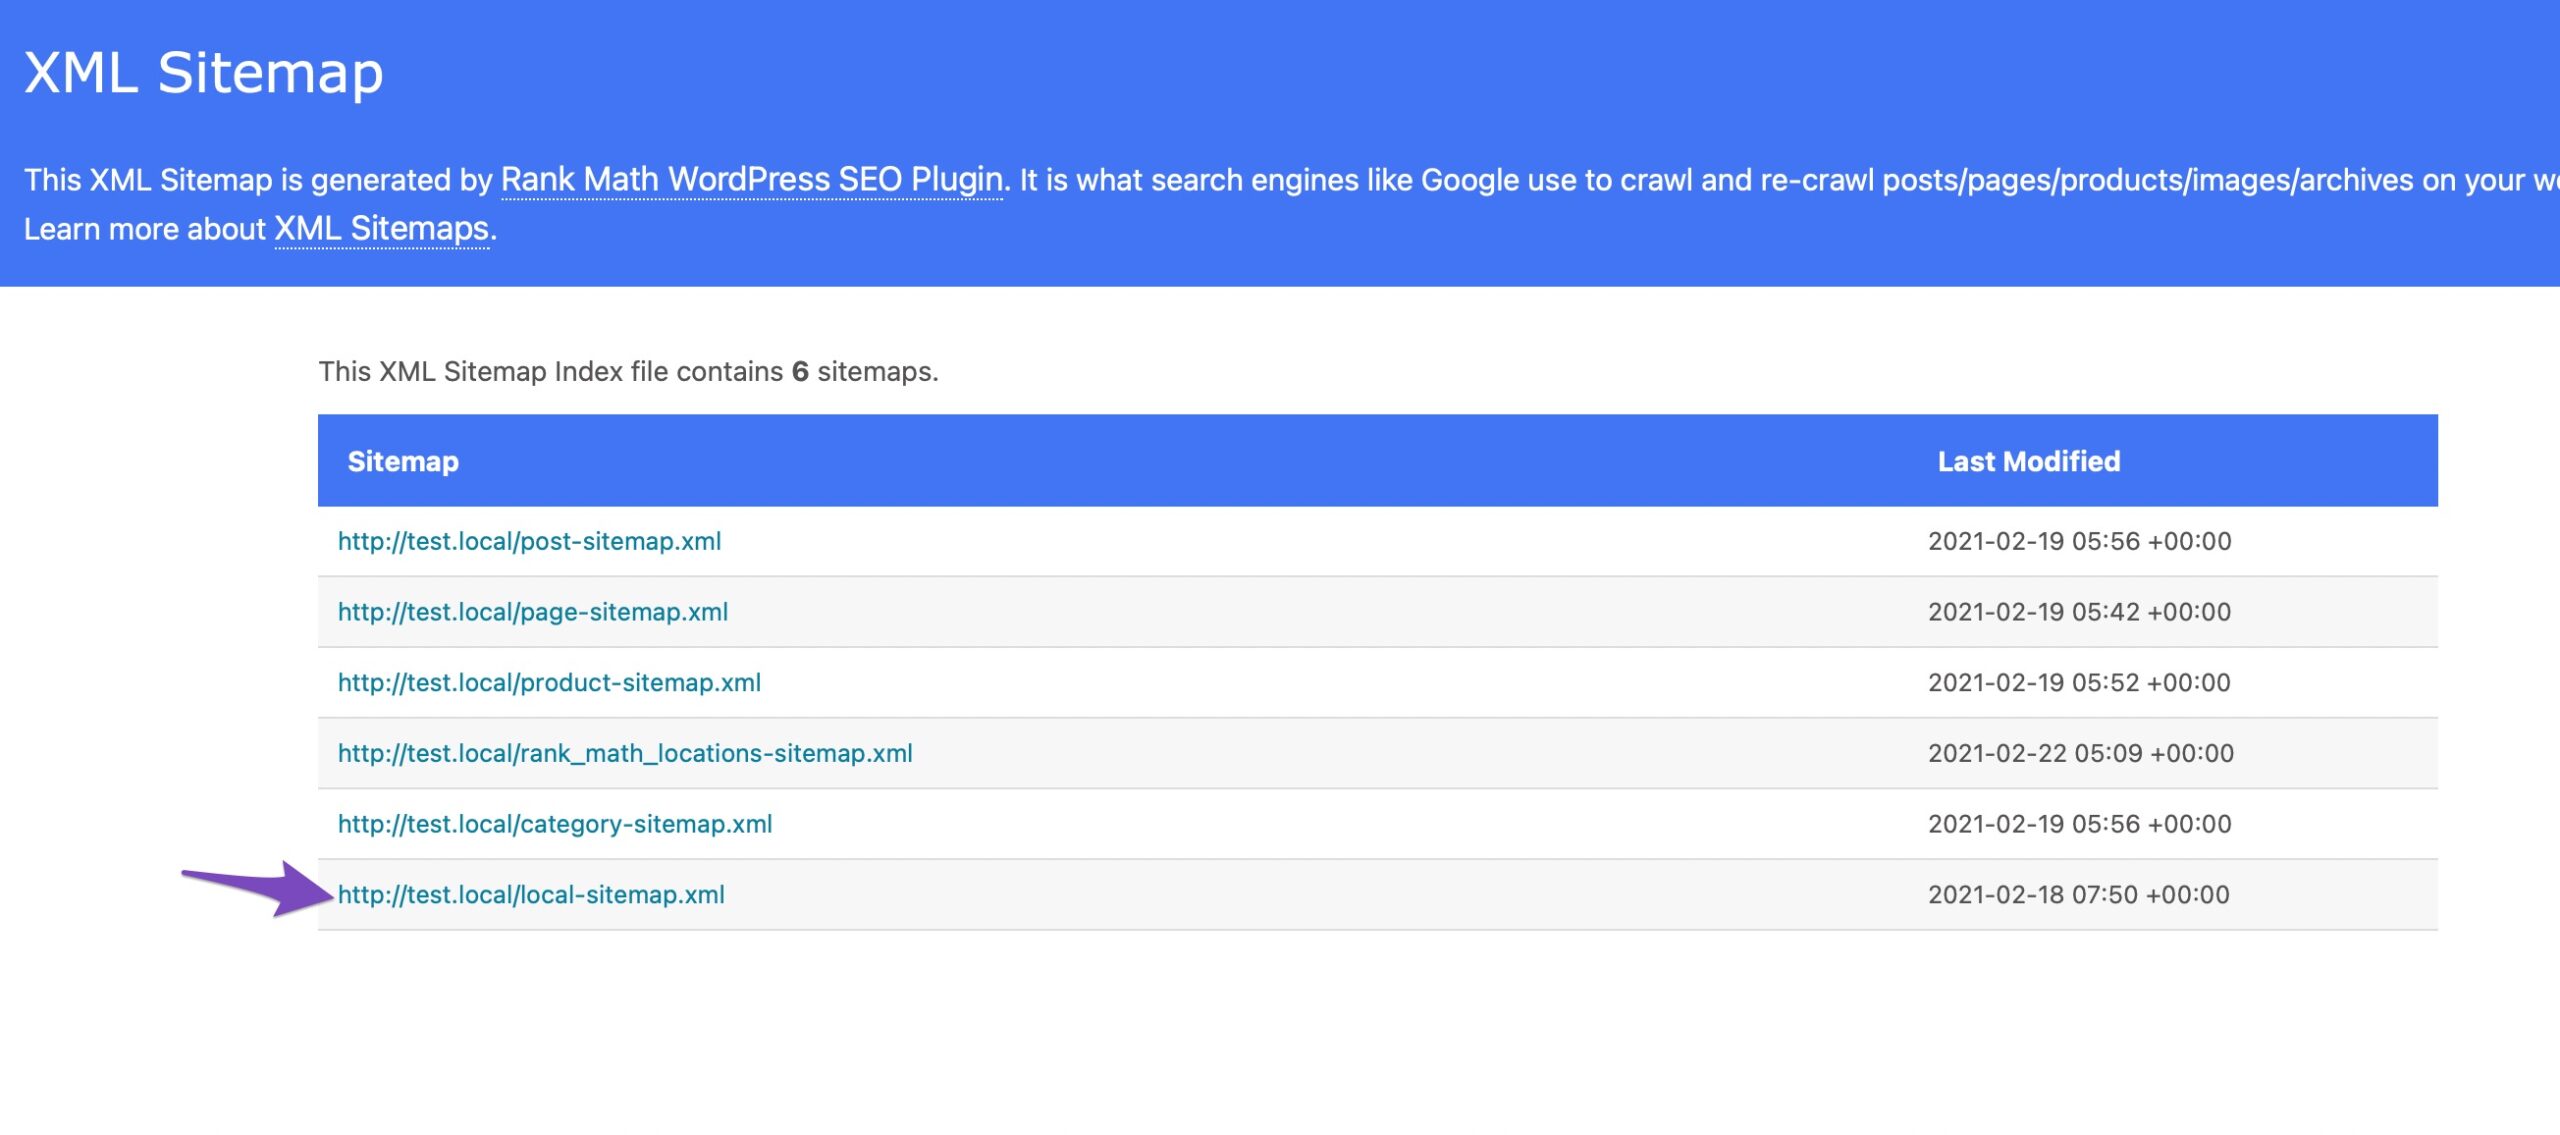
By clicking on local-sitemap.xml you’ll find the KML file as shown below:

The sitemap is generated automatically when the Local SEO module is enabled, and the geo-coordinates are added. When you check the KML file you’ll see each location that you’ve created as shown below:

23 Saving Your Settings
Once you’ve made all the changes to the sitemap settings, it’s time to save your settings. If you navigate away from the page without saving, then all your settings will be lost. To avoid that, save your settings by clicking the “Save Changes” button at the bottom right of the screen.
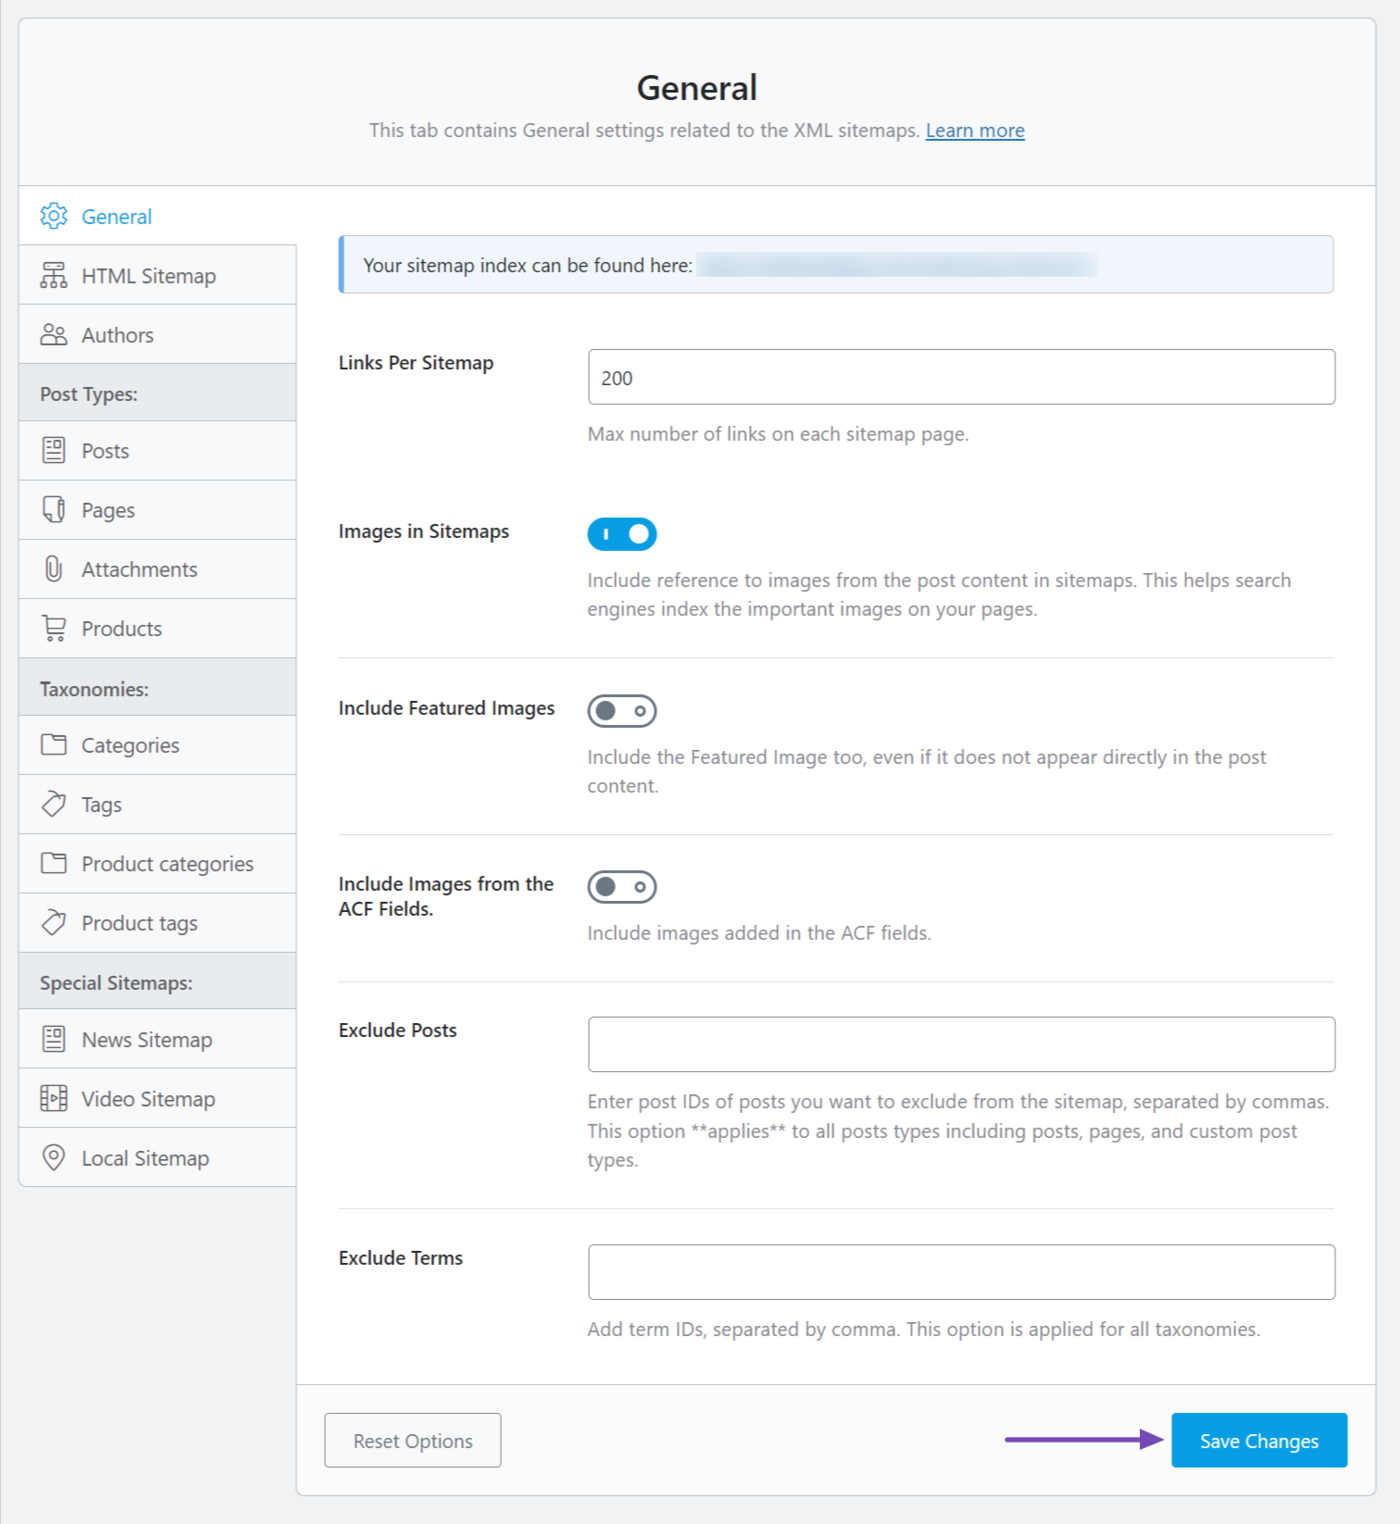
It might take a few seconds, but the page will refresh, and your settings will be saved. You will see a confirmation message at the top of the screen.

24 Submitting Your Sitemap
Once you’ve configured your settings, the next and one of the most important steps is to actually submit your sitemap to Google and other search engines. Search engines will not discover your sitemap on their own, and without it, they won’t be able to find your content effectively. That is why you need to submit your sitemaps.
The good news is that you only need to do this once. After your sitemaps are submitted, any new content that you add to your website will be updated by Rank Math to the respective sitemaps automatically, and Google will be able to fetch that content seamlessly.
Here is how to submit your sitemap to Google.
Start by going to the Google Search Console. Google Search Console is a set of webmaster tools that Google provides to help you manage your website. It also has a section where you can submit your sitemap. Start by logging in.
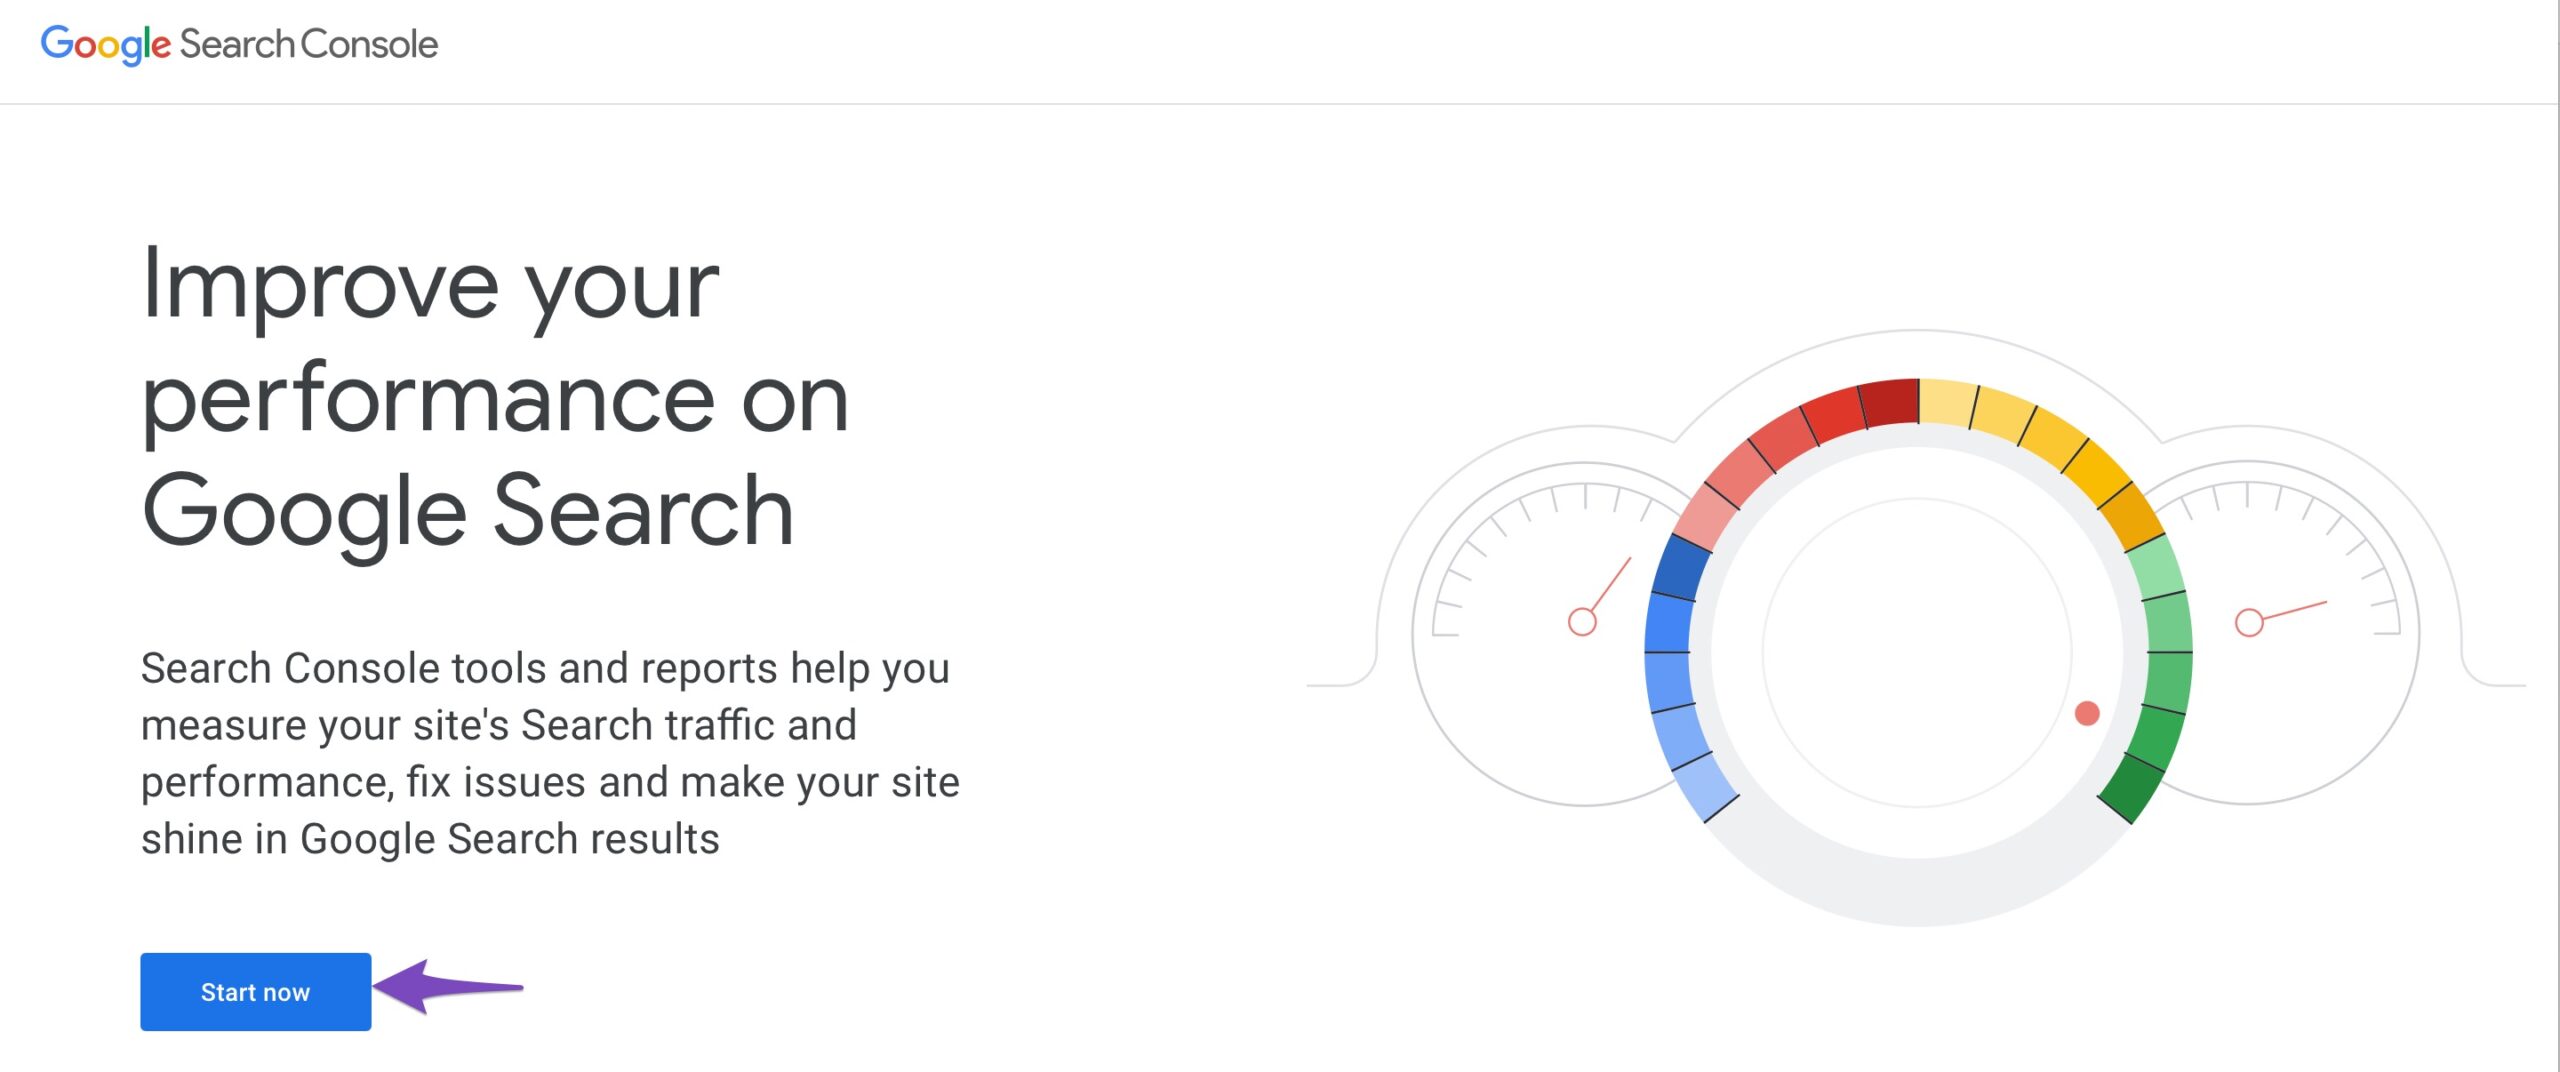
You’ll need to use your Google Account to log into Search Console.
After logging in, you’ll need to verify your website if you haven’t already done so. The verification process is necessary to show Google that you are the rightful owner of the website. Giving access to website management tools without it would be a security risk.
If you don’t have a verified website, then first read how to verify your website with Rank Math. The next steps can only be performed with a verified website.
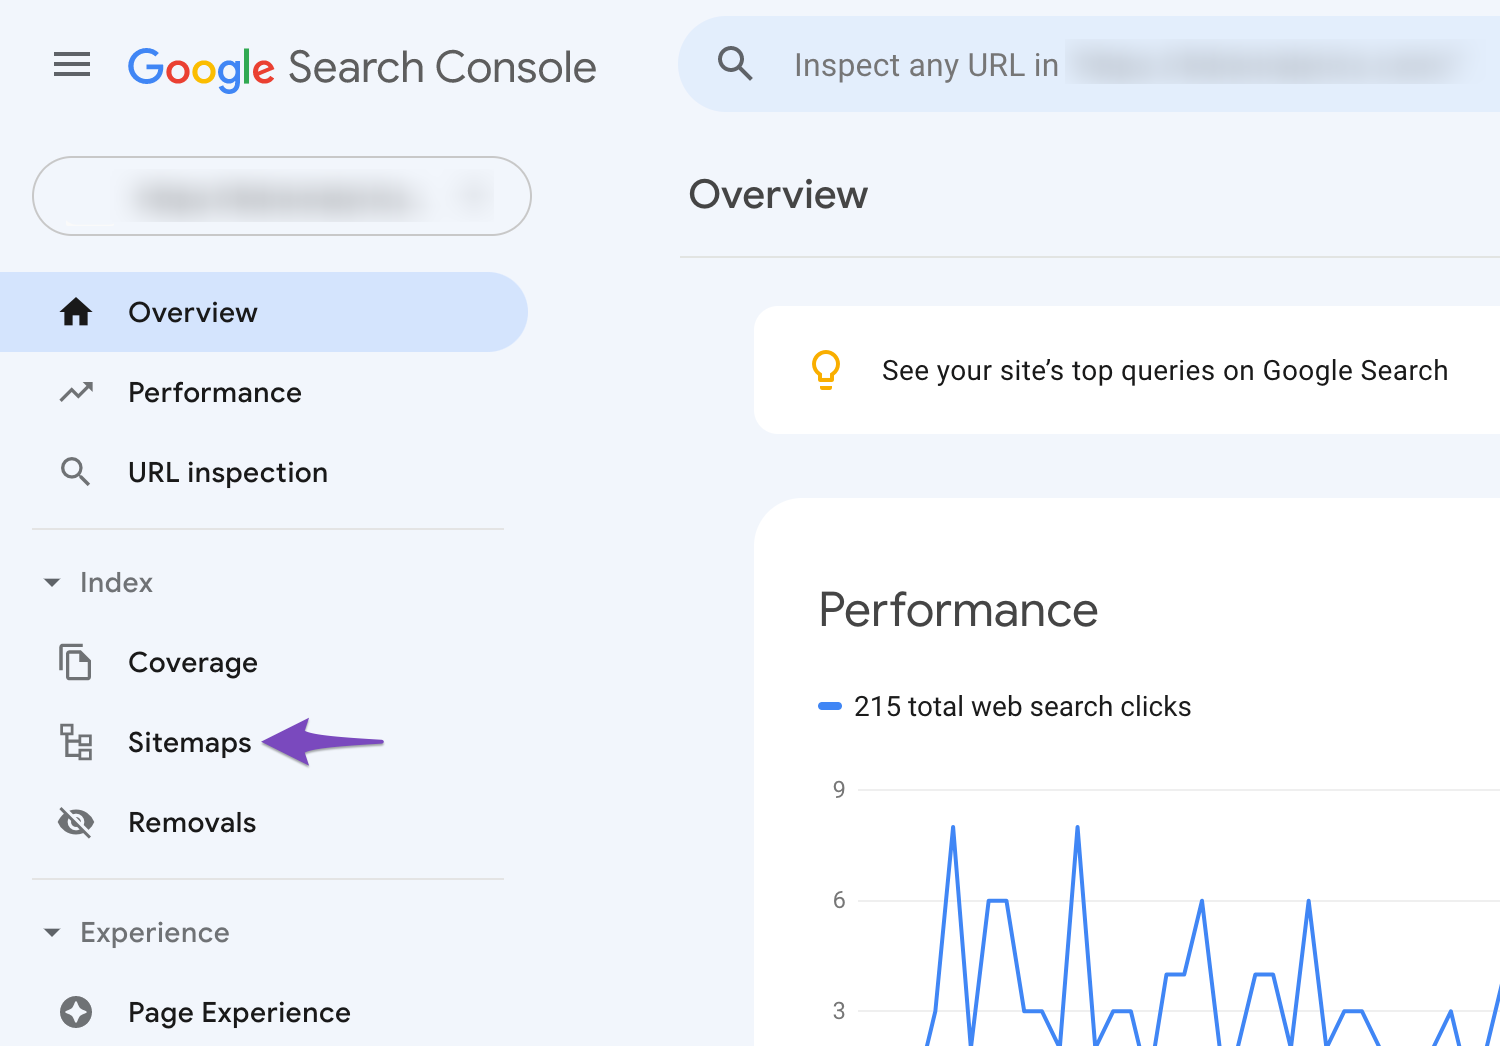
If you just verified your website, then obviously your Search Console will look empty. Click and reach the Sitemaps section.
On the next page, paste the URL of your sitemap in the “Add New Sitemap” field. You don’t need the full URL, just the section after the domain. For example, if your sitemap URL is:
http://yourwebsite.com/sitemap_index.xml
Then, you just need the sitemap_index.xml part of the URL. Paste it in the field and hit Submit.

Google will take some time to discover and fetch your sitemap, and you should see a status next to the sitemap’s entry.
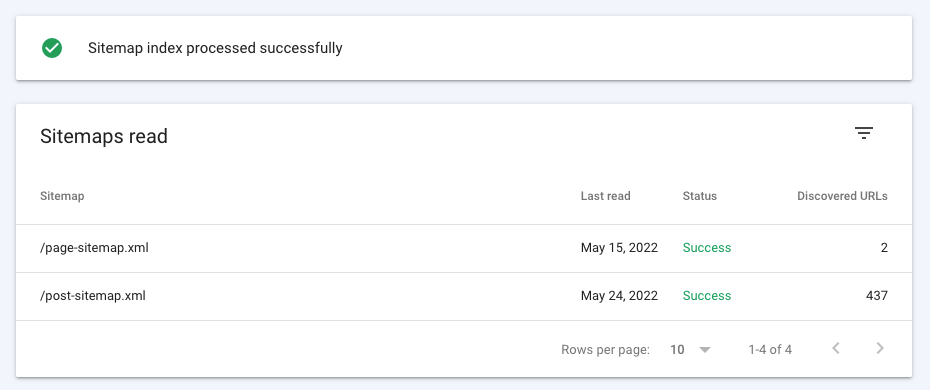
That’s it. You are done. You’ve submitted your sitemap to Google.
Remember, you have to submit each sitemap on your website to Google.
Tip: Rank Math automatically creates a Sitemap Index for your website, and it is available at https://yourdomainname/sitemap_index.xml. As the name suggests, it is an index of all the sitemaps on your website. When you submit the Sitemap Index to the search engine, they can automatically pull out all the sitemaps on your website so that you don’t have to submit each sitemap manually.
25 Resetting Your Settings
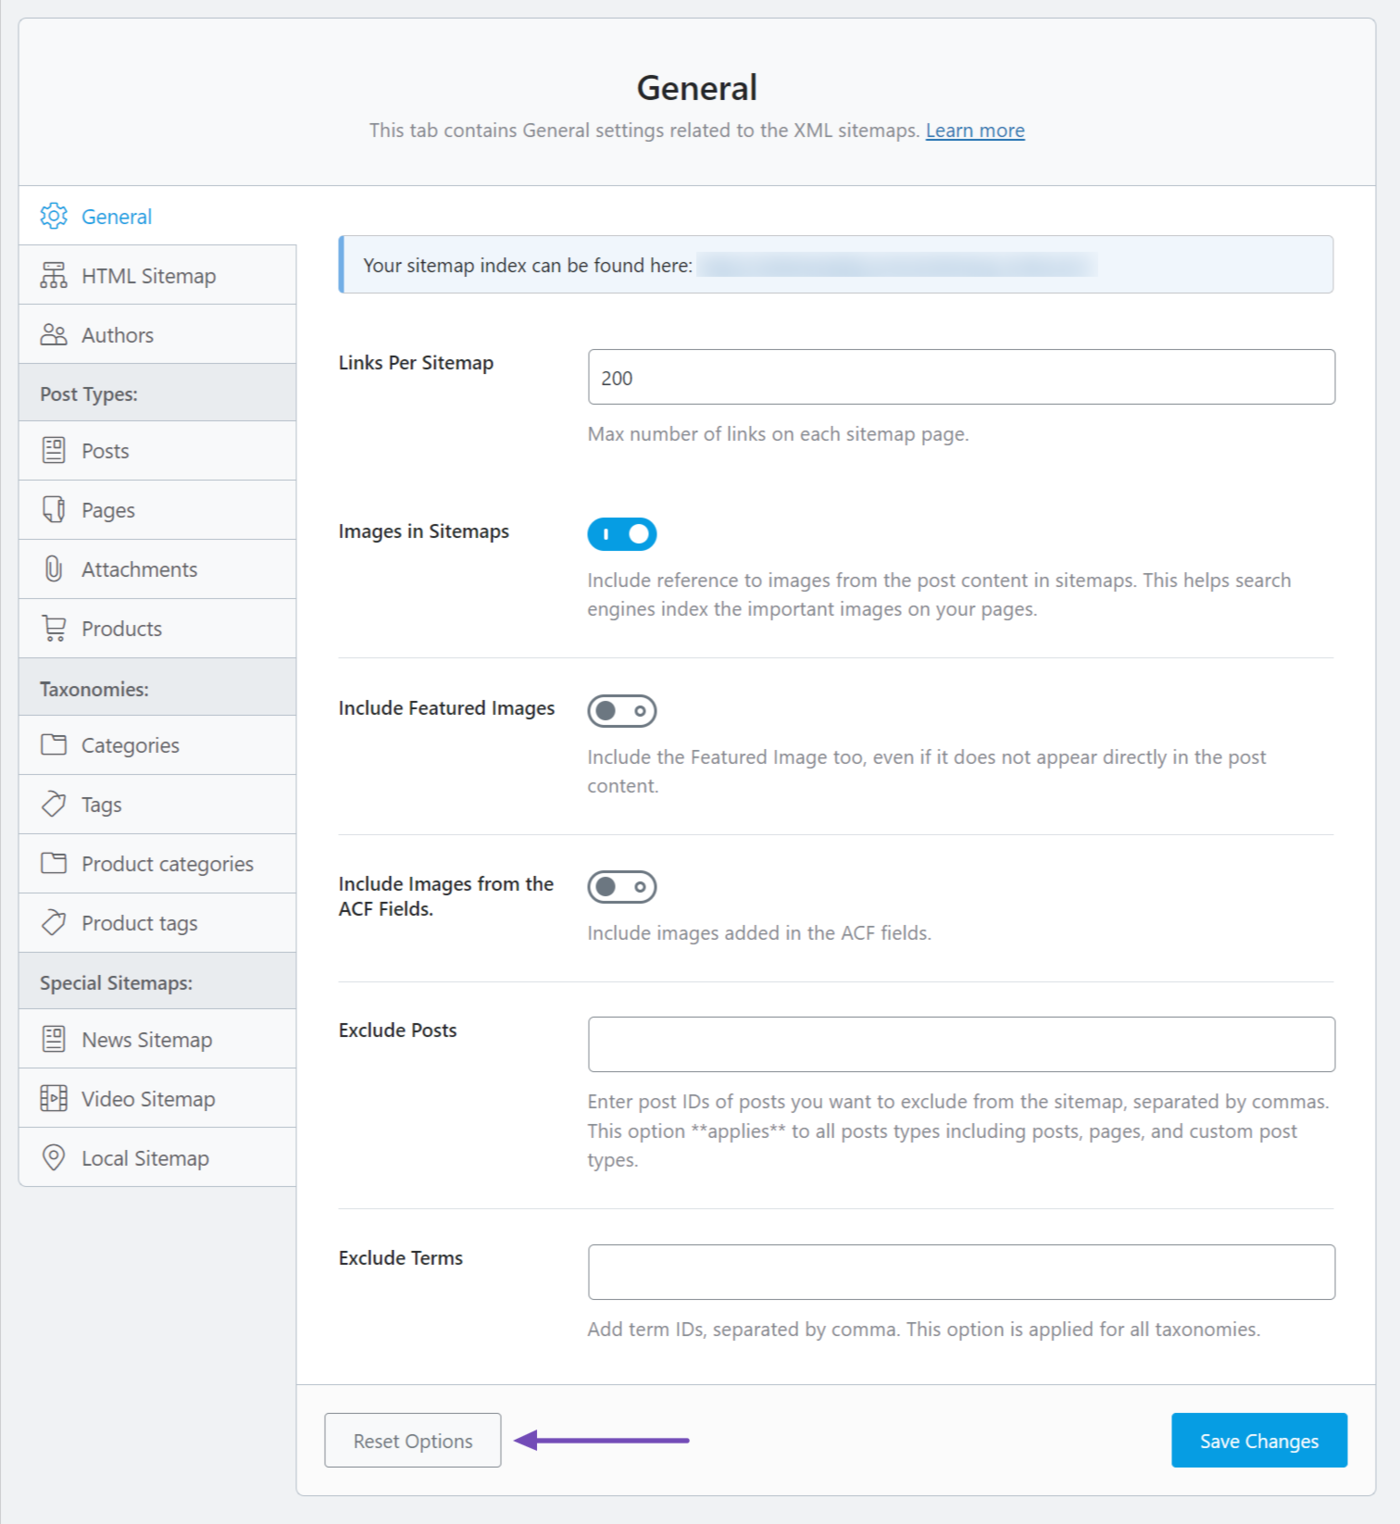
If at any point in time you want to go back to the default Sitemap settings, then you can use Rank Math’s Settings Reset option. The button for that is located at the bottom of the page and is visible from any of the settings. Click the button to reset your settings.
Once you click the button, Rank Math will ask for confirmation before it proceeds. Click the OK button to reset your settings.
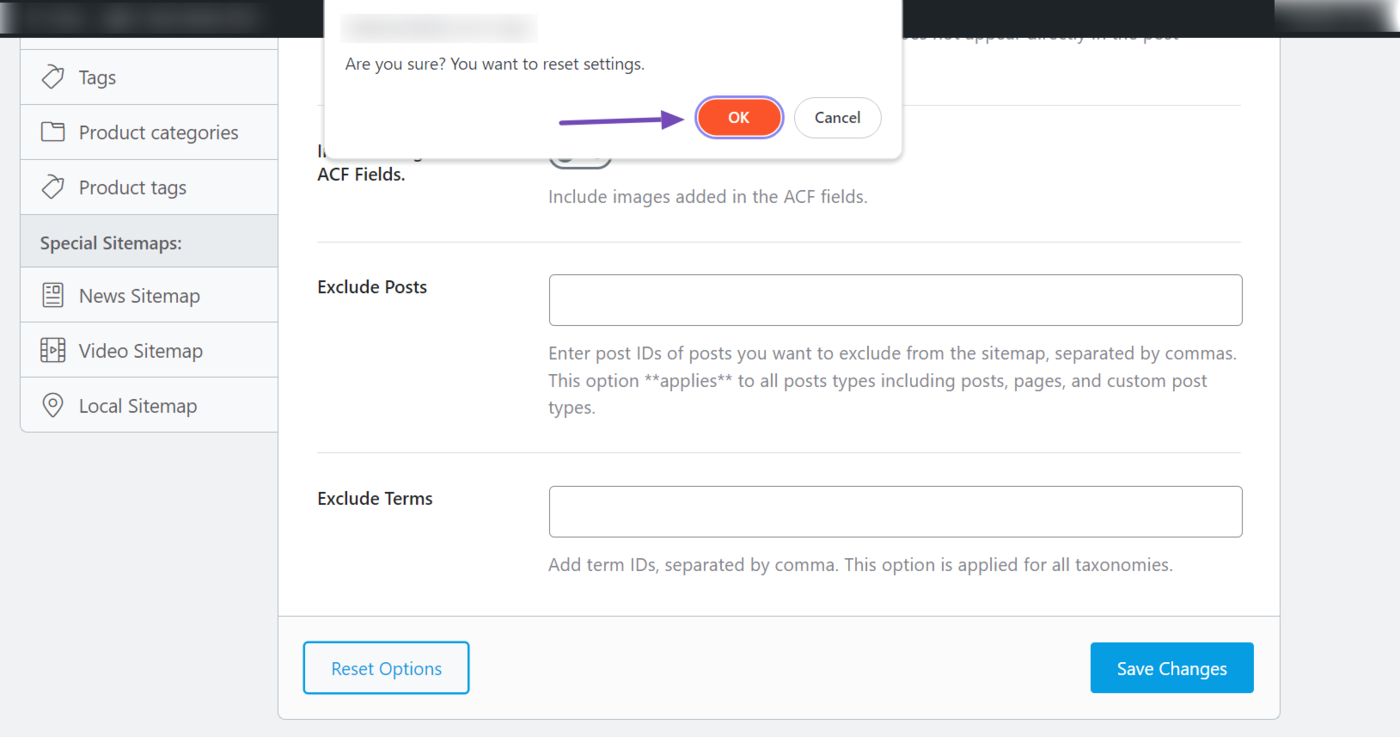
The page will refresh in a few seconds, and your settings will be reset.
25.1 How Reset Works
Before you use the Reset process, it is important to know how it will affect your settings. Whenever you use the Reset Option, it will reset all the settings in the Sitemap Settings, not just the one section that you’ve opened up.
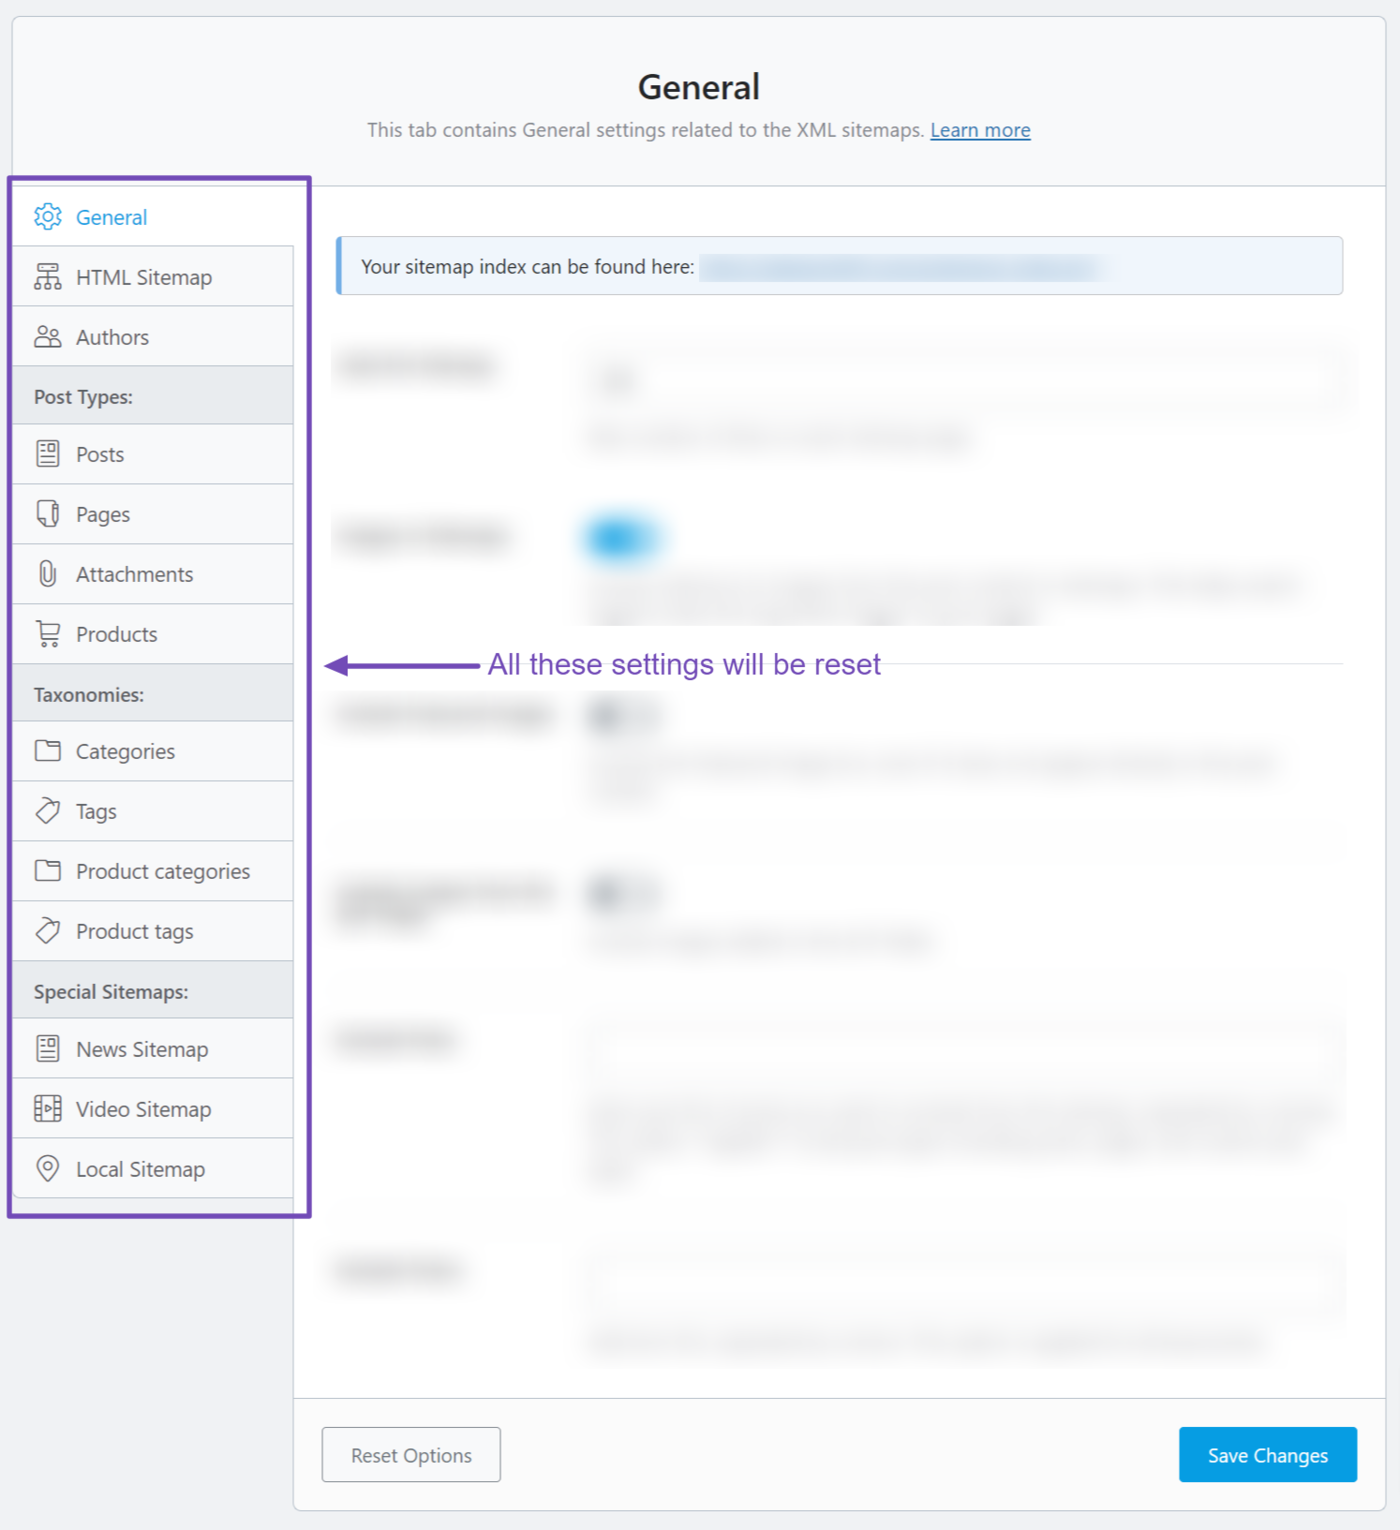
Once the settings are reset, there is no way to bring them back, unless you have a backup. Due to this, we highly recommend that you always take a backup of Rank Math’s settings before you reset them. Doing this will avoid a lot of problems that might come with accidental resets.
26 Fixing 404 Error in Sitemap_Index.xml
Submitting sitemaps using Rank Math is very easy. But sometimes it shows a 404 error. This 404 error in sitemap basically means that the sitemap index is not found or individual sitemap does not exist.
When URLs are submitted to the sitemap for indexing, Google expects a result of 200 ok responses for your website URLs. If it shows a 404 error, it means that it cannot locate the sitemap_index.xml. We have got a separate article on how to solve 404 error issues in sitemap_index.xml, in case, if you ever encounter such issues while using Rank Math’s Sitemap Module.
27 Adding Custom URLs to Sitemap
If you prefer to include custom URLs from CPTs or other pages to Rank Math’s sitemap, you can add the following filter to wp-content/themes/theme-name/rank-math.php. Just replace {$type} with either post or page, in case, if you want the URL to be included in the post or page sitemap respectively.
/**
 Filter to add extra URLs to the XML sitemap by type.
 *
 Only runs for the first page, not on all.
 *
 @param string $content String content to add, defaults to empty.
 */
add_action( 'rank_math/sitemap/{$type}_content', function() {
return '<url>
<loc>https://rankmath.com/some-custom-url/</loc>
<lastmod>2020-06-10T20:20:20+00:00</lastmod>
</url>';
});
28 Frequently Asked Questions
How to allow Rank Math to submit sitemap automatically to Google?
Rank Math submits your sitemap index automatically to Google if you have connected Rank Math with your Google Search Console account. You can refer to its dedicated knowledgebase tutorial.
Why Rank Math does not include <priority> or <changefreq> values in Sitemap?
Google has deprecated the usage of these attributes. Google no longer considers the <priority> or <changefreq> values in the sitemap, hence Rank Math does not include these attributes.
Why is my sitemap not updated after publishing a new post?
It is possible that your sitemap is cached. In this case, you’ll have to exclude the sitemap from caching to fix the issue. You can refer to this article to exclude sitemaps from caching.
Can I change the XML sitemap address?
Yes, you can use these filters to change the Sitemap URL base and Sitemap Index slug.
29 Conclusion
We hope that you understand how the sitemap feature in Rank Math functions and how the various options affect your website and the sitemap. If you have any questions or face issues while configuring sitemaps in Rank Math, don’t hesitate to open a support ticket. The support staff is available 24x7x365 and will help you with any issues that you might have.