Did you just come across a page that needs to be added with a noindex tag or displaying a 404 error that needs to be redirected to a specific page? You don’t have to go back to your WordPress dashboard, find the specific page, navigate to the page settings and make the changes. Thankfully Rank Math has a quick actions menu item present in the admin bar that helps you work faster in these scenarios.
In this tutorial, we will walk you through our Rank Math’s quick actions menu item, which is present in the admin bar.

So what are quick options? When you are logged into your website and are browsing through your posts, you might have noticed that WordPress places a black admin menu bar on top of the screen. Here is how it looks. If this admin menu isn’t appearing, then follow this tutorial to enable the admin bar on your WordPress site.

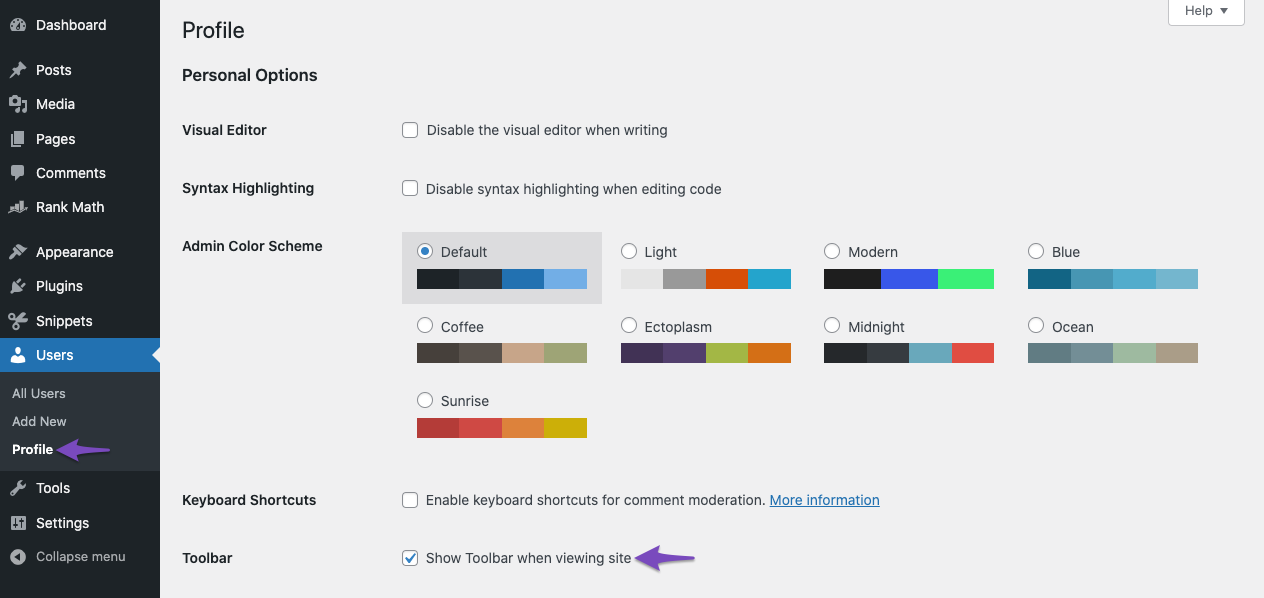
This black bar hosts some quick shortcuts which help you work faster. As you might have noticed on the image above, you can customize the post you’re viewing, check its pending comments, check updates, and add new posts. If you can’t see the bar, enable it in your user settings by going to WordPress Dashboard → Users Your Profile.
When you install Rank Math, it will add its own menu item on this bar. Here is how it will look if you have Rank Math installed.

We’re going to discuss all the options that this quick-access provides.
To see all the options, all you have to do is hover your mouse over it, and all the options will appear below it.
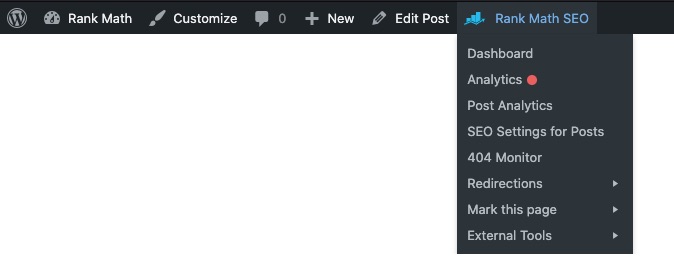
You’ll see a total of 8 entries in the quick-actions menu, but it may change in the future.
The Entries in the Quick-Actions Menu Are:
Some of these are direct links to certain tools inside Rank Math, like the 404 Monitor. Others have sub-options inside them. The entries with the sub-options inside will have a small arrow pointing outwards with them.
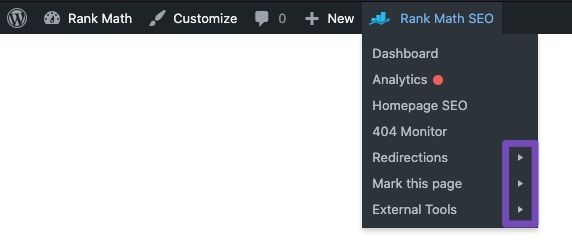
We’ll talk about the sub-options inside the individual options when we discuss the respective options.
For now, let us start discussing each of the quick-actions.
1 Rank Math Dashboard
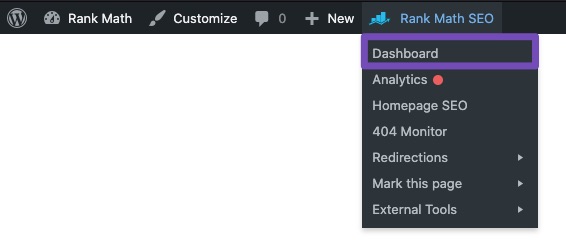
The first quick-action is for the Rank Math Dashboard. It’s a pretty straightforward action. If you click it, you’ll reach the Rank Math Dashboard; specifically, you’ll reach the modules section.
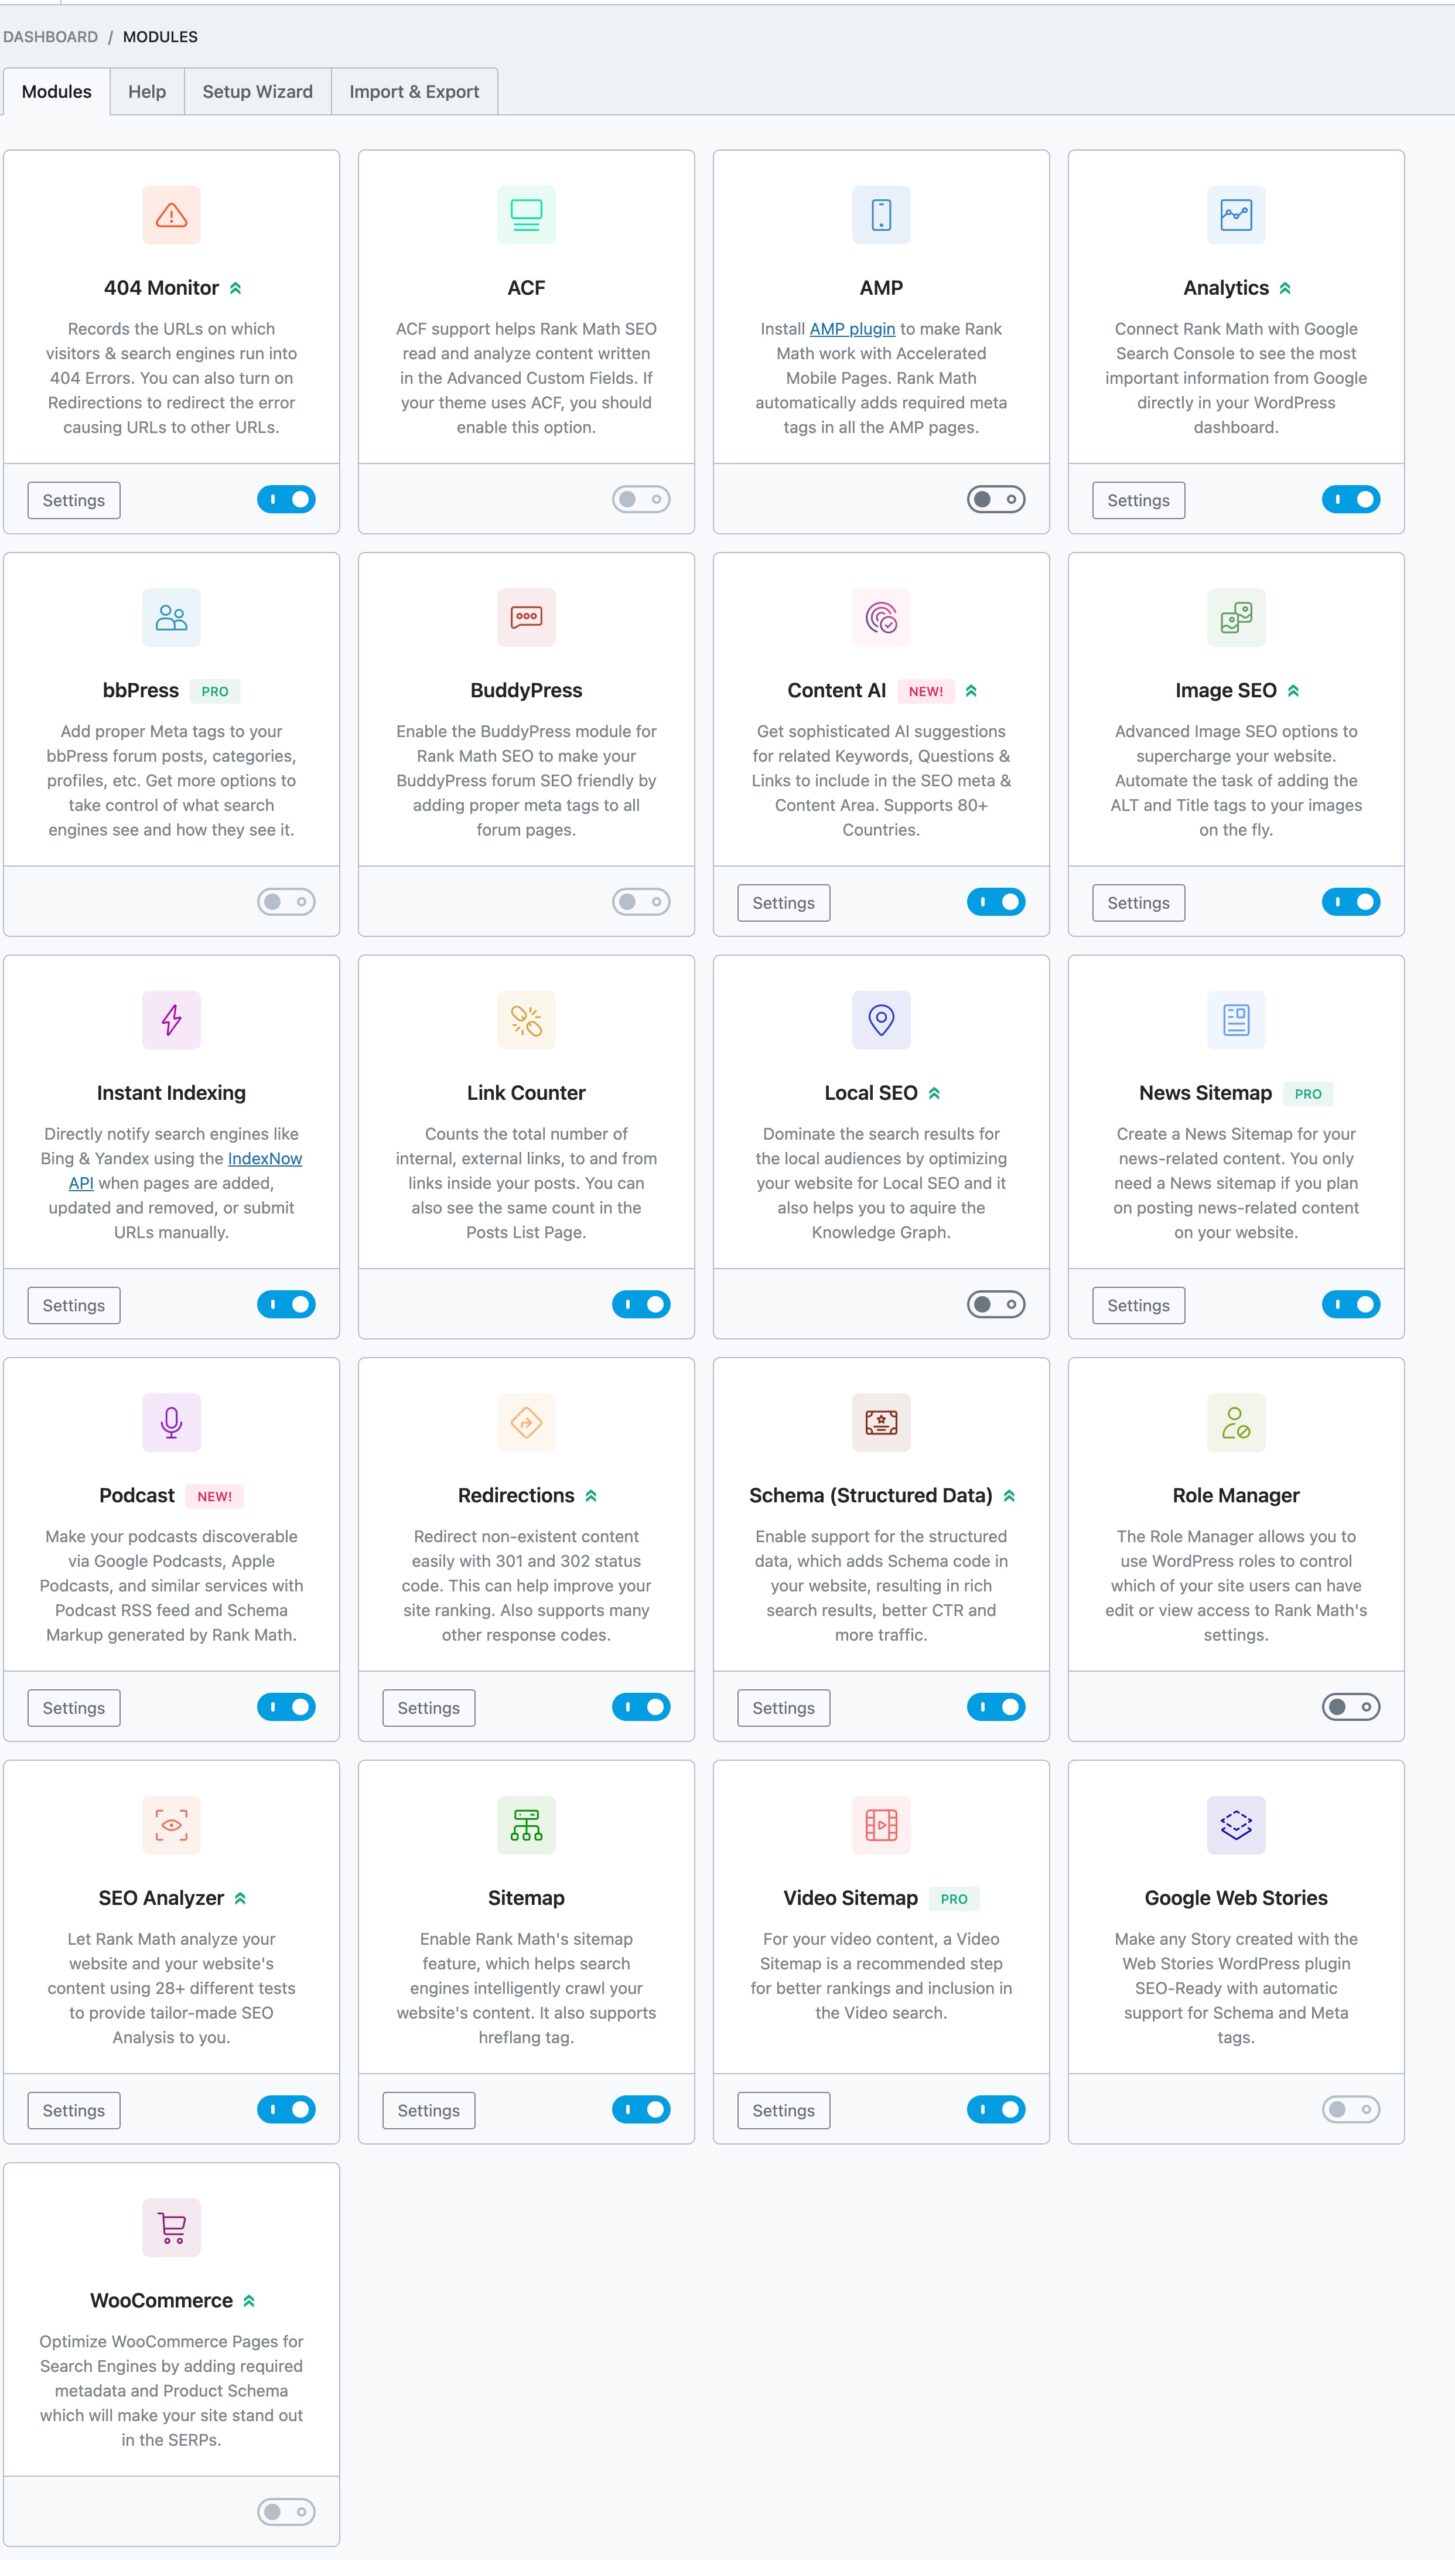
The link does not open in a new window, so be prepared to leave your progress behind or Ctrl + Click (on Windows) or Command + Click (on a Mac) to open it in a new tab.
2 Analytics
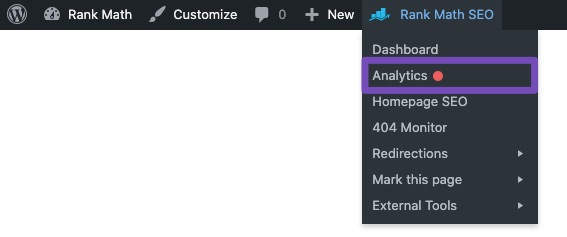
The next option in the quick-actions list is the Analytics, which takes you to the Rank Math Analytics dashboard. The dashboard will give you an overview of your website’s current performance with respect to organic traffic. Here is how an Analytics dashboard look like in Rank Math:
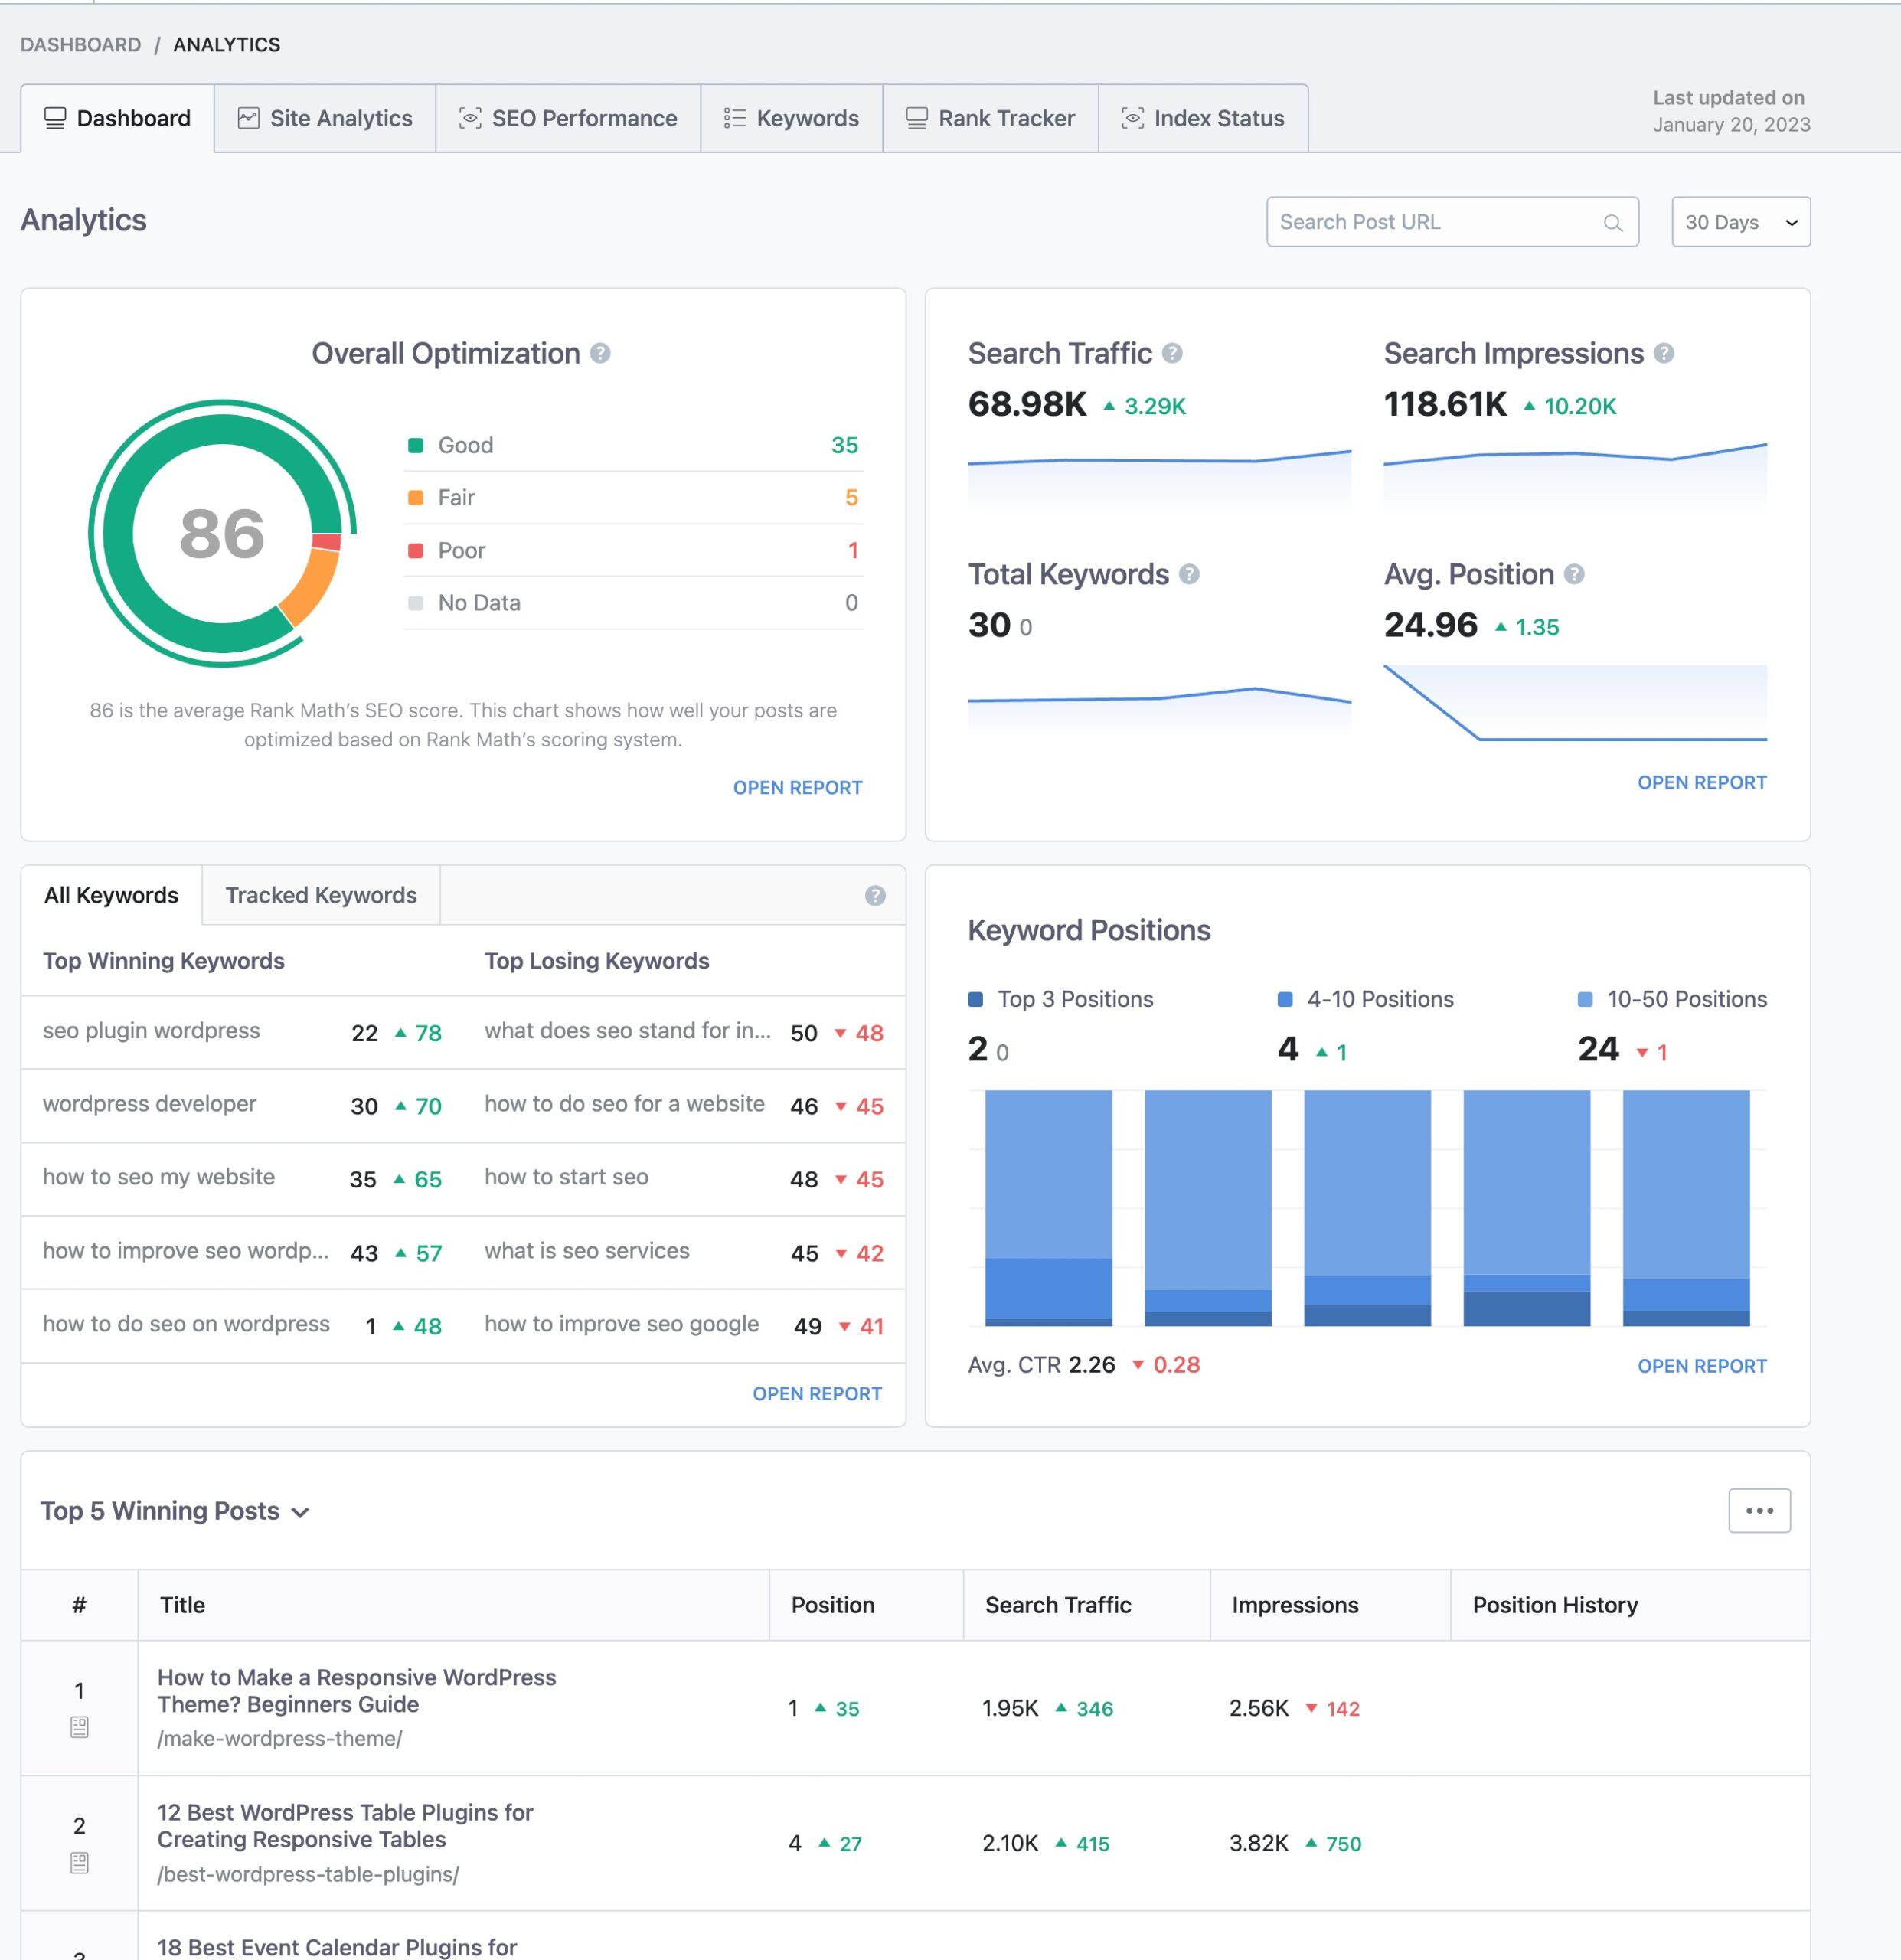
The dashboard will only give you an overview of reports and you can open each report to delve more into the data from your Google Search Console.
We aren’t covering the features of this dashboard in detail here — we’ve got a detailed knowledgebase article on the Site Analytics dashboard that covers the different metrics shown on this page and what you can infer from them.
3 Post Analytics PRO
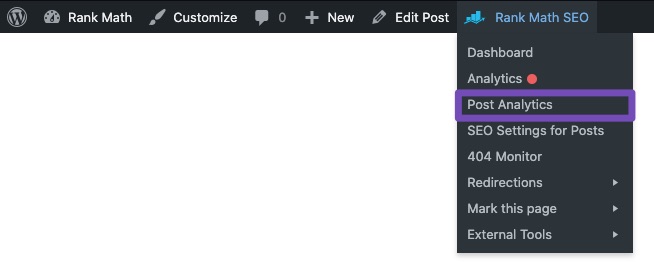
The post analytics quick-action is available only for PRO users and visible in the admin menu of specific pages of your post/product/CPT.
The option will take you to the analytics overview of the specific page and present you with the page’s performance in the search engine results.
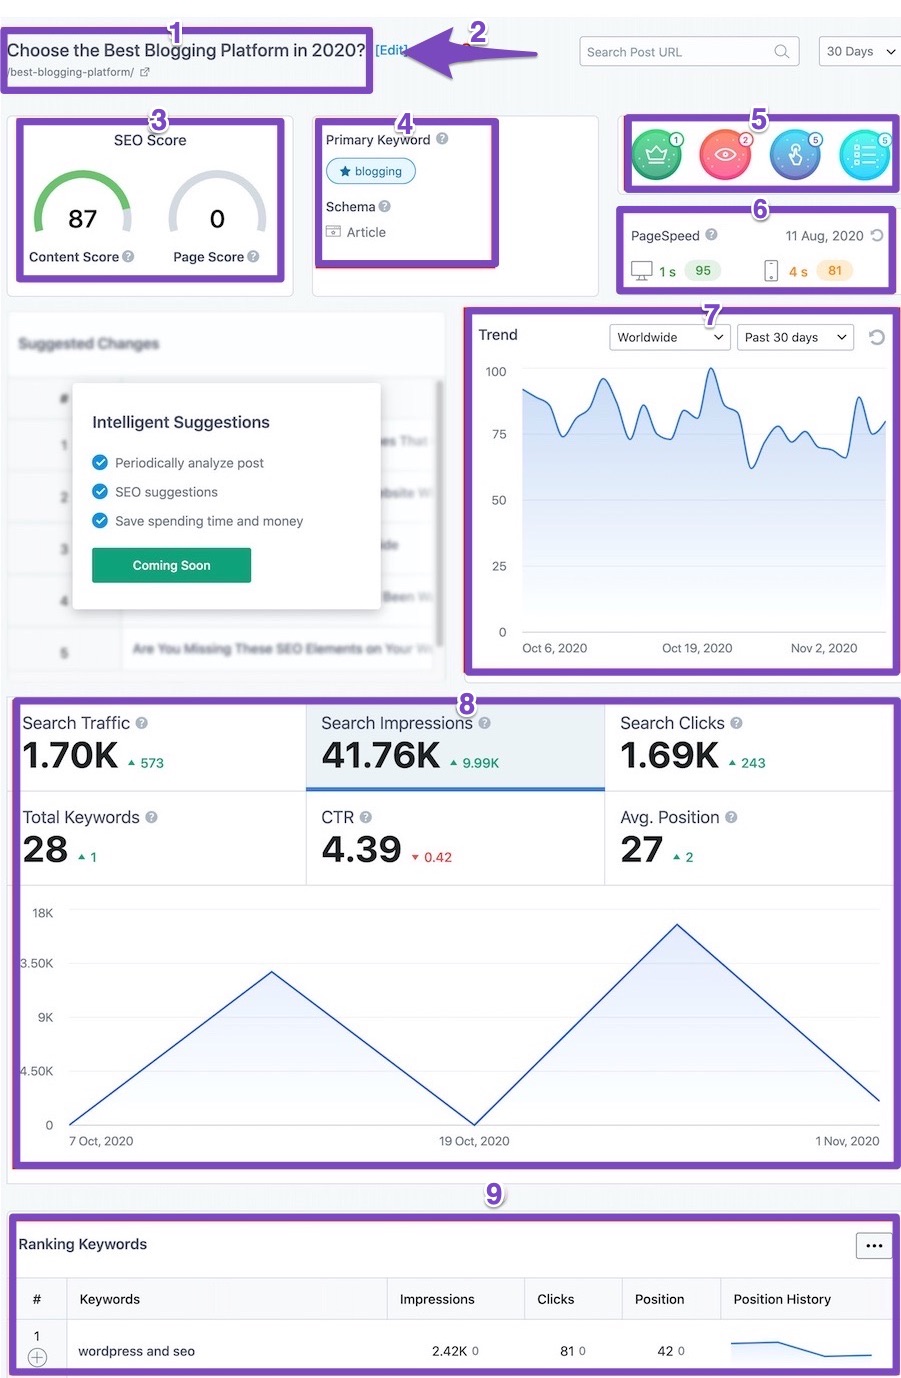
You can change the number of days for which the data is to be displayed and can have a deeper understanding of the SEO performance of the page, the Schema used on the page, page speed metrics, the keywords the page is currently ranking for, and its trends for the set period.
These metrics shown here are vital, as they help you decide if the page is ranking for the keywords as intended or needs to be optimized further.
4 Homepage SEO
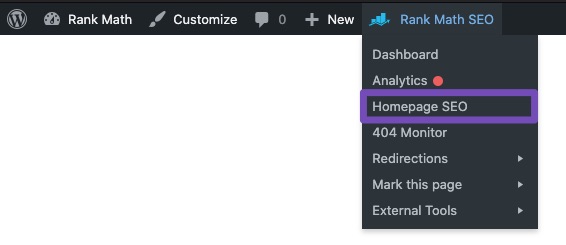
The next option in the quick-actions is the Homepage SEO option. Technically, it’s more than that. This option gives you a quick-shortcut to reach the default SEO settings of the type of page you’re on. Since we were on the homepage, we saw the option for Homepage SEO.
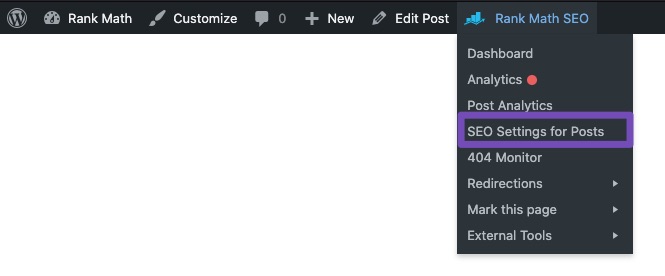
If you were on a regular post on your website, this is what you’d see there.
And on pages, you’d see similar results.
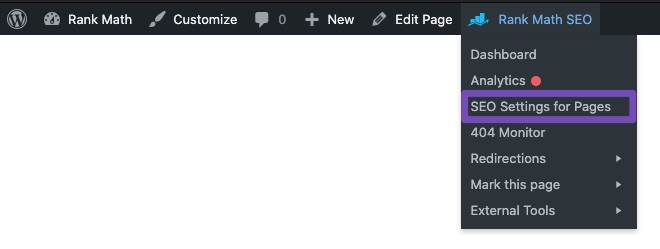
Another thing to note is that for pages and posts, there is an additional entry which is “Mark this post/page”. We will discuss this option too in the later parts of this tutorial.
Since this option can have 3 different settings in itself, we’ll briefly explain each of them.
4.1 Homepage SEO
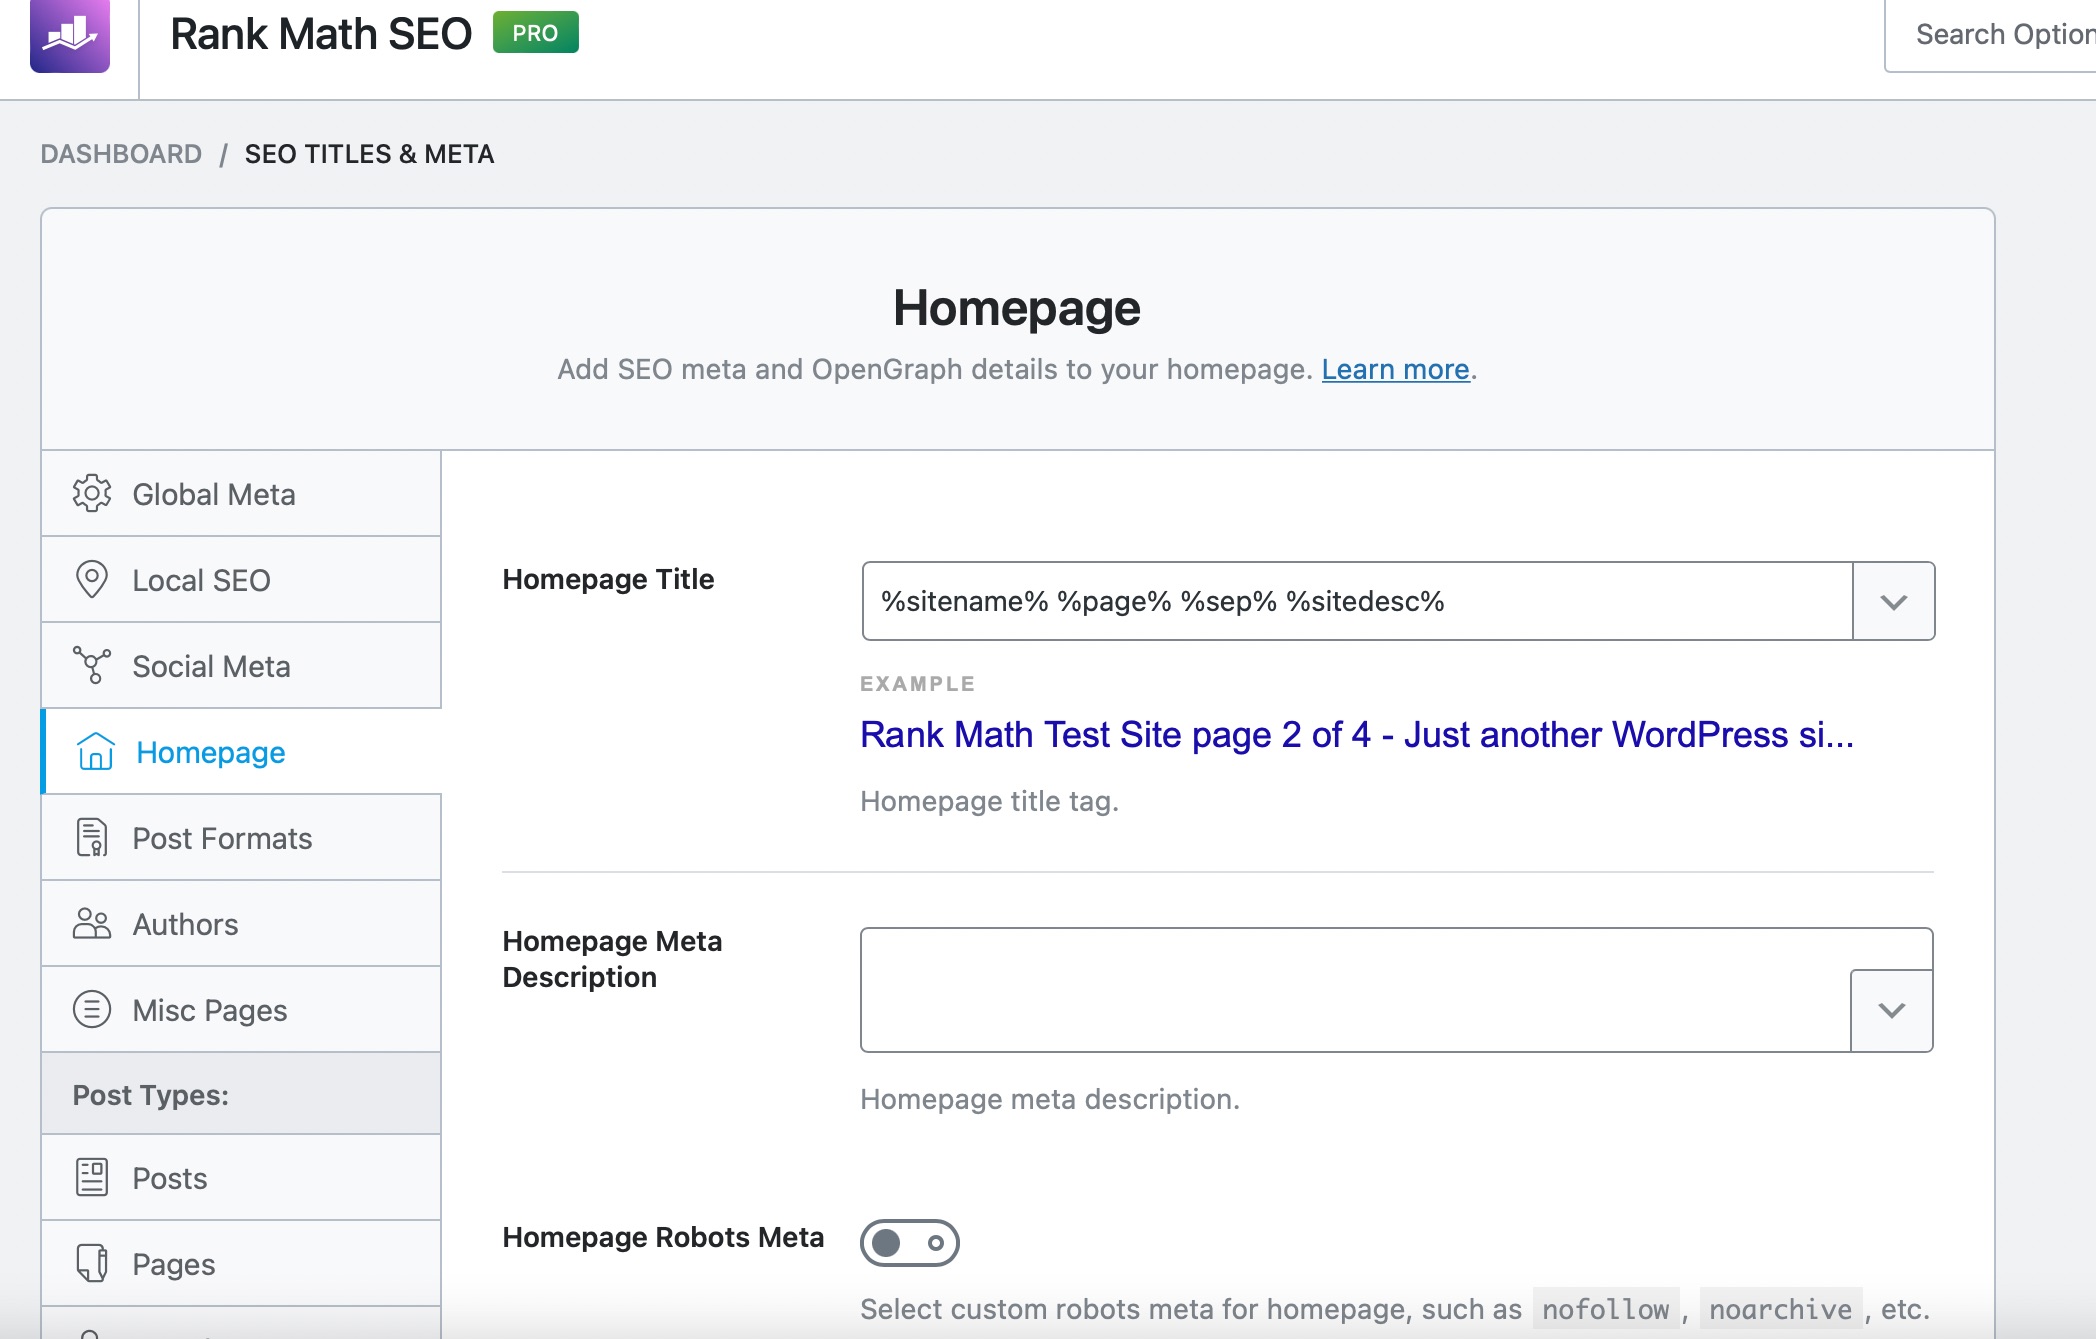
The homepage option will take you to the homepage options inside Rank Math. Specifically, you’ll reach the Homepage options in the Titles and Meta Settings.
4.2 SEO Settings for Posts
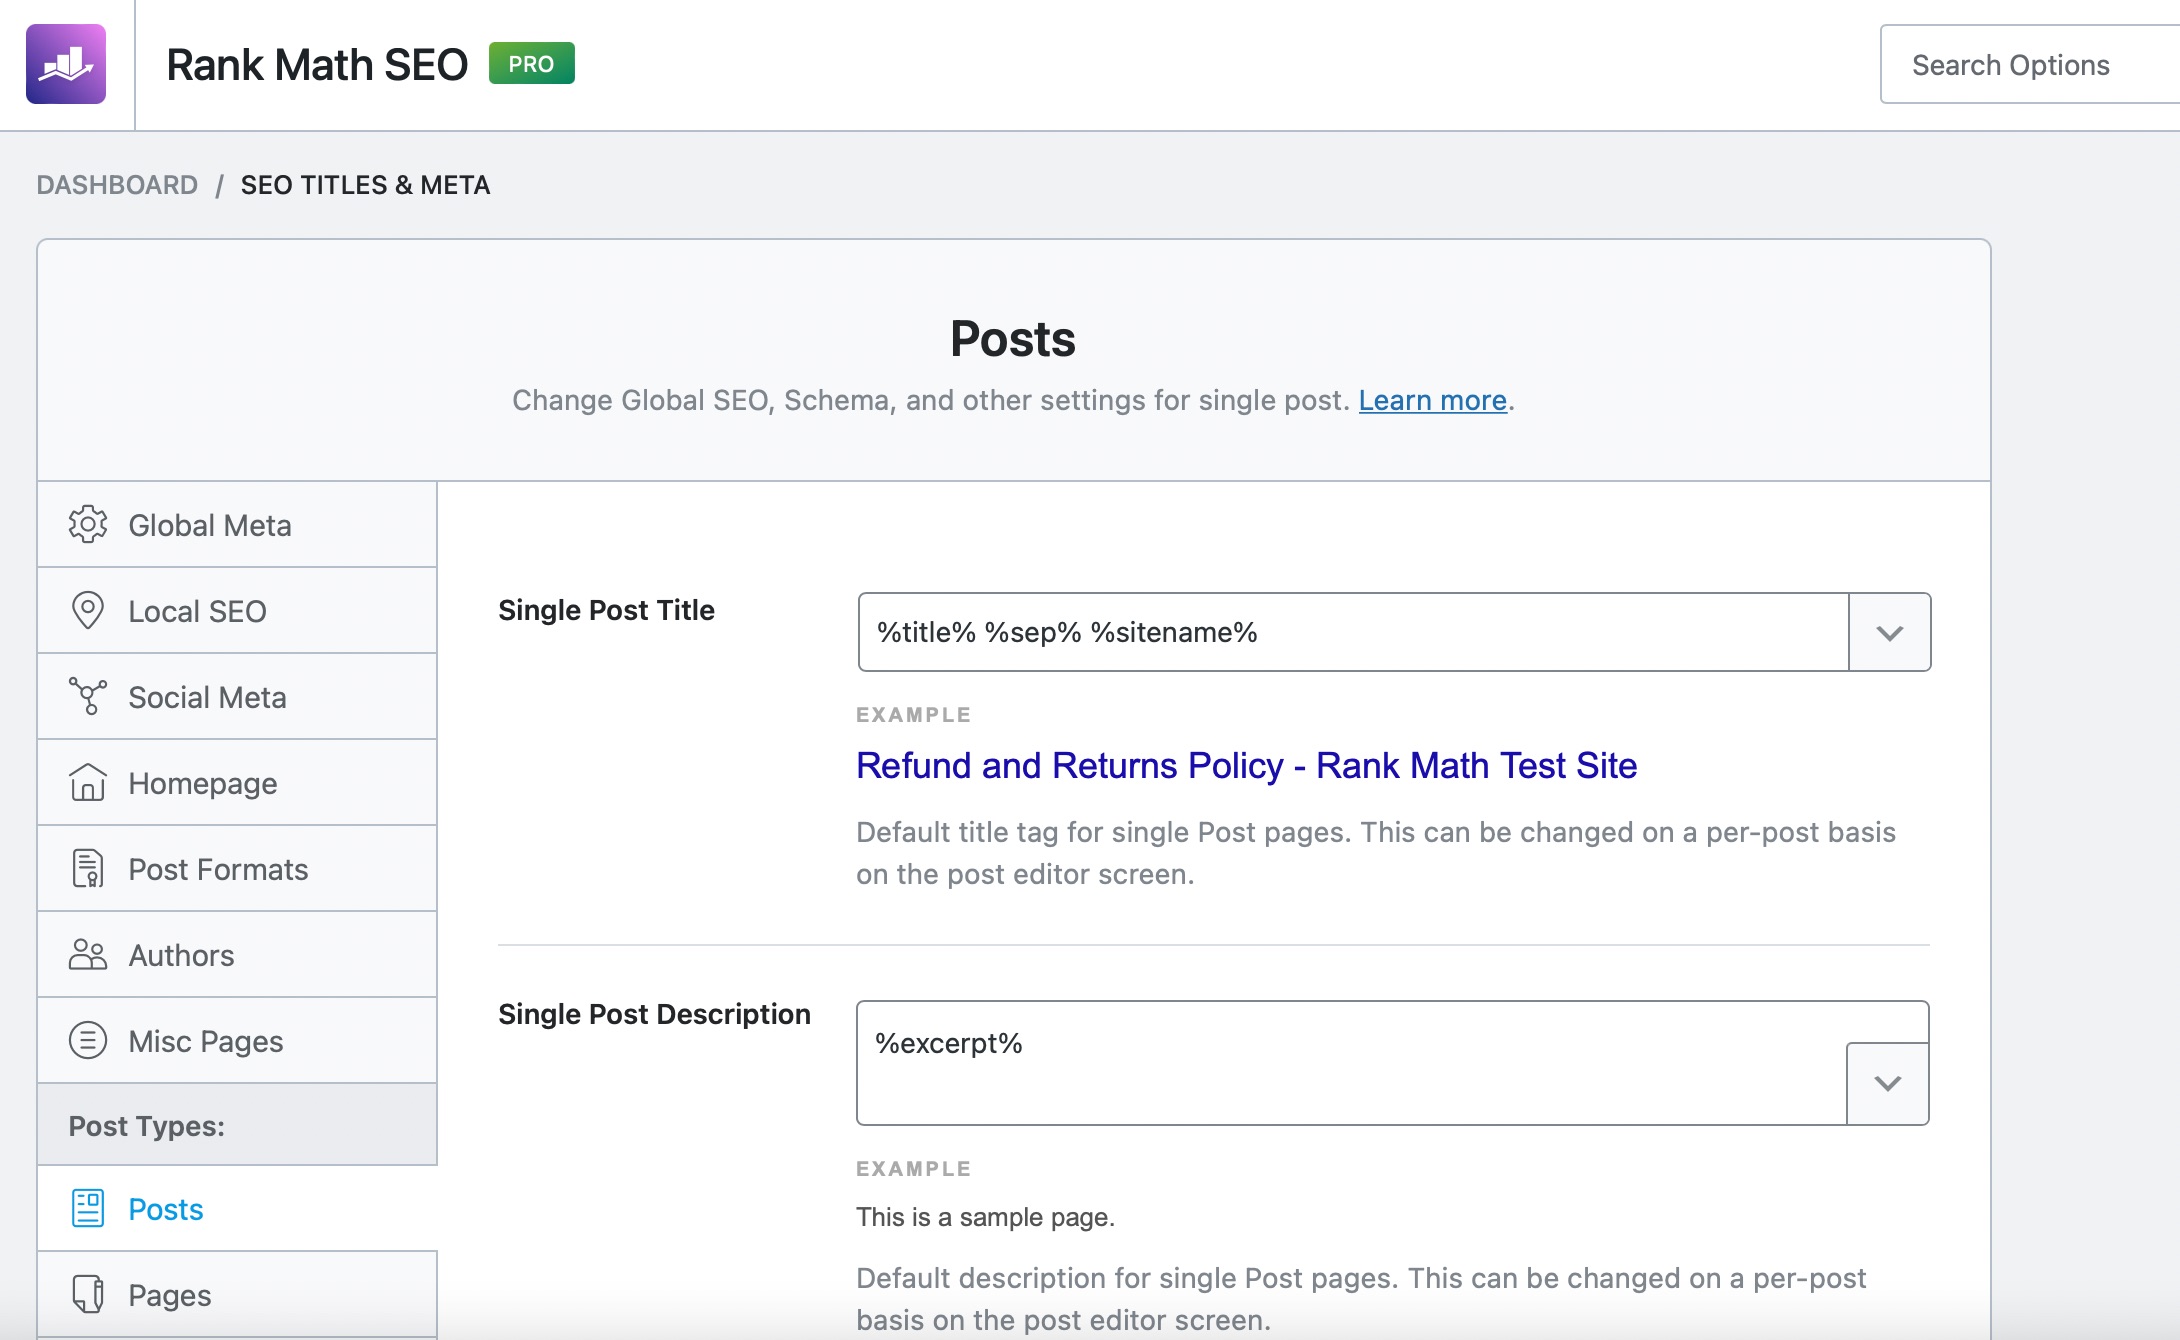
The SEO Settings for Posts will also take you to the SEO Titles and Meta Option, but will also take you to the Posts settings.
4.3 SEO settings for Pages
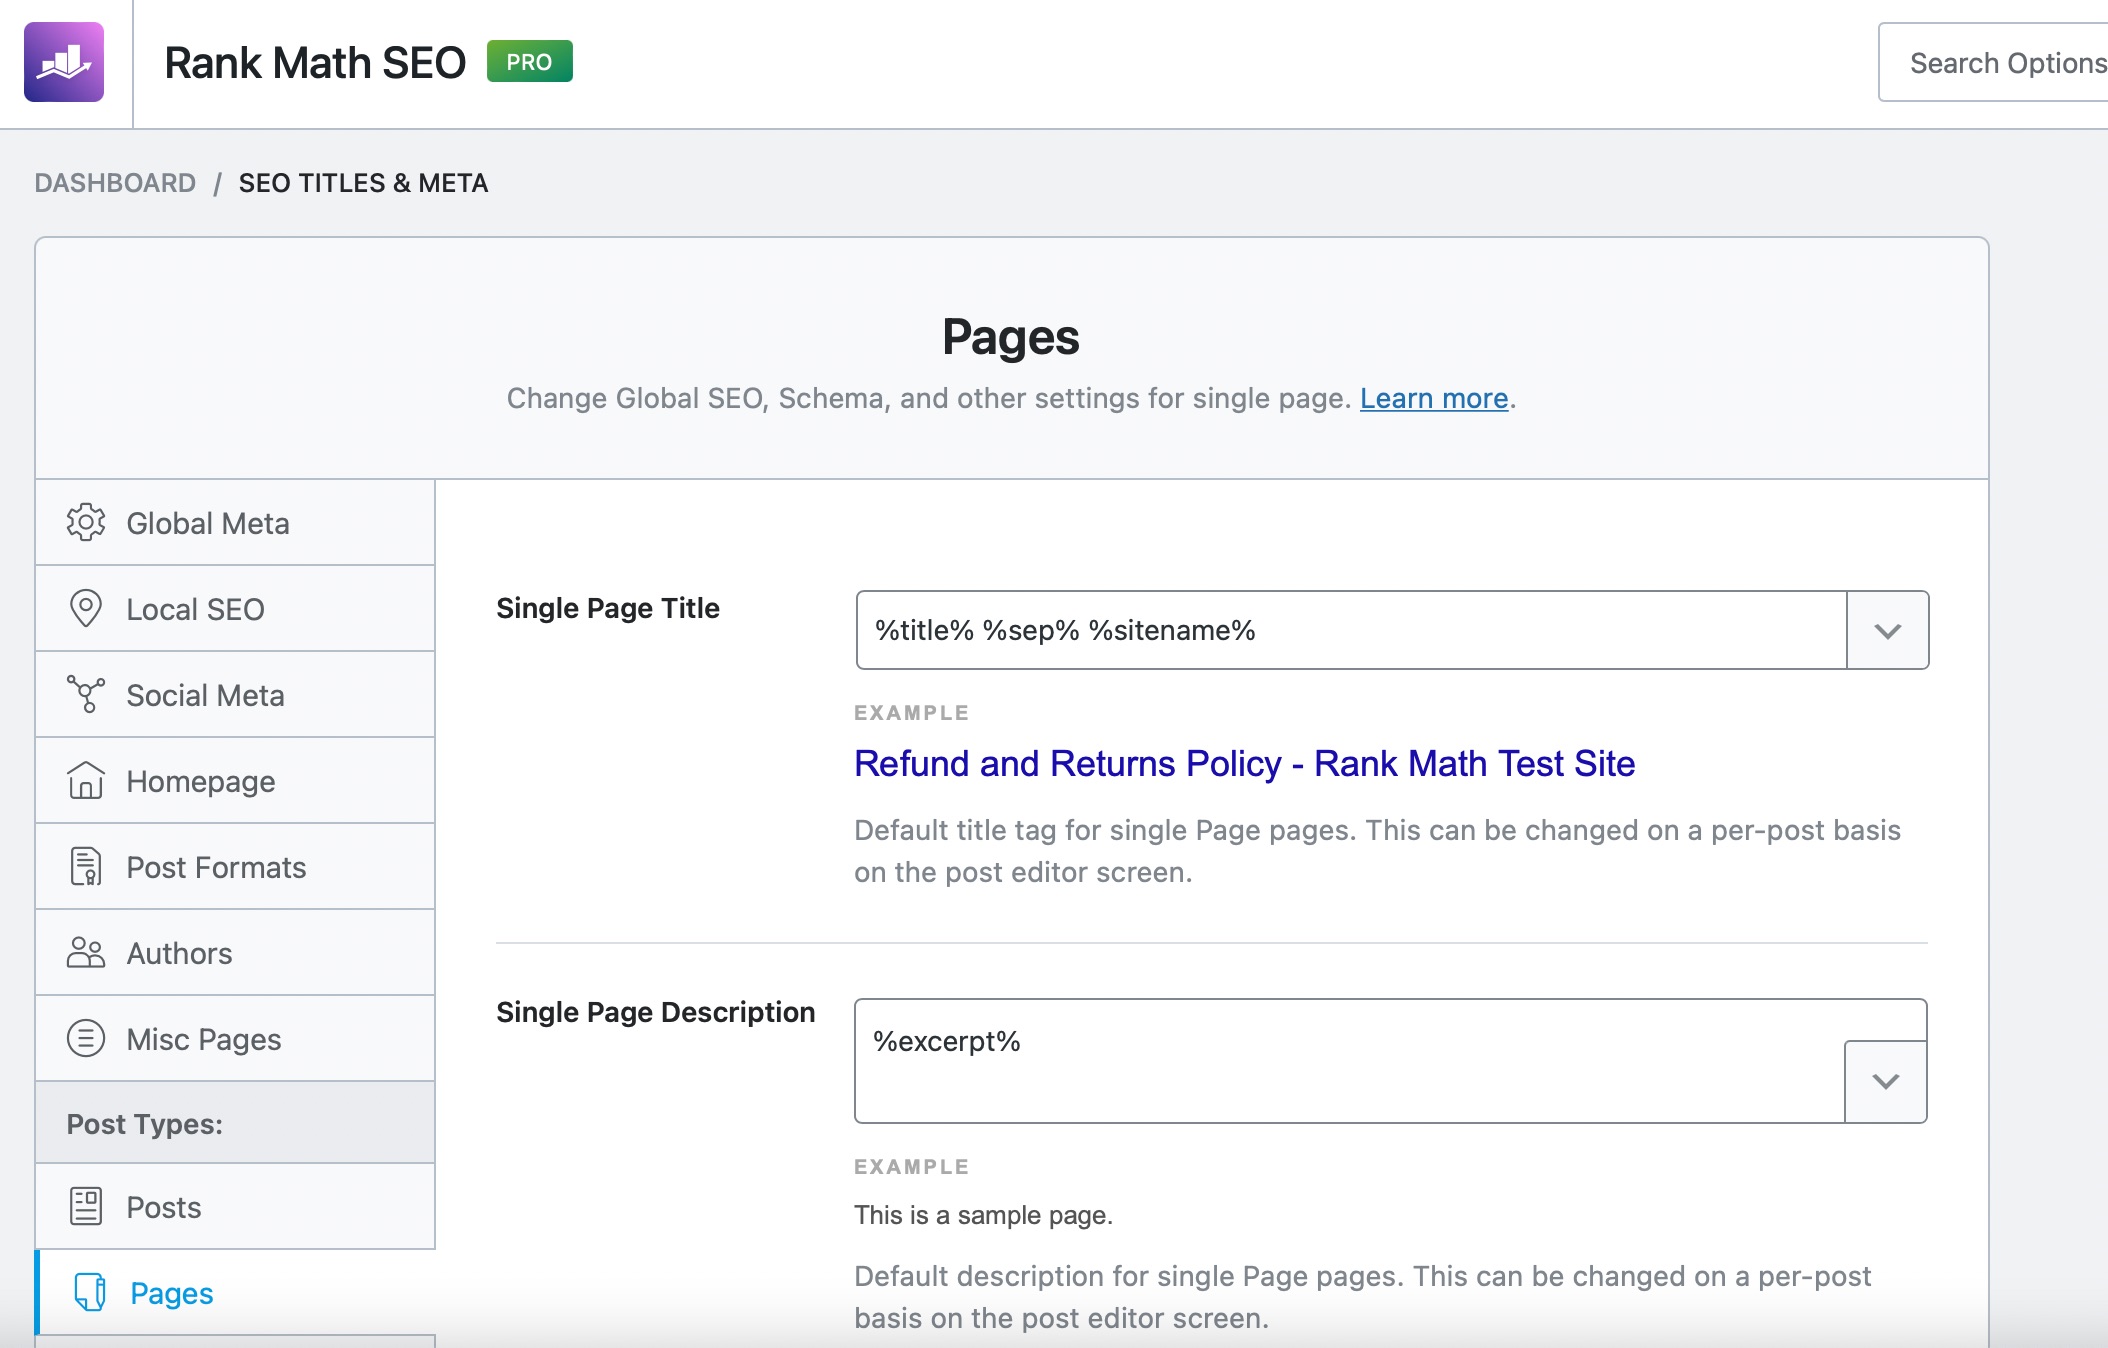
Continuing the same trend, the SEO settings for Pages will take you to the SEO titles and Meta options, but you will reach the Pages options instead.
5 404 Monitor
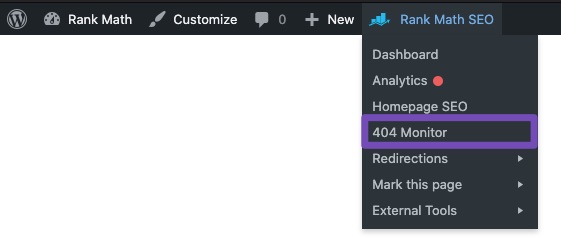
Clicking the 404 monitor will take you to Rank Math’s 404 monitor which is located in Rank Math SEO → 404 Monitor.

Rank Math’s 404 Monitor will give you access to all the 404 errors on your website, if you have enabled the 404 Monitor module inside your WordPress admin area by navigating through Rank Math SEO → Dashboard.
The log provides you with the URI (Uniform Resource Identifier), hits, and access time of the URL that has ended up with a 404 error. The information present here is straightforward and you can use them to fix the 404 errors.
6 Redirections
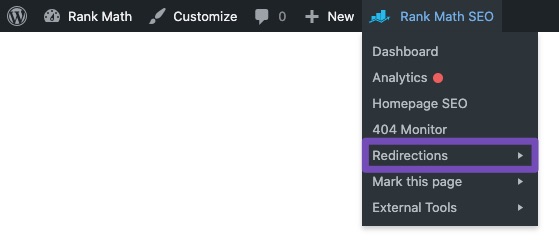
As we mentioned above, the Redirections setting doesn’t do anything on its own. You have to use one of the 3 sub-options inside it.
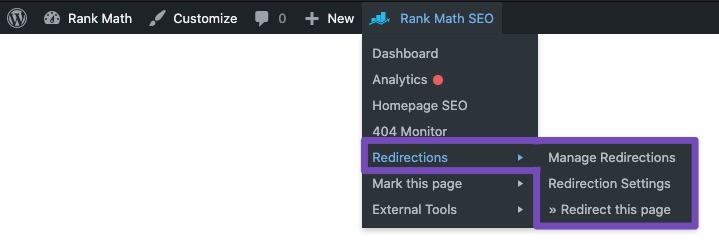
Let’s see what each of the settings accomplishes.
6.1 Manage Redirections
Clicking the Manage Redirections option will take you to Rank Math’s redirection manager, where all the current redirections will be displayed.

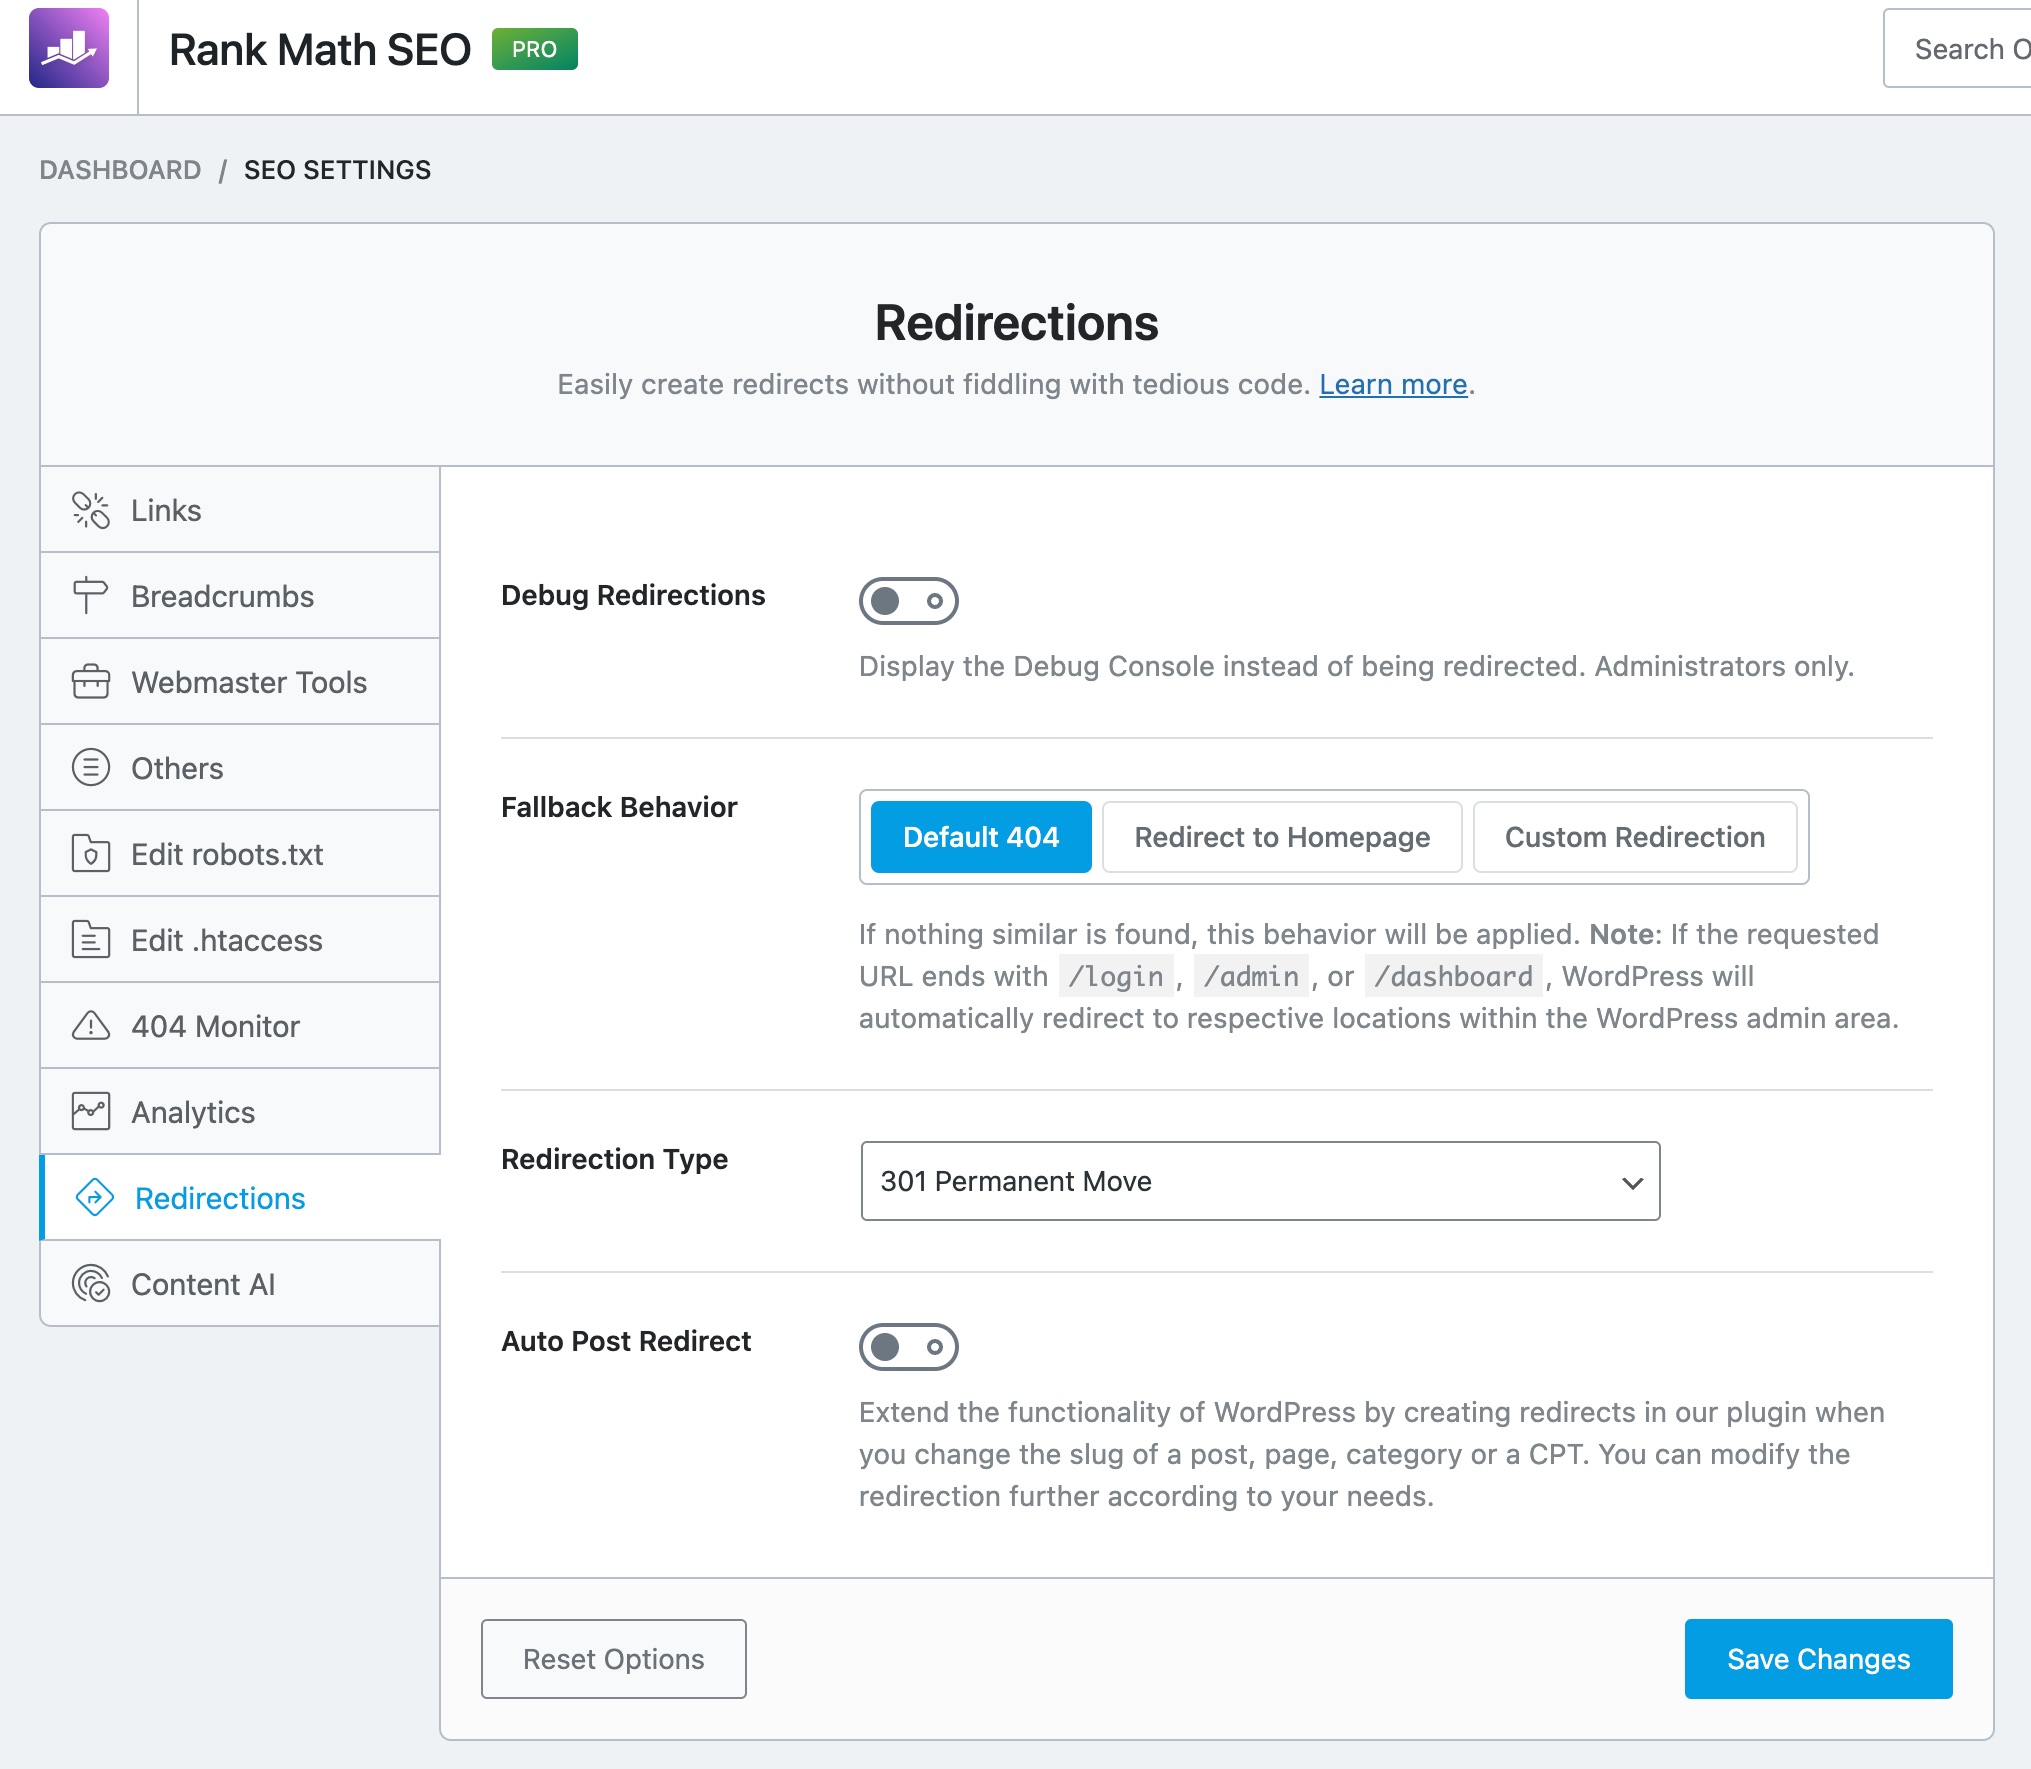
6.2 Redirection Settings
Clicking the Redirection Settings option will take you to Rank Math’s redirection settings, where you configure settings related to Redirection. The setting is located inside Rank Math’s General Settings.
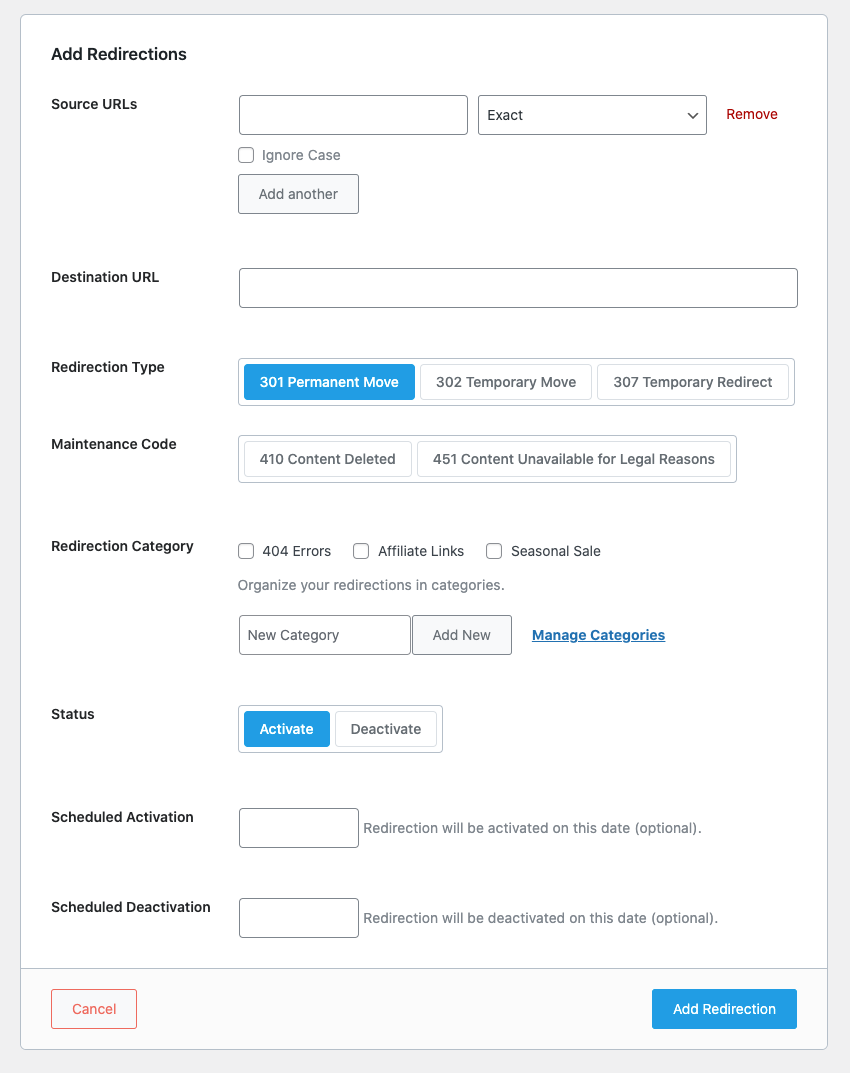
6.3 Redirect This Page
The Redirect this Page option opens the Redirection Tool – which is similar to the Manage Redirections option. However, in this case, Rank Math will initiate the process of creating a new redirect, which you can quickly configure to redirect your current post. The relative URL of your current post or page will already be present in the Source URL option if you select this option.
We have a dedicated KB on How to Set Up Redirections. Please go through it to understand how to apply URL redirection using Rank Math.
7 Mark This Page/Post
As we mentioned, the Mark This option is only available when you are looking at the quick actions from a post or a page. Similar to some other options, the Mark This option also has some sub-options.
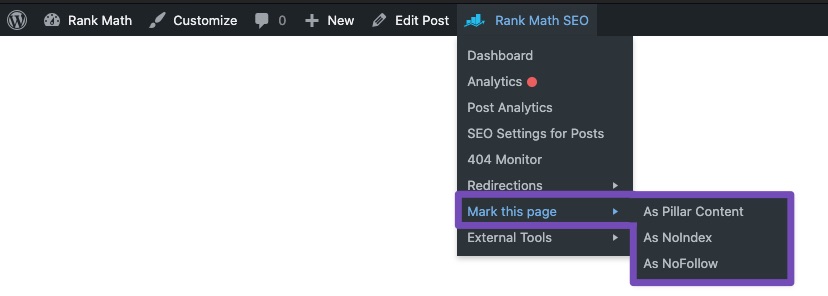
Before explaining what these options do, let us explain what they do not do. Contrary to other options, clicking any of these options will not take you anywhere inside Rank Math. Instead, each of these settings acts like a checkbox that can be enabled or disabled. Here is how that works.
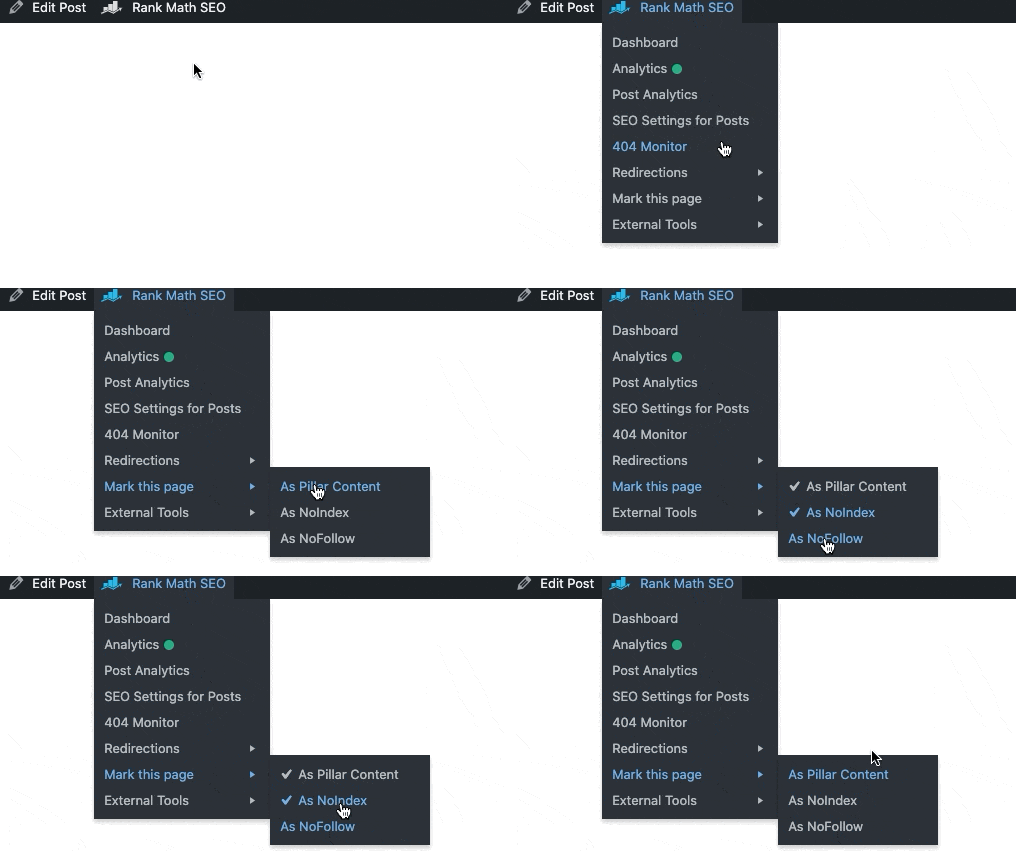
Clicking an option enables it, which also adds a tick in front of it. Click the option again to disable it. In this particular example, there were no ticks on the options as we specifically intended to show it that way. However, in real-world use, Rank Math will automatically enable certain settings based on your post.
Let us now understand in brief what each of these options achieves.
7.1 As Pillar Content
Rank Math has a feature where it can mark a piece of content as “Pillar Content” – which is usually used for posts. Pillar content is an evergreen piece of content that is designed to answer age-old questions which are bound to be asked for years to come.
In the photography world, a question like “What’s the relationship between Aperture, ISO, and Shutter Speed” is a sort of question that can qualify to be a Pillar Post.
When you’re writing a post, you have the option to set that post as a Pillar Post from right within the content. Here is how that option looks.

When you set a post as a Pillar Post, Rank Math will then suggest that you internally link to this post from your other posts. The recommendation will appear in the Link Suggestions section, which is present on the right sidebar in the post editing page.

Since a blog can have many categories, the suggestions to internally link are limited to posts in the same category.
When you enable this option from the quick-actions menu, Rank Math will mark this page as the Pillar Content.
7.2 As NoIndex
NoIndex is a robots-meta directive that tells the search engine not to index the page. If your head is spinning, let us explain.
By default, Google and other search engines will try to access all your website’s pages and add them to your index, unless you specifically tell them not to. On many occasions, it makes sense for some of your pages to never be in Google’s Index. An example would be an e-commerce store with old discontinued products. You want the pages to exist, but not be indexed by Google.
You might think, but what’s the harm in Google indexing my pages, doesn’t that mean more traffic? You may be right. In certain cases, it won’t matter much. But for larger sites, having the ability to tell Google what not to index a certain page gives them a degree of control.
Google might have near-infinite resources to index the web when you compare it to your website. But they also have to index the entire web. That is why they have something called a “crawl budget” for each website. That crawl budget is an approximate number of pages that Google will index on your website per visit. The crawl budget is different for different websites and depends on many factors which are not important to this discussion.
The point is that it exists. If there are unnecessary pages on your website that Google is indexing, isn’t it wise for you to direct Google to the more important pages of your website?
This option lets you do just that. When you enable this option, it enables the Noindex robots meta for this page. When Google sees that option, it will skip over this page and move on to the next.
7.3 As NoFollow
NoFollow is another robots-meta directive. It is different from NoIndex however. In Noindex, the search engine visiting the page is directed not to index the page. The case with Nofollow is different.
When Nofollow is used, you’re directing the search engine to index the page, but not follow any links on the page.
This is another directive that is incredibly useful. A simple example can be a user-profile page on your website. You can give the users complete freedom to write anything about them, even add URLs, and then simply Nofollow the page. Their profile will still be indexed by Google, but any links on the page will have no value.
As with the case above, the Nofollow directive is most useful to discourage spam on websites.
When you enable this option, the Nofollow meta directive is added to the page, and as a result, Google and other search engines will ignore the links on the page.
8 External Tools
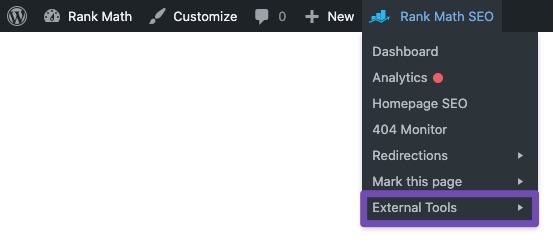
As the name says, the external tools section holds some important tools in it. Hover over the external tools option to reveal the list of tools.
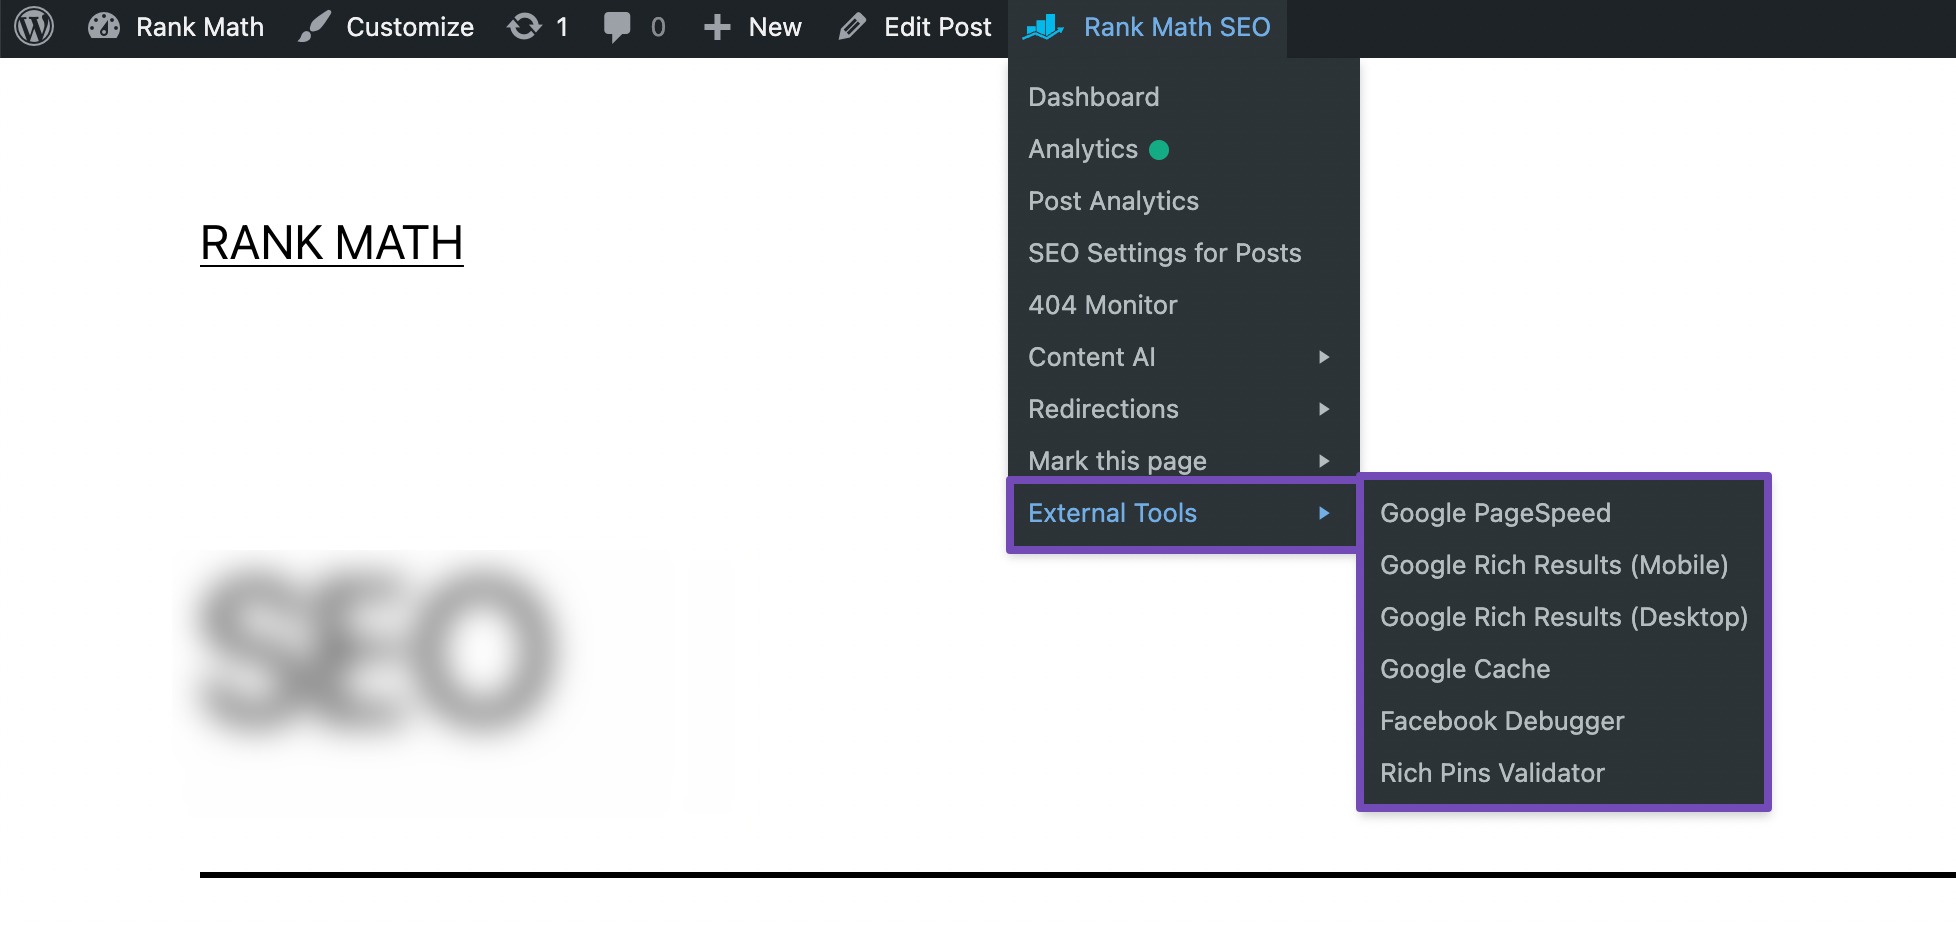
As you see in the image above, there are 7 tools inside the external tools section. Let us tell you about each of them briefly.
8.1 Google PageSpeed
According to Google, the speed of a web page is an important ranking factor.
Google PageSpeed is a well-known tool by Google that helps you test your website’s desktop version and the mobile version for speed and performance issues.
This tool will evaluate your page on a number of performance metrics, such as personalized optimization scores and a list of prioritized suggestions to improve the speed of loading web pages (for mobile and desktop). It is designed to help website owners and marketers improve their websites’ performance and enhance their marketing efforts.
8.2 Google Rich Results (Mobile)
This option links to the Google Rich Results tool, which lets you test the structured data on your site. Structured data is commonly known as rich snippets, and they are chunks of code that give Google additional information about your site. Google is known to reject snippet data entirely, even if there is a small discrepancy, so this tool is great for avoiding issues with Google in the first place.
The Rich Results tool has the ability to run separate tests for mobile and desktop. This option will specifically run the test for mobile.
8.3 Google Rich Results (Desktop)
This option is similar to the previous ones we’ve discussed, but it runs a structured data test on your website for the desktop version.
Benefits of Rich Results:
- Structured snippets let your customers view a small snippet of information about your products and services before they make their purchase decision.
- It helps search engines to understand your content and you may have the possibility to rank higher for your content.
- Rich results provide more relevance to a user’s search. They also provide additional information that helps users to understand exactly what they find. This helps to generate more engaged visitors to your site and decrease bounce rate.
8.4 Google Cache
Google generates cached versions of pages to make searching for information faster and more efficient. It does this by using the rendered version of a page’s HTML and content rather than by using the original source code. A cached version will look similar to the page you originally found and may contain the exact same or very similar content.
This option of Rank Math lets you see Google’s cached version of your page. It’s also an easy way to confirm if your page has been indexed by Google or not.
By viewing your website’s cached version, you will come to know how it is visible to Google when crawling. This will help you in optimizing content for all relevant SEO elements such as keywords and other elements apart from the visual creatives (images or videos, etc.).
Note: Google may not always cache a page. In fact, Google only caches some web pages by default.
8.5 Facebook Debugger
You might have known that Facebook is the best medium to maximize your potential audience for your website.
If your page or post has issues while sharing on Facebook, there might be a Facebook OpenGraph issue on your website. The Facebook Debugger tool helps you identify and fix these issues.
8.6 Rich Pins Validator PRO
If your website has a lot of images, then Pinterest could be a potential platform to drive traffic back to your site. If your site is eligible for Rich Pins, then Pinterest will display the metadata of your page on the pin itself, giving a rich experience for the viewers and encouraging them to click through the pin.
This tool will check if your website’s data is marked up and eligible for displaying Rich Pins, if not — helps you identify the issues to fix them.
9 How to Enable/Disable Quick Actions Admin Menu?
Considering that this admin menu bar gives access to different Rank Math options on your website, you can enable/disable this admin menu bar for specific user roles like Administrator, Editor, Author, Contributor, Subscriber, etc.
For accessing this option, navigate to the left side of WordPress dashboard → Rank Math SEO → Role Manager and check for the option Top Admin Bar as shown in the screenshot below:
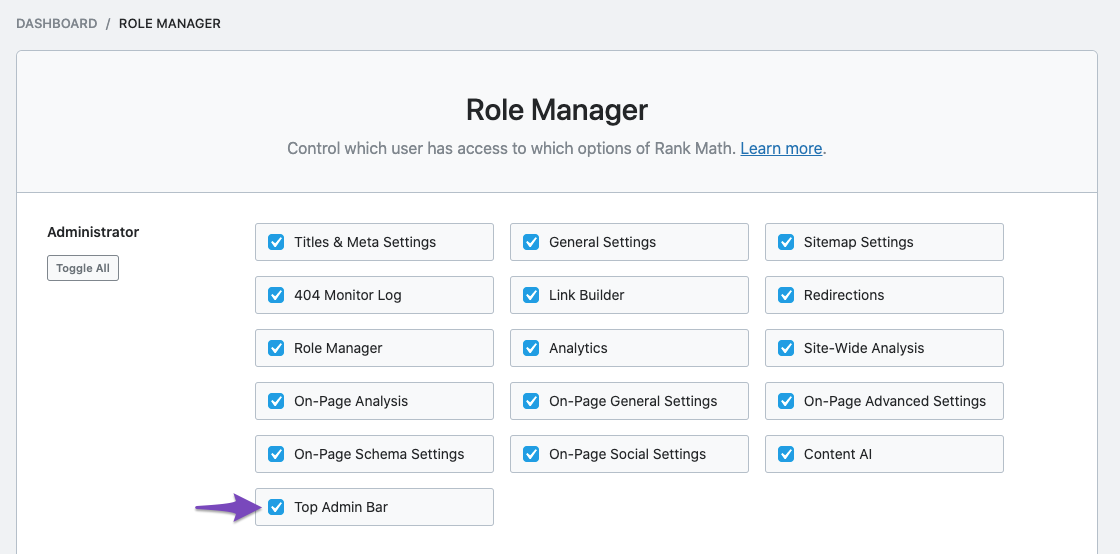
If you click that option, you’ll see a blue tick mark, which means you’ve enabled these users to have access to the quick-actions admin menu. If you don’t want to give access, then simply uncheck the box.
Conclusion
There you have it. Those were all the options that are included in the quick-actions menu in Rank Math. The list of options is not set in stone, and we might include more options depending on user feedback and other testing.
While there was not much to understand in this section, we hope that you found the information useful, and hopefully, it saves you some time – that’s what it’s intended for. If you have any questions or face issues with any of the features, don’t hesitate to get in touch with the support staff – they’re available to help you 24x7x365.