Managing your WordPress website might require you to delete a WordPress page at some point.
Removing unnecessary pages is necessary for maintaining an organized and user-friendly website, whether due to outdated content, duplicate pages, or a complete site restructuring.
However, it’s important to note that deleting a page without considering the SEO implications can result in broken links and negatively impact your site’s search engine rankings.
In this post, we’ll walk you through how to delete a WordPress page and discuss the SEO aspect of redirecting the deleted page to another location.
Table Of Contents
1 Why Would You Want to Delete a WordPress Page?
Before we dive into the steps, it’s important to understand why you might want to delete a WordPress page. Here are some reasons why:
- You might have mistakenly created a page and want to eliminate it
- You might have a page that is no longer relevant or useful to your website
- You might want to consolidate your content and delete similar or redundant pages
- The page violates your website’s terms of use or privacy policy
- The page contains outdated information that needs to be updated or removed
- It might be causing technical issues or conflicts with other pages on your website
Whatever the reason, deleting a WordPress page is a simple process that can help you keep your website organized and clutter-free.
2 Steps to Delete a WordPress Page
Now, let’s explore the steps to delete a WordPress page.
2.1 Log in to Your WordPress Dashboard
To begin, log in to your WordPress admin area by entering your username and password. Once logged in, you will be directed to your WordPress dashboard.

2.2 Navigate to the Pages Section
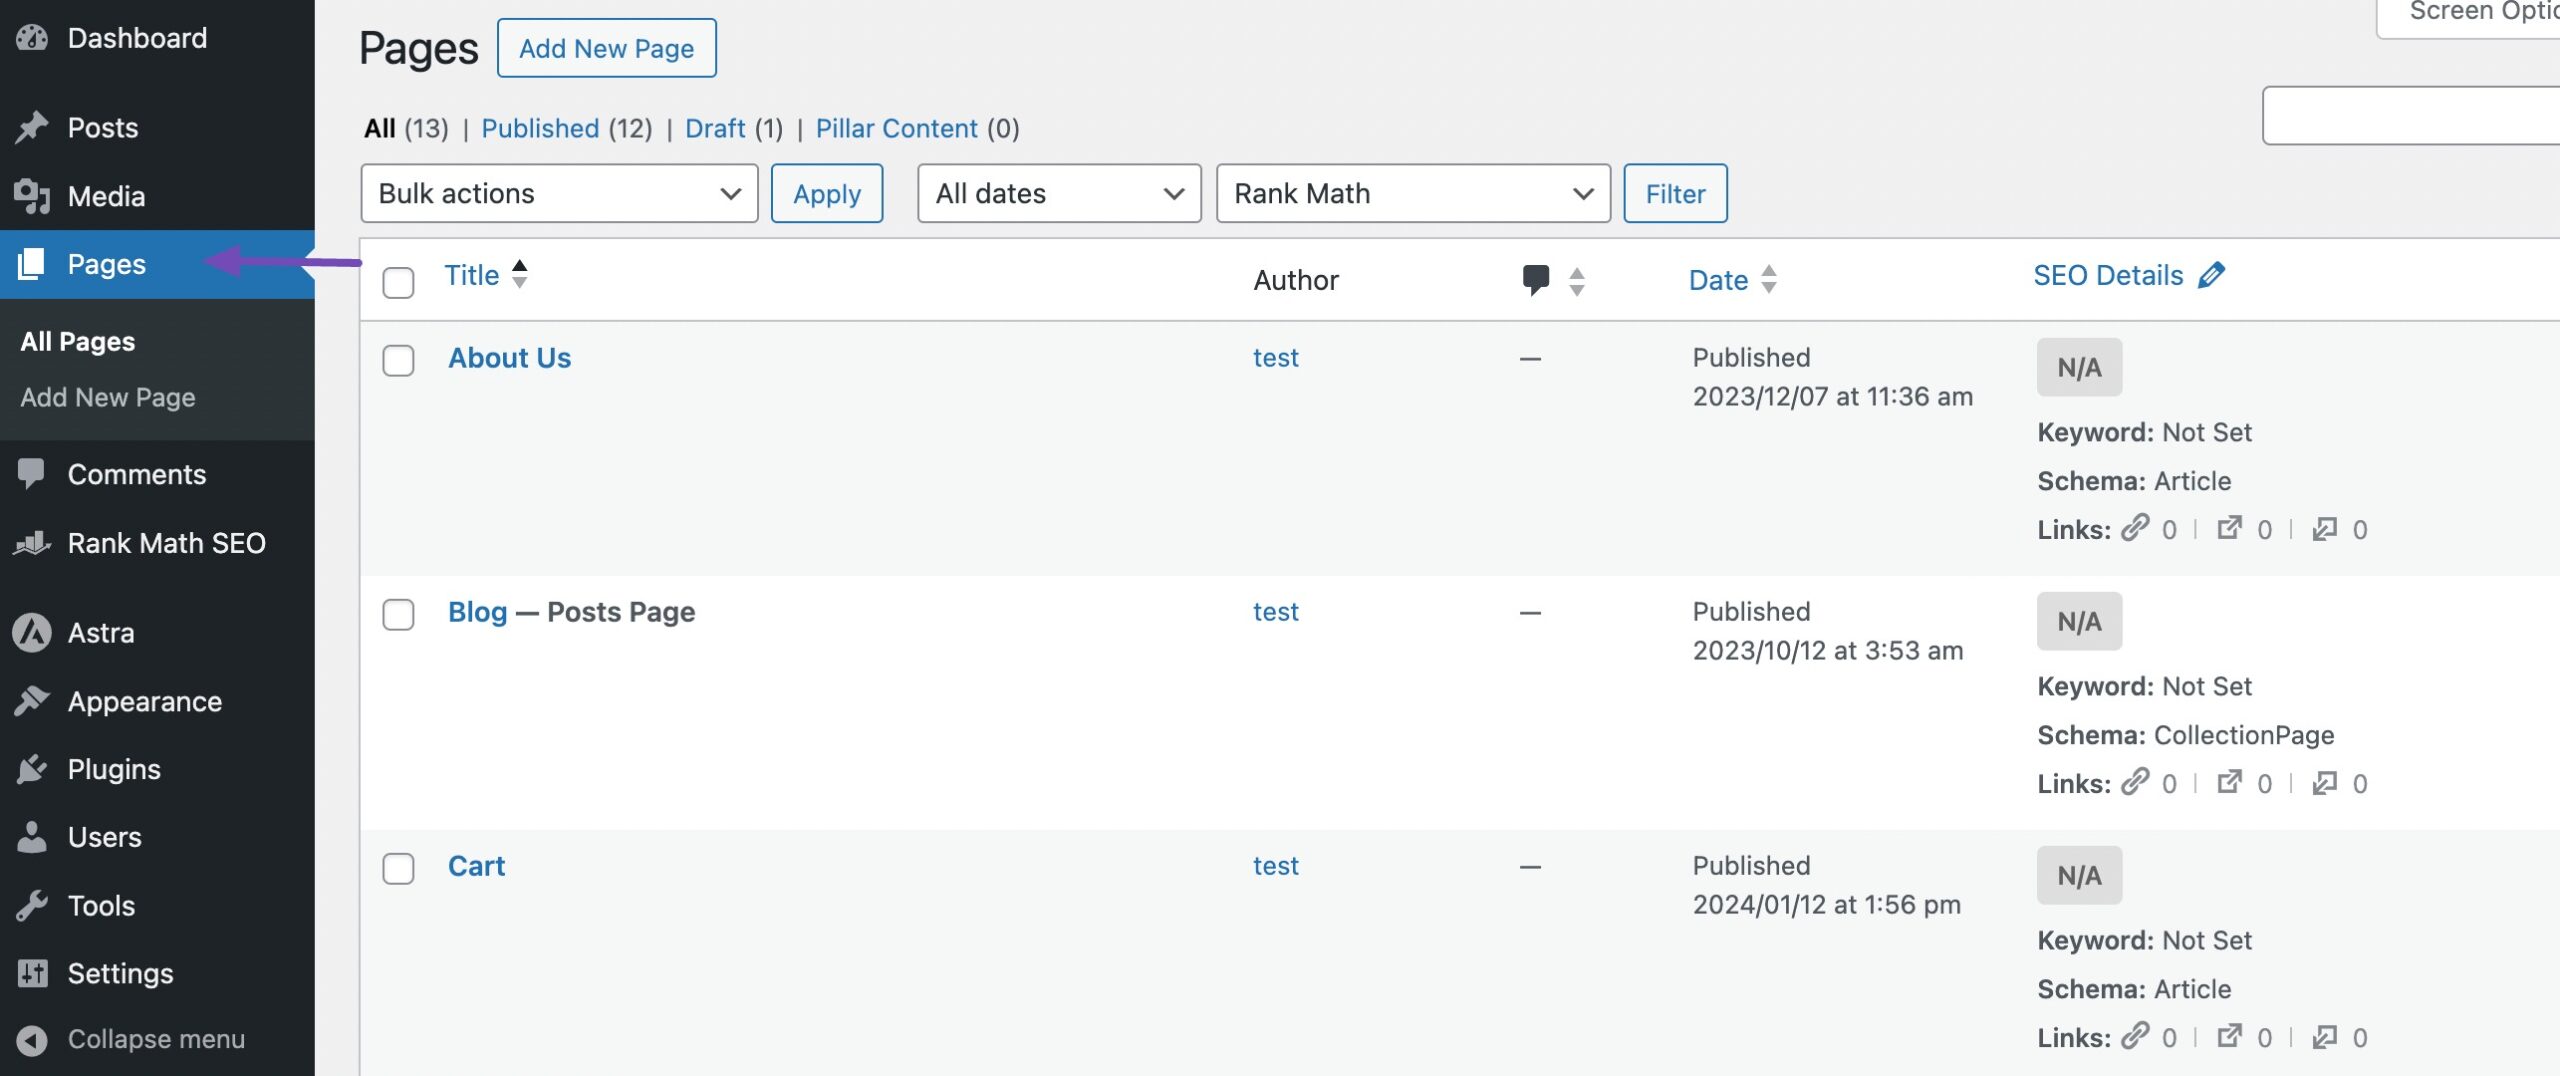
In the left-hand menu, find and click Pages. This will open a list of all the pages on your WordPress site.
2.3 Delete the Page
Browse through the list or use the search function to find the specific page you want to delete.
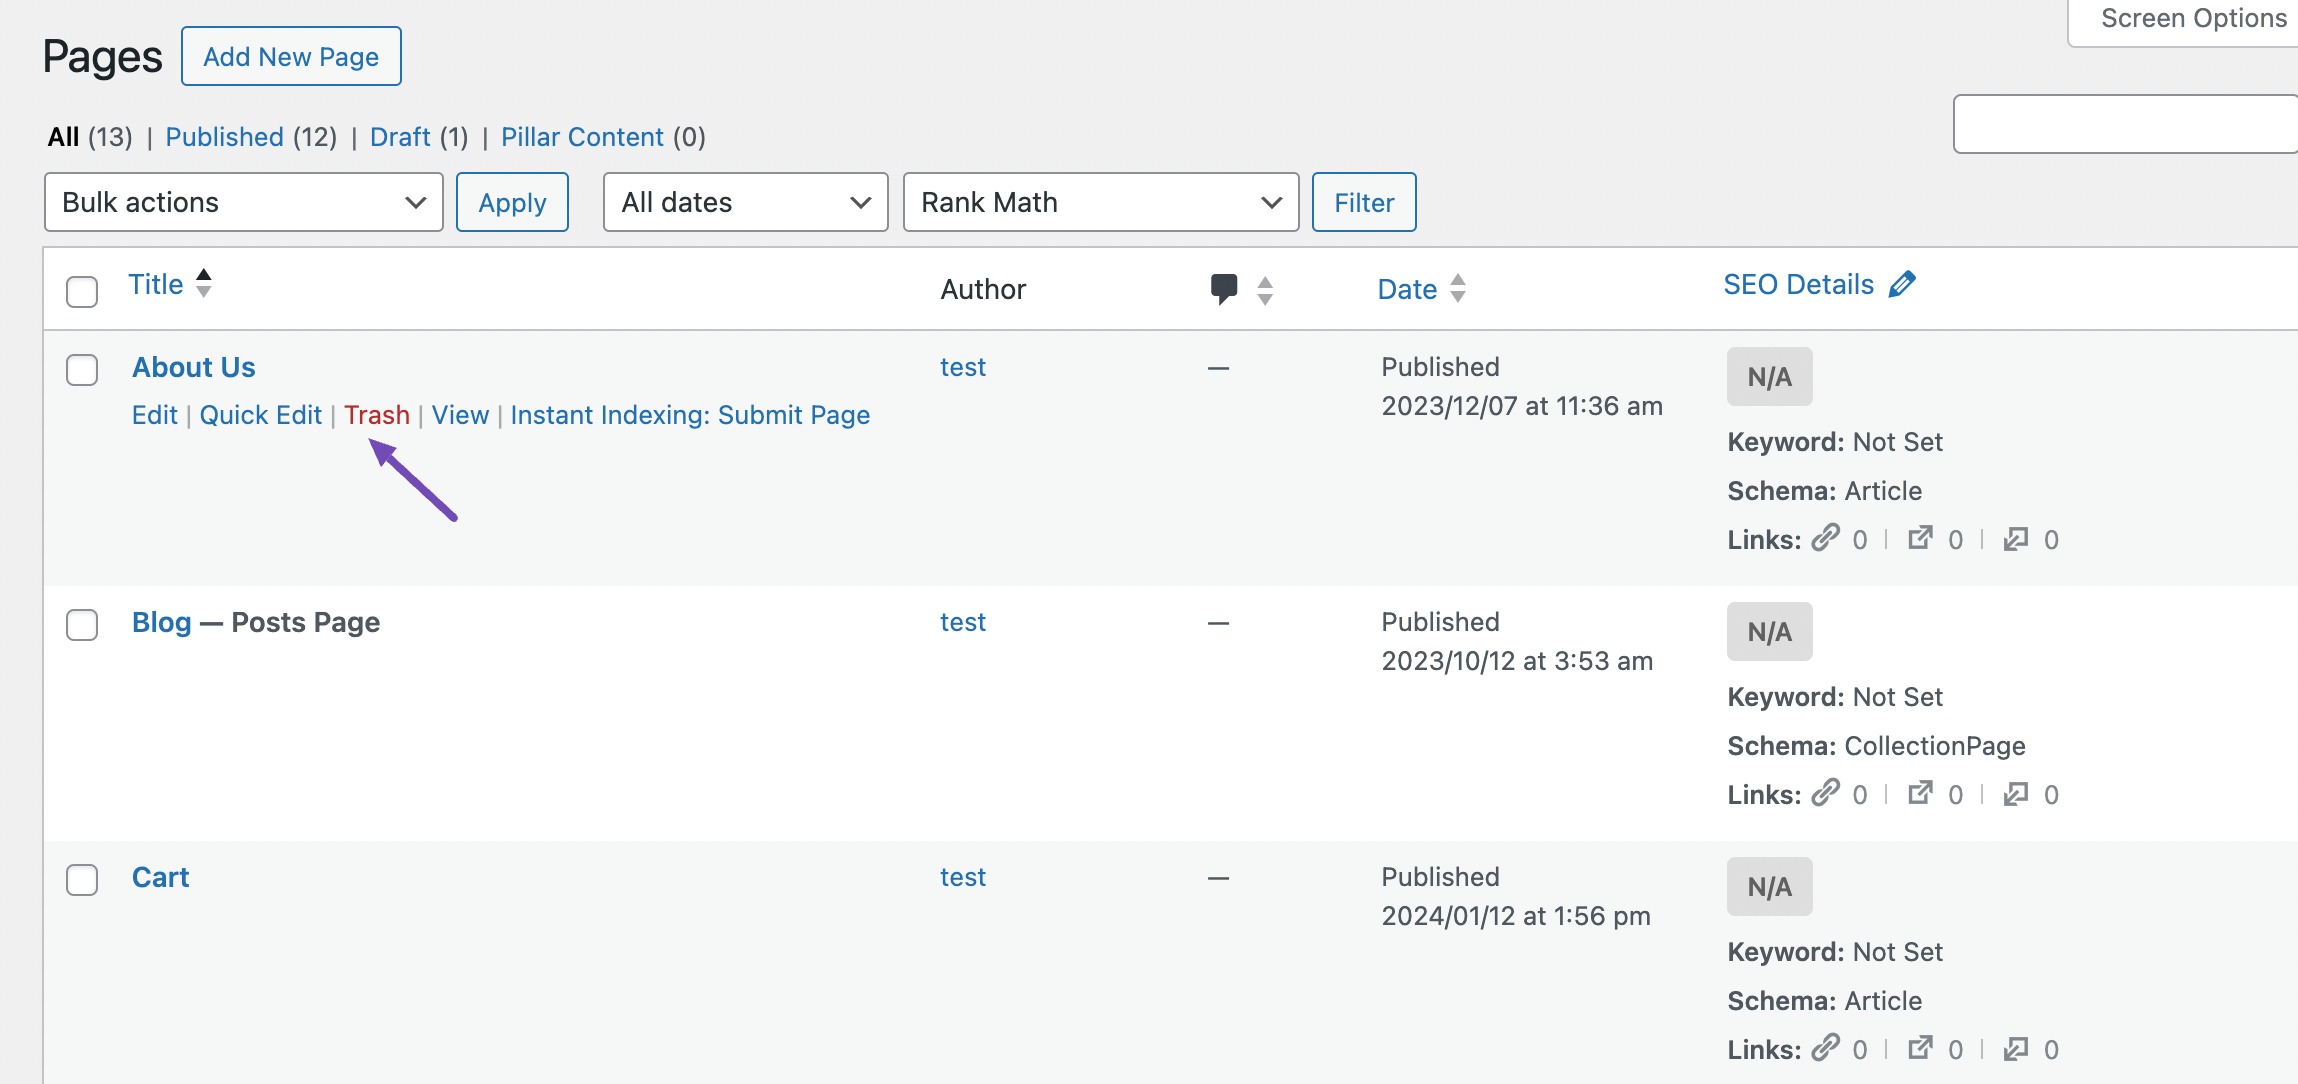
A few options will appear beneath the page title. One of these options is Trash. Click on it to move the page to the trash.
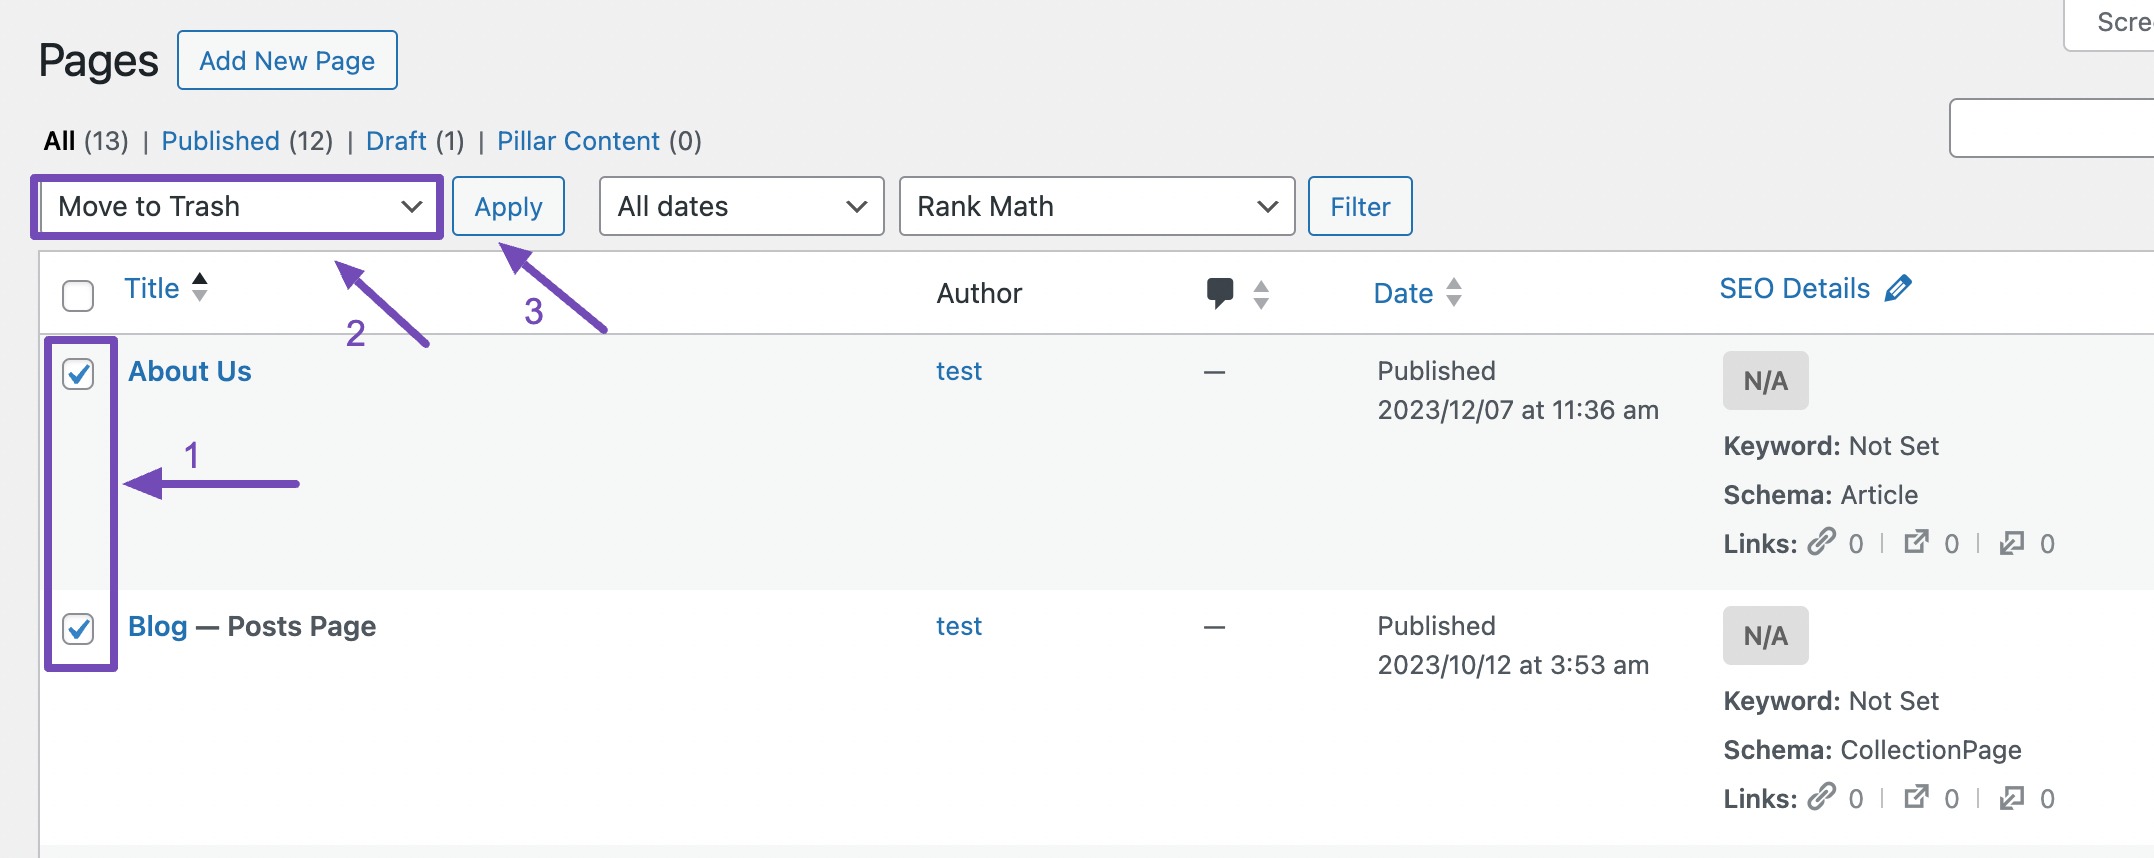
You can bulk delete the pages by selecting the pages and choosing the Move to Trash option, as shown below. Click Apply, and the selected pages will be moved to trash.
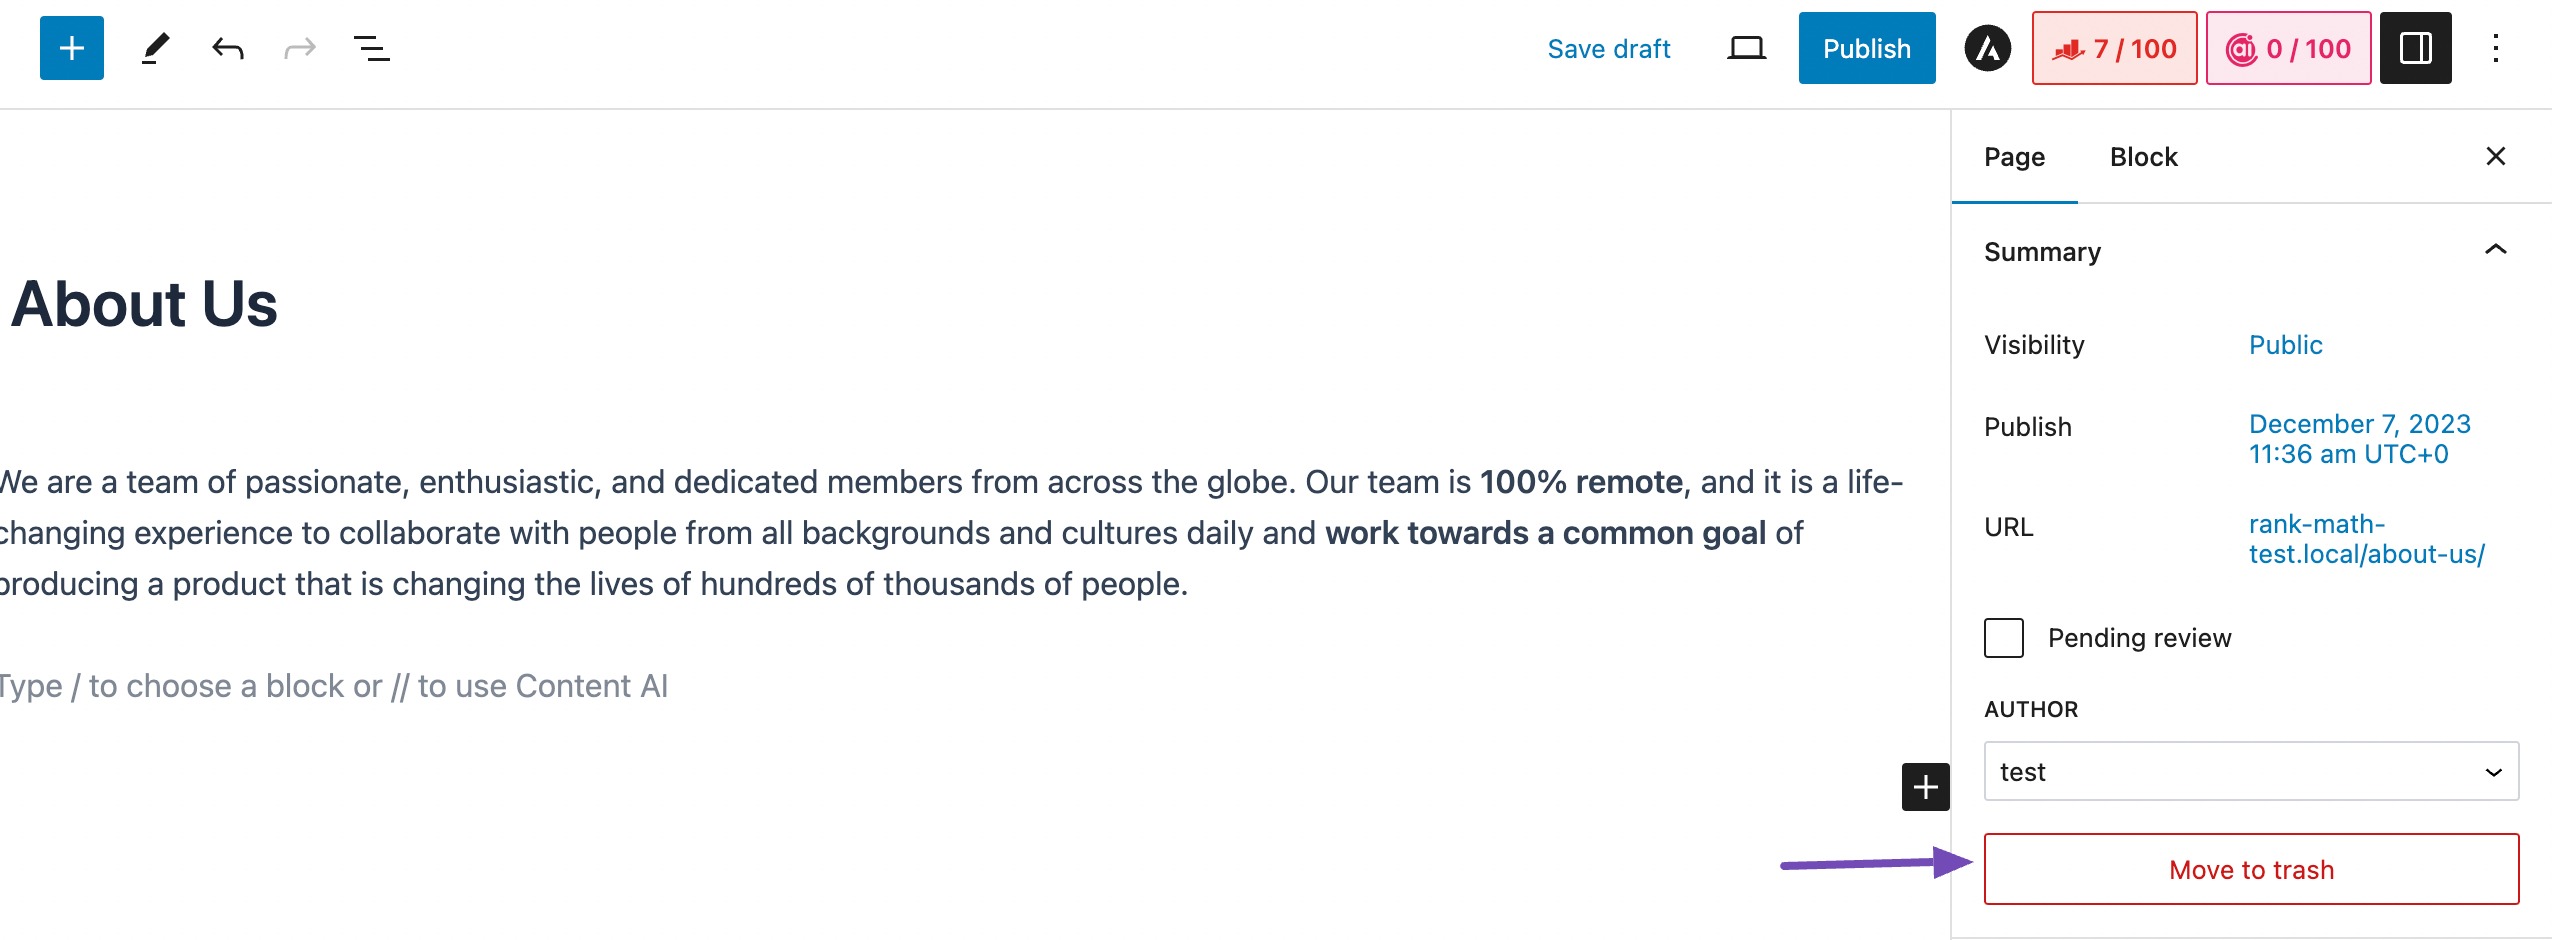
You can also delete a WordPress page from the page editing screen.
You’ll find the Move to trash option. Click on it. This action doesn’t permanently delete the page but moves it to the trash.
2.4 Empty the Trash (Optional)
By default, deleted pages are moved to the Trash folder, where they can be restored if needed.
If you want to permanently delete the pages and free up space, navigate to the Trash tab, hover over the page, and then click the Delete Permanently option.

To delete all the pages in the trash at once, click on the Empty Trash button below the pages.
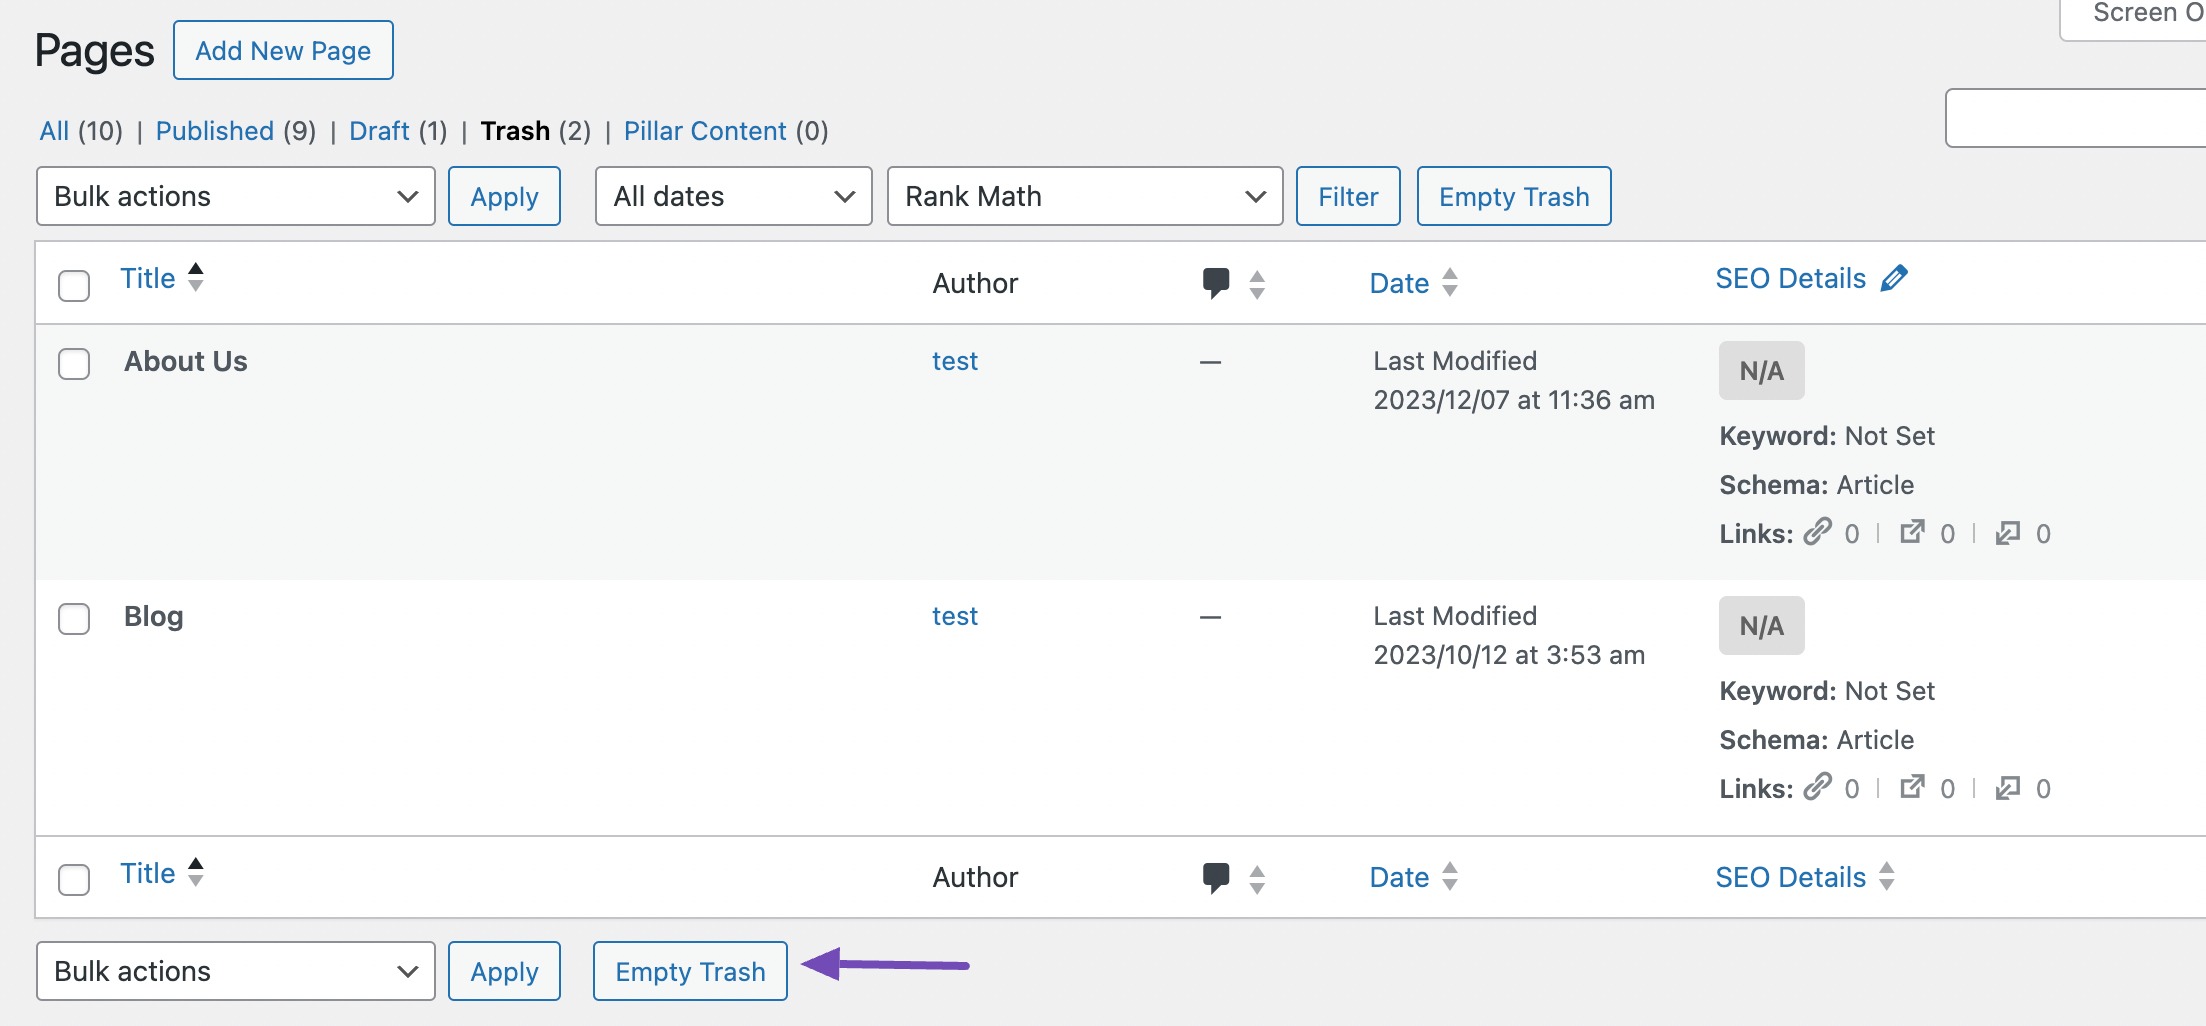
But keep in mind that once a page is deleted from the trash, it cannot be recovered, so be sure to double-check before proceeding with the deletion.
3 Redirecting Deleted Pages for SEO Purposes
Redirecting deleted pages to another new URL is essential to maintain SEO integrity and prevent broken links on your WordPress website.
With the redirection feature in the Rank Math SEO plugin, you can effortlessly redirect deleted pages to an existing live page, maintaining the link value and ensuring a seamless user experience.
If you have the Rank Math SEO plugin enabled on your website, it will prompt you to redirect a deleted page to a new URL to improve SEO.

The new URL can be a fresh or improved version of the deleted content or the original to eliminate duplication.
Click the a new URL link in the notice to access the redirections feature and make the necessary adjustments.
Let’s explore how this process works.
3.1 Install and Configure Rank Math SEO Plugin
To begin, install and activate Rank Math SEO in your WordPress dashboard. Refer to our step-by-step guide on how to install the Rank Math plugin.
Once activated, ensure you complete the setup wizard and configure the plugin on your website.
3.2 Enable the Redirections Module
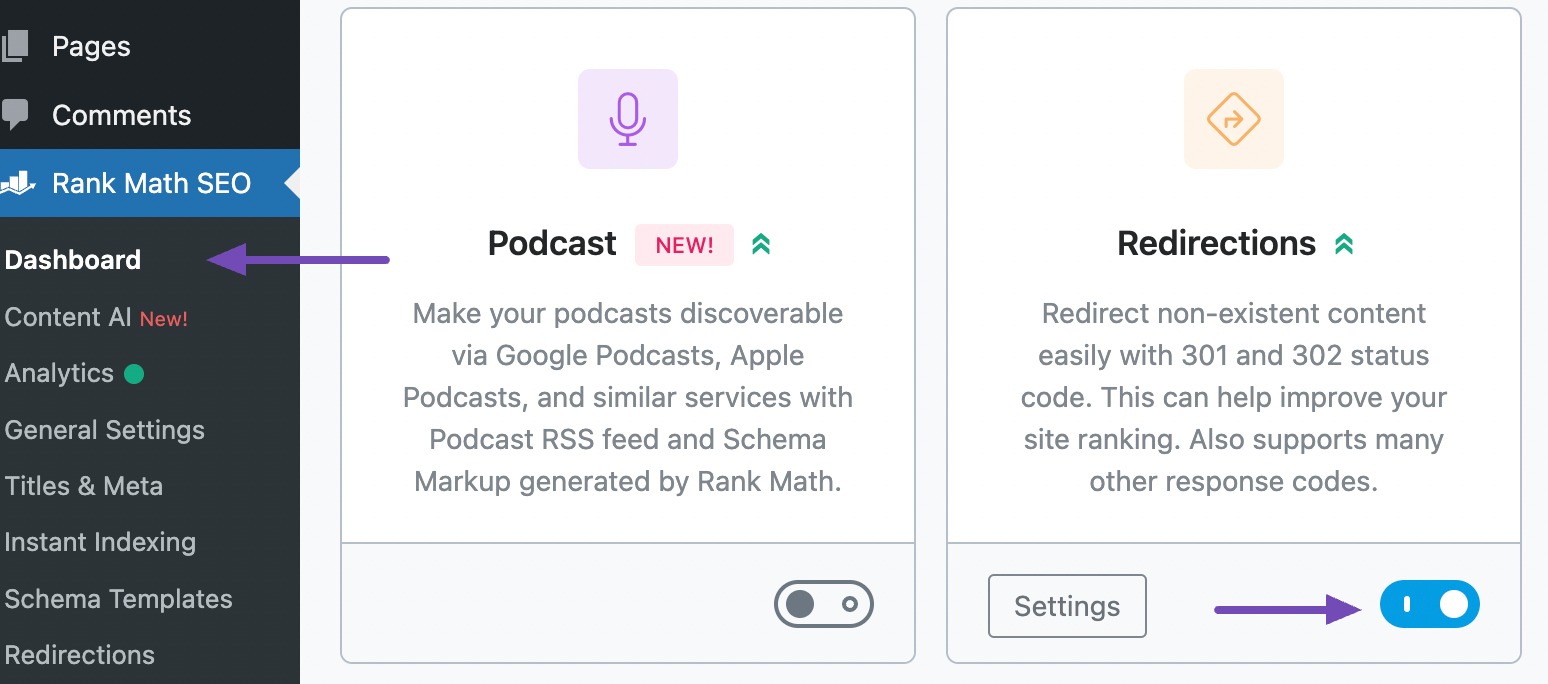
Before using the redirection features, you need to enable them. To do so, navigate to Rank Math SEO → Dashboard from your WordPress dashboard and enable the Redirections module, as shown below.
3.3 Access the Redirections Page
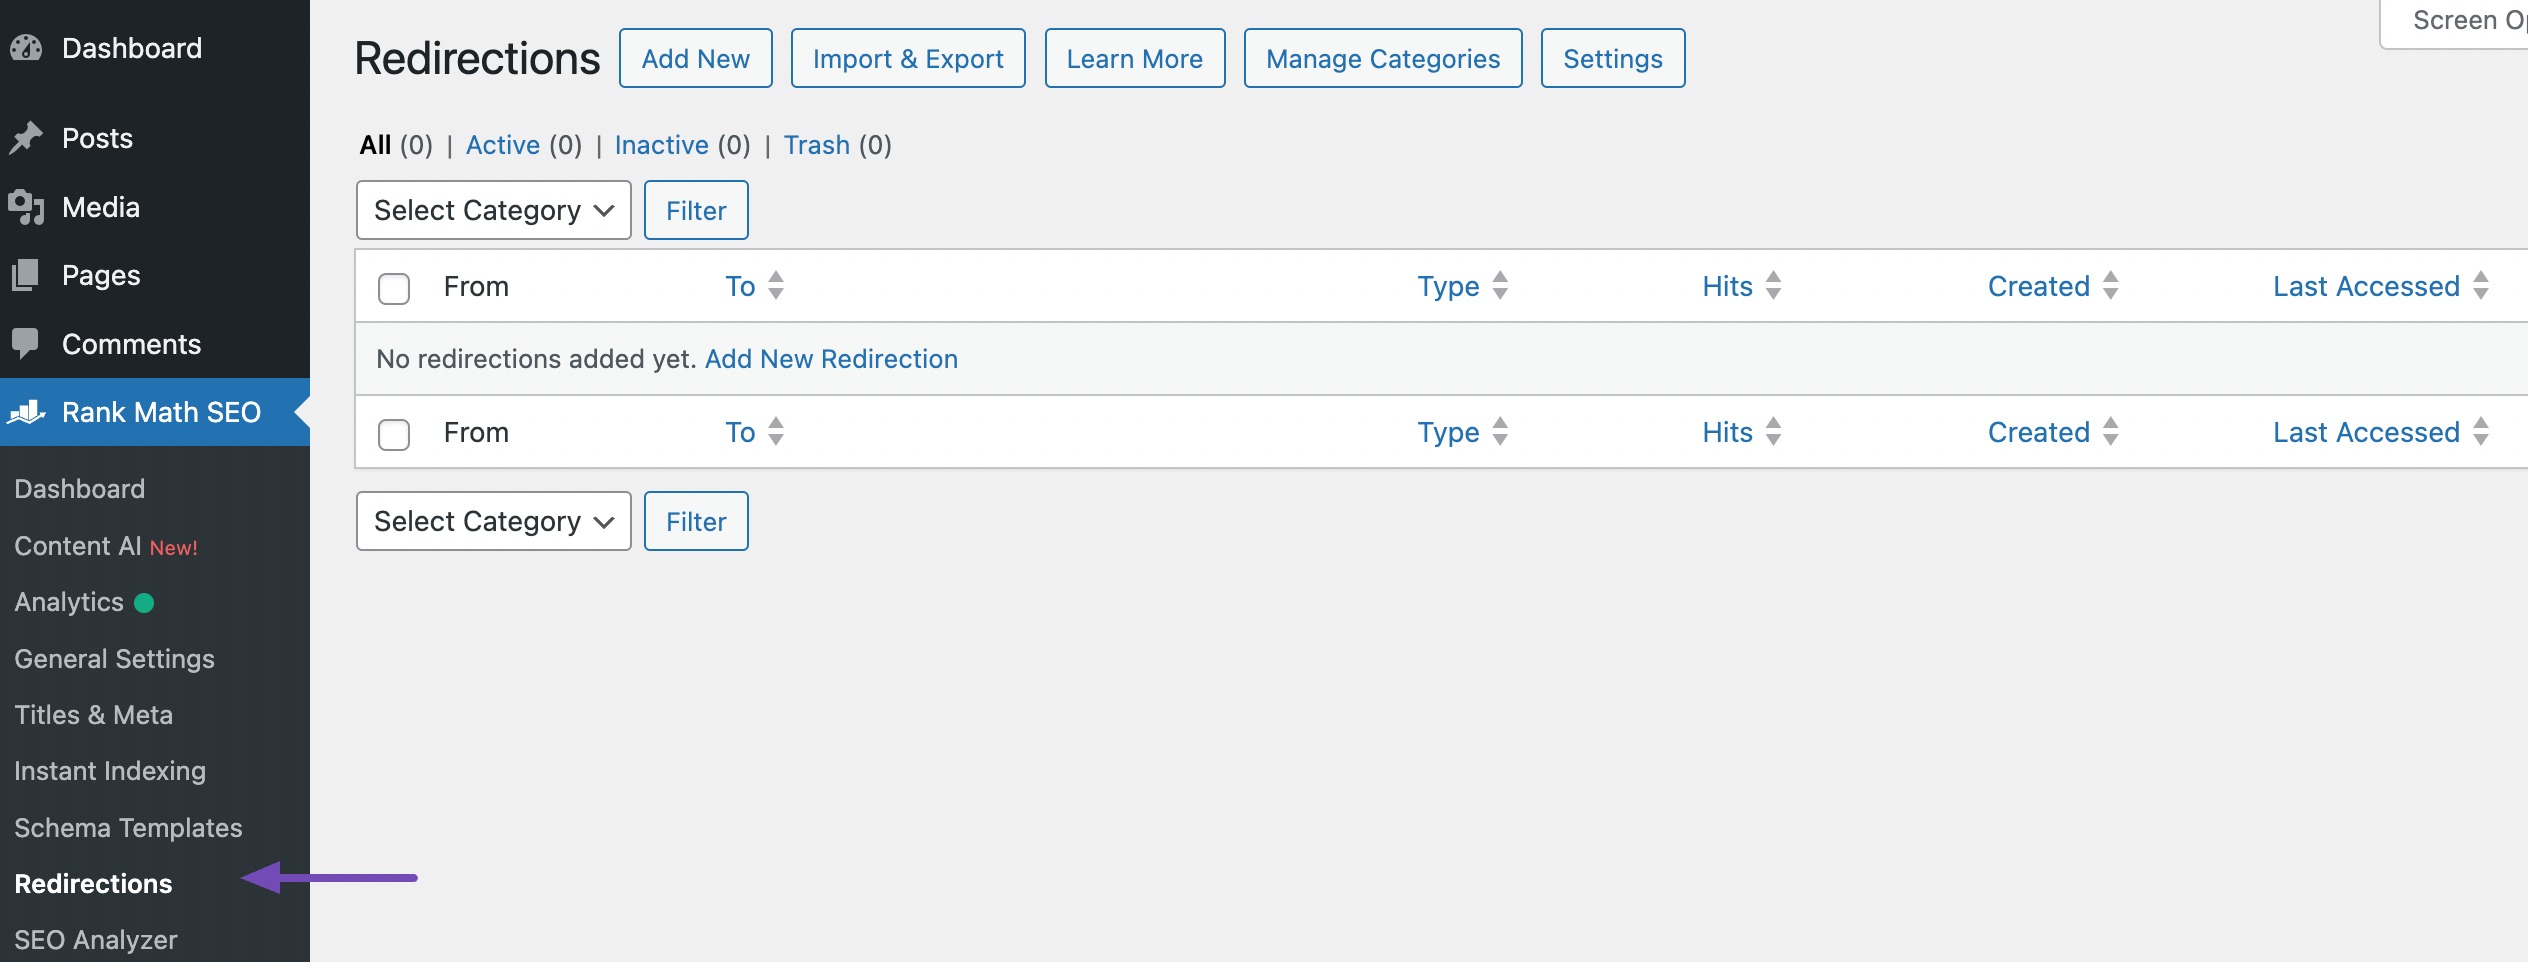
Once you’ve activated the Redirection Module, you’ll find it in the left-hand sidebar under Rank Math SEO. To access the redirection page, simply click on Redirections, as shown below.
3.4 Add a New Redirection
On the redirection page, click the Add New button. This will open a form where you can add a new redirection.

In the Source URLs field, input the URL of the deleted page you wish to redirect (e.g., if it was “https://example.com/deleted-page,” enter “/deleted-page”).
Then, in the Destination URL field, enter the URL of the active page where you want the deleted page’s traffic redirected.
Choose the suitable redirection type. For deleted pages, opt for the 301 Permanent Move option. This signals to search engines that the page has permanently moved to a new location.
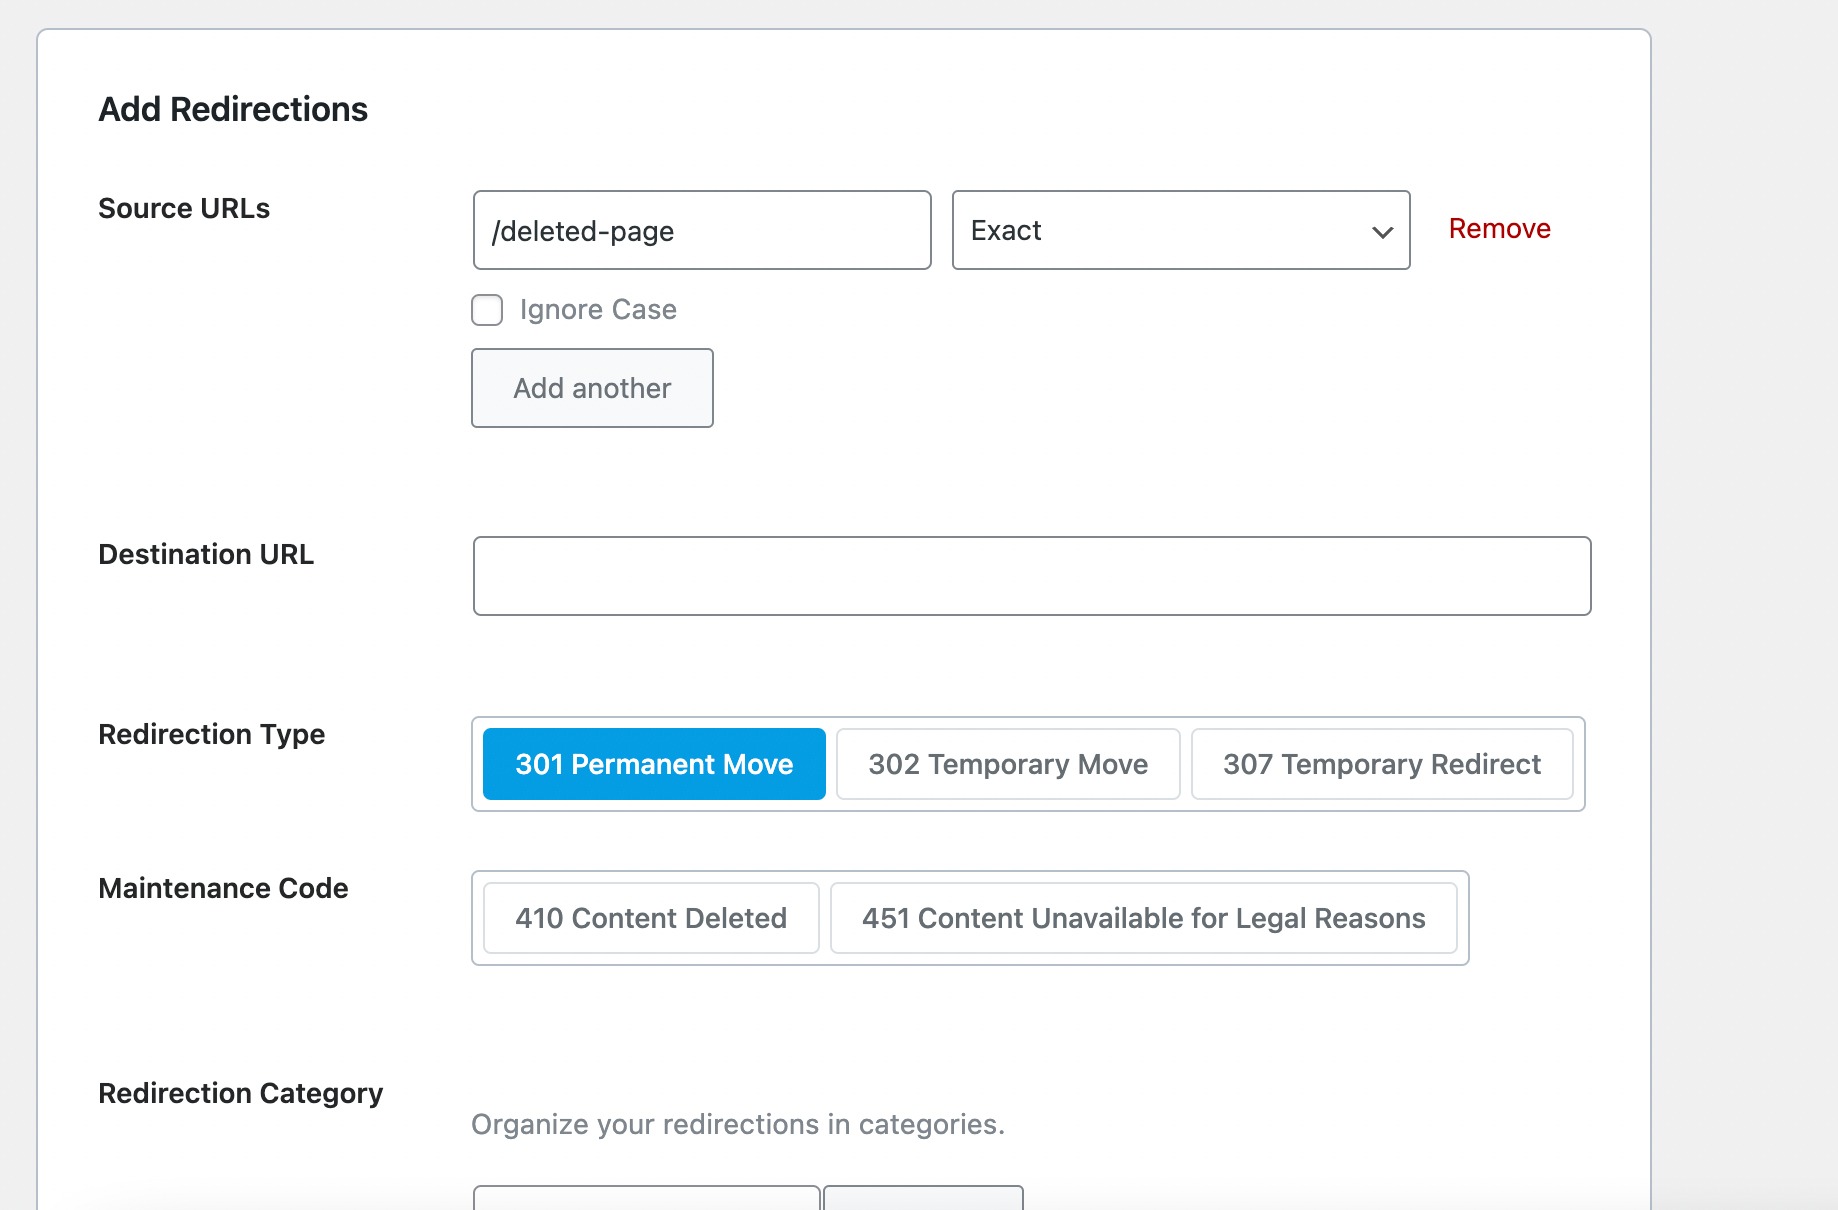
Below, you’ll find additional options such as redirection category, status, and schedule. Configure them according to your preferences. Then, scroll down and click the Add Redirection button to add the redirection.
4 Conclusion
Deleting a WordPress page can be a simple process, but it’s important to remember to redirect the URL to another page or post.
Following the steps outlined in this post, you can safely delete a WordPress page and ensure your website’s visitors are directed to the right content.
Remember to consider SEO implications, implement proper redirects, and periodically review your content for optimal website management.
The Redirection feature of Rank Math SEO can be helpful in managing your website’s content.
By following the outlined steps, you can delete a WordPress page in a seamless and effective way.
If you like this post, let us know by Tweeting @rankmathseo.
