Adding and aligning images in WordPress is essential as it helps create an attractive and professional website. Images draw attention and make content more engaging for readers.
Additionally, images can create a more engaging experience for the user by adding a sense of personality to a page. They can also help illustrate complex concepts and provide visual cues to help readers guide through a page.
But how do you add an image in WordPress?
Adding images in WordPress is a simple process that requires only a few clicks, making it easy for businesses to create an aesthetically pleasing and informative web page. With that said, there are various ways to add images in Gutenberg and Classic editors.
In this post, we’ll show you how to add images in WordPress in both editors.
Table Of Contents
1 Why Add Images in WordPress?
You might want to add images to your WordPress site for several reasons. Here are a few:
- To enhance the user experience: Images can help break up long blocks of text and make your content more visually appealing. They can also help to illustrate a point or provide visual cues to help the readers understand your content more easily.
- To increase engagement: Images can make your content more engaging and increase the chances that people will read it, share it, and return to your site.
- To boost SEO: Adding images to your content can also improve your search engine optimization (SEO). By using relevant keywords in your image file names and alt text, you can make your images more easily discoverable by search engines, leading to more traffic to your site.
- To showcase a product or portfolio: On an eCommerce site, images are the primary way to showcase the product. On a portfolio site, images are medium to showcase the work.
- To create galleries, sliders, and other visual elements on the website: WordPress has native features and many plugins available to create galleries, sliders, and other visual elements that attract and engage visitors.
Now that you’re aware of why images are so important, let’s take a look at different methods to add images in WordPress.
2 How to Add Images in Gutenberg Editor
We’ve enlisted below the different ways to add images in the Gutenberg editor.
2.1 Add Images Using the Image Block
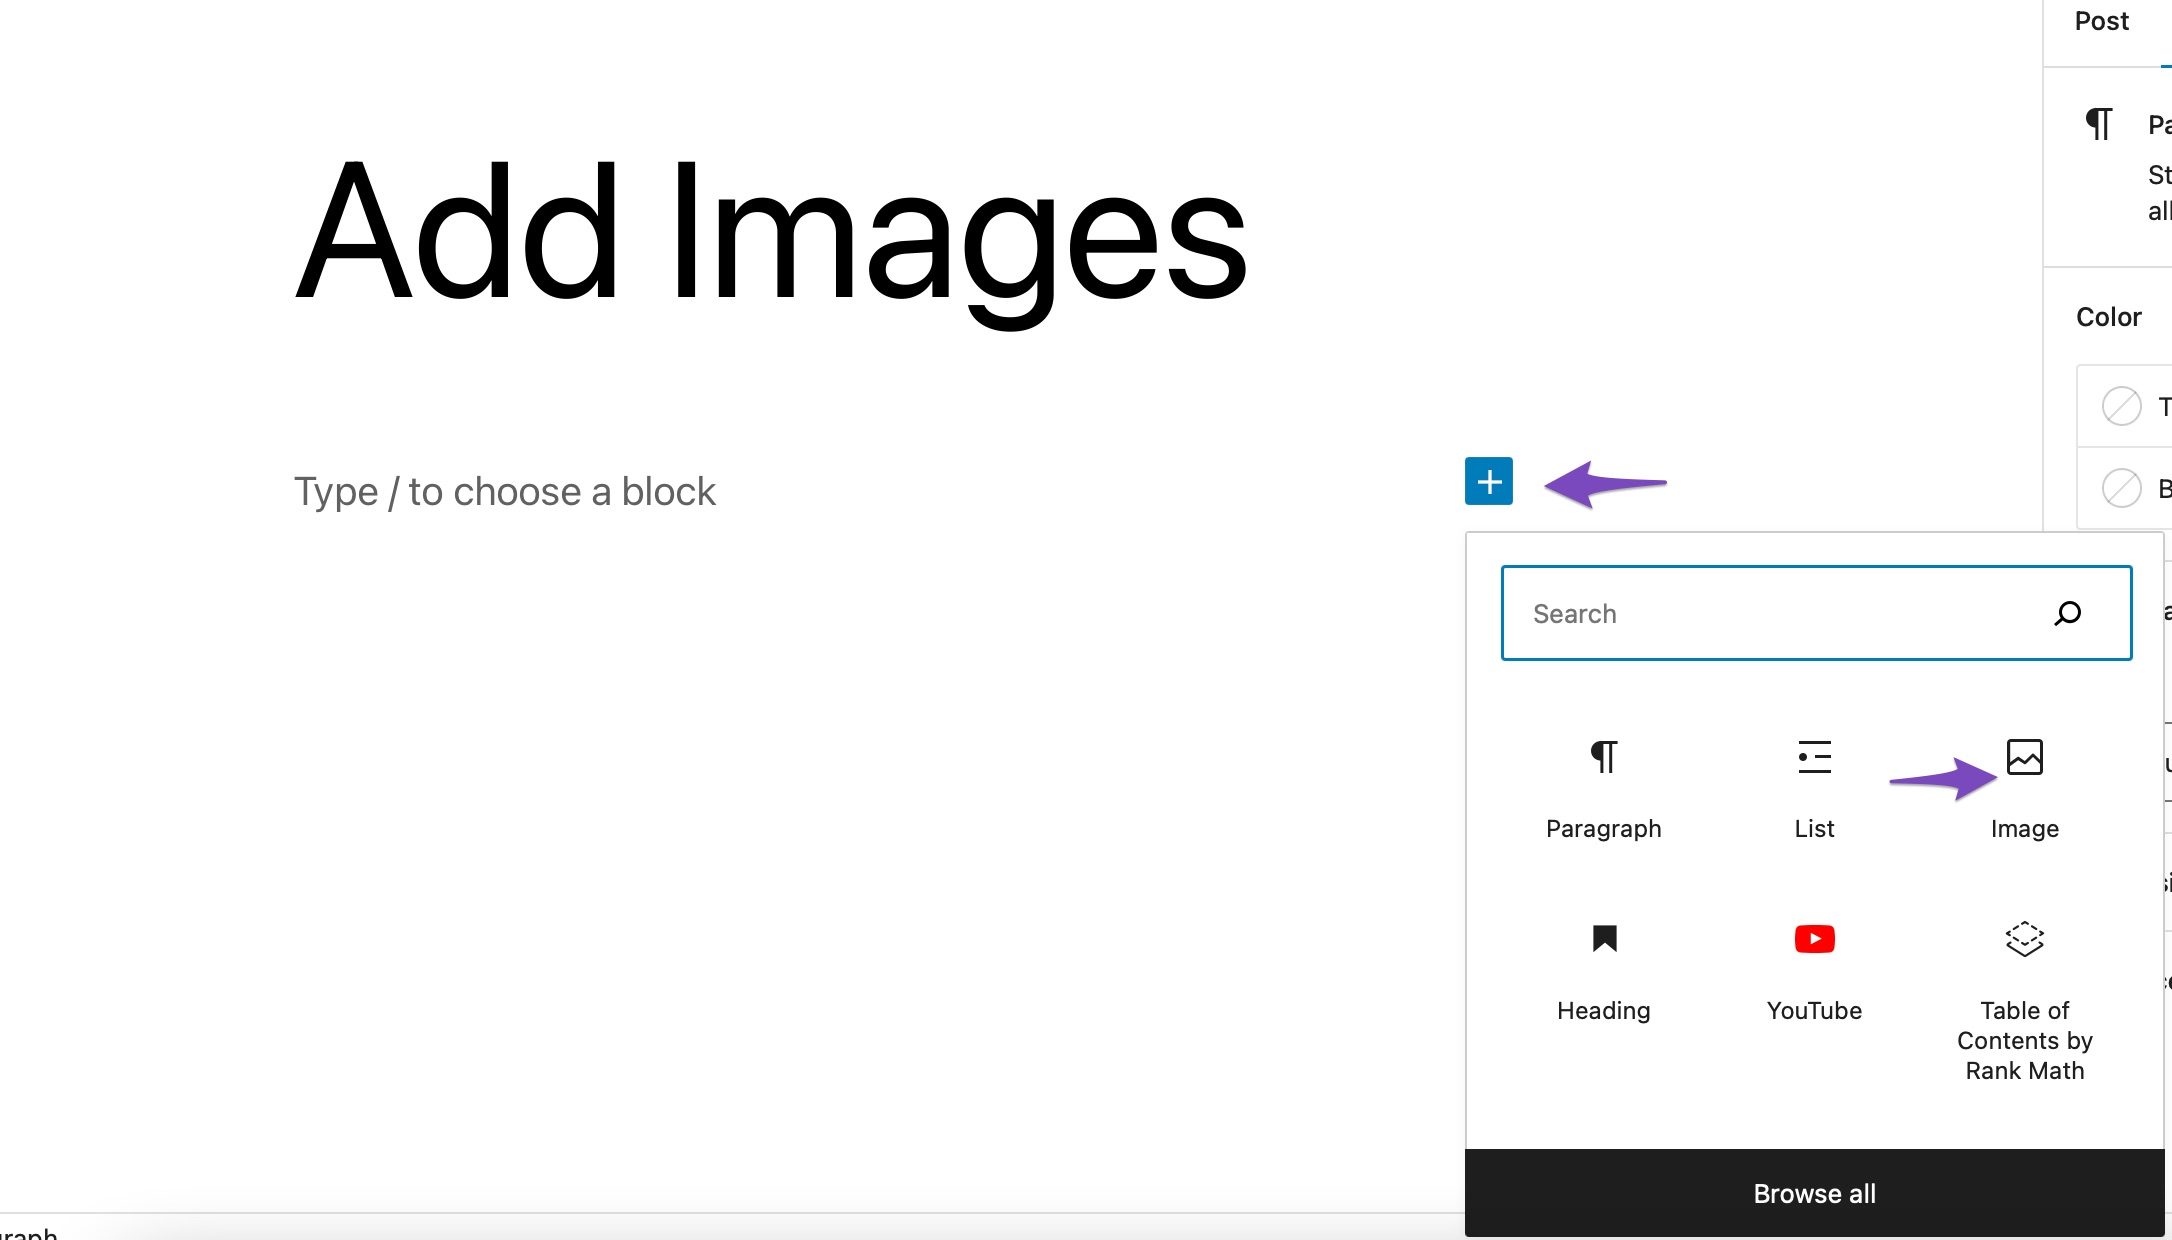
The most common way of adding images is using the Image block. To add images in WordPress, click on the ‘+’ sign and select the Image block, as shown below.
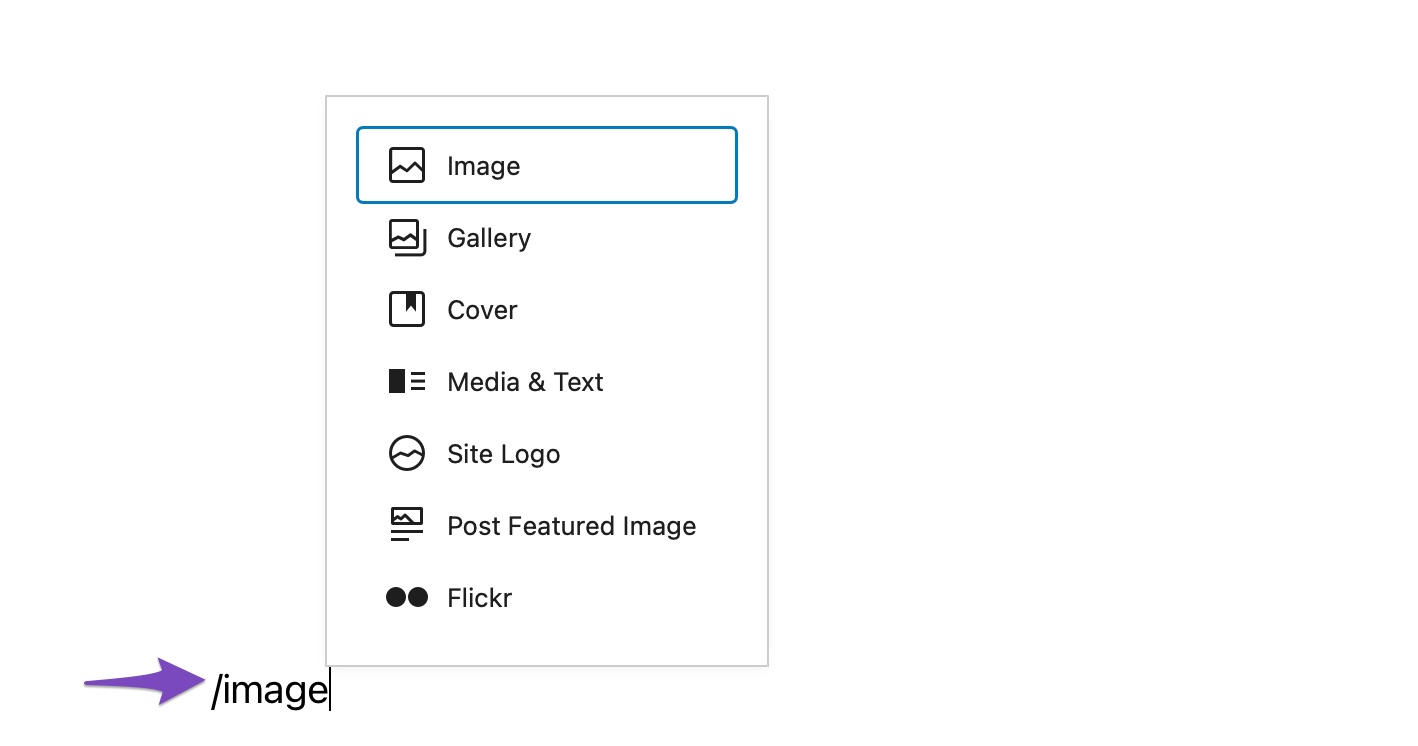
You can also type /image in the post editor to insert an Image block.
Once done, you’ll find three buttons inside the blank Image block.
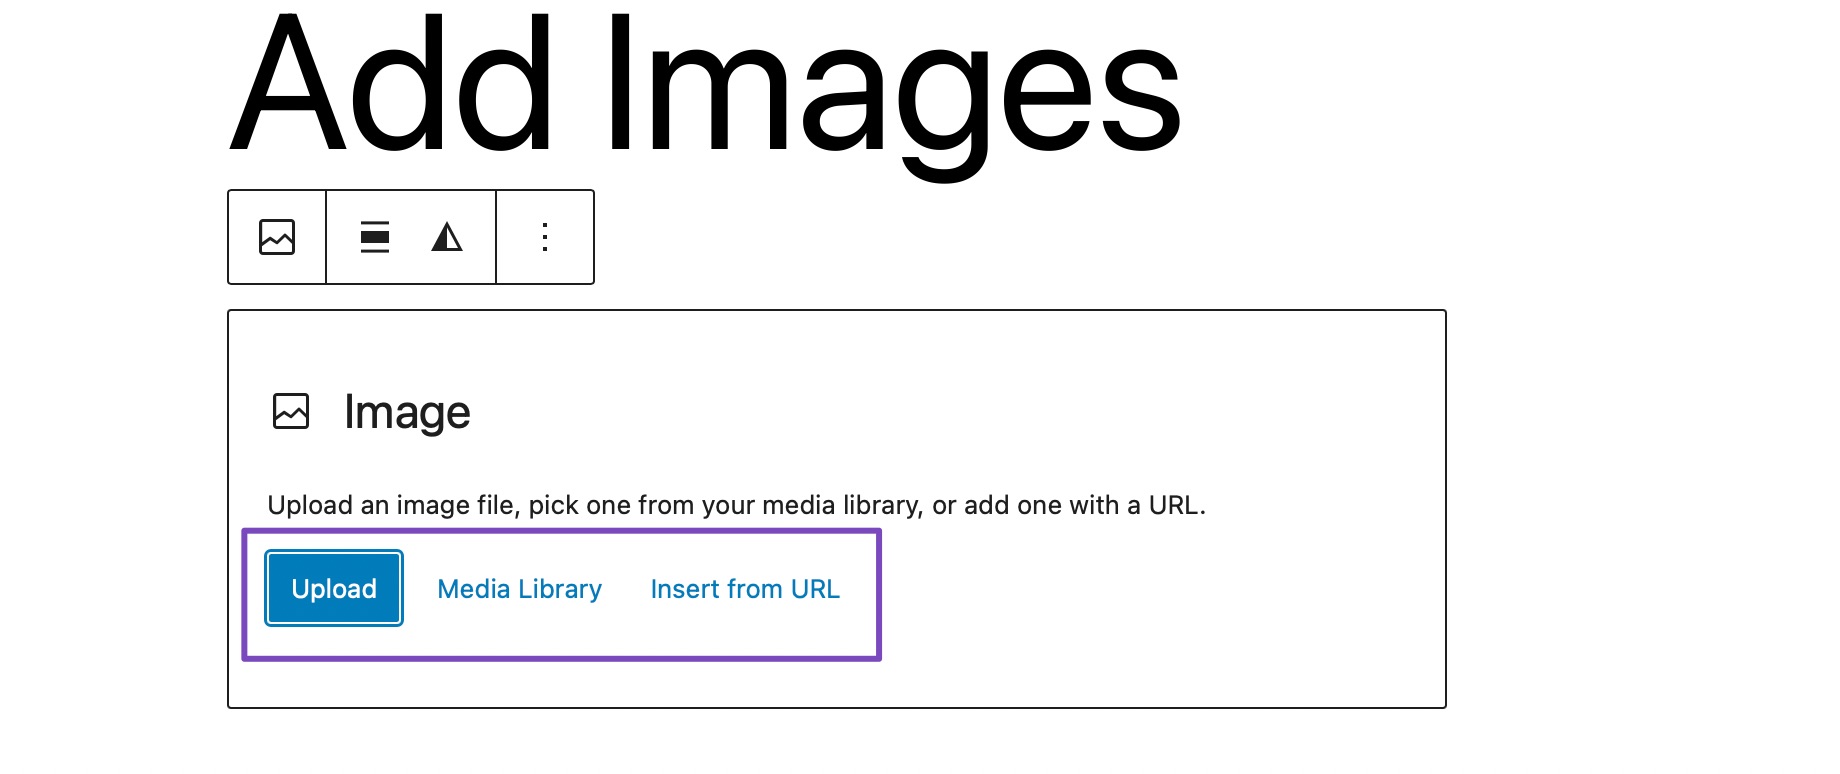
You can either upload an image from your computer, select an already uploaded image from the Media Library, or insert an image by providing the image file URL.
If you wish to upload an image from your computer, click on the Upload button, choose the image, and click on Upload, as shown below.
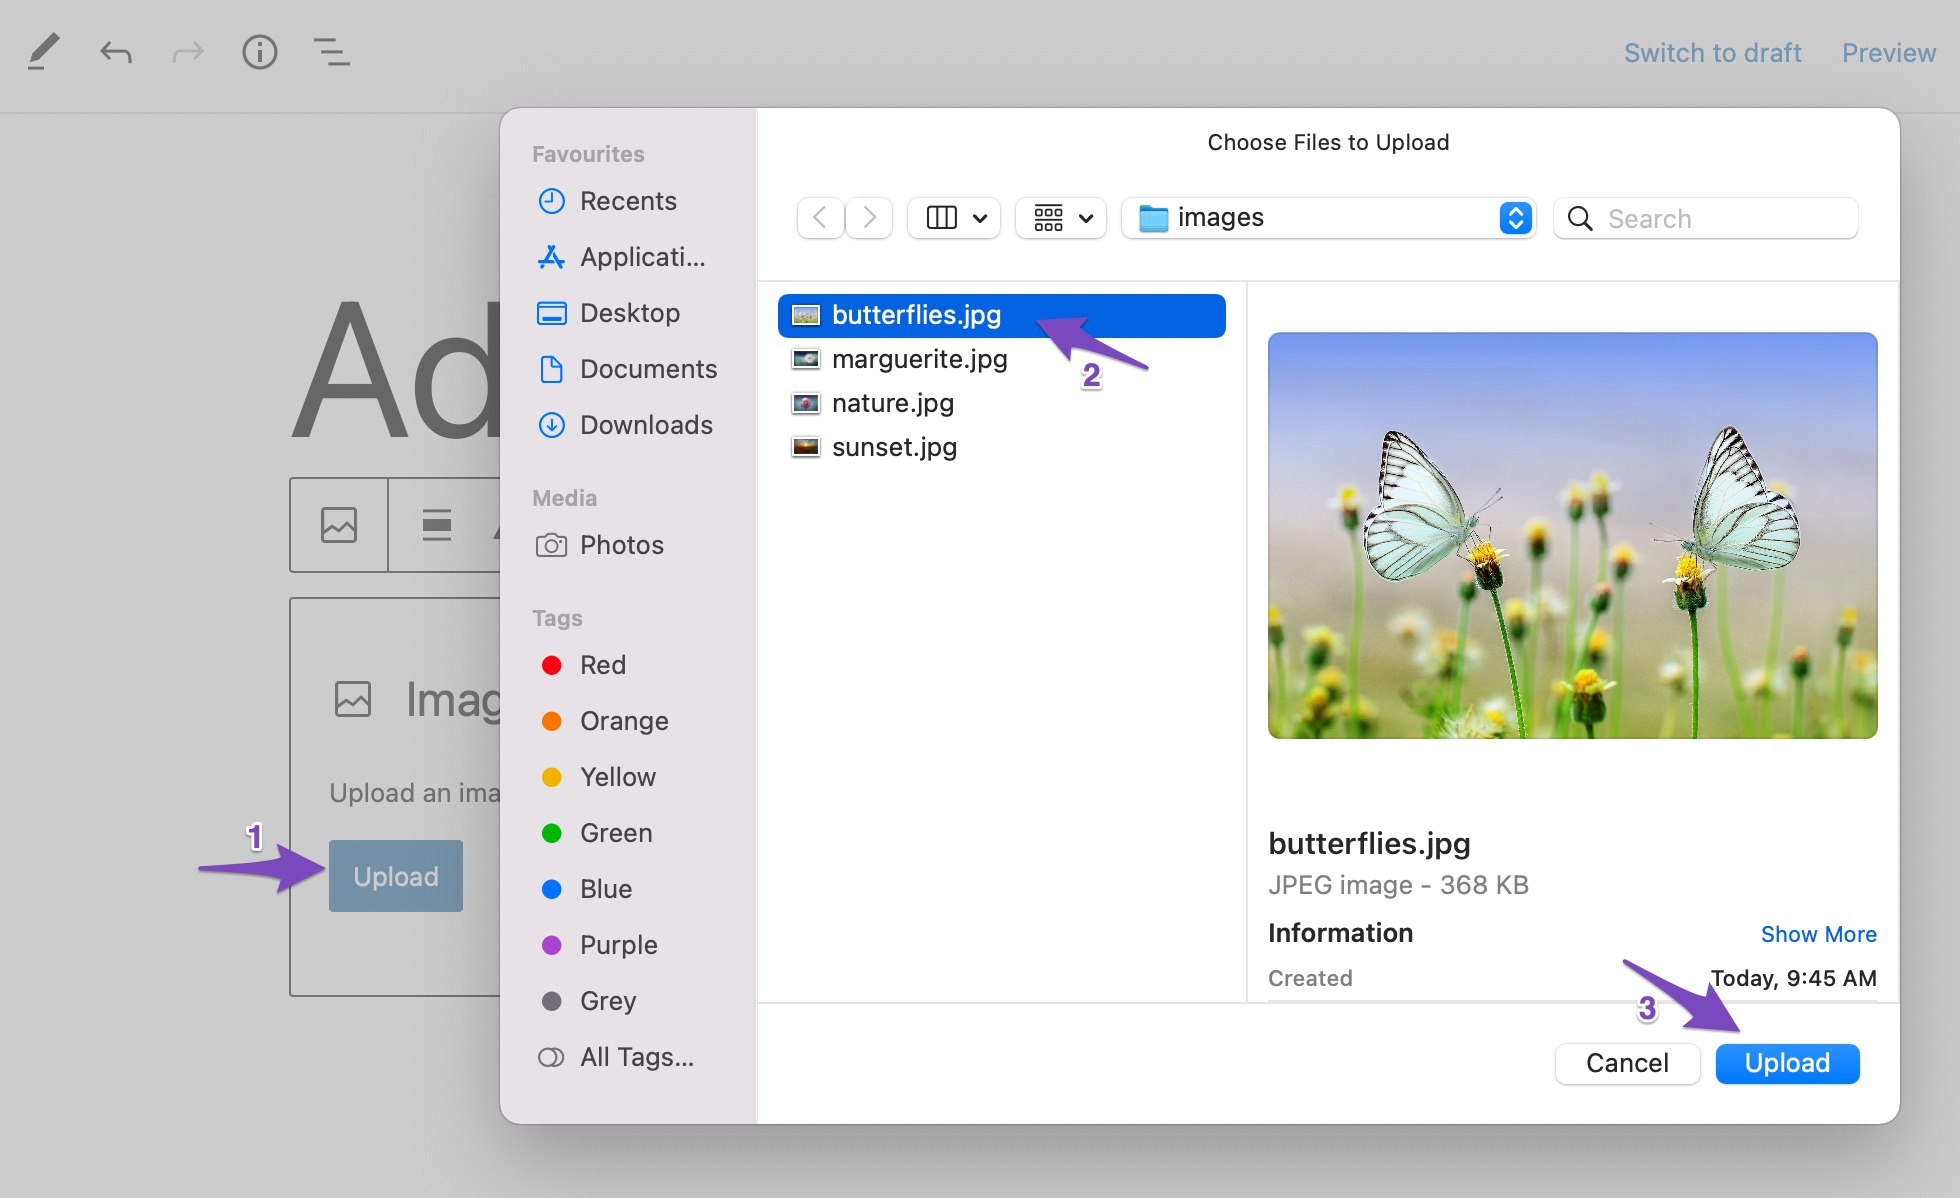
As soon as you upload the image, WordPress will insert the image into the Image block.
If you wish to add an image from your WordPress Media Library, click the Media Library button, and select the image. In the case of Insert from URL, enter the image URL in the box.
2.2 Add Images Using the Gallery Block
You can also insert images in the Gutenberg editor using the Gallery block. This block can add multiple images to your post/page.
To add the Gallery block, click on the ‘+’ sign and select the Gallery block, as shown below.
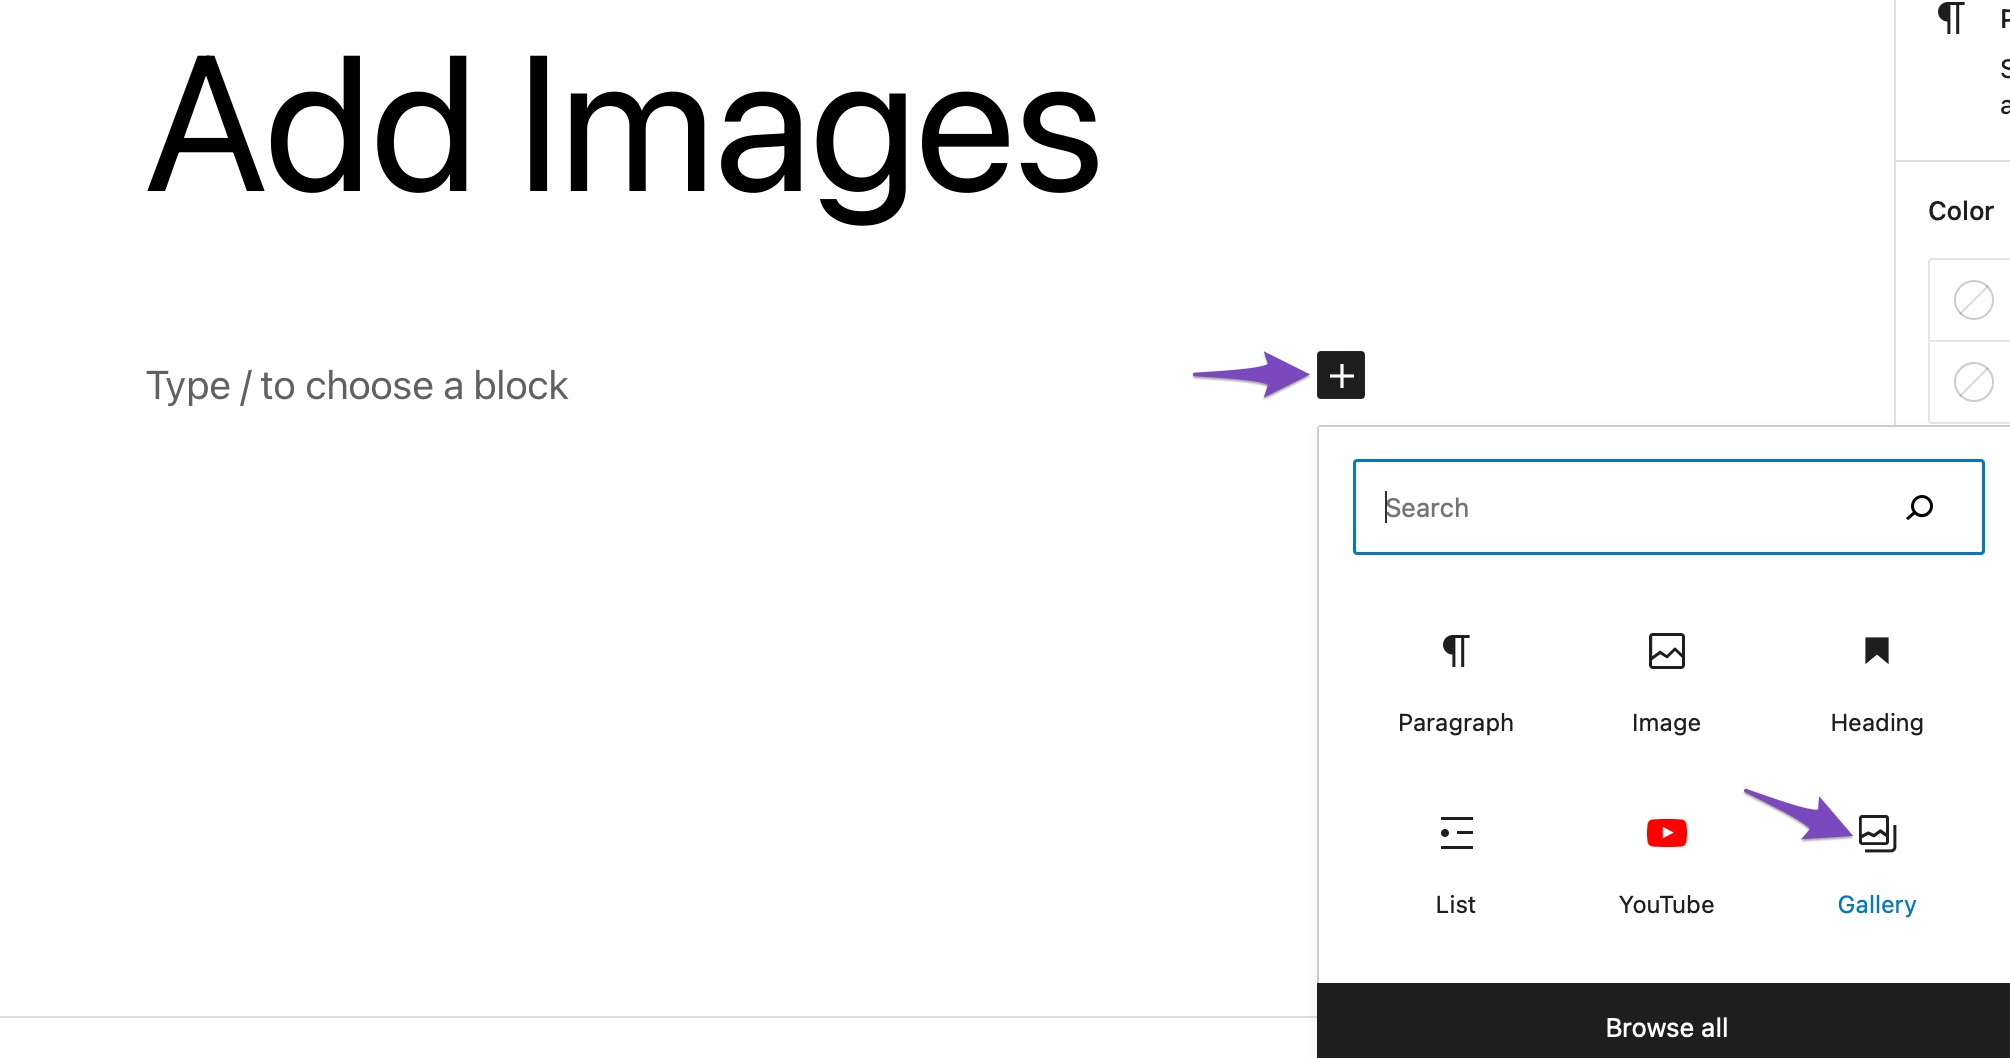
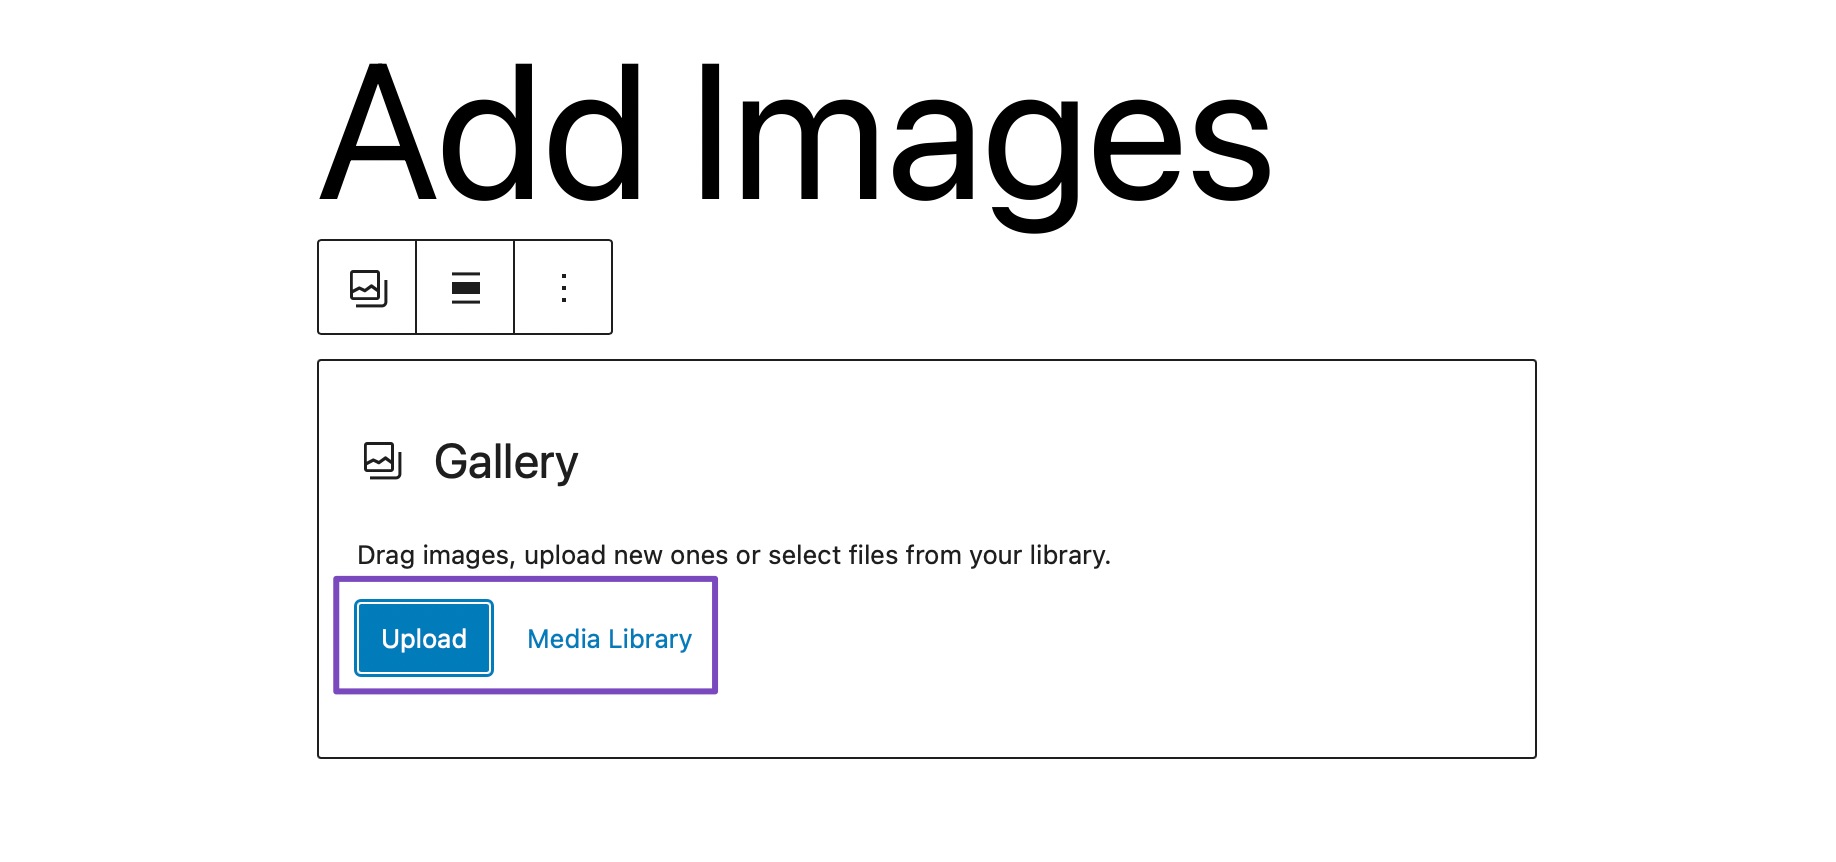
Adding images using the Gallery block is the same as the Image block. You can upload images to the gallery or choose the images from the library.
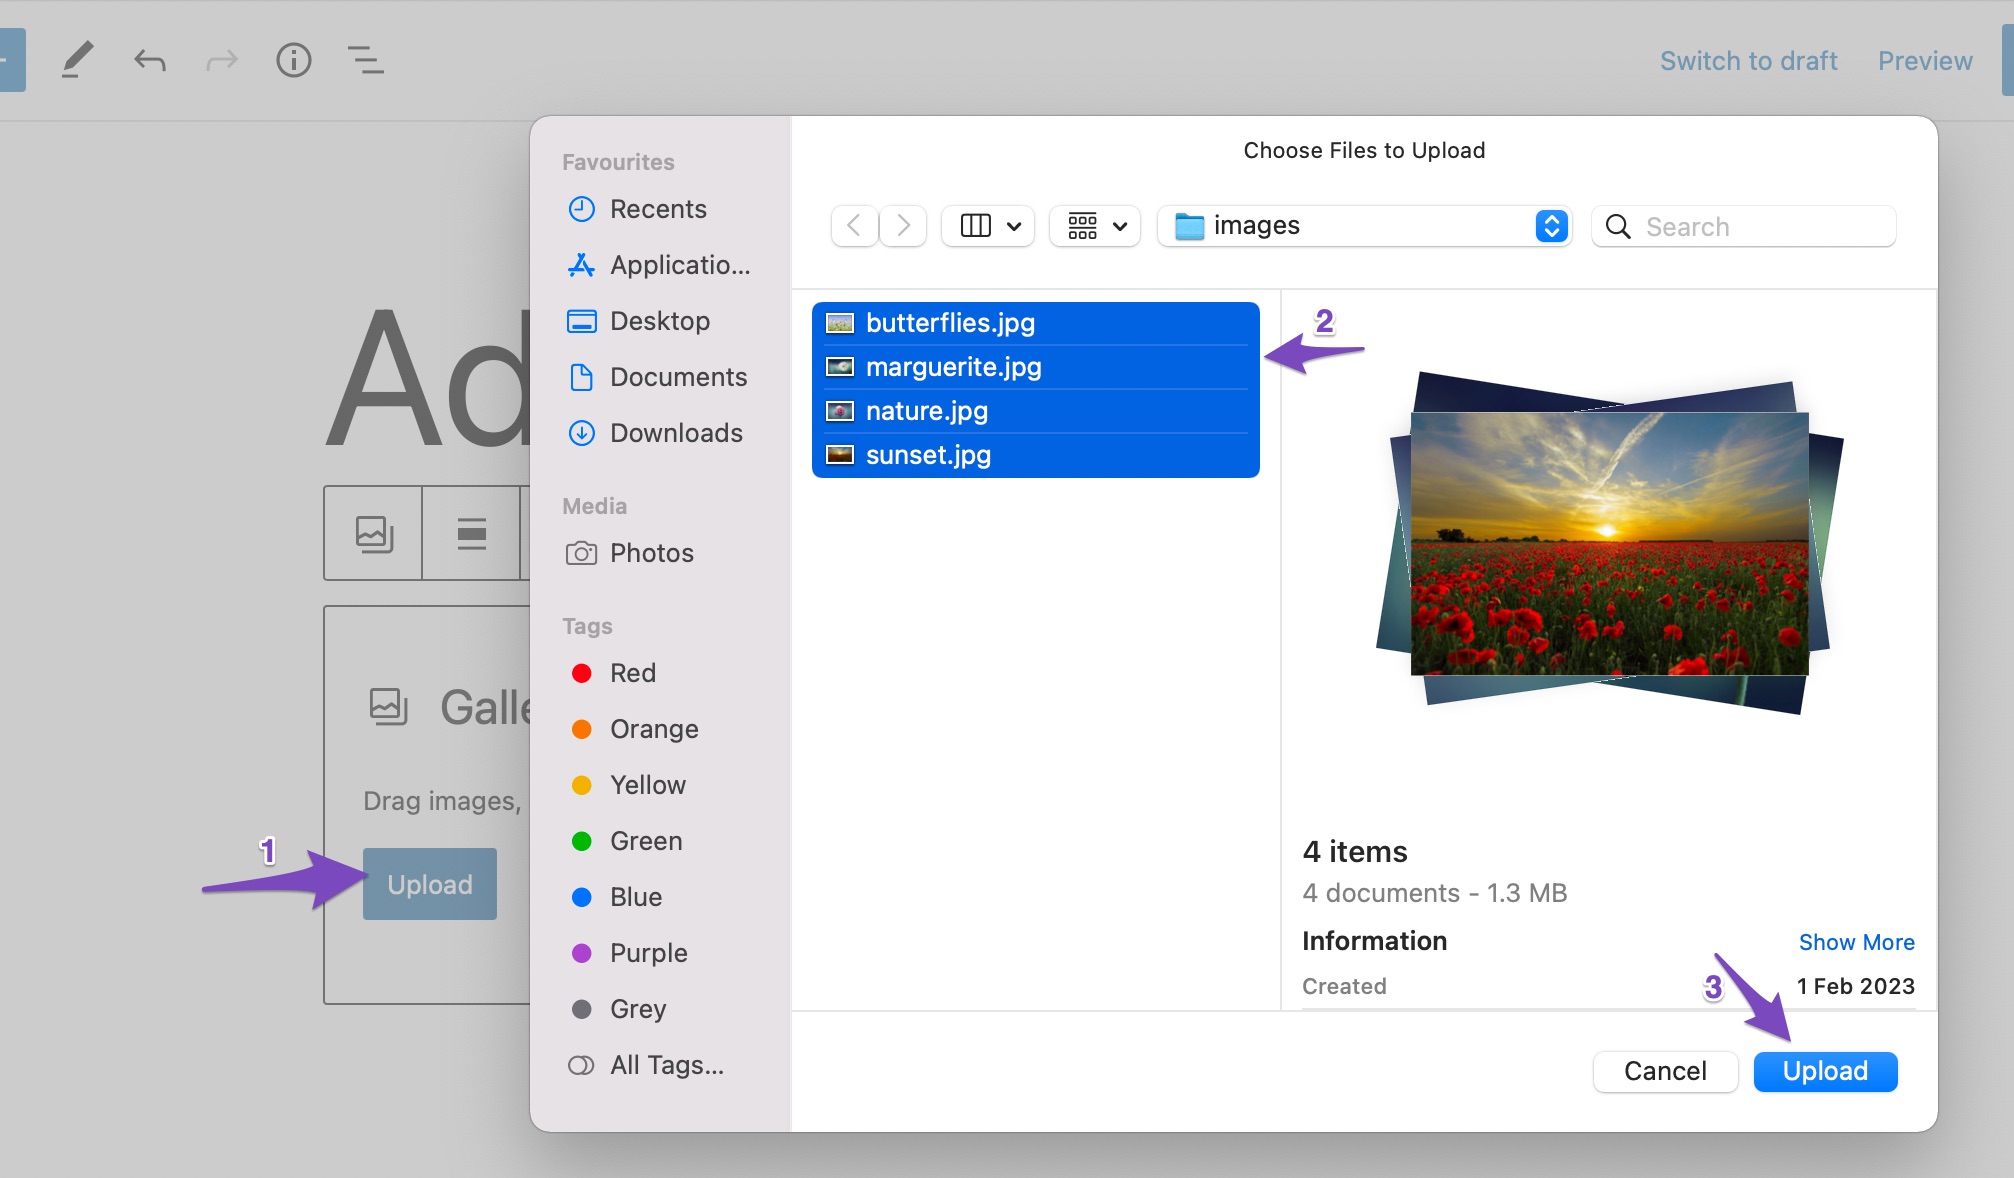
To upload images from your desktop, click on the Upload button, select the images you wish to add to your post, and click the Upload button, as shown below.
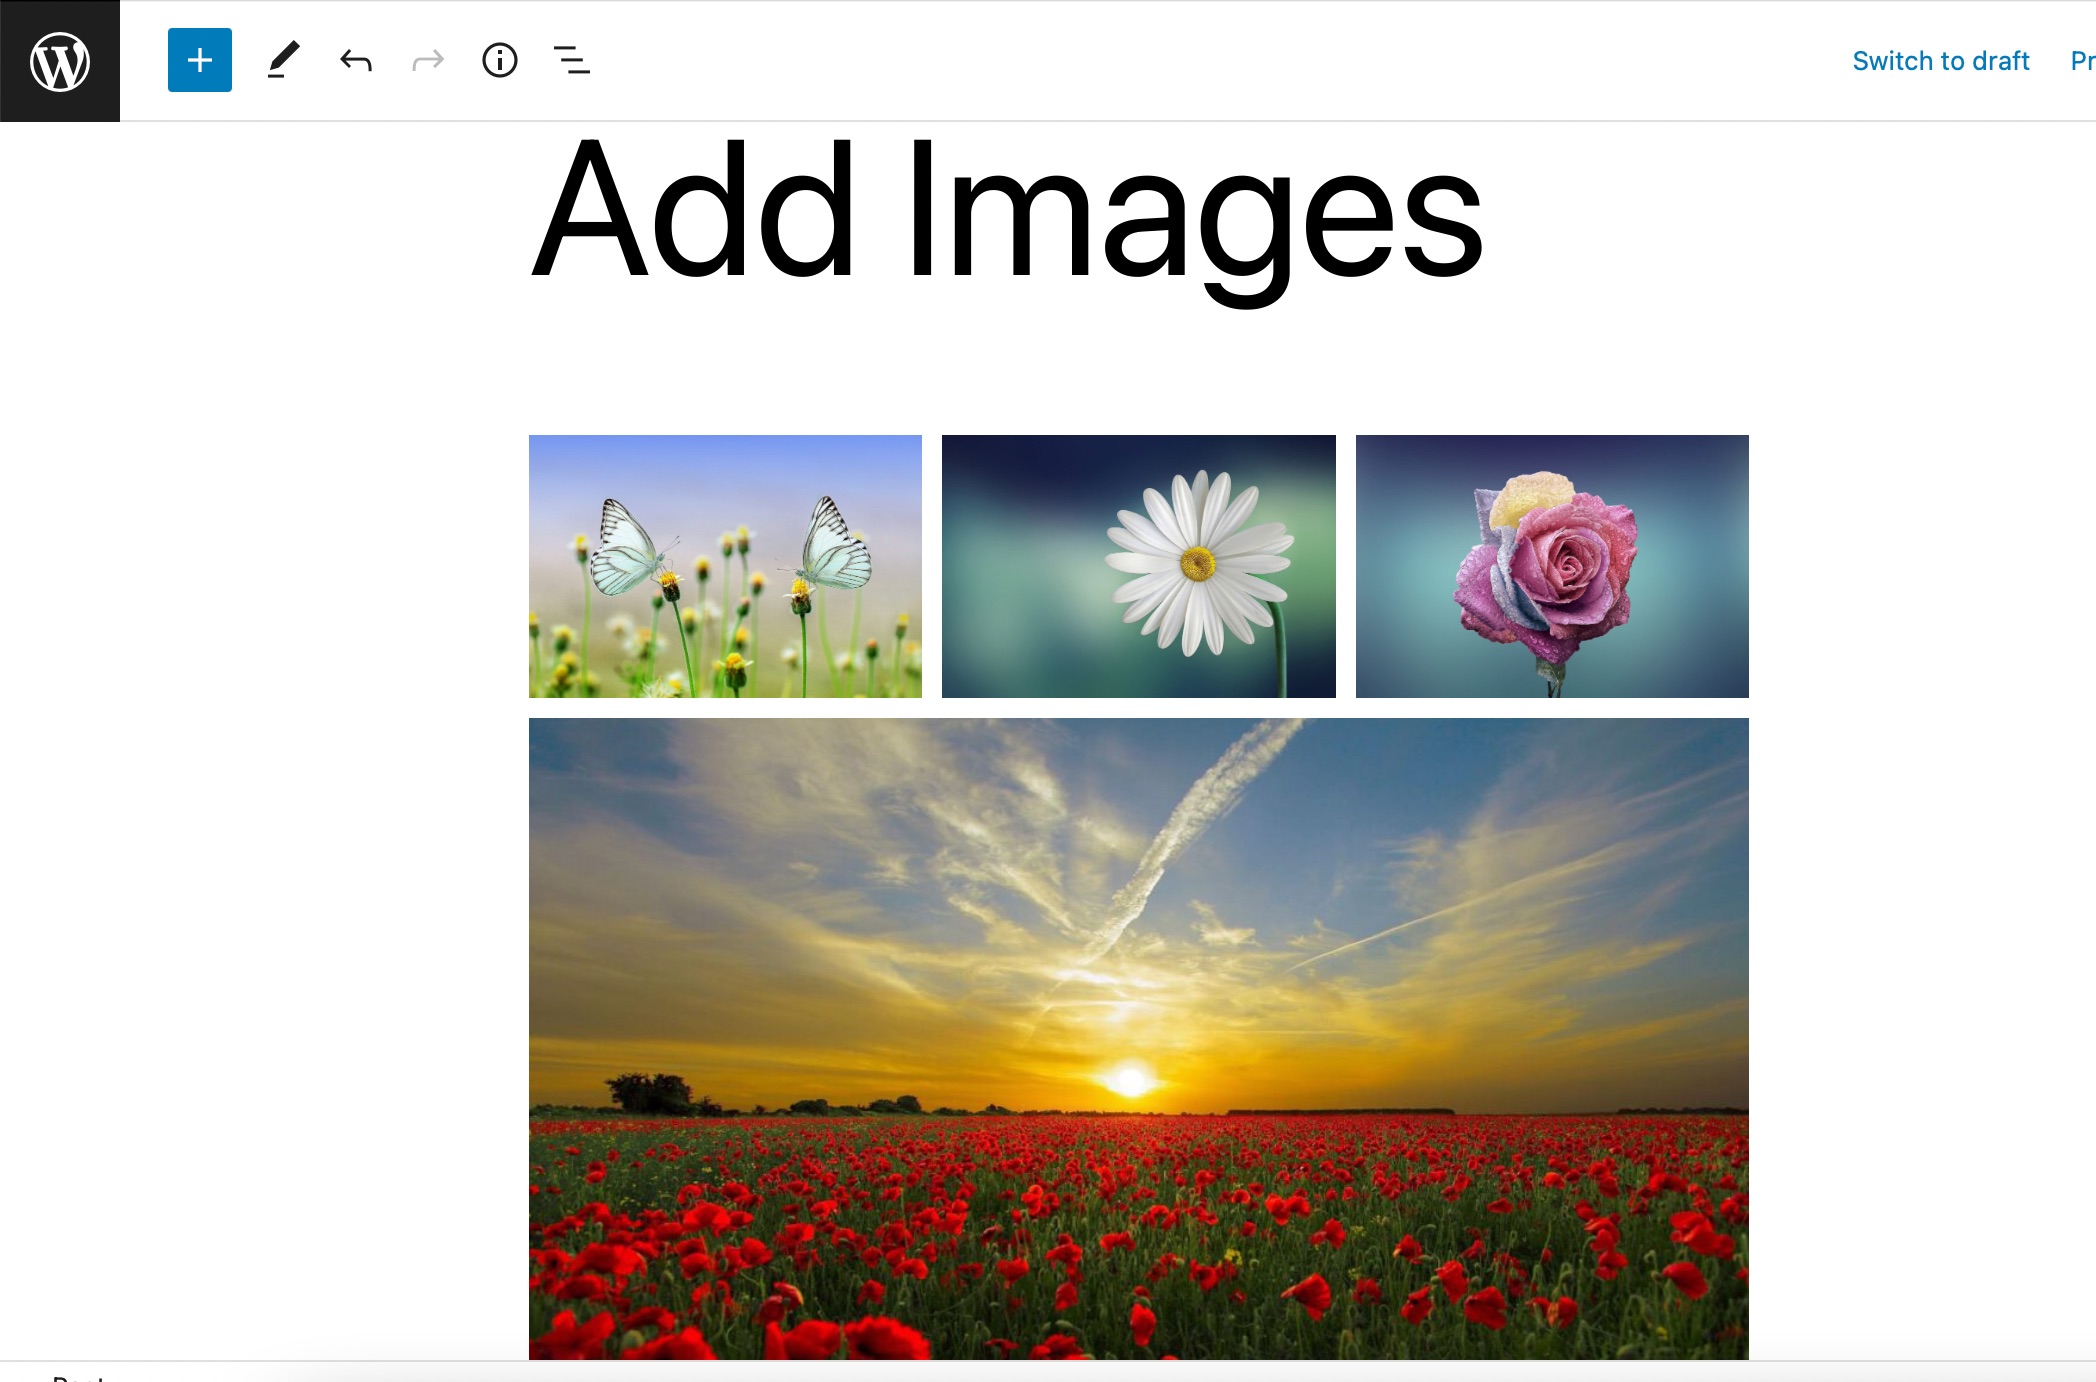
All the images will now be added to your post, as shown below.
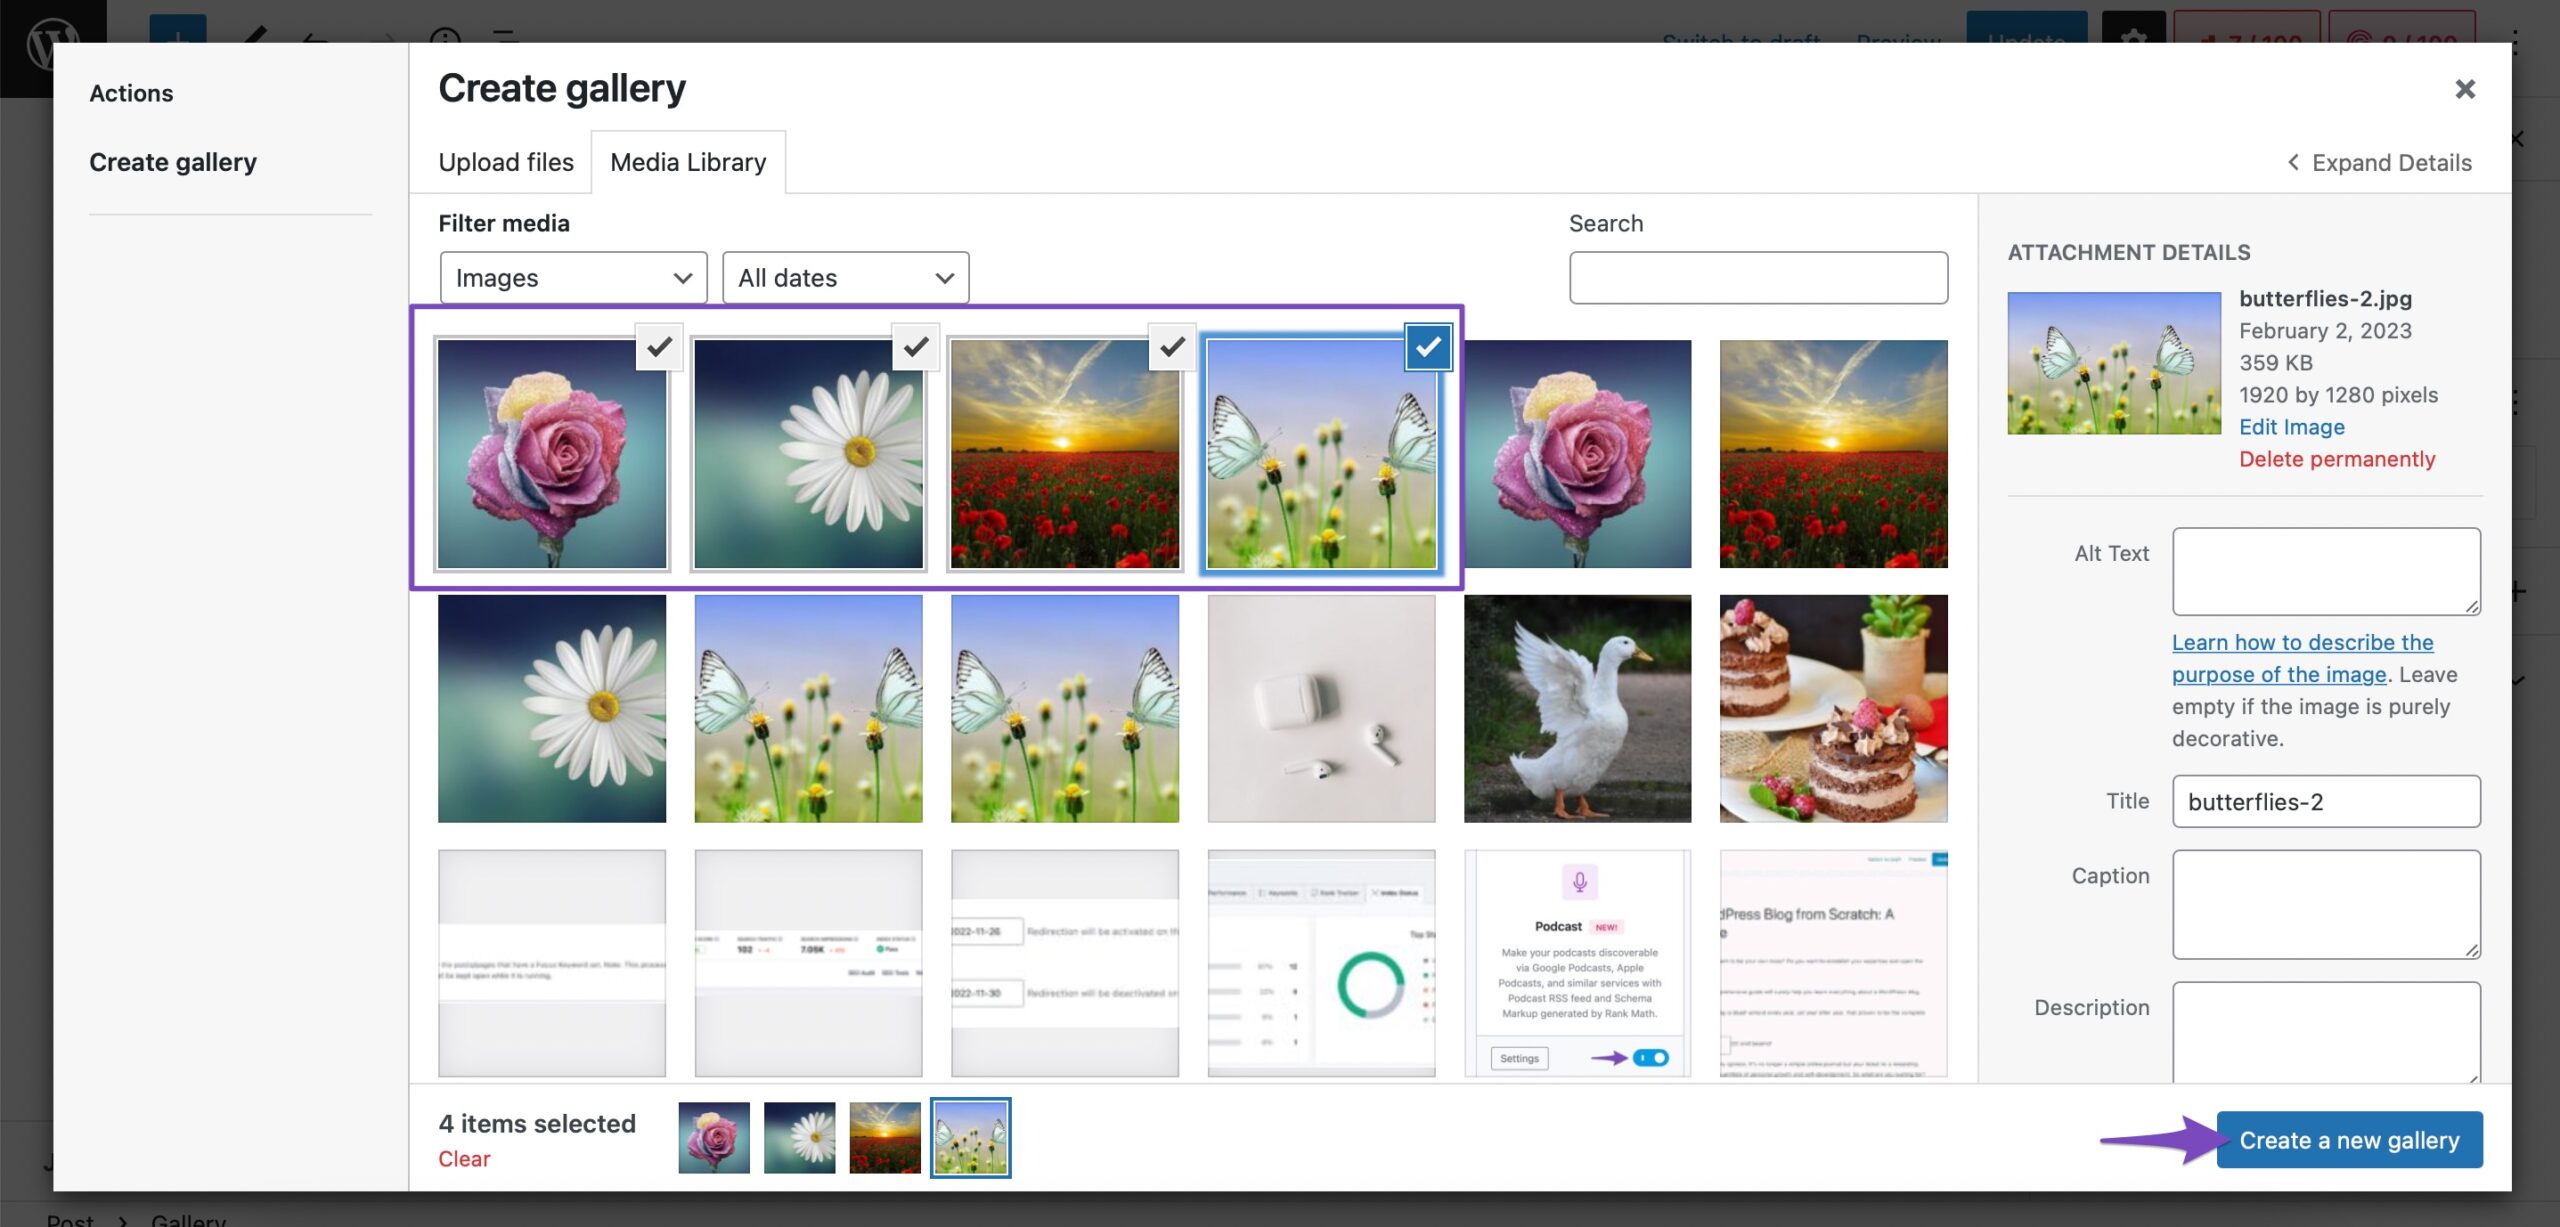
If you wish to add images from your WordPress Media Library, click the Media Library button, and select the images to create a new gallery. Once selected, click on the Create a new gallery button, as shown below.
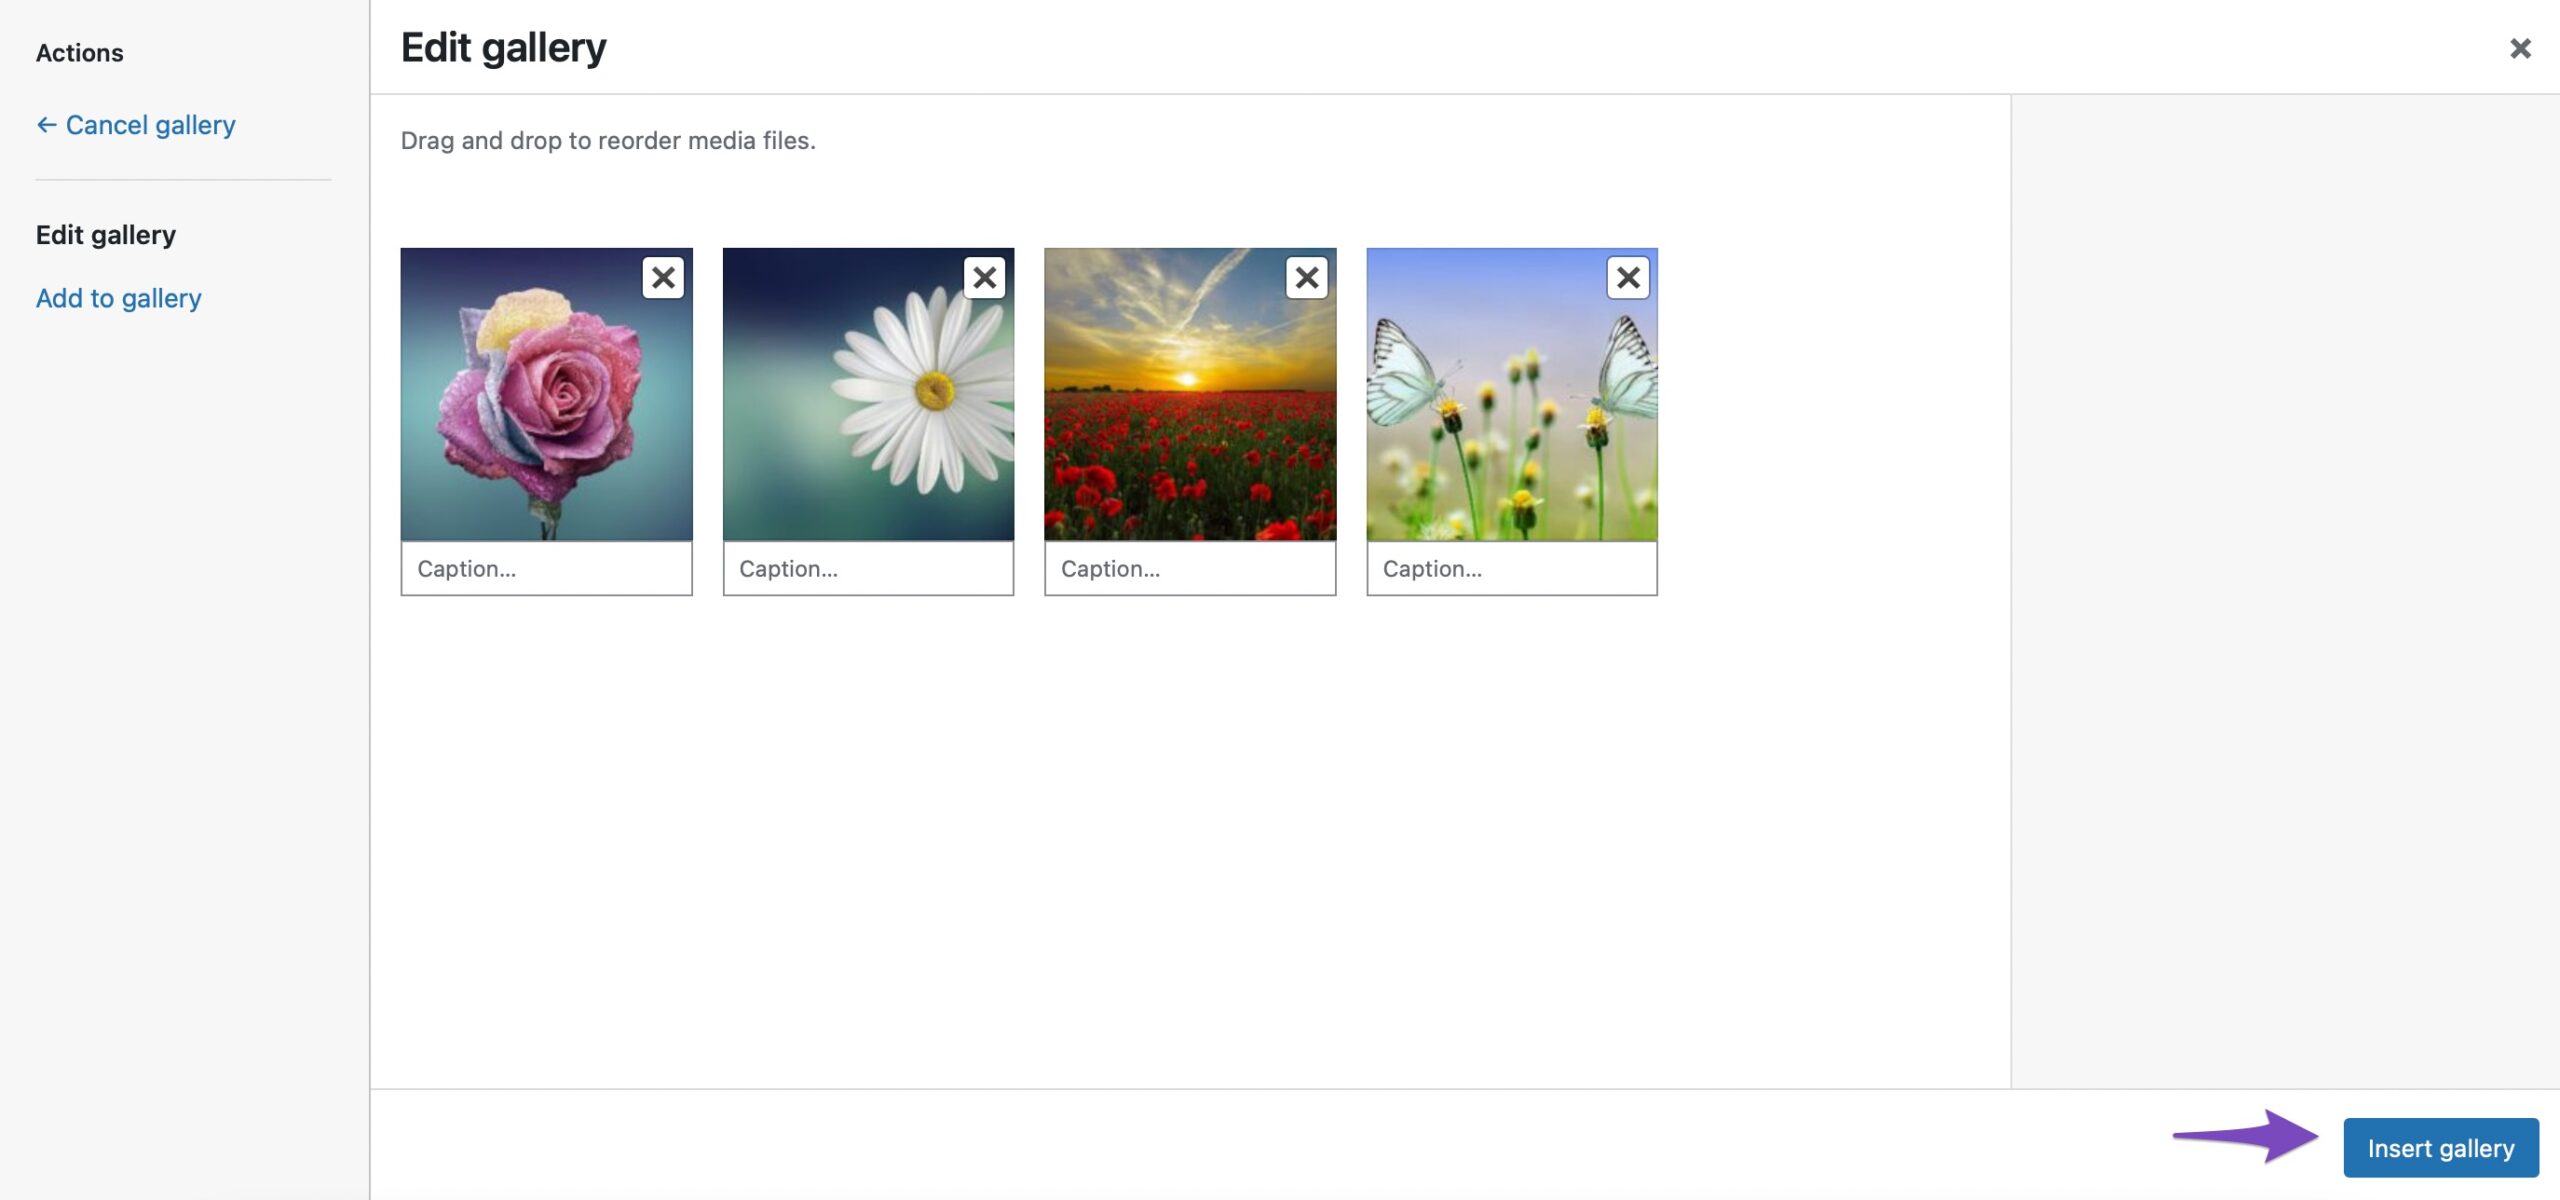
A new gallery will be created, and now click on the Insert gallery button to add the images to your Gallery block. You can also edit the gallery and add/remove images from your gallery.
All the selected images will now be added to your Gallery block in WordPress.
2.3 Add Images Using the Cover Block
You can also add images using the Cover block in WordPress. You can use this block if you wish to offer a rich visual experience to your readers.
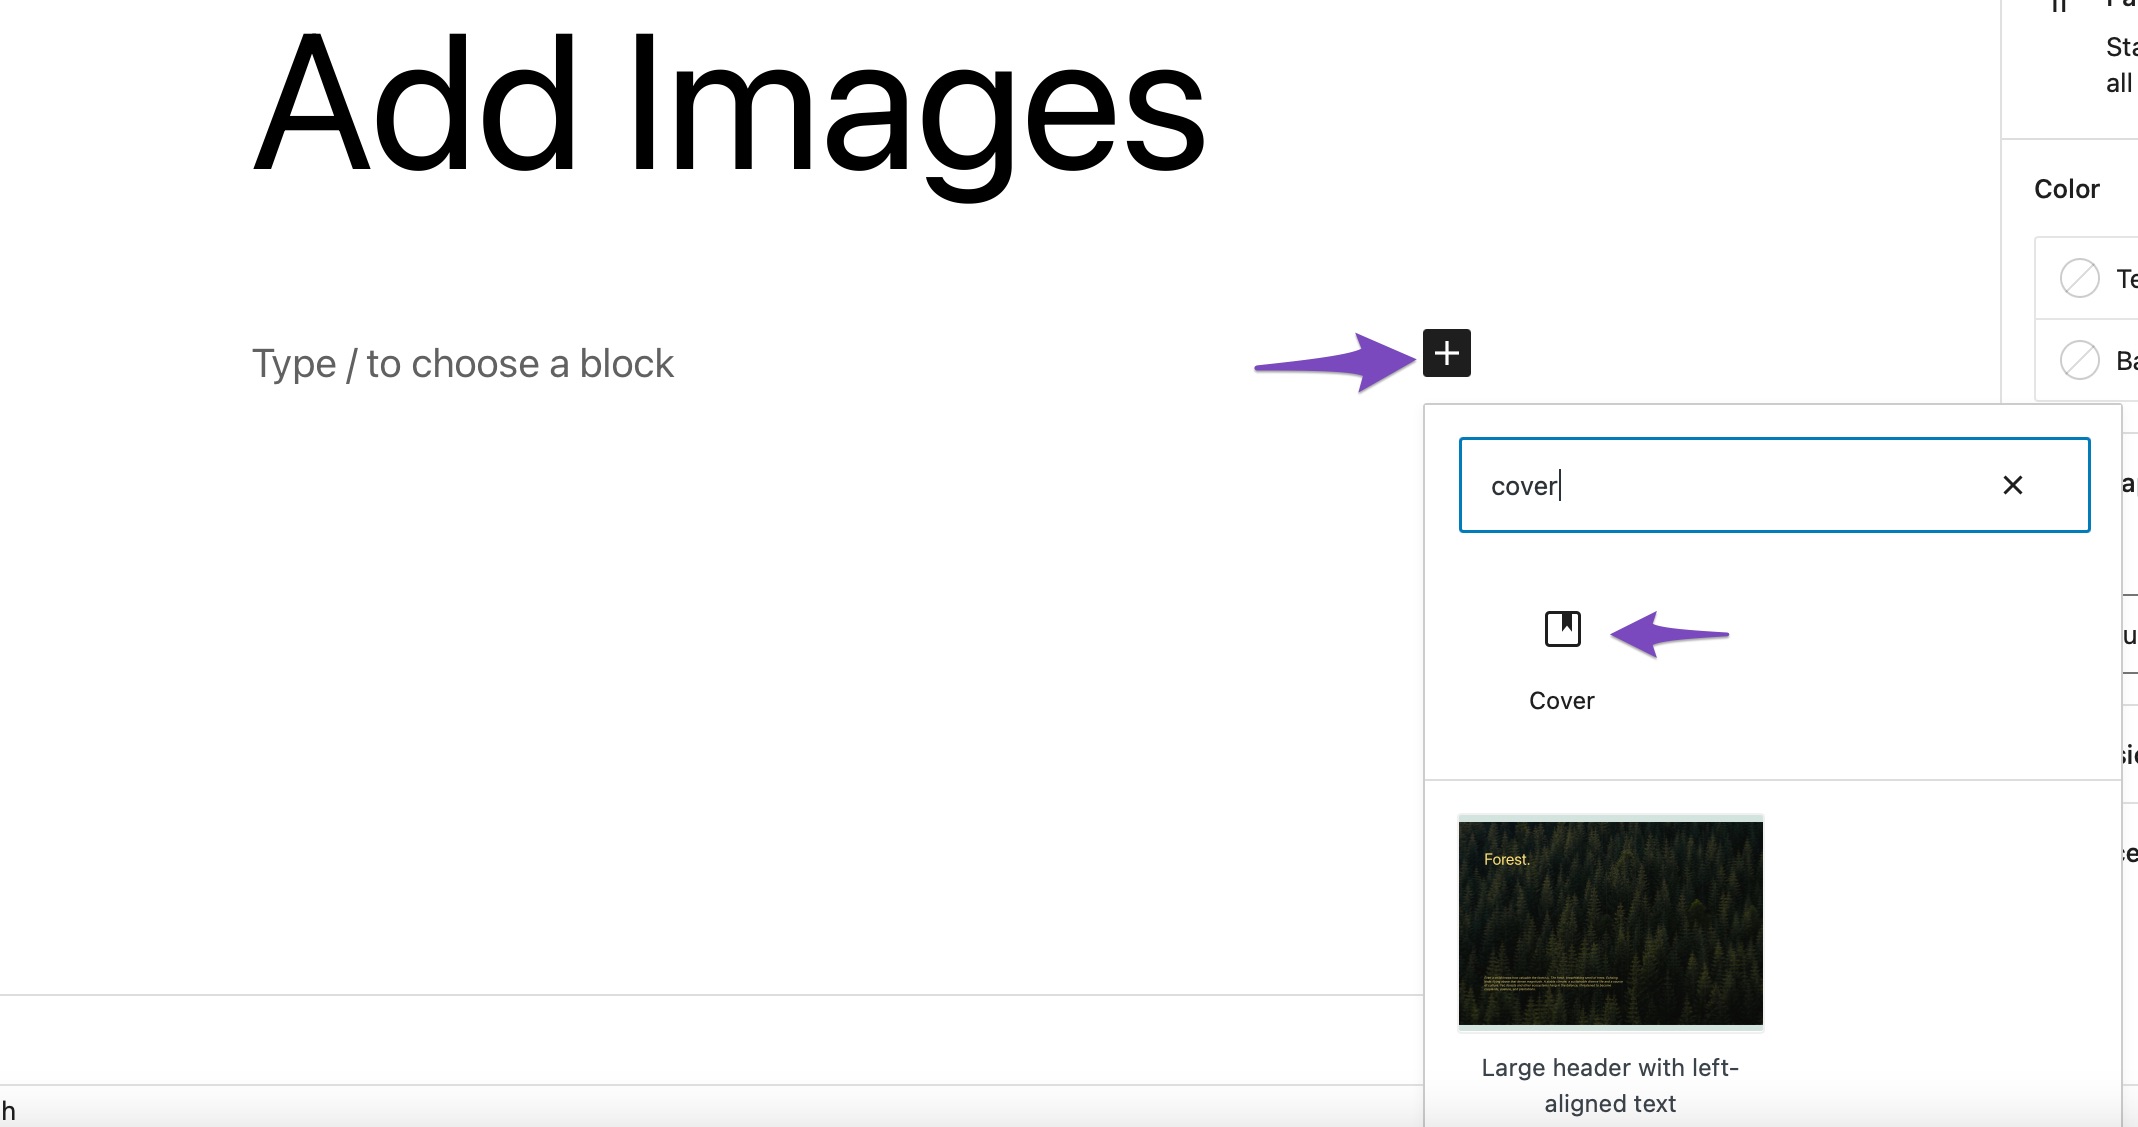
To add a Cover block, click on the ‘+’ sign and select the Cover block, as shown below.
You can either upload an image from your computer, select an already uploaded image from the Media Library, or set the featured image as your cover image.
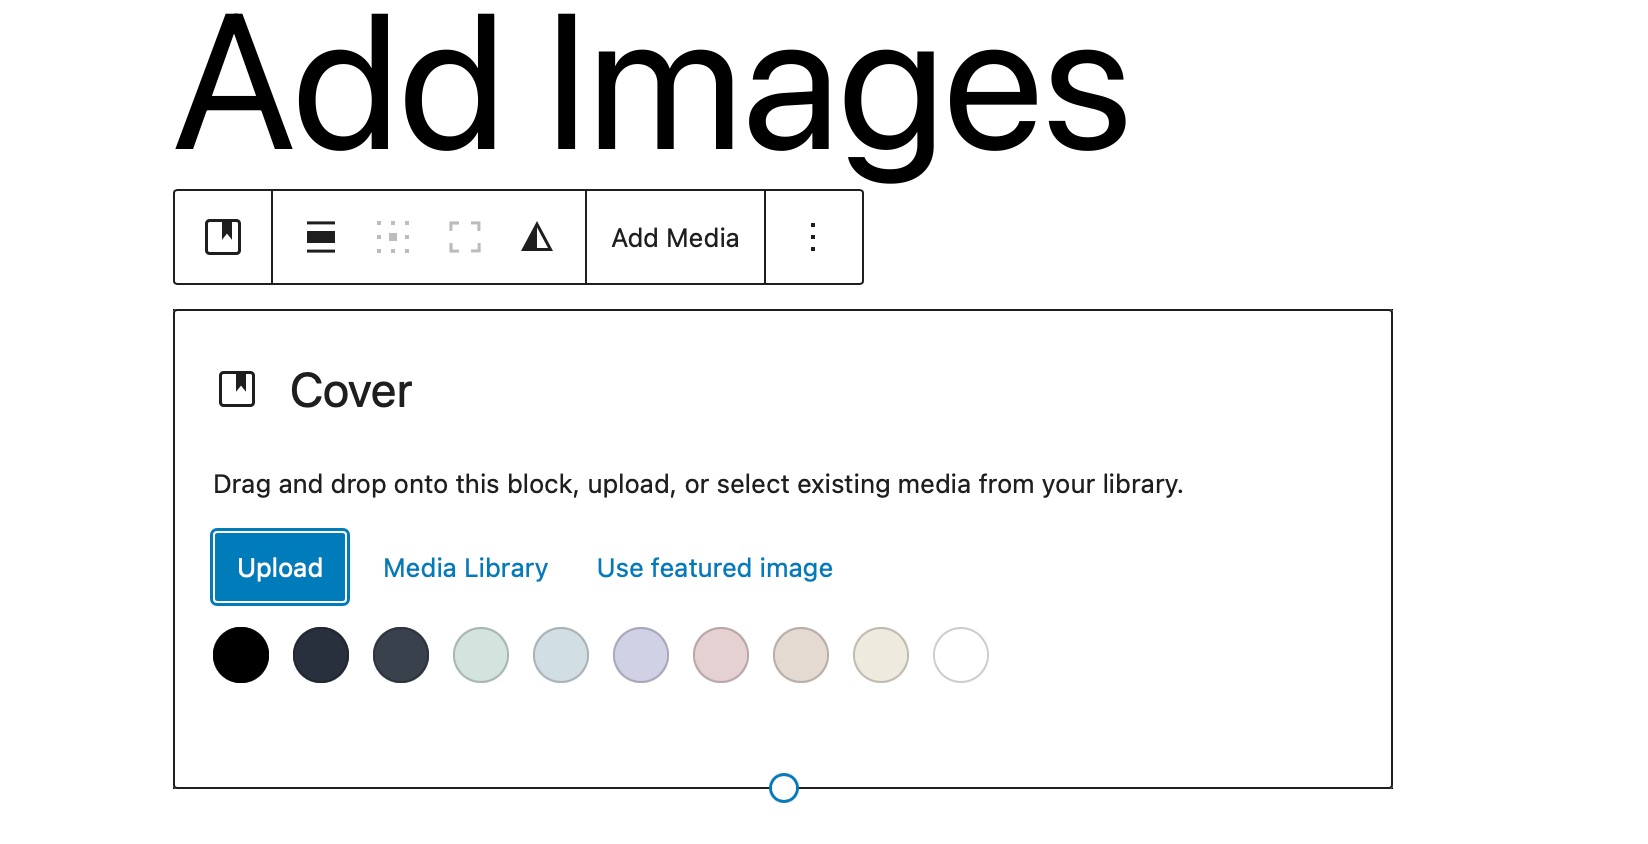
The block also comprises options for a fixed background, overlay with gradient, and different display styles. It lets you add an image along with a title on top of it.

2.4 Add Images Using the Media & Text Block
The Media & Text block enables you to add written content, videos, and image files side by side with the help of multiple layouts. To add this block to your post/page, click on the ‘+’ sign and select the Media & Text option, as shown below.
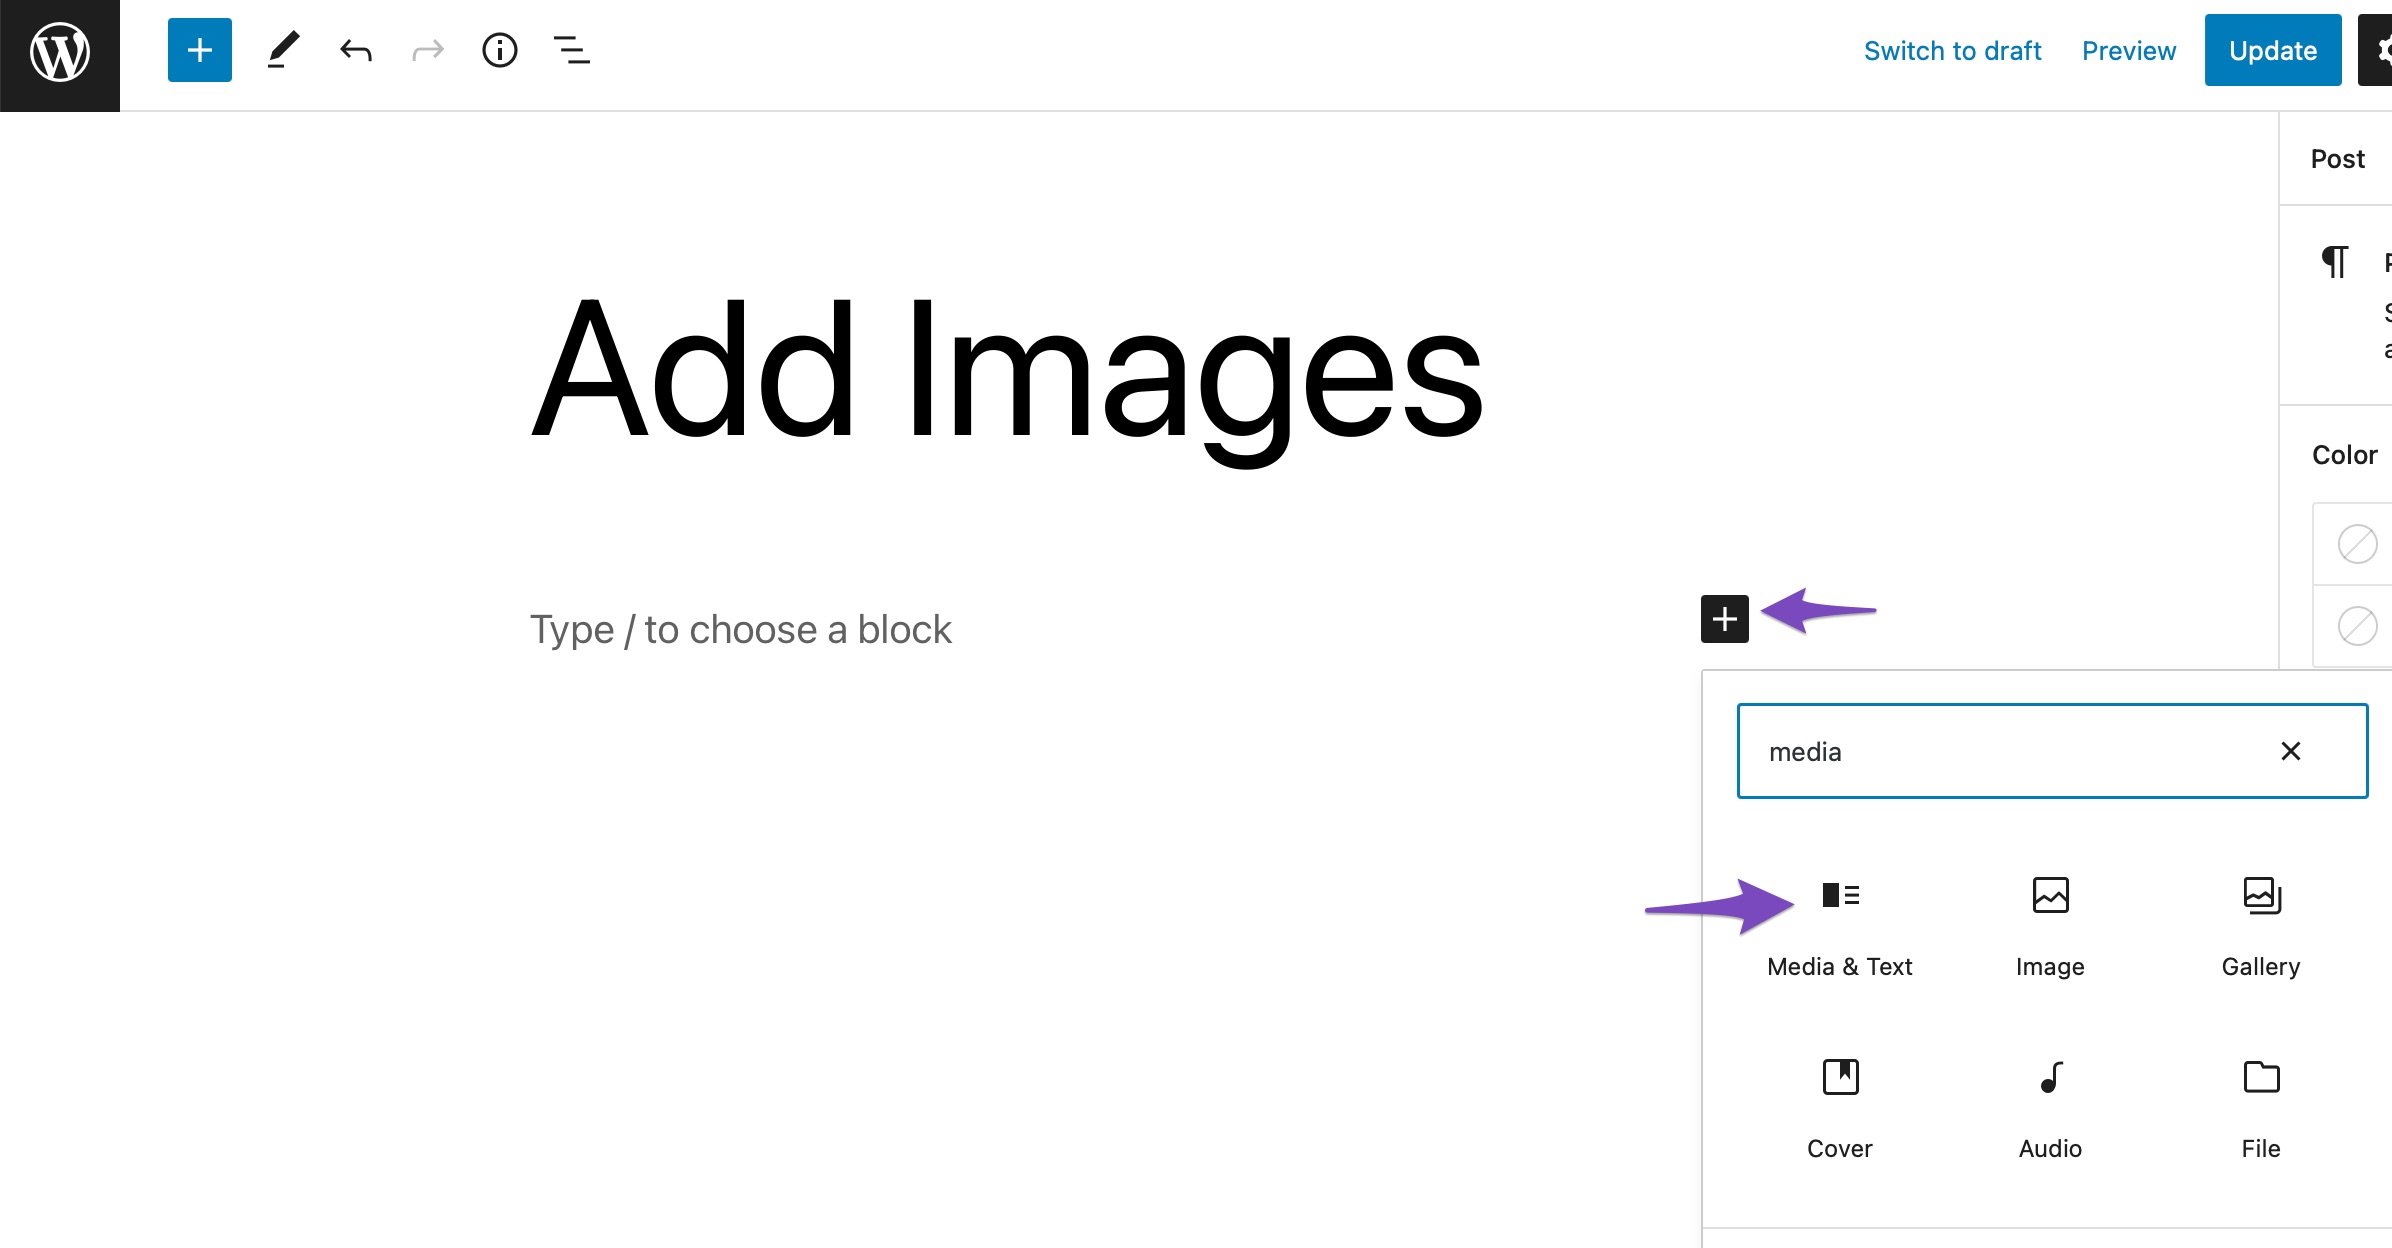
By default, the Media & Text block will add a layout that places images or video files to the left and written content to the right.
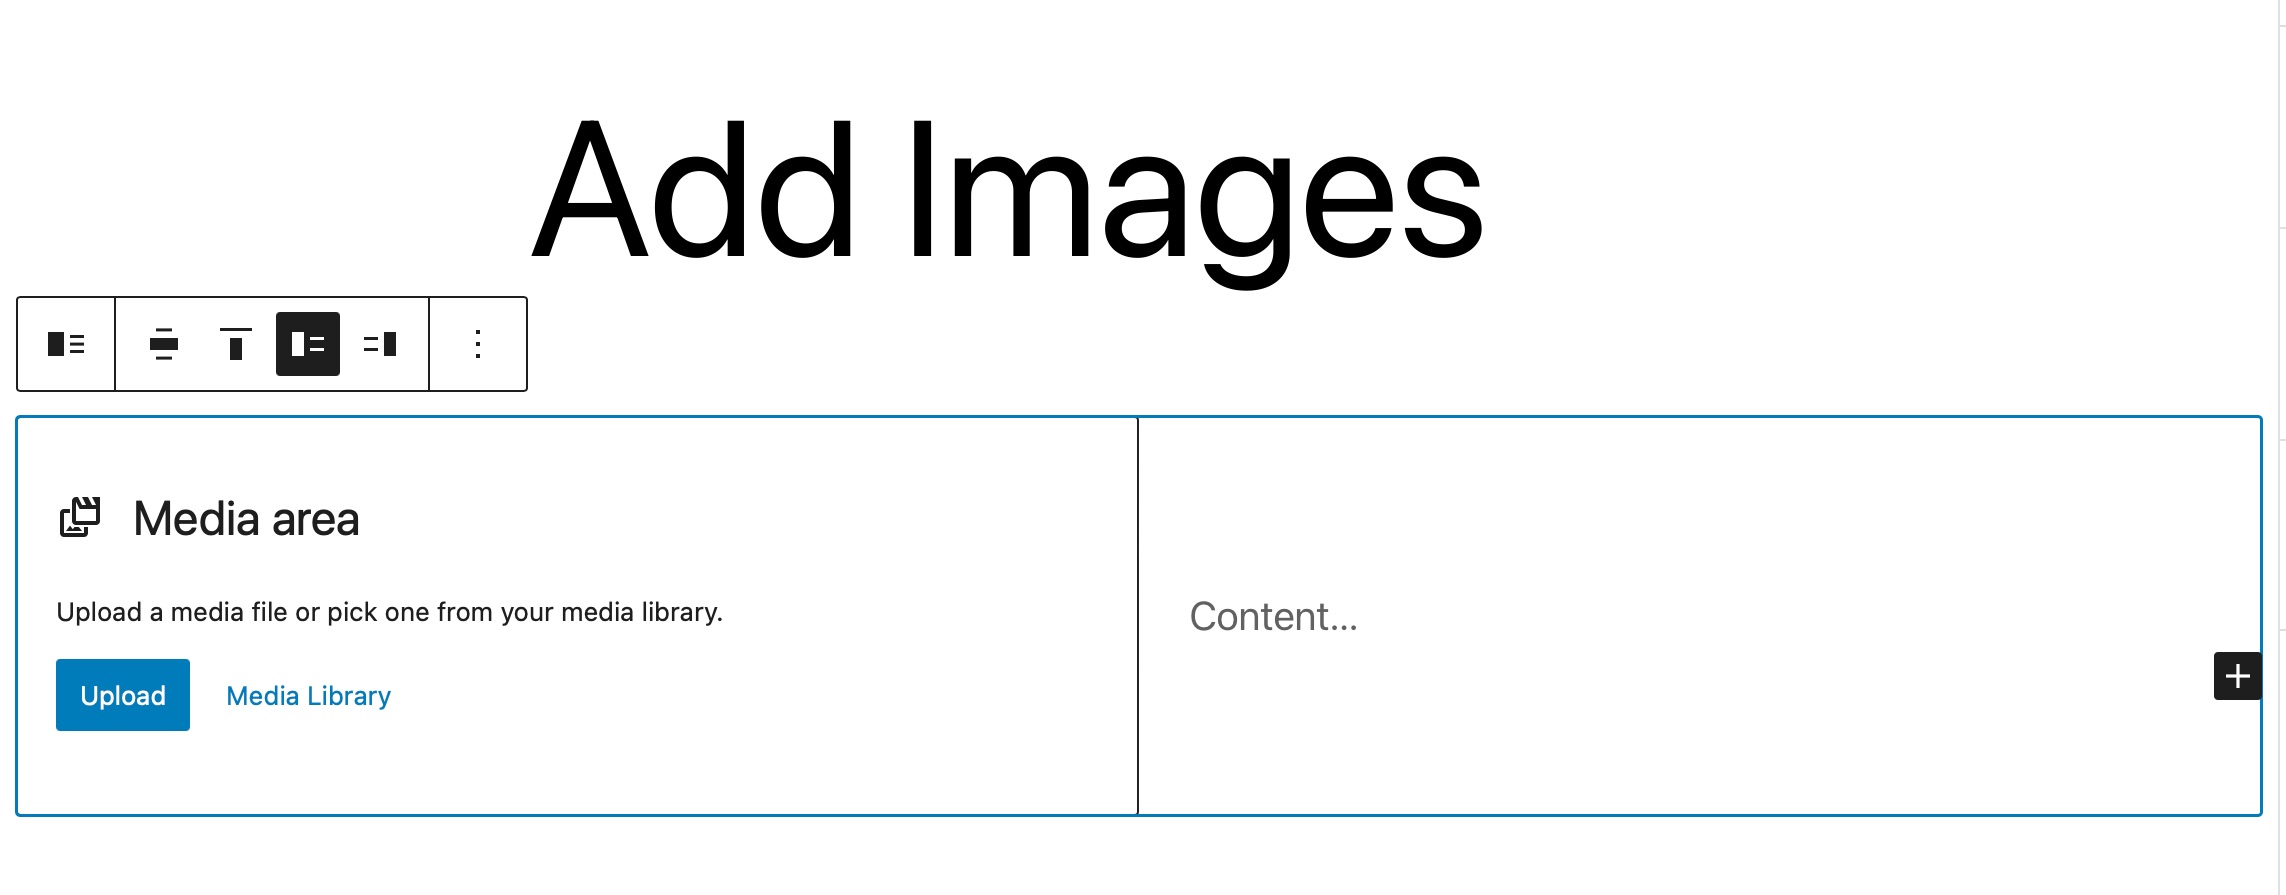
Next, click on the Upload or Media Library options to select a media file, as shown below.
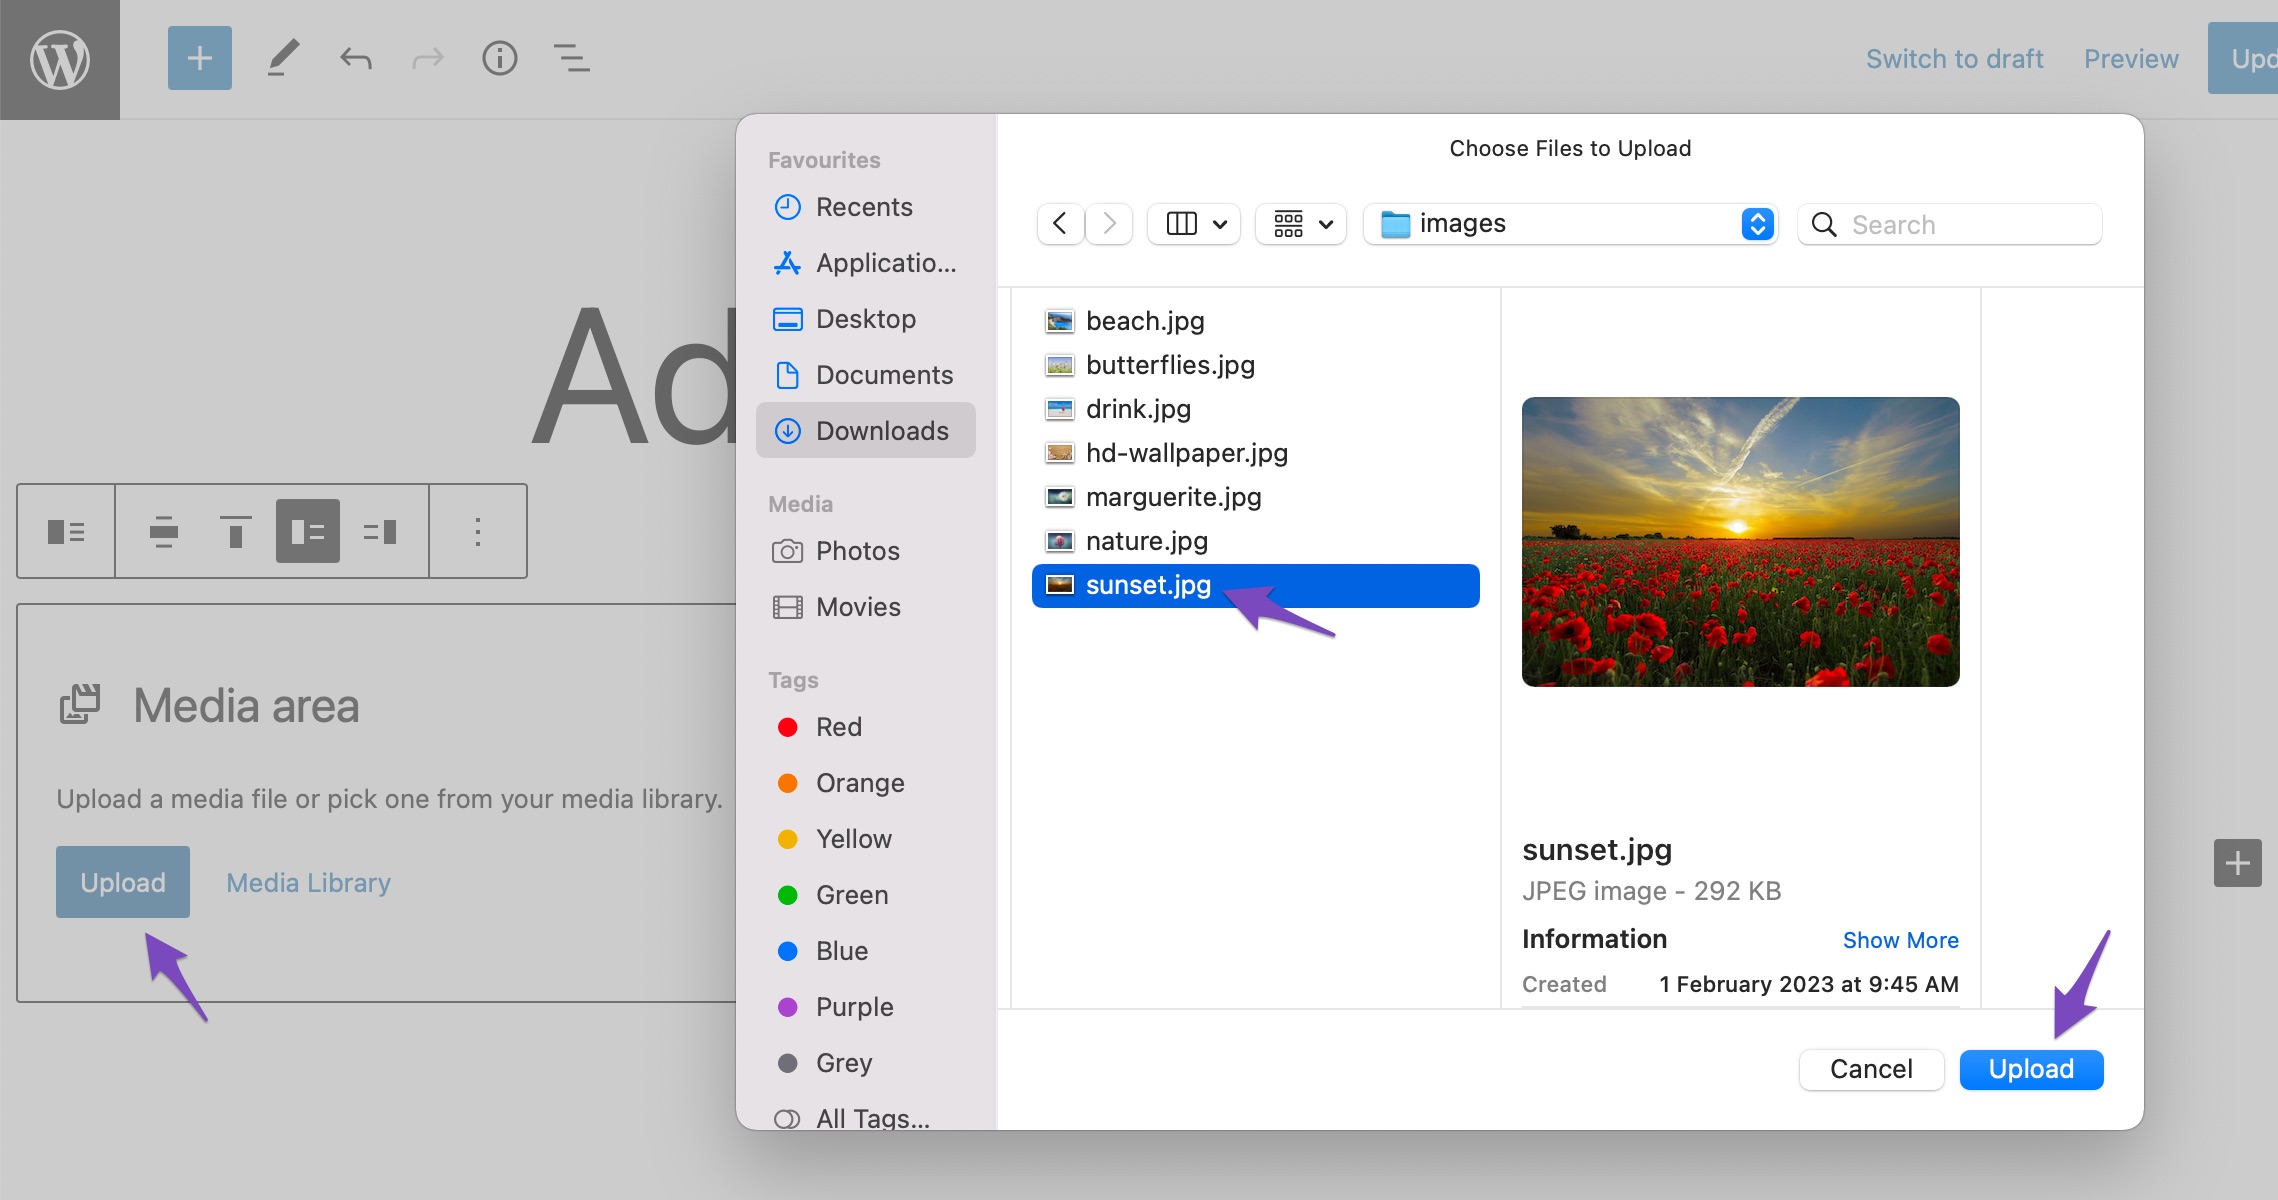
Once you’ve added an image or a video file, you can add the content in the Content section. Here’s a quick example of how it might look after you’ve added some content.
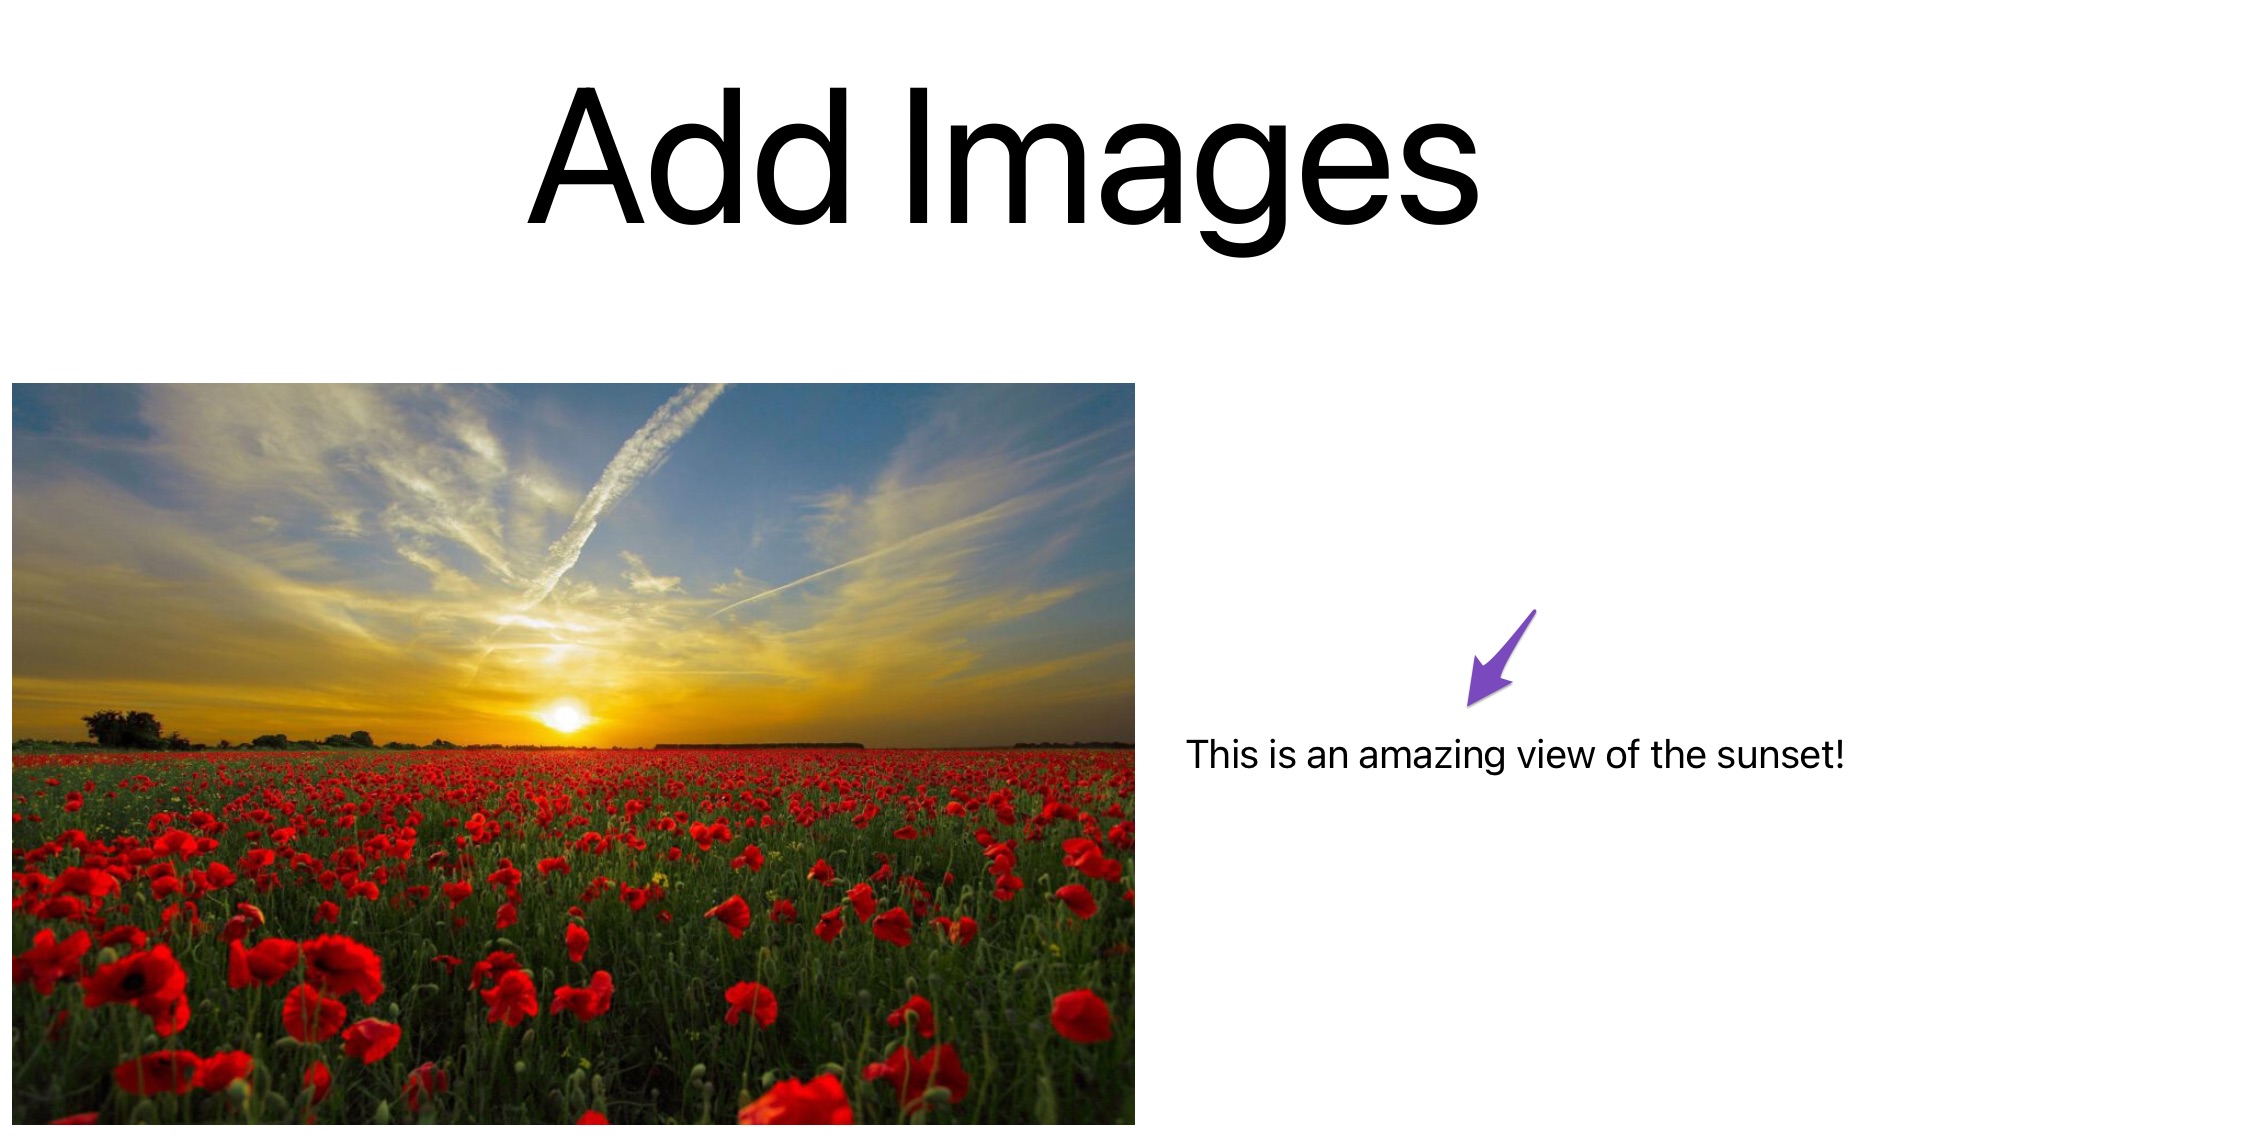
The Media & Text block is an exceedingly flexible option, as it places media and text pairs together beautifully and enables you to put them side by side with a simple layout that fits into any theme and page.
3 How to Add Images in Classic Editor
Let us now look at different methods to add images in your Classic editor.
3.1 Add an Image from Your Computer
You can easily insert an image from your computer in the Classic editor.
To do so, place the cursor where you wish to add the image in the editor. Next, drag and drop the image from your computer to the editor. Click on the Insert into post button, and your image will be added to the editor.
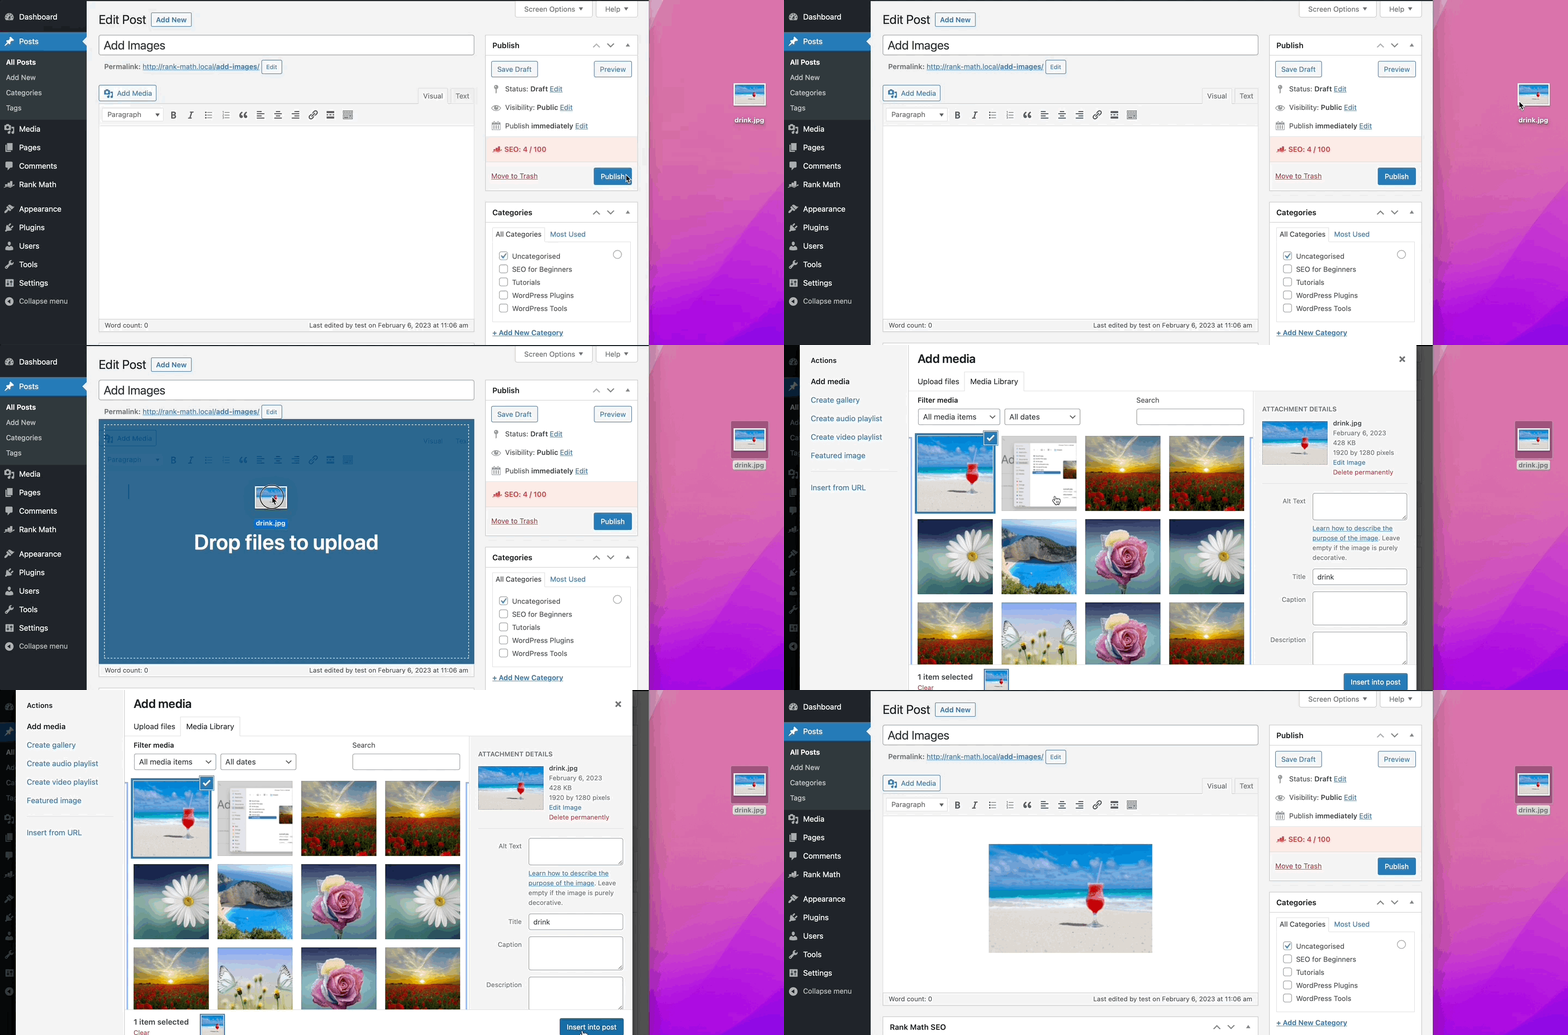
Once done, you can Update/Publish your post.
3.2 Add an Image from the Web
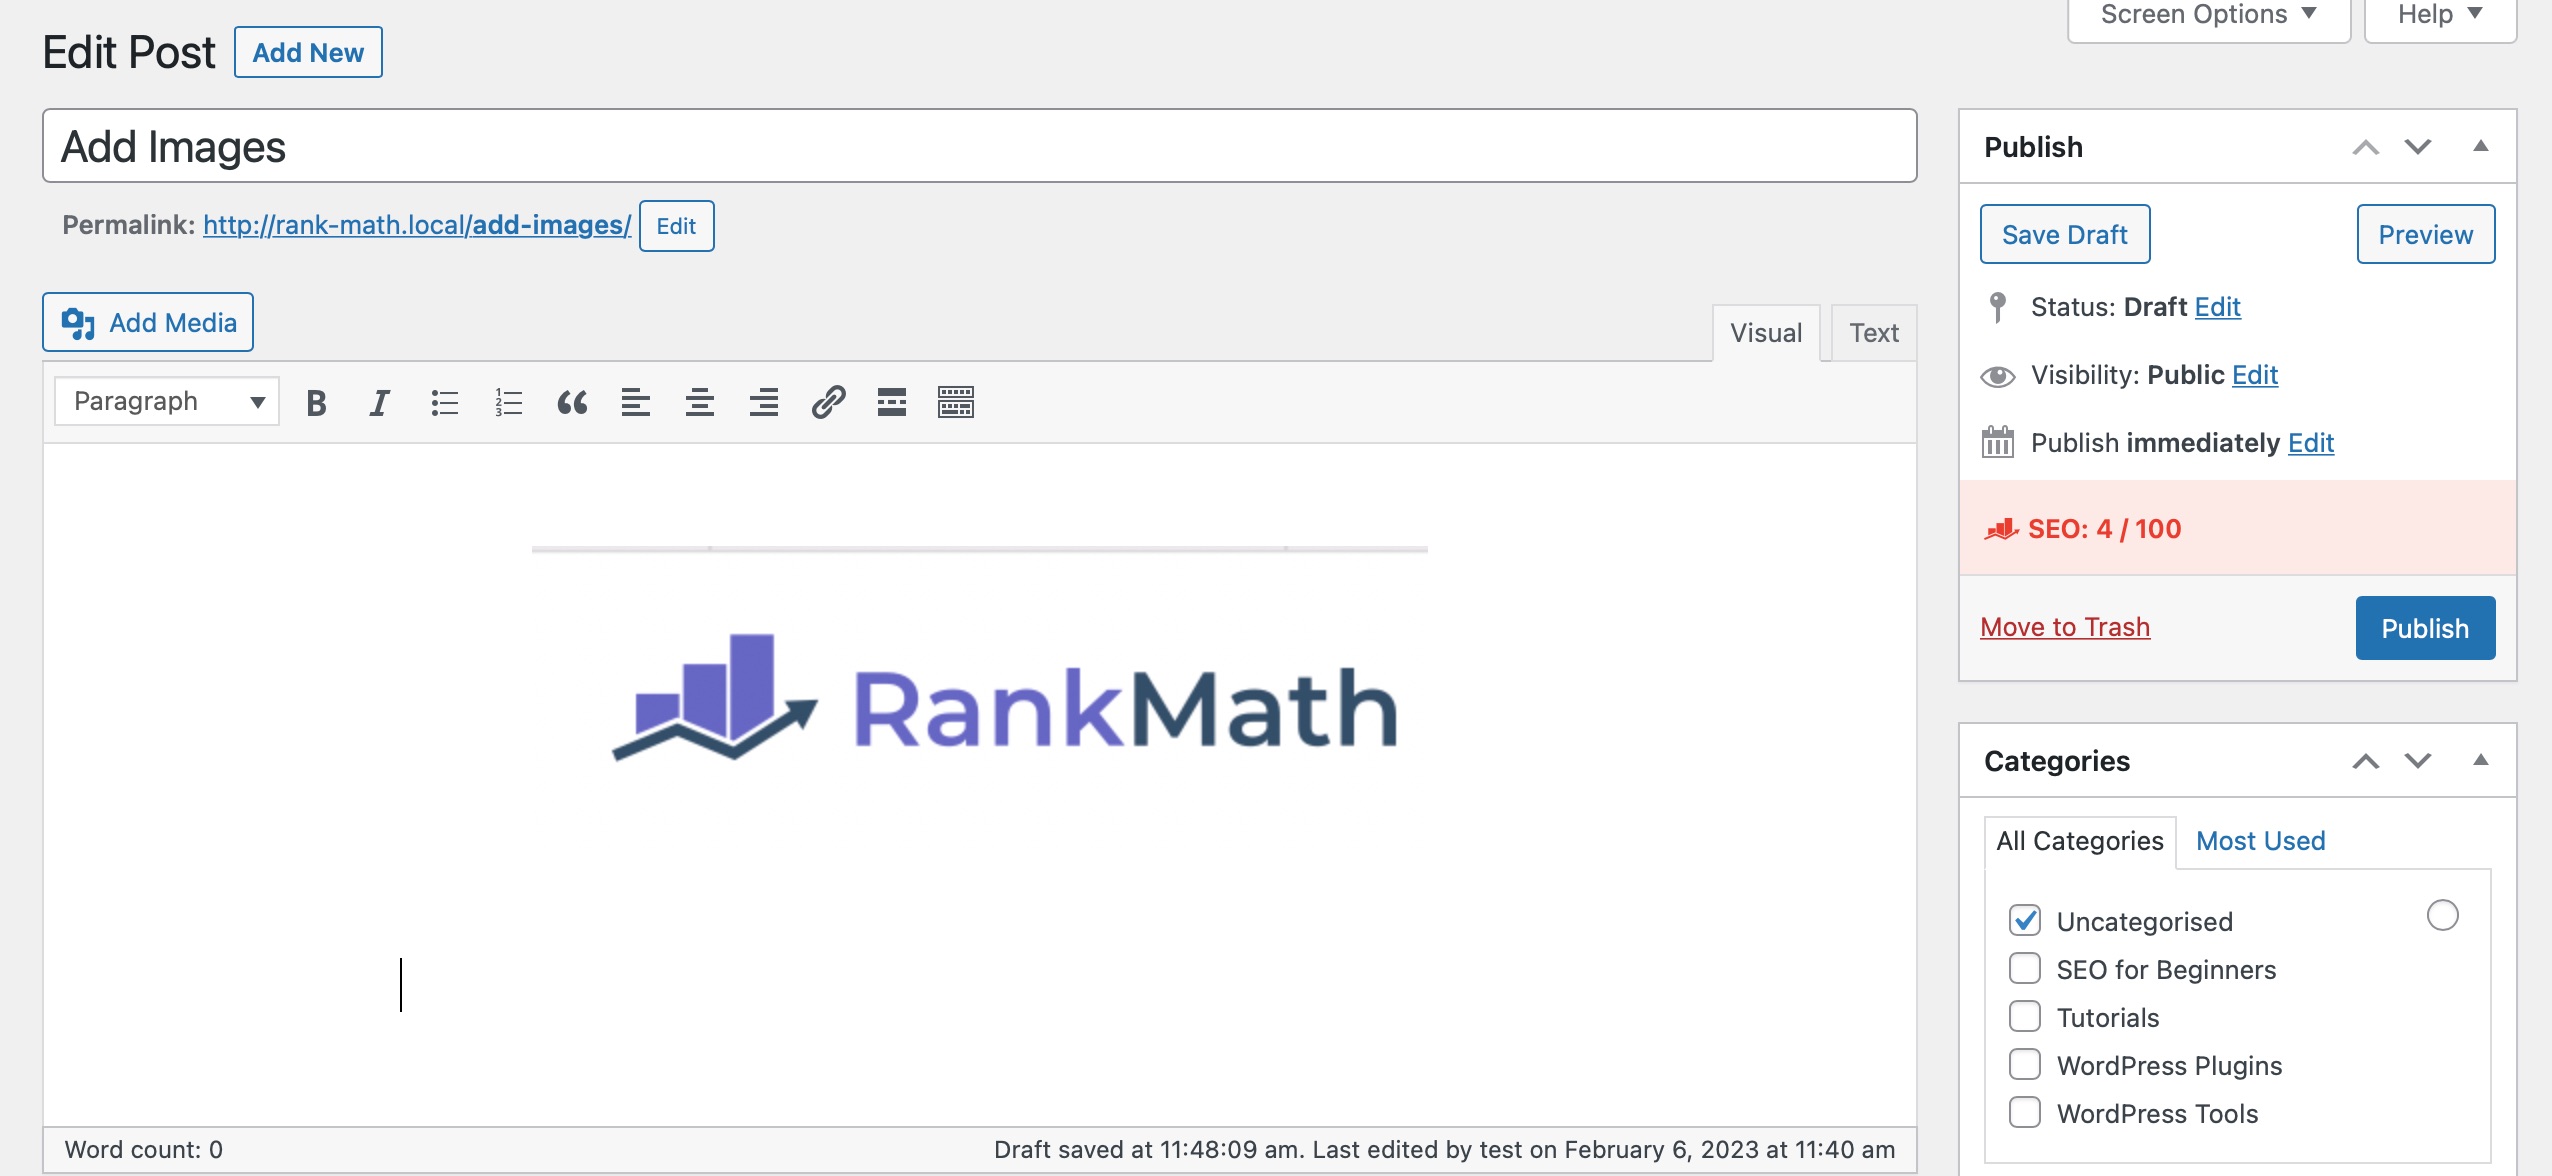
To add an image from the web, place your cursor where you want the image to appear and click on the Add Media button, as shown below.
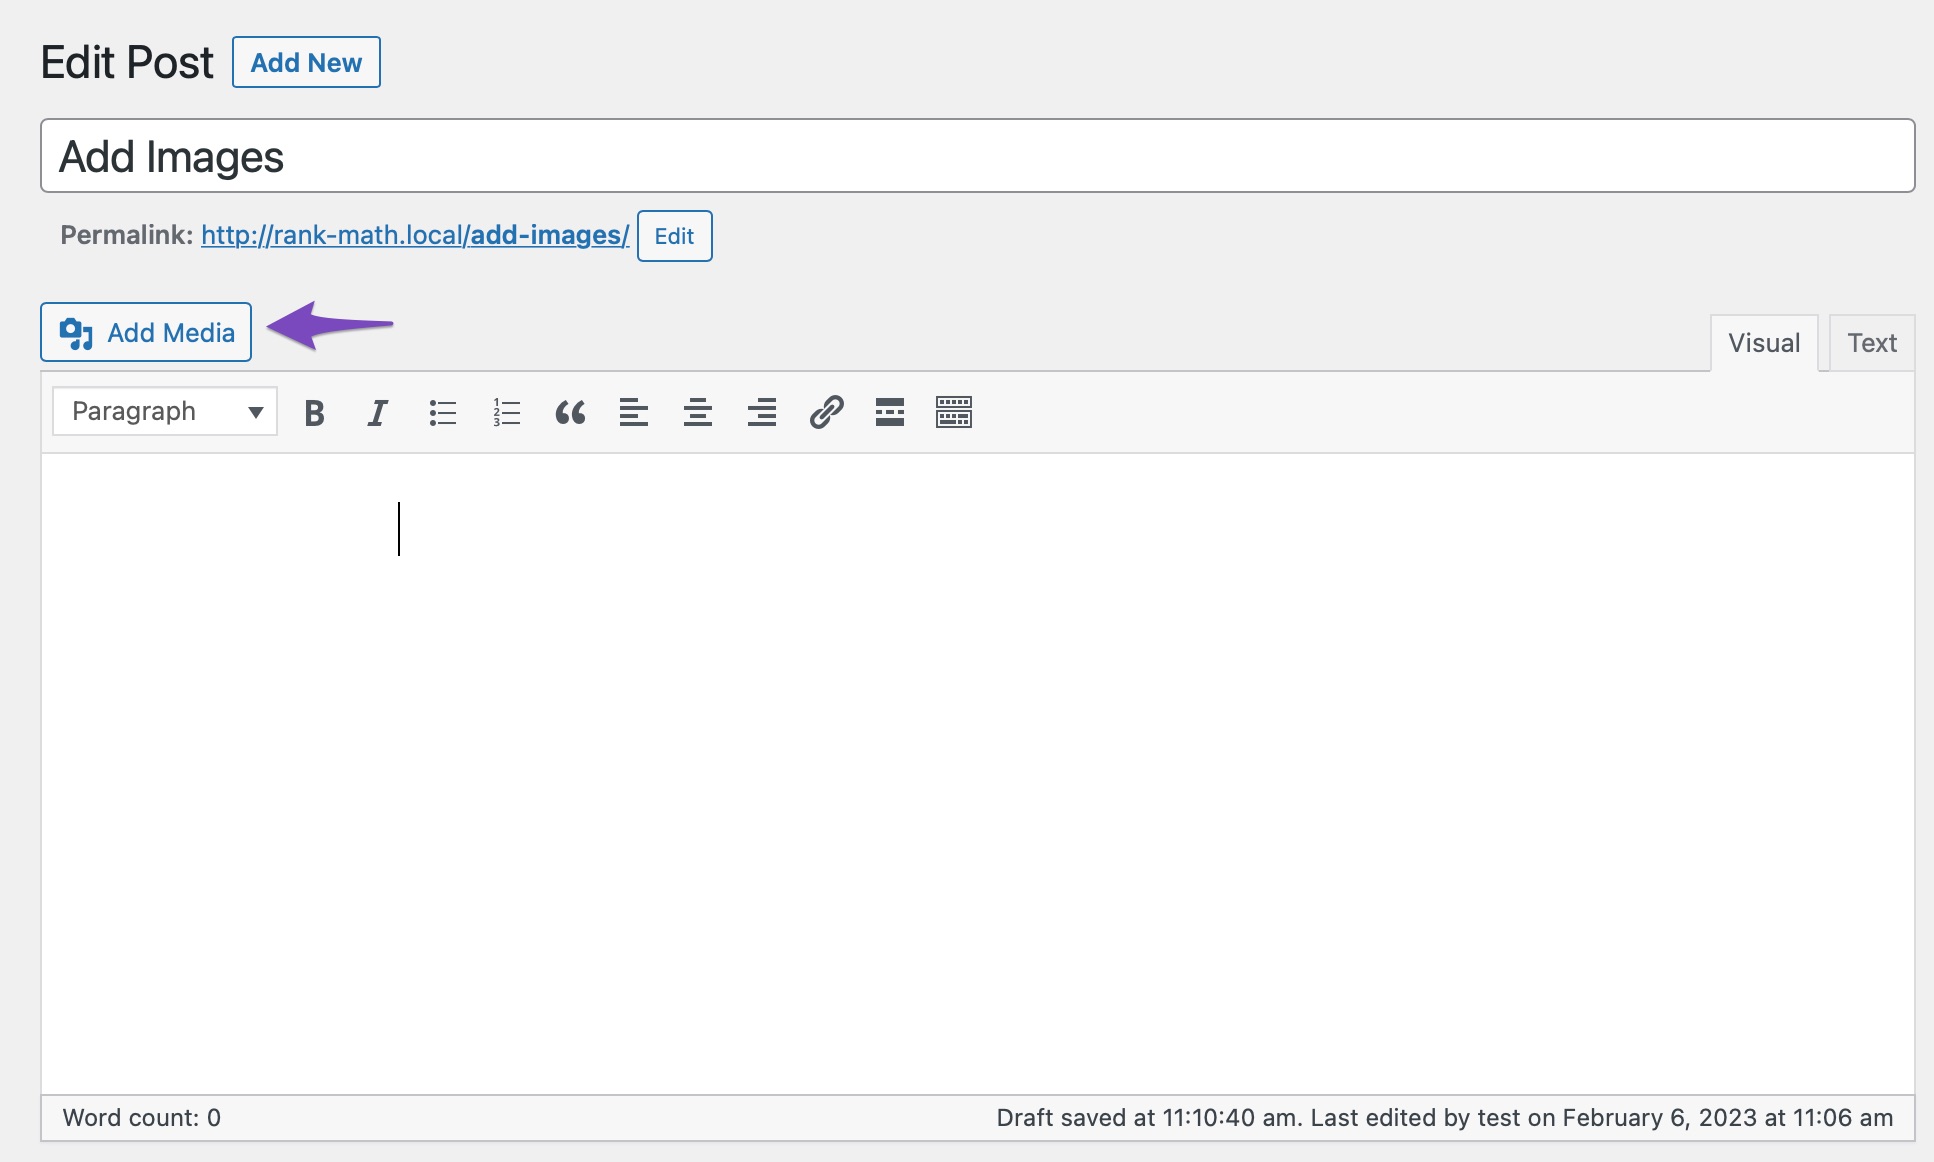
Next, choose Insert From URL and paste the URL of the file, as shown below.
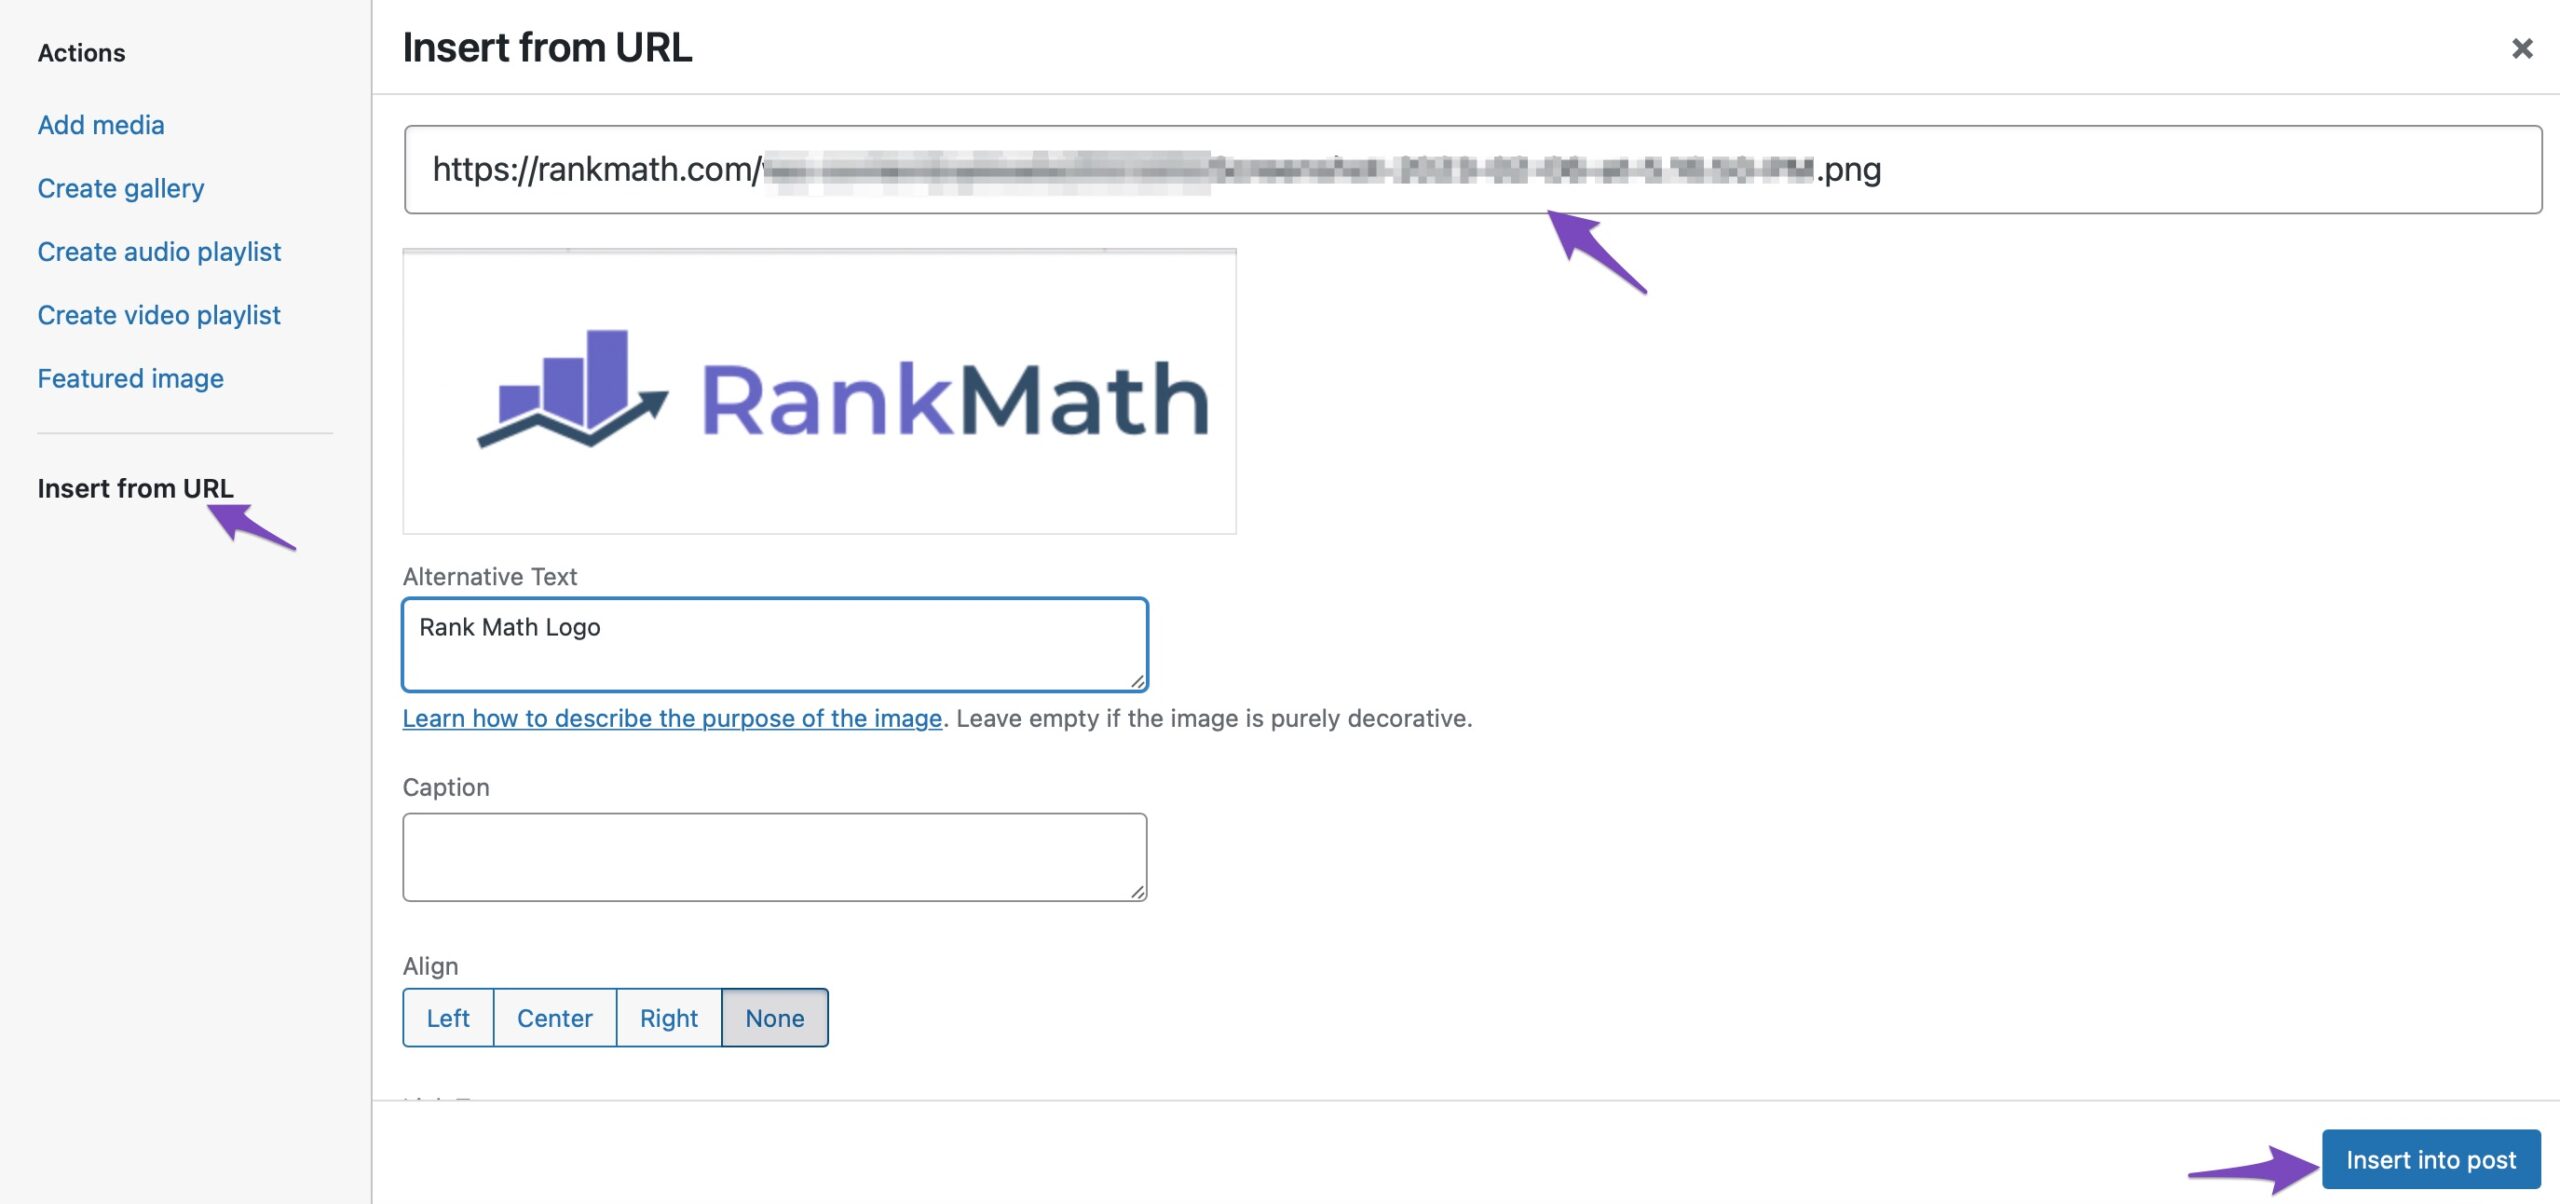
Once done, click the Insert Into post button, and your image will be added to the Classic editor.
3.3 Add Images from Media Library
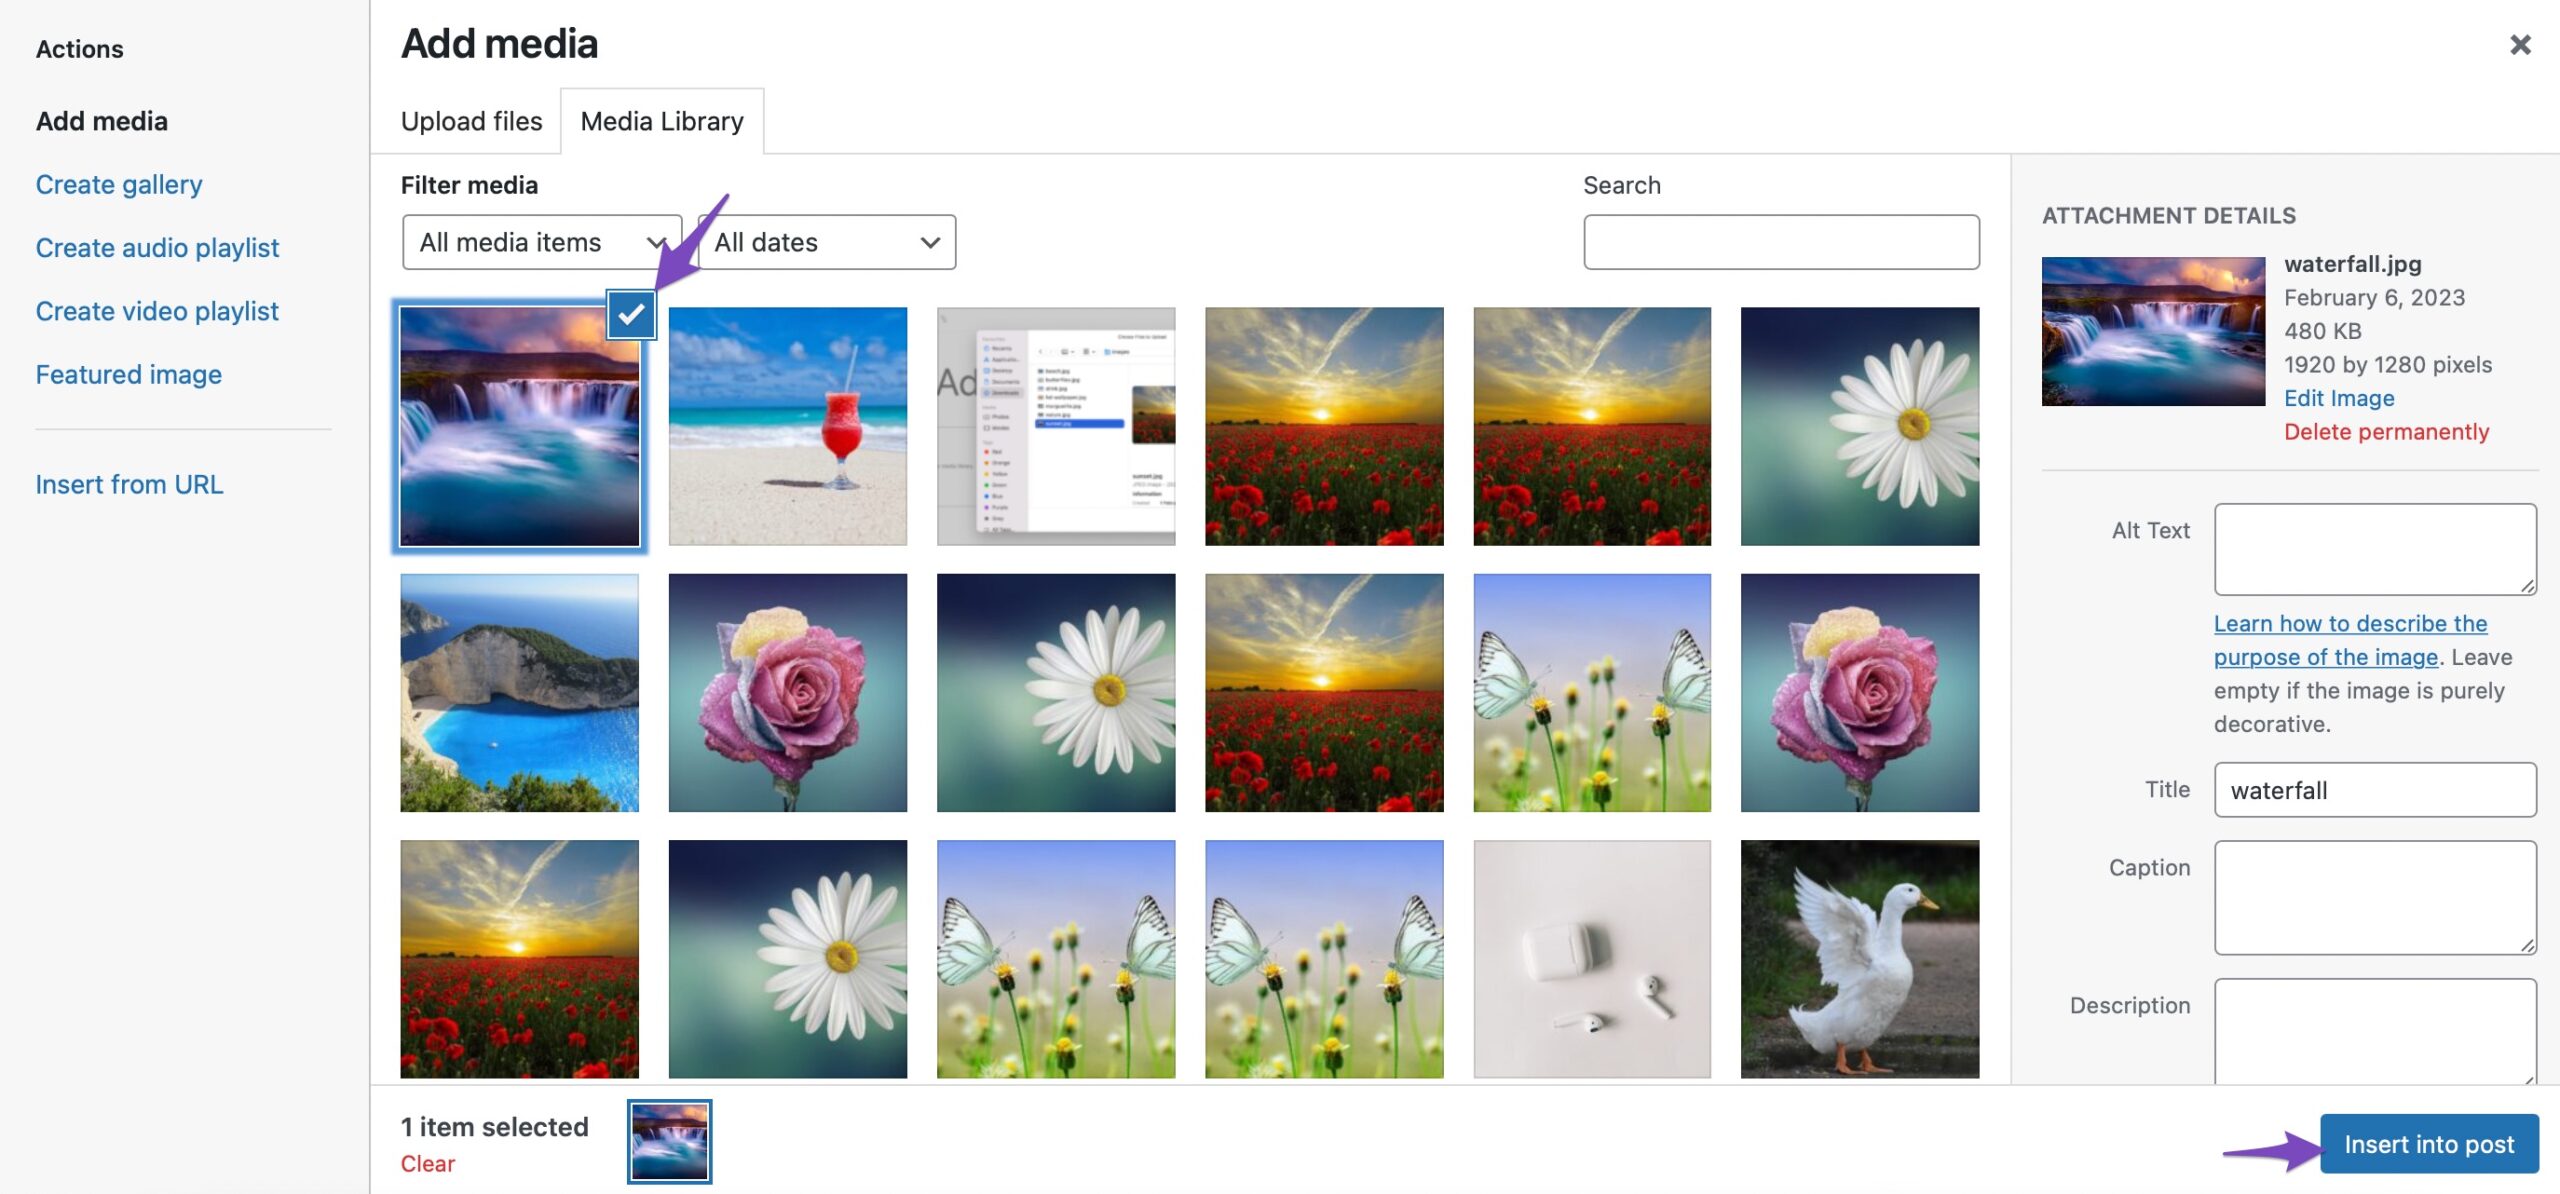
To add an image from your Media Library, place the cursor where you want the image to appear and click on the Add Media button.
Choose the image you wish to insert and select it. You can also select multiple images. Next, click the Insert into post button to add the image to your editor.
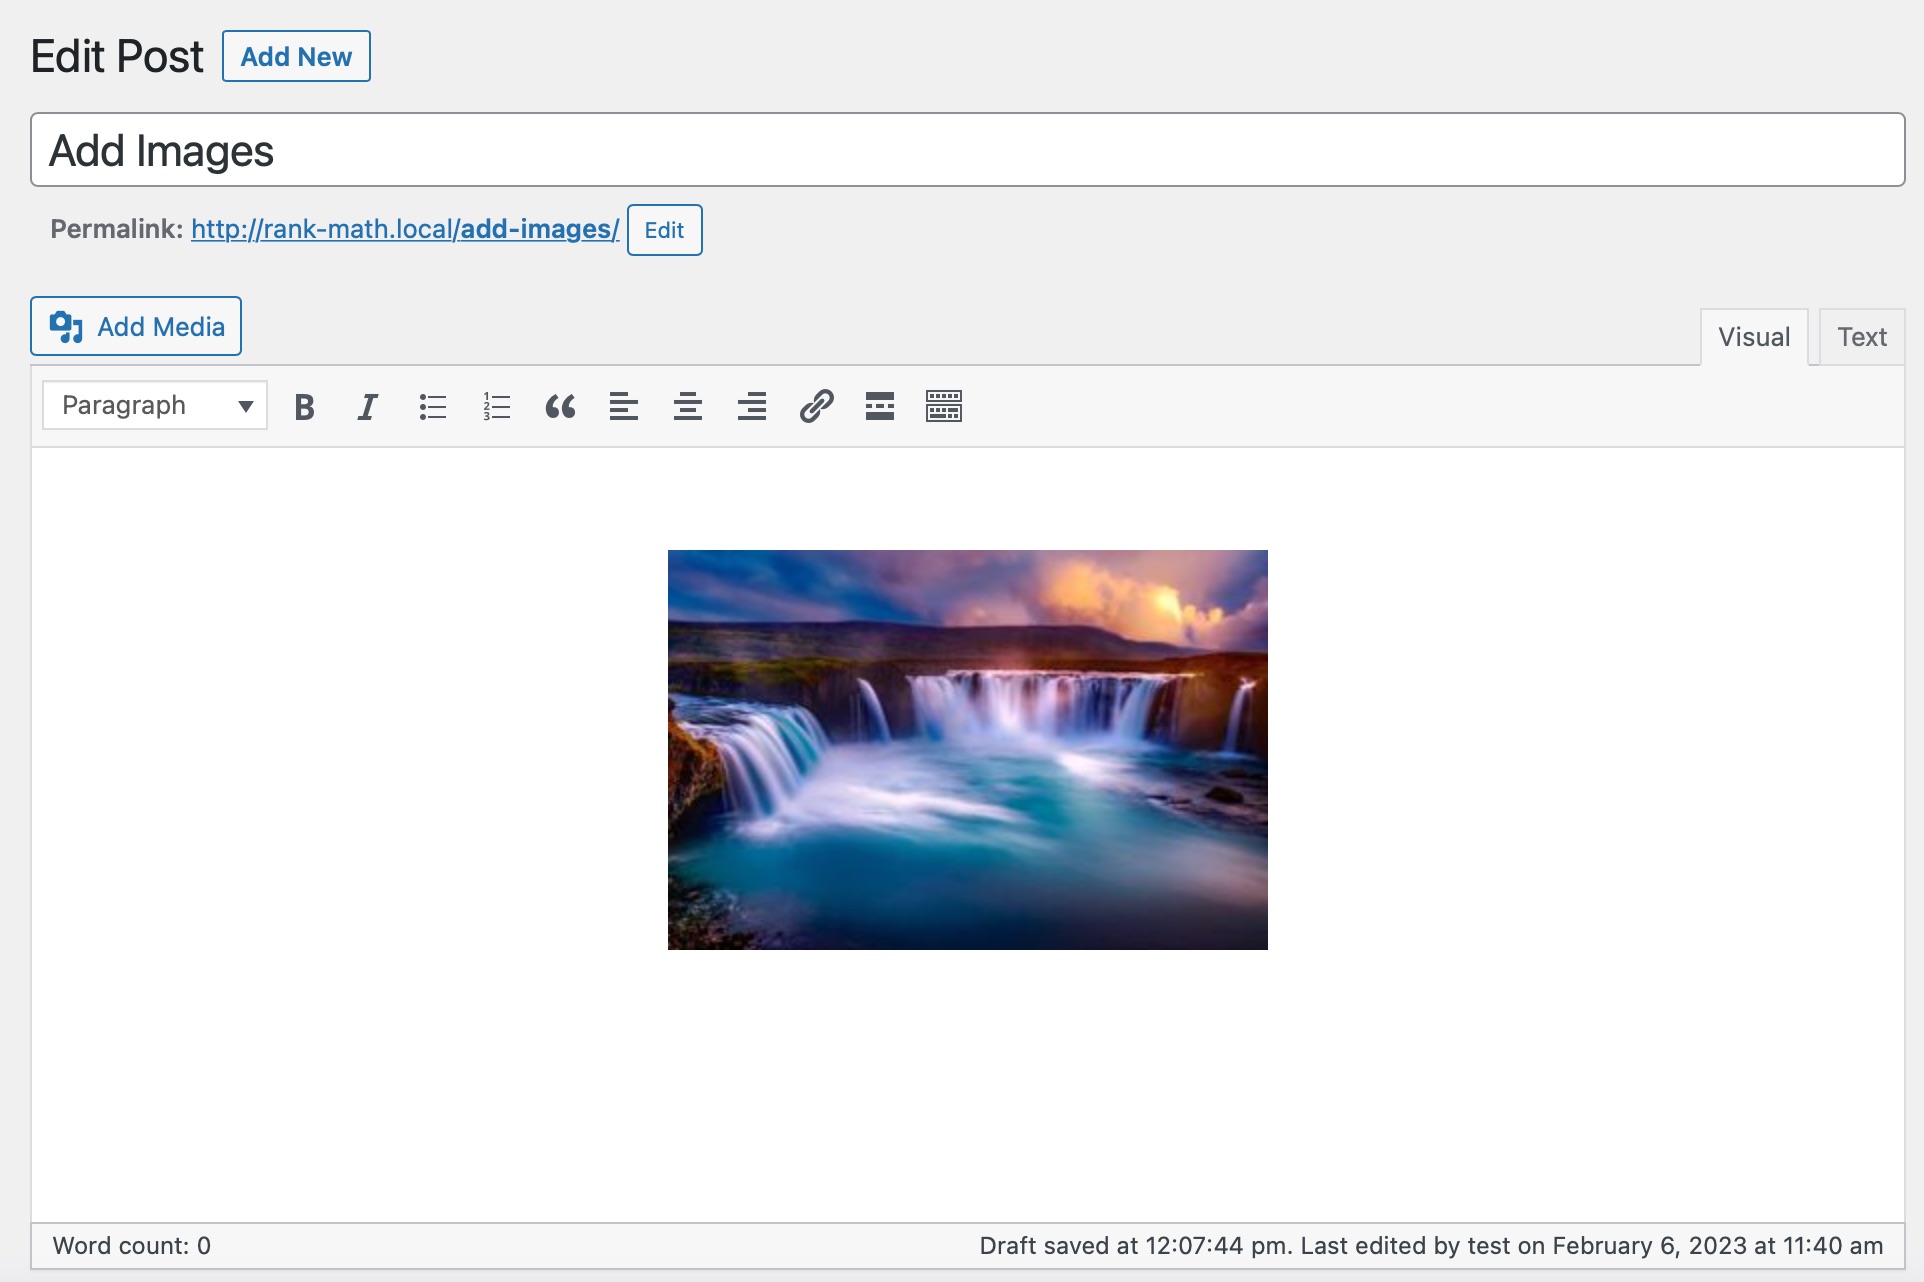
And that’s it! The image will be added to your editor.
4 Conclusion
We hope this article helped you learn how to add images in the WordPress editor easily. You may also want to see our guide on optimizing images for search. If you happen to face any issues while uploading images to WordPress, you may need to refer to our detailed troubleshooting guide.
Have any additional questions about adding images you’d like us to cover in this post? Let us know by Tweeting @rankmathseo. 💬
