WordPress is one of the most popular content management systems in use today. While it’s relatively easy to use, there are still some issues that can trip up even experienced users.
One of those things is to replace images and media files on your site.
Images and media files are essential for any website as these help in adding value to the content and make it more attractive for the visitors.
With that said, WordPress helps you add images and media files easily. However, what if you need to replace the image or a media file just because it’s outdated, or you may have found a better one to use?
You can mitigate these issues using a powerful Enable Media Replace plugin to streamline your efforts.
In this post, we’ll show you how to replace images and media files in WordPress. So without any further ado, let’s get started.
Table of Contents
1 Why Replace Images and Media Files in WordPress?
Images and media files can be a great way to add an element of visual appeal to your blog posts and articles. However, they can take up a lot of space on your website over time.
It can be a hassle to remove them every time you want to make a change to your blog post or article, and it’s also difficult to keep track of which files you need to keep and which you can delete.
We’ll mention a few instances when you might find yourself wishing you had a quicker way to replace these media files.
1.1 Move to a Different Domain Name
If you have ever had to move a WordPress website to a different domain name, you have probably encountered an issue with image files and media attachments. That’s because your WordPress database stores the URL for these files and not the actual file name. So when you change your domain name, the old domain name is still stored in your database for each file.
1.2 Online Shop
An online shop deals with many product images, so managing them effectively is important. This includes being able to replace and update the images with ease.
1.3 Change the Logo
If, at any given time, you choose to change the logo of your site, you want to make sure that it will be changed everywhere on your website.
All these and many other common situations are easily solved with the right plugin like Enable Media Replace. Let’s now see how to use this plugin to replace media files on your site.
2 How to Replace Images and Media Files in WordPress?
The Enable Media Replace plugin streamlines the replacement of images and files into a quick and easy process that only requires a few clicks.
For instance, we’ll replace the below image with some other image with the help of this plugin.

2.1 Install and Activate Enable Media Replace Plugin
To begin with, install and activate the plugin by navigating to Plugins → Add New section of your WordPress dashboard.
Search for the Enable Media Replace plugin in the search bar, install and activate it as shown below.

Once activated, it works wonders, and there are no settings for you to configure.
2.2 Replace WordPress Media Files
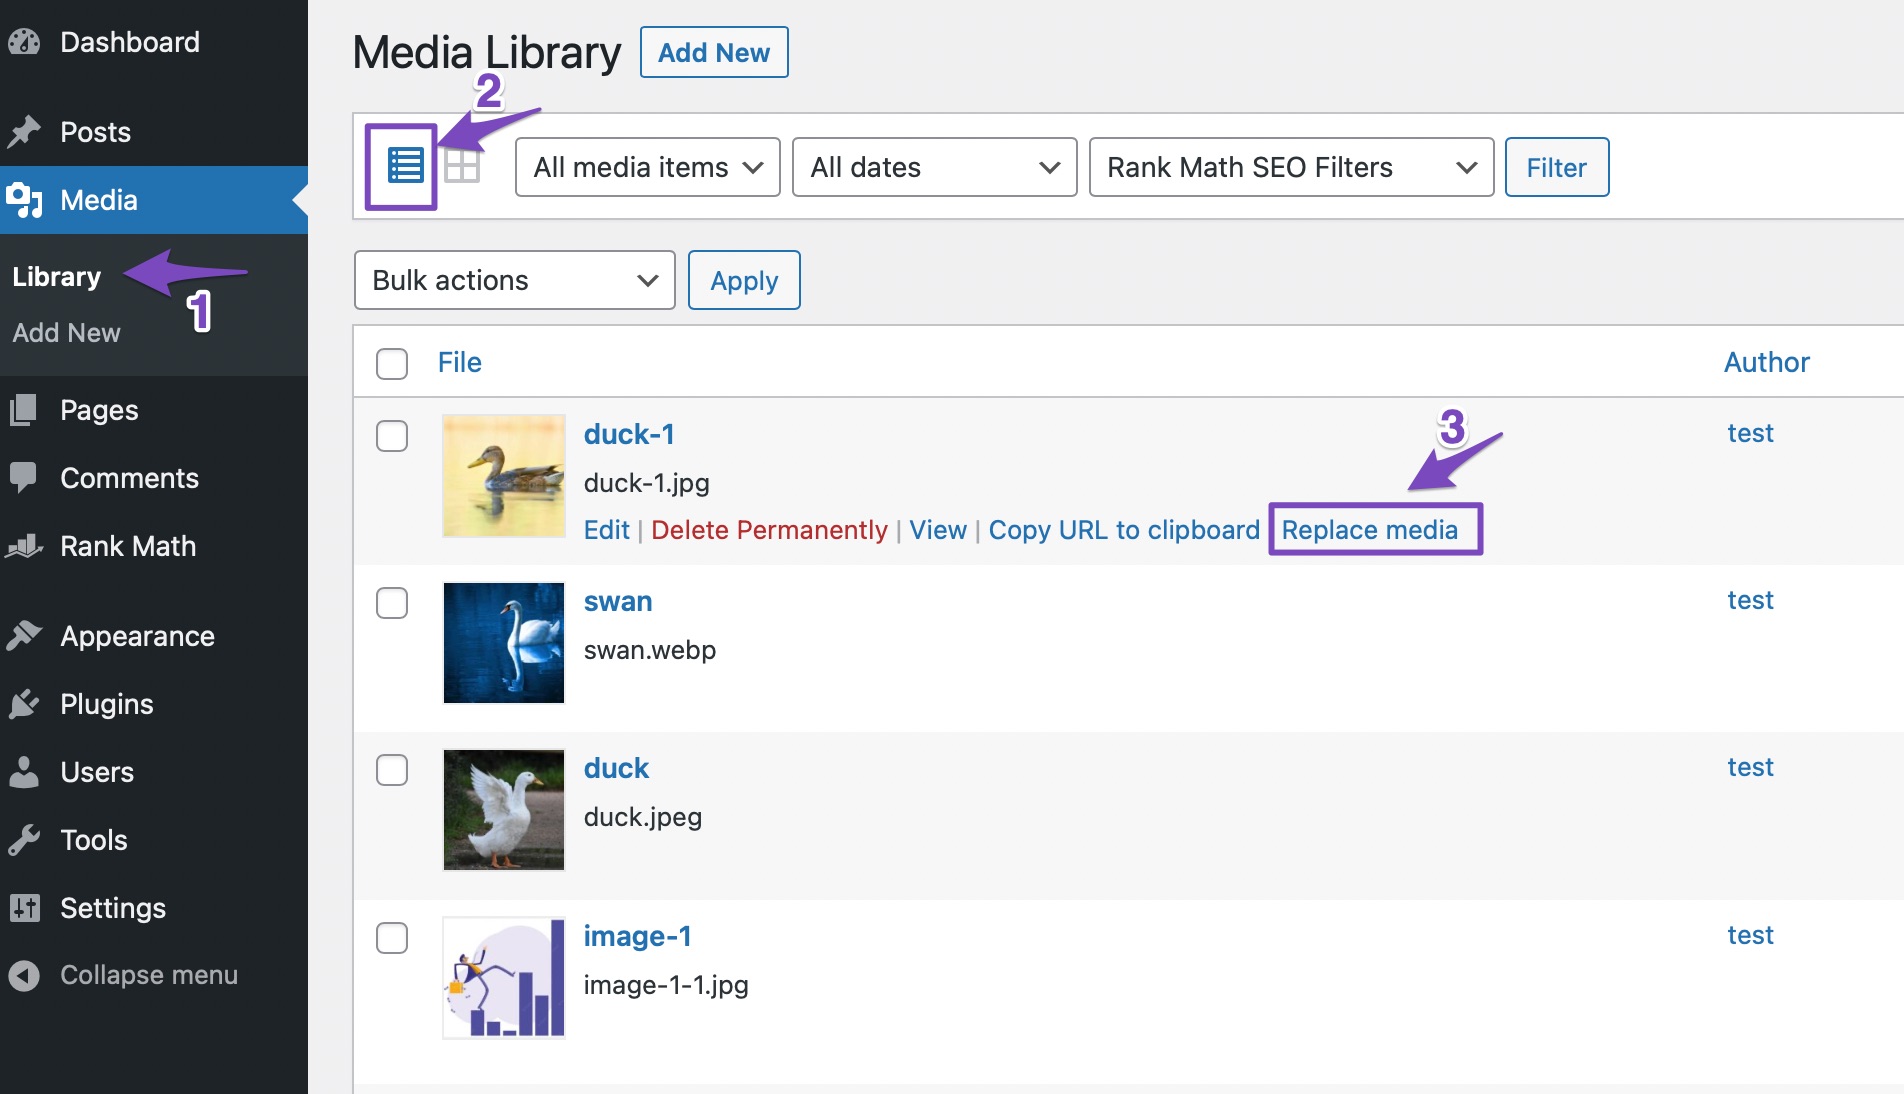
To replace your media files, navigate to Media → Library from your WordPress dashboard. You’ll have to switch to the list view if you’re using the grid view.
Now locate the file that you wish to replace. Once you have found the file, hover your mouse near the file name, and you’ll notice a link labeled Replace media, as shown below.

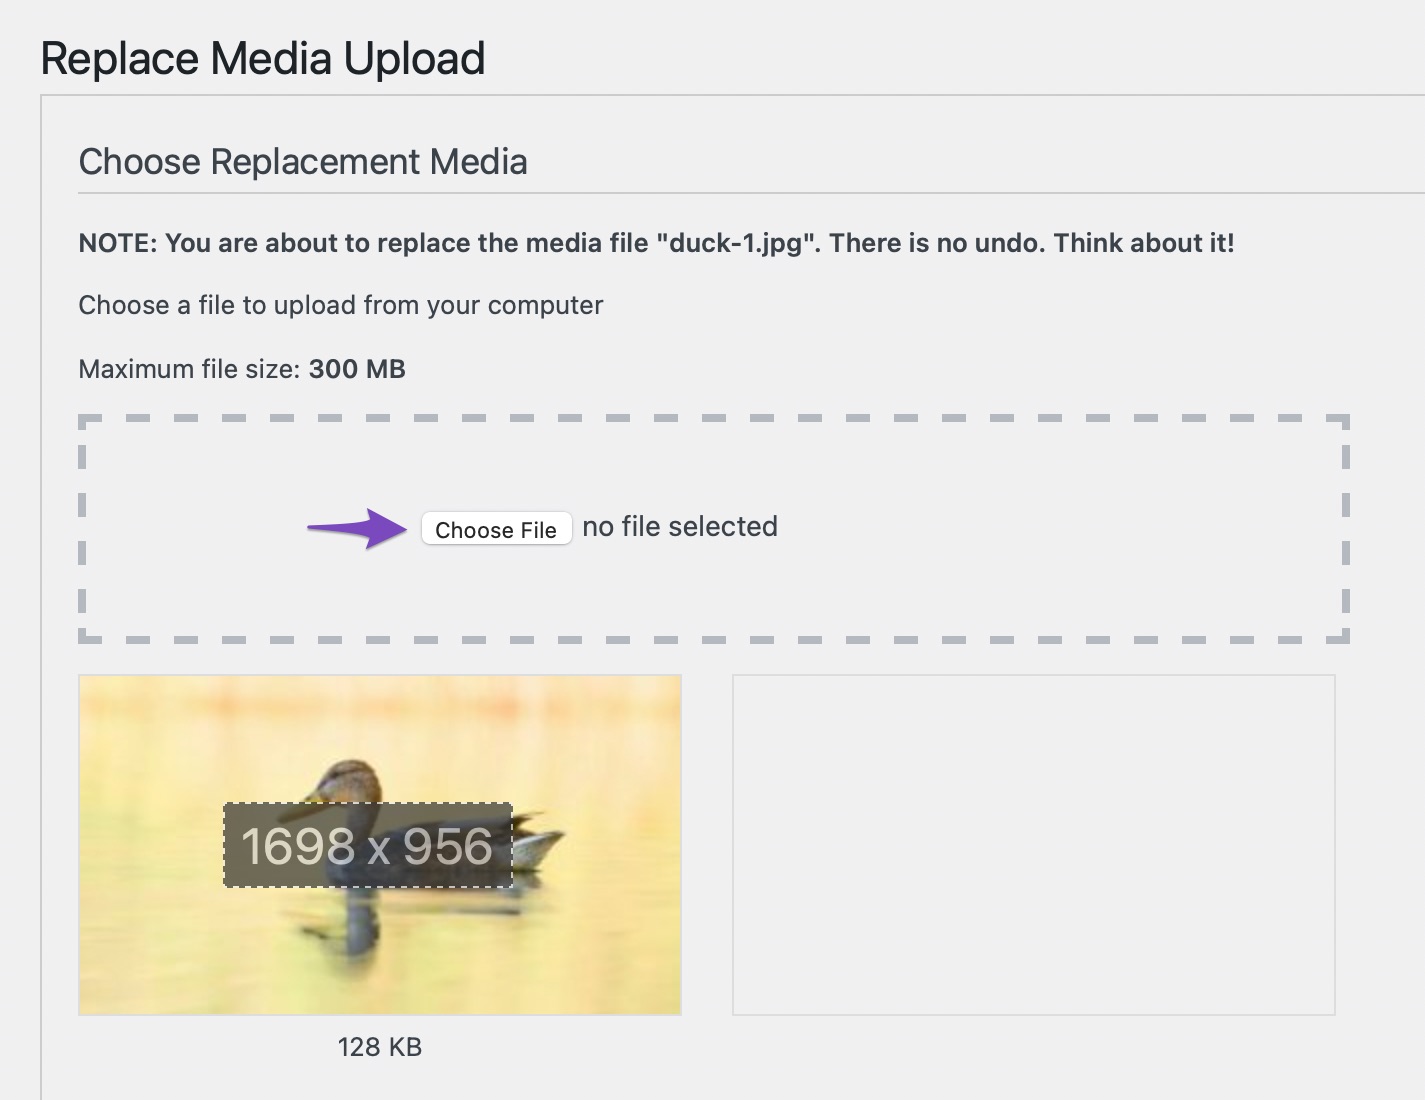
You’ll be navigated to the replace media page when you click on the link. You need to upload your new file by clicking the Choose File button.

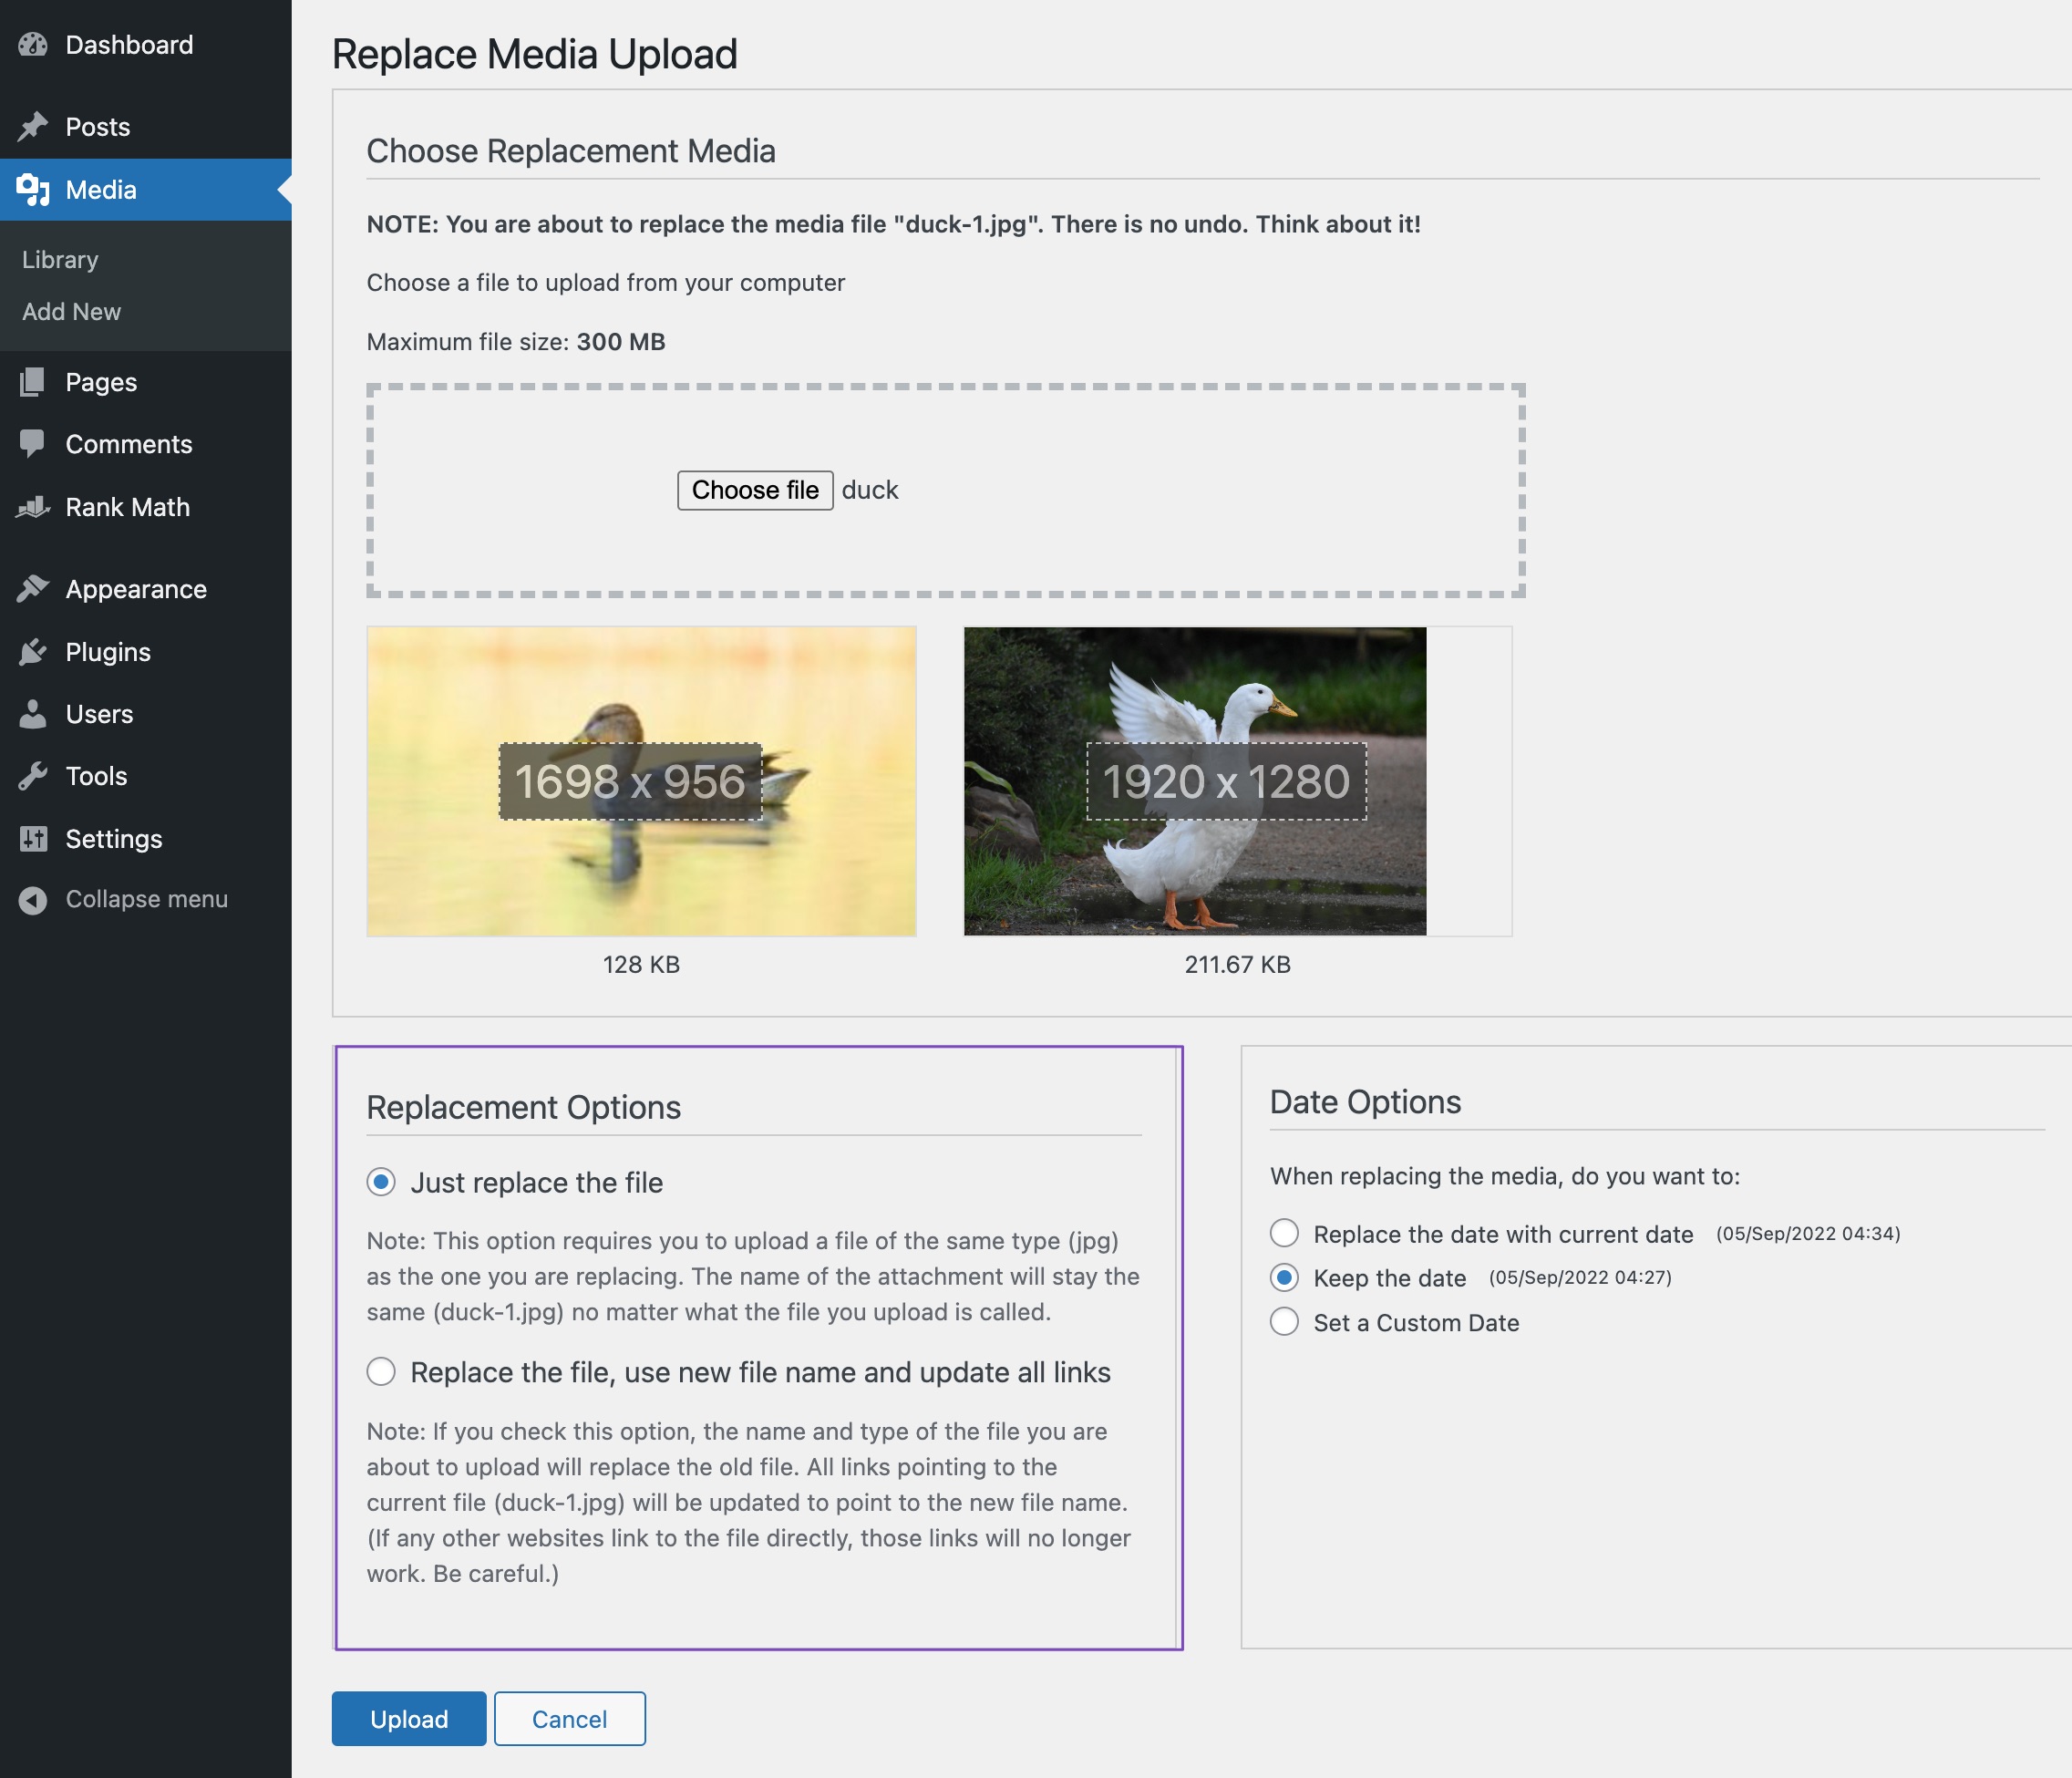
Once you choose the file, you have two replacement options. You can choose only to
- Replace the file or
- Replace the file, use a new filename, and update all links pointing to the old file.

Once you’ve selected any one of the options, click on the Upload button. The plugin also provides Date Options, and you can choose any one of the options that best suit your needs.
WordPress will now upload your media file, and the plugin will replace the previous one. The plugin will also take care of using new filenames and updating links if you choose to do so.
Now that the new file has been uploaded, you may visit the posts or pages where you previously attached the media file to see how it has been replaced.

3 Conclusion
Anyone who operates a website is aware that it is impossible to predict how frequently a particular image or media file will be seen by visitors.
With the help of Enable Media Replace plugin, you can replace a file with another and be sure that it will be replaced everywhere it appears on the website without leaving any empty spaces on your pages, saving you the time and effort of manually looking for and changing the files.
Also, remember that if you want to maintain your search ranking, loading speed, and high-quality user experience, the newly added media files must be optimized just like the old ones.
Have you ever felt the need to replace images and media files on your website? Let us know by Tweeting @rankmathseo.💬
