When a result is displayed in Google search, it is standard practice to have the site name at the top, followed by the content URL and meta title. However, Google may throw things around and display the homepage URL instead of a site name.

You may not like it when Google shows your site this way. You want Google to display your site name at the top of your results, just as it does for everyone else.
In this knowledgebase article, we will explain why Google displays your homepage URL and show you how to get it to display your site name.
Table Of Contents
1 How Google Determines Your Site Name
To understand why Google displays your URL in place of your site name, you must first understand how Google determines your site name.
Google uses four methods to determine your site name.
- The name in your homepage’s title tag.
- The name in your homepage’s H1 header tag.
- The name in your homepage’s Open Graph metadata.
- The name in the WebSite structured data on your site.
When these locations do not contain your site name or have different site names, Google may be unable to determine the correct site name to display in search results.
You should provide a site name in those locations to ensure that Google knows the correct site name to display in search results.
2 How to Add a Site Name to Your Site
This section will show you how to add your site name to the four locations Google checks for it. However, before you proceed, you want to ensure your site name complies with Google’s content guidelines:
- Your site name should be the same across your site.
- Your site name should not contain extra words like Inc. or LLC.
- Your site name should be different from the name of a more popular site.
2.1 Add a Site Name to Your Homepage Title Tag
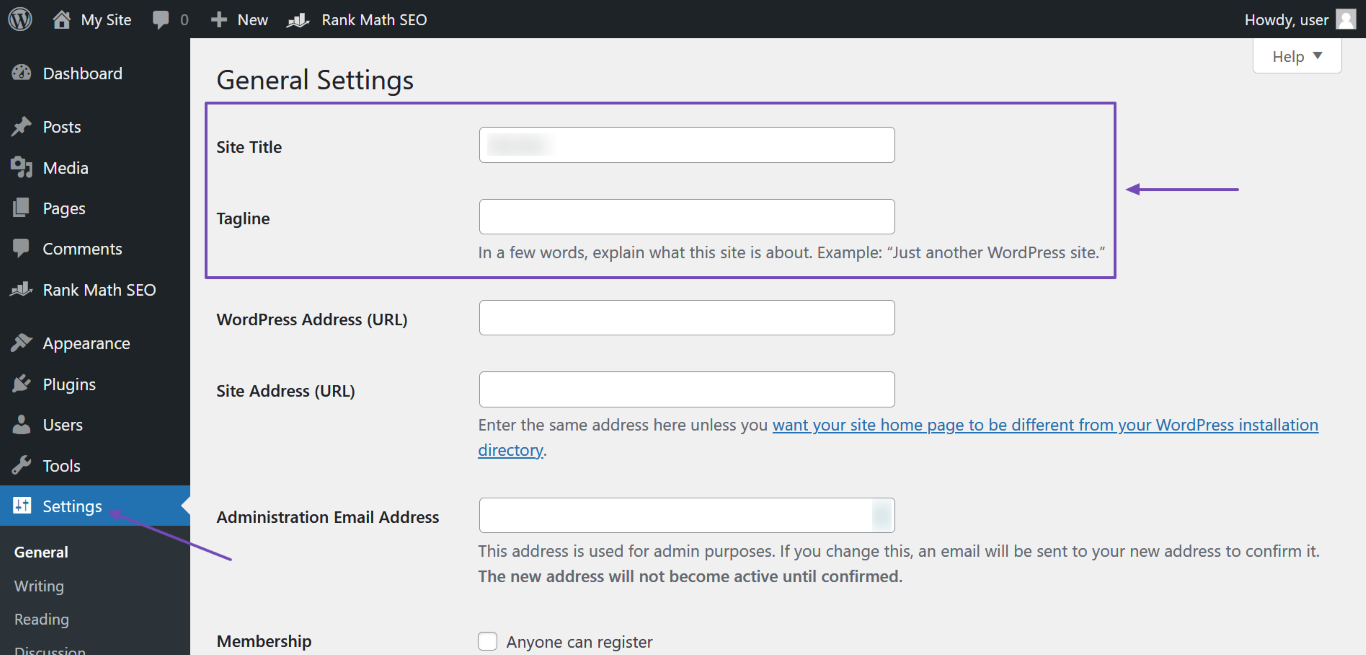
Head to WordPress Dashboard → Settings and enter your site name in the Site Title field. You can also enter a site description into the Tagline field, as shown below.
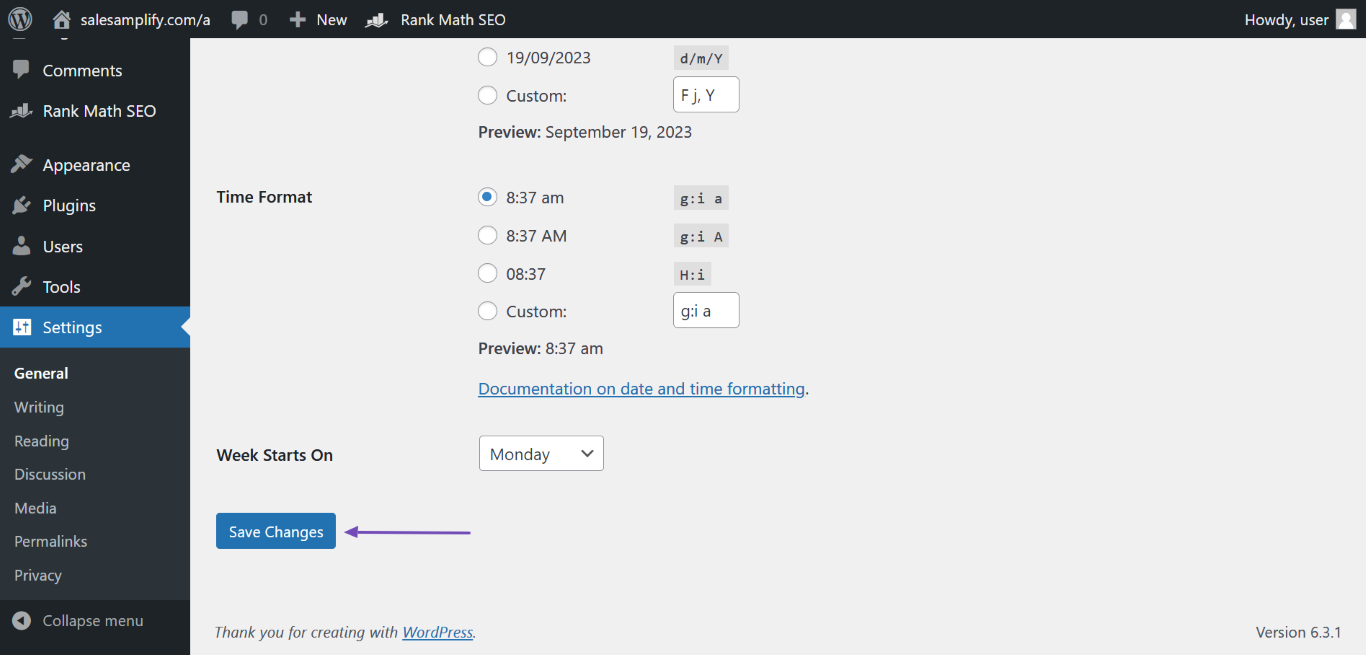
Once done, scroll down and click Save Changes.
2.2 Add a Site Name to Your Homepage H1 Header Tag
Head over to WordPress Dashboard → Settings → Reading. Next, navigate to Your homepage displays and take note of how your homepage is set to display.
Note: The “Your homepage displays” option will be unavailable if you have not published a page on your site. In this case, your homepage will display your latest posts.
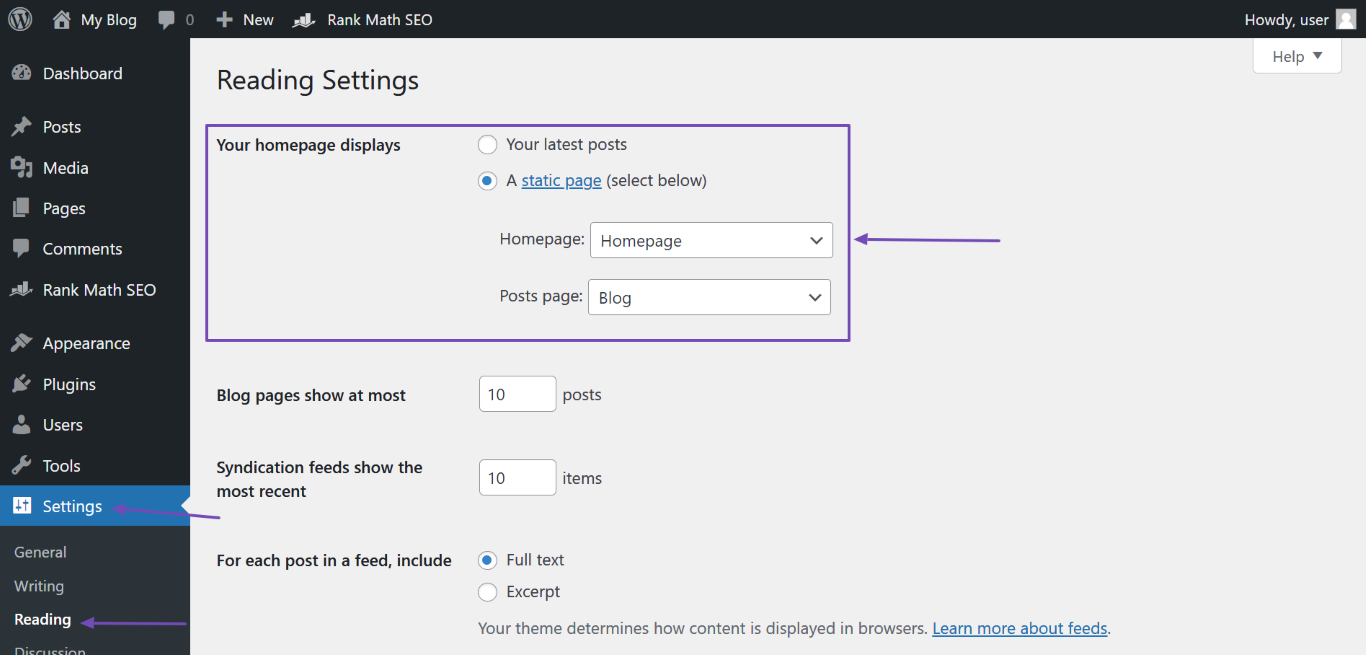
If your homepage is set to display Your latest posts, you can skip to the next section, as your site title will be used as your homepage H1 header tag.
If your homepage is set to display A static page, head over to WordPress Dashboard → Pages. Hover over the page labeled “Front Page” and click Edit.
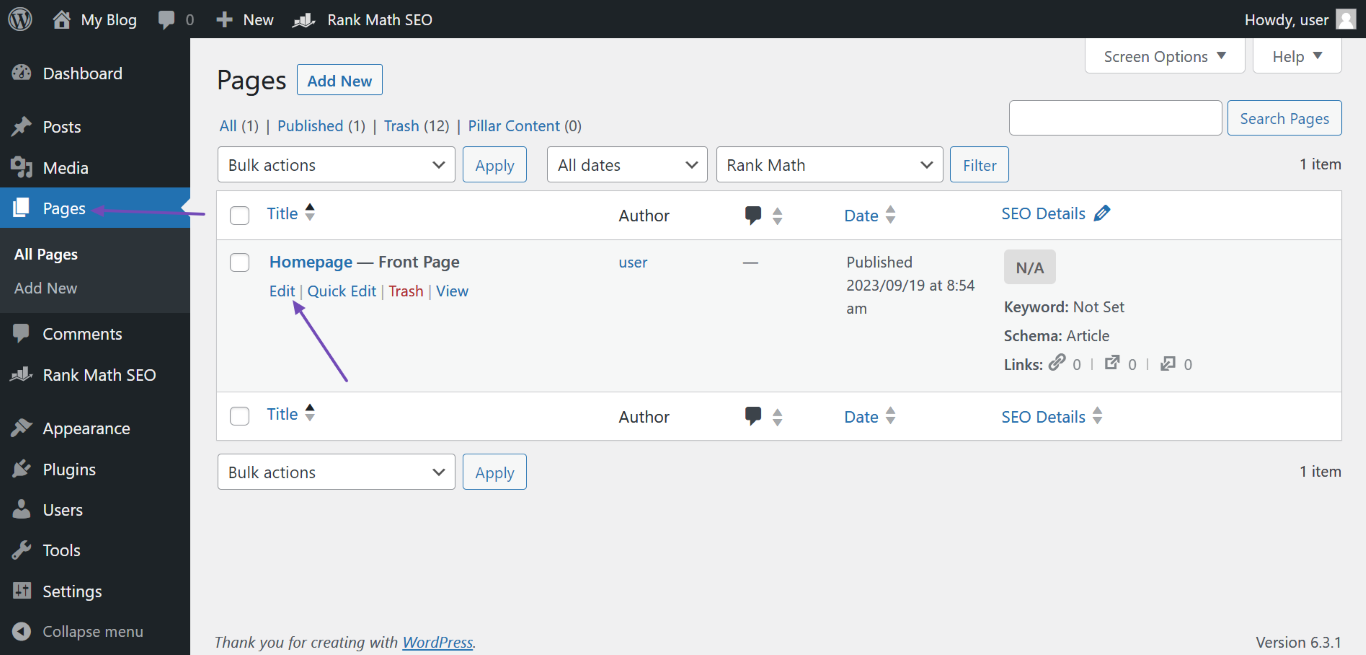
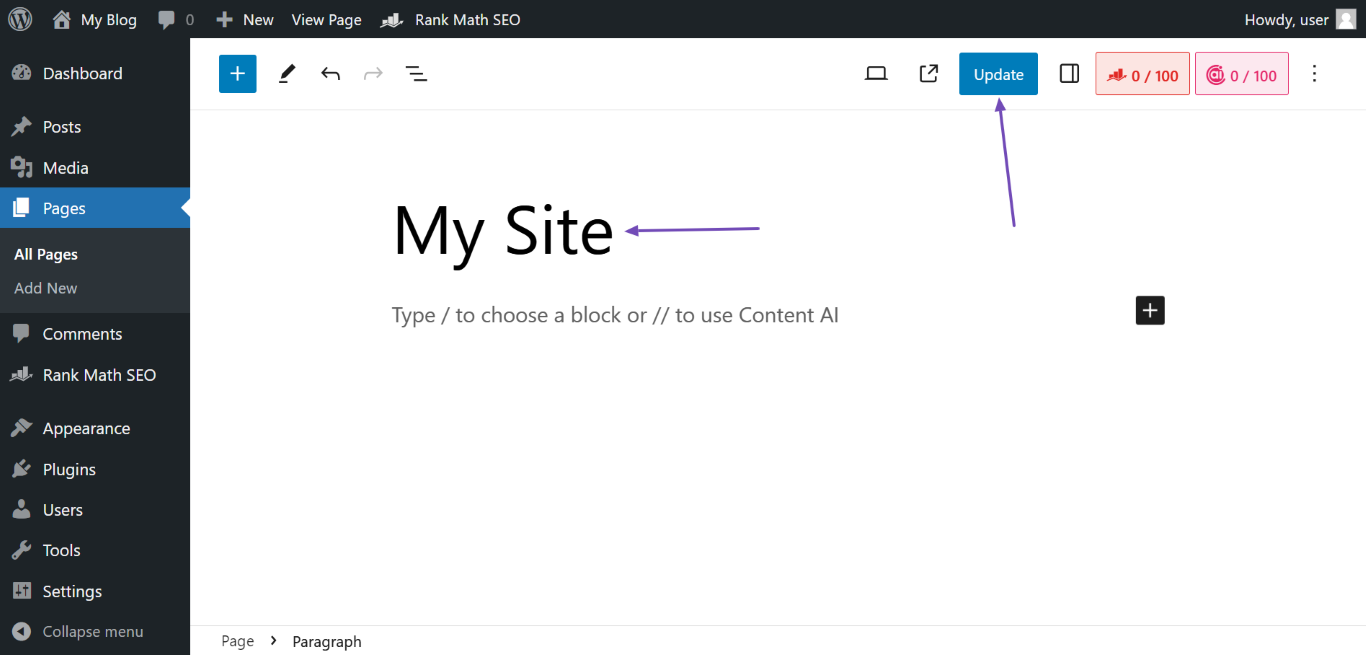
The next step is to enter your site name as the page title. Once done, click Update, as shown below. The site name you entered in the page title field will be set as your homepage H1 header tag.
2.3 Add a Site Name to Your Homepage Meta Title
A meta title is an SEO-rich title displayed in search results. When the displayed content is a post, the meta title will describe the post and contain the keywords it is trying to rank for.
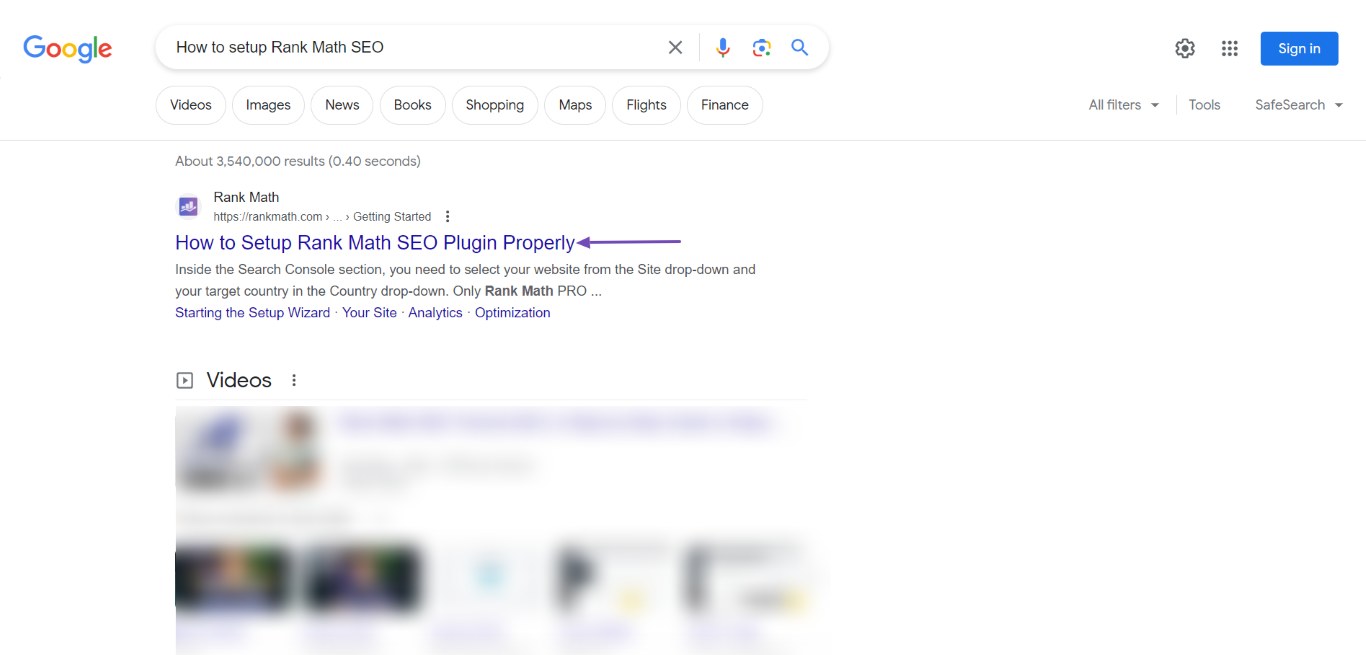
When the displayed content is a homepage, the meta title will contain the site name. It may include a description and keywords, but they should appear after the site name, as shown below.
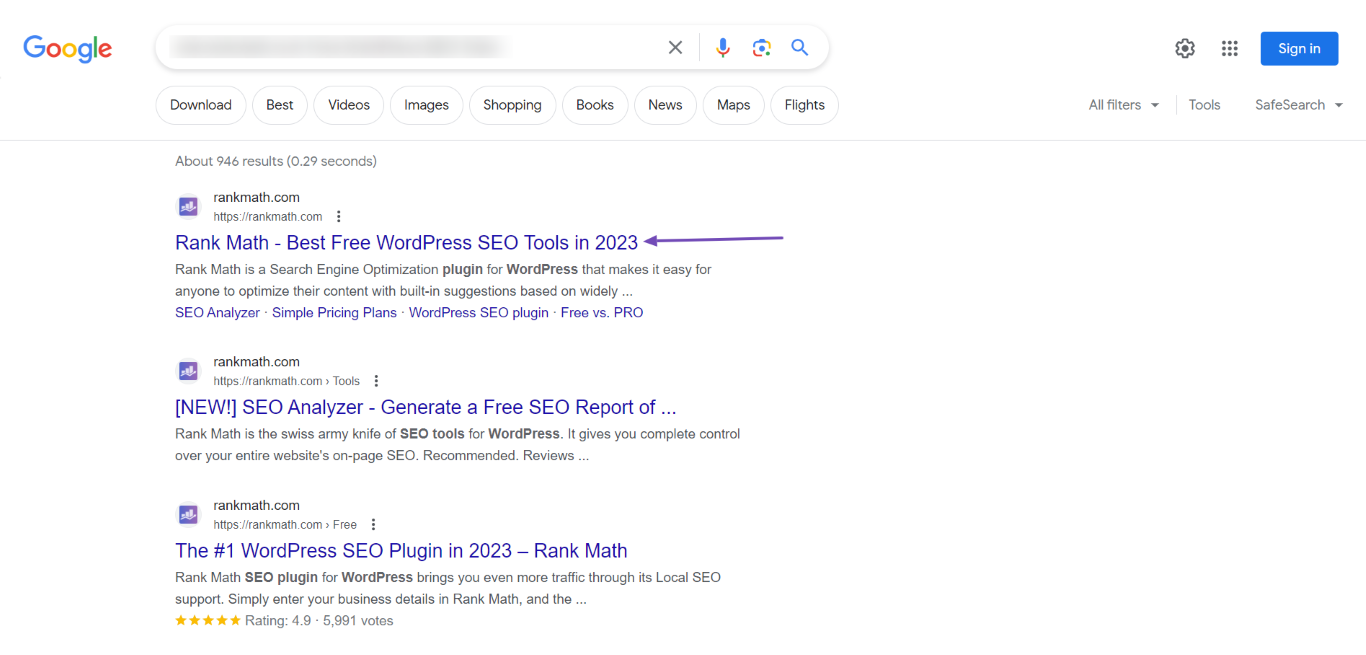
You can set your homepage meta title or allow Google to generate one for your site.
However, considering Google cannot determine your site name, you should expect it to encounter issues with generating a relevant homepage meta title. So you should create your homepage meta title yourself.
If you have Rank Math, refer to this guide on setting a homepage meta title and description using Rank Math.
2.4 Add a Site Name to Your Open Graph Metadata
You may have wondered how social media apps can generate images and text from a URL.

These are previews and are generated using the Open Graph metadata. While the Open Graph metadata is intended for social media apps, search engines, including Google, use it to better understand your content.
Your Open Graph metadata is automatically added to your homepage if you have Rank Math. You don’t need to do anything and can skip to the next step.
2.5 Add a Site Name to Your Website Structured Data
Google gives the site name in your WebSite structured data a higher priority over the site name in the other locations we have mentioned.
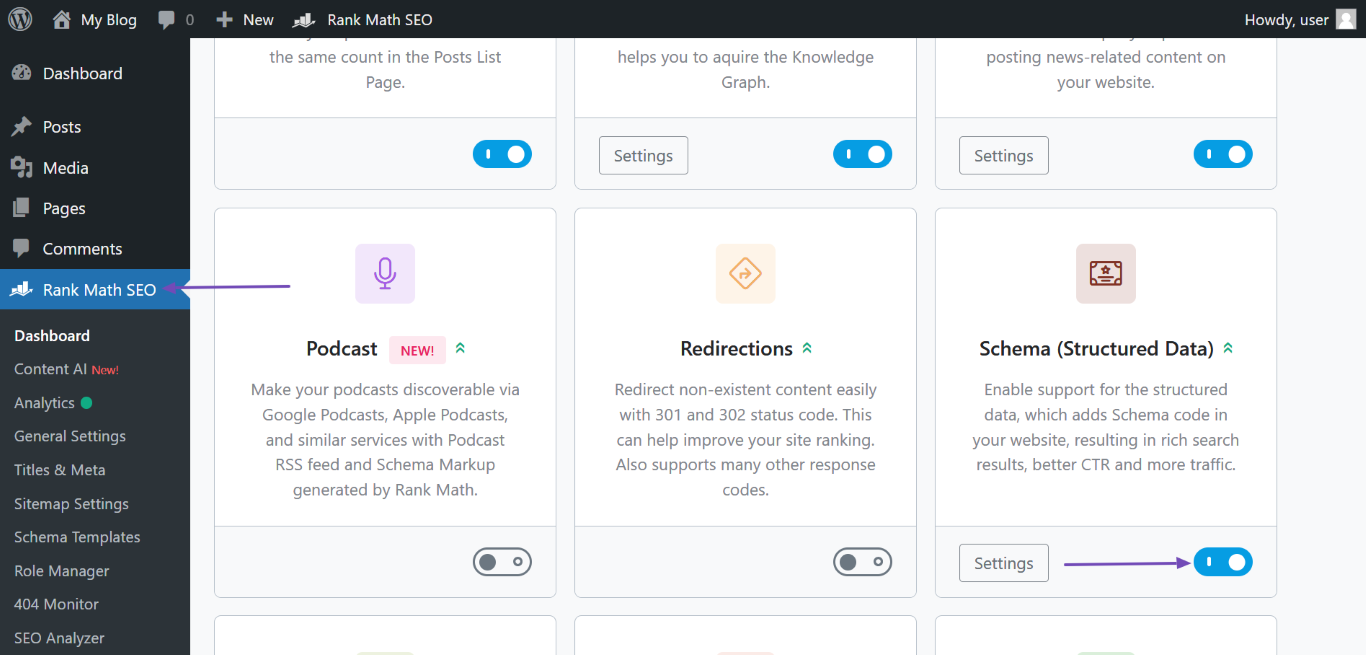
If you have Rank Math, navigate to WordPress Dashboard → Rank Math SEO and enable the Schema module, as shown below.
Once done, head over to Rank Math SEO → Titles & Meta → Local SEO. You will now fill in the required fields discussed below.
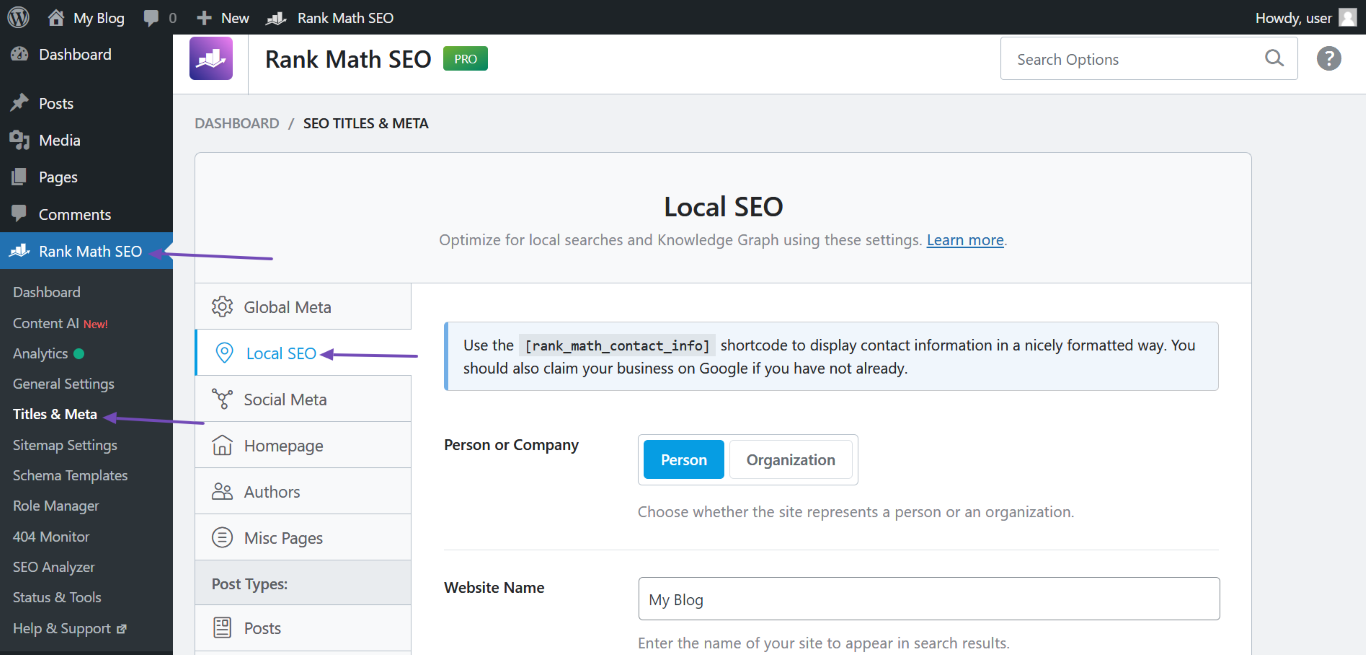
Person or Company – Specify if the website is operated by an individual or organization.
Website Name – Enter the name of the site into this field.
Website Alternate Name – If your website is known by some other name or initials, enter it into this field. If not, leave it blank.
Person/Organization Name – Enter the name of the person or organization the site is being operated for. This name may be displayed in the knowledge panel section of Google search results.
Logo – Click the Add or Upload File button to upload your site logo.
URL – Enter the link to your homepage into this field. Ensure to include http:// or https:// if you use them in your URL.
You can proceed to fill in the other fields available on the page. Once done, scroll down the page and click Save Changes, as shown below.
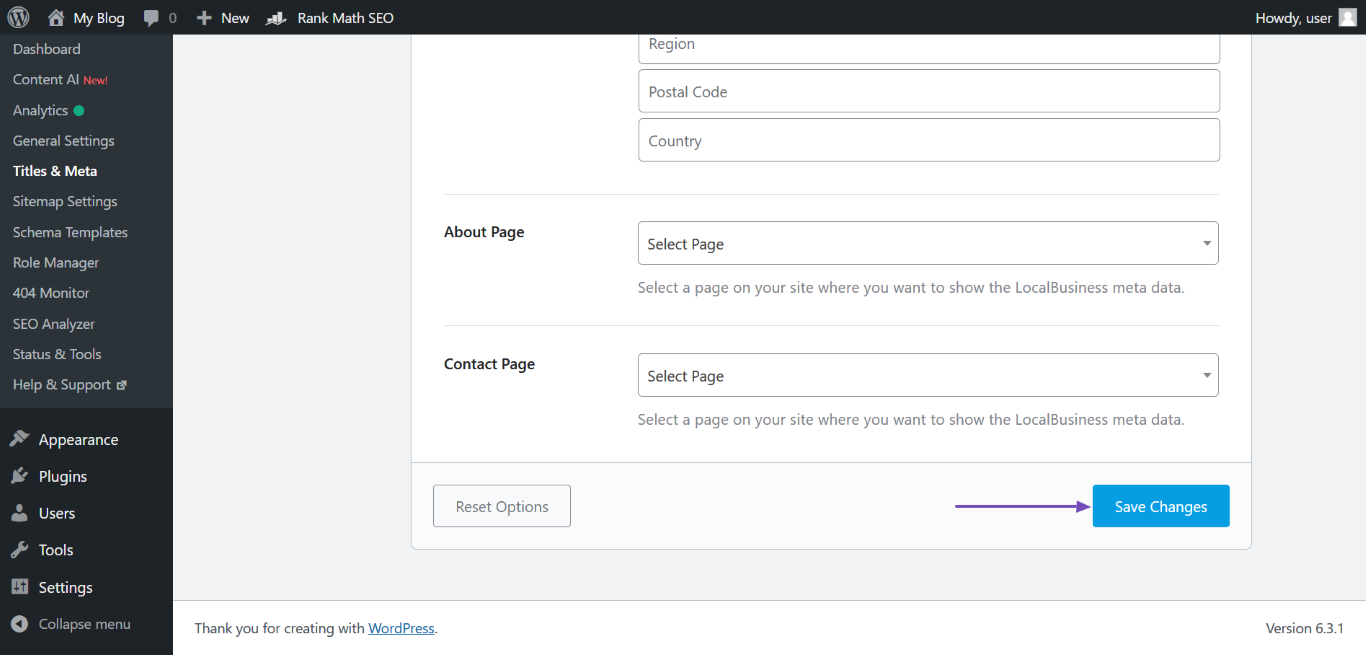
That’s how to set a site name for your website. You now have to wait for Google to crawl your site or follow some best practices to inform Google of the update and get your site crawled quicker.
3 What to Do After Updating Your Site Name
It may take search engines a few weeks to notice the update you made to your site name. Fortunately, you can speed things up by informing them of the update.
3.1 Request Google to Reindex Your Homepage
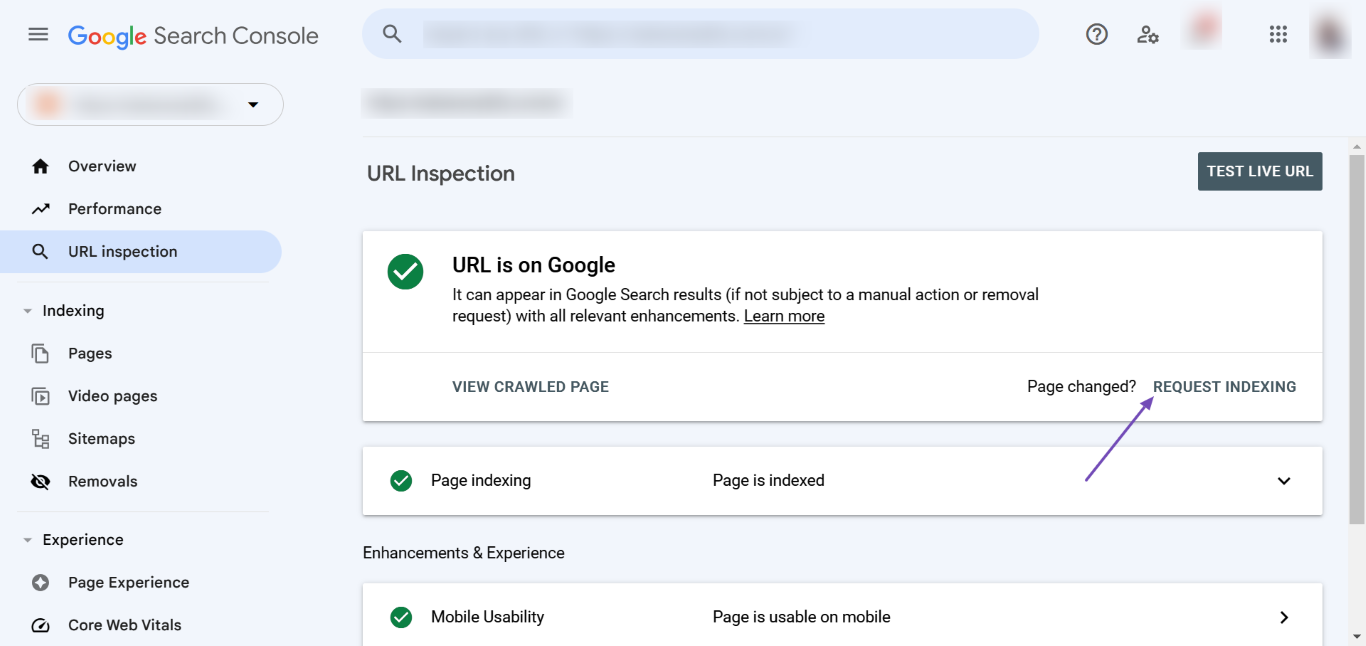
Navigate to the Google Search Console. Once done, enter your homepage URL into the provided field and click Enter on your keyboard. Next, click REQUEST INDEXING, as shown below.
3.2 Submit URL to Google Using Instant Indexing
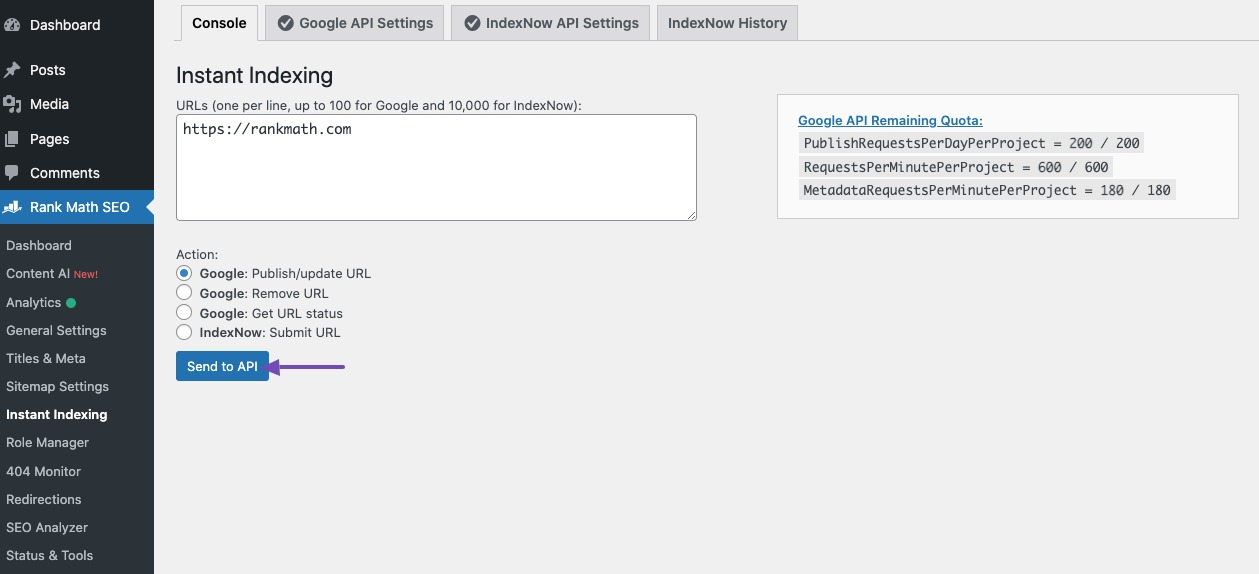
If you have already configured Google’s Instant Indexing, then head over to Rank Math SEO → Instant Indexing. Next, enter your homepage URL into the provided field and click the Send to API button.
That’s it. We hope you are able to set a site name for your website. If you still have any questions about setting your site name – you’re always more than welcome to contact our dedicated support team. We’re available 24/7, 365 days a year…