There is a whole range of reasons & situations in which you’d want to keep posts & pages out of search results. Let’s take a look at how to do this…

Rank Math allows you to set a post/page/product/CPT to NoIndex in a simple way. For the sake of simplicity, we are going to show you how to set a post to NoIndex but the principle applies to your pages, products, custom post types, or taxonomies as well.
First, you need to select the Advanced Mode in Rank Math:
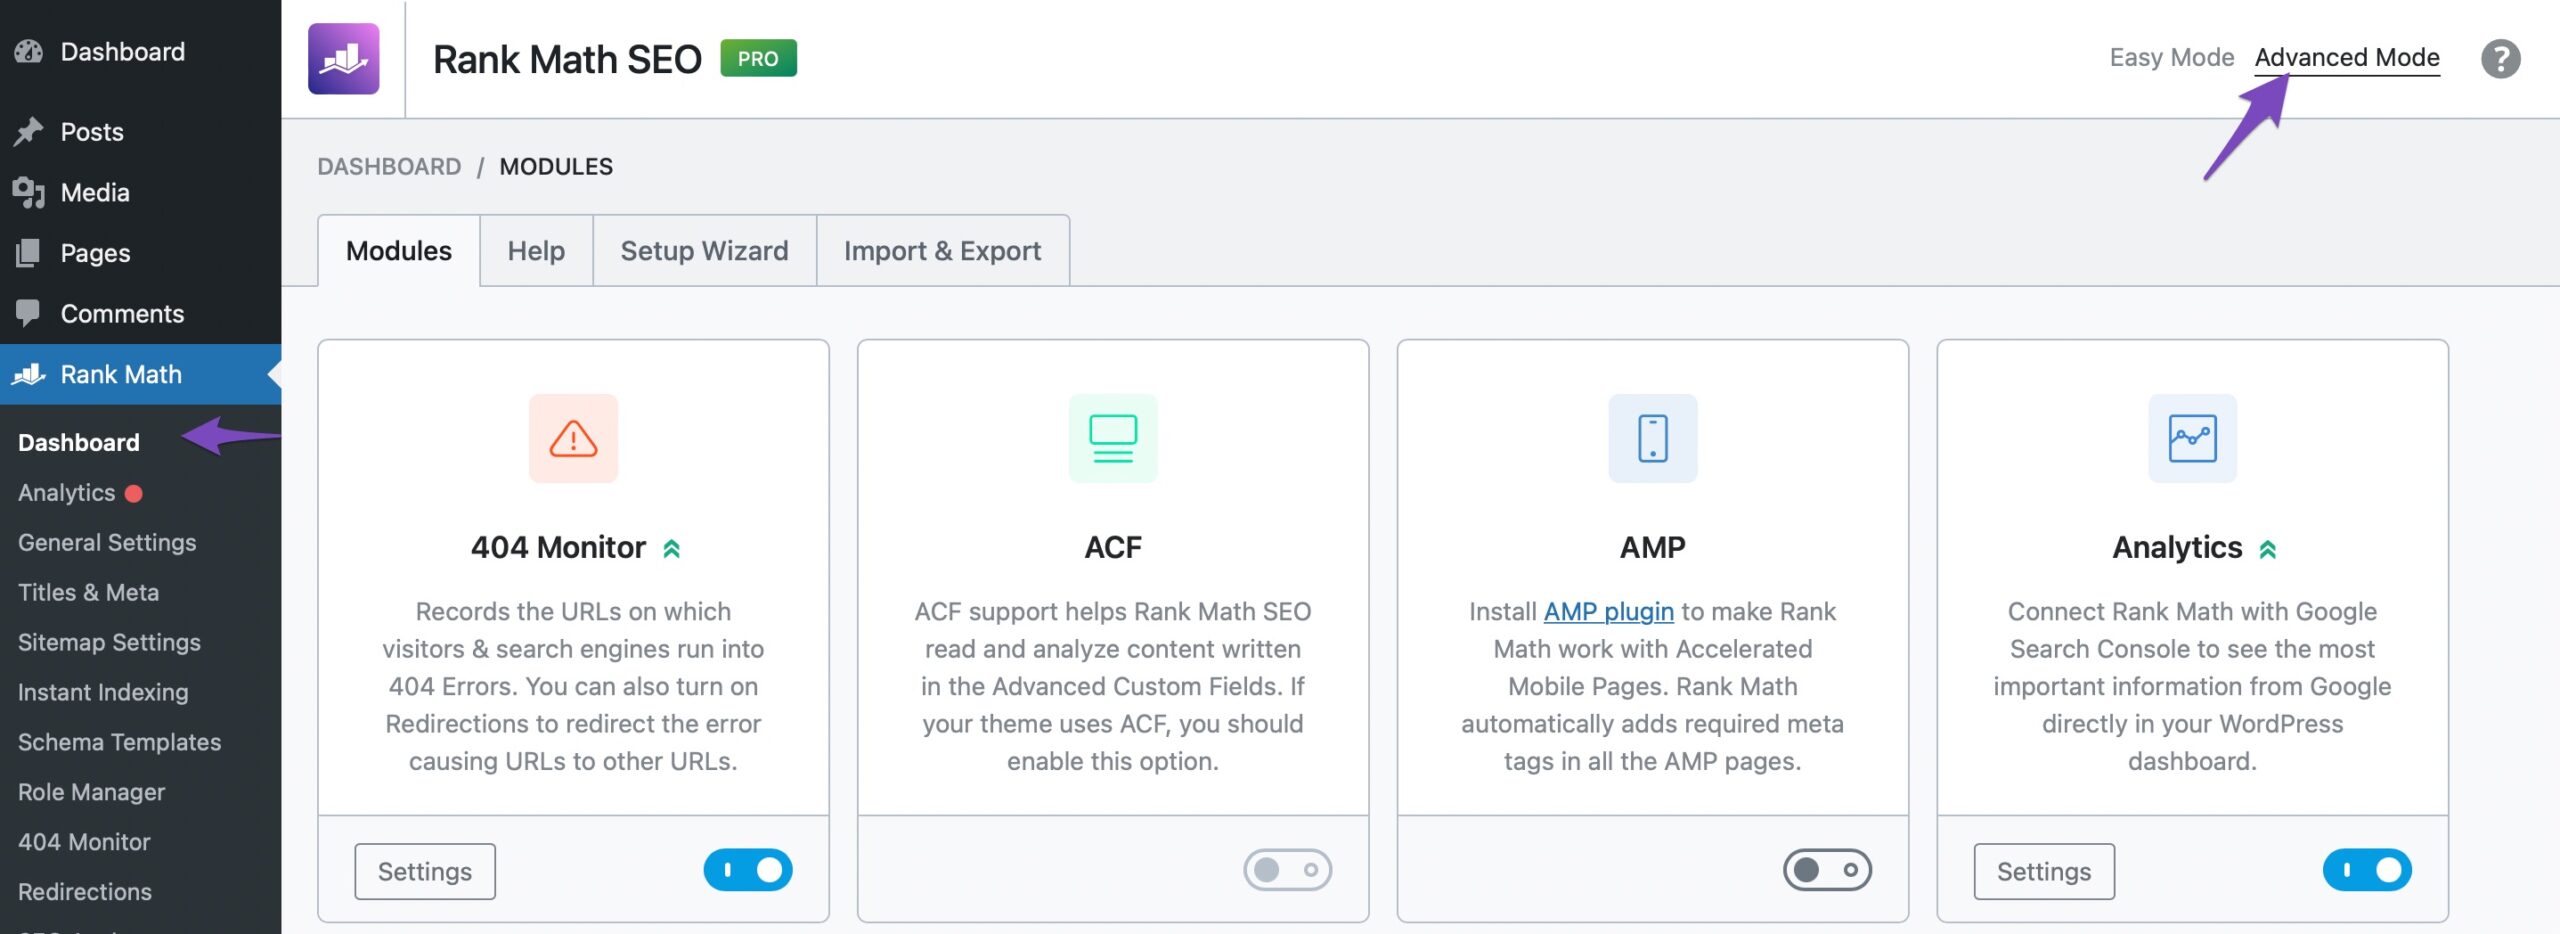
You need to use Advanced Mode to see the Advanced option in the single post editor in case you want to change it for a particular post. The advanced tab in Rank Math caters to the indexing options.
Table of Contents
- Noindex All Posts of a Specific Post Type
- Noindex Posts & Pages in the Classic Editor
- Noindex Posts & Pages in Gutenberg
- Noindex Posts & Pages in Elementor
- Noindex Posts & Pages in Divi Builder
- Mark Webpages as Noindex Using Quick Edit
- Mark Webpages as Noindex Using Bulk Actions
- Mark Webpages as Noindex Using the Admin Menu Bar
1 Noindex All Posts of a Specific Post Type
Rank Math lets you set No Index by default for all the posts of a specific post type so that you don’t have to manually add No Index for each post. You can configure that by navigating to WordPress Dashboard → Rank Math SEO → Titles & Meta.
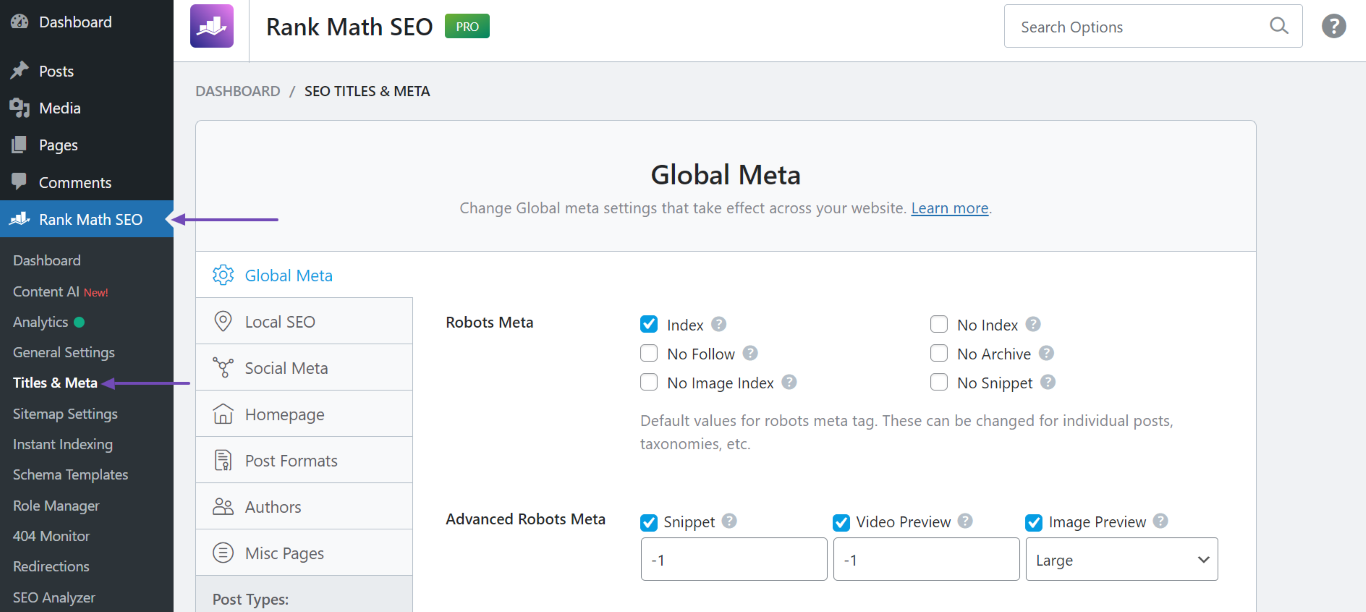
Next, select the post type (posts, pages) or taxonomies (categories, tags) that you wish to set to noindex.
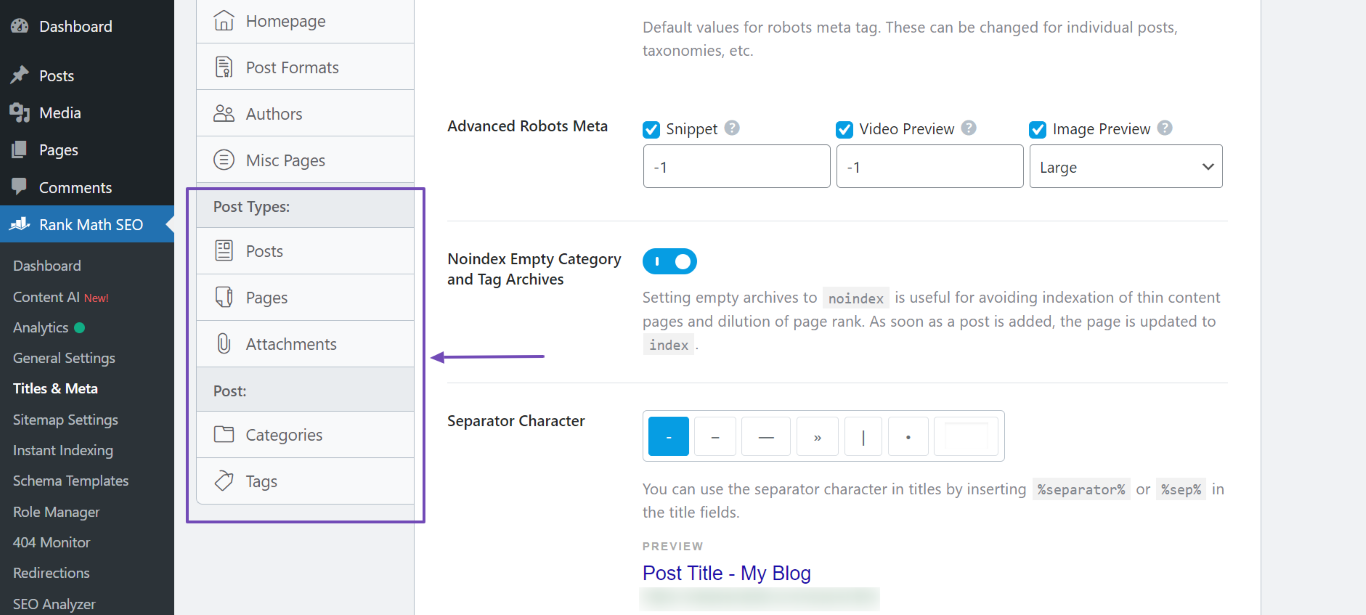
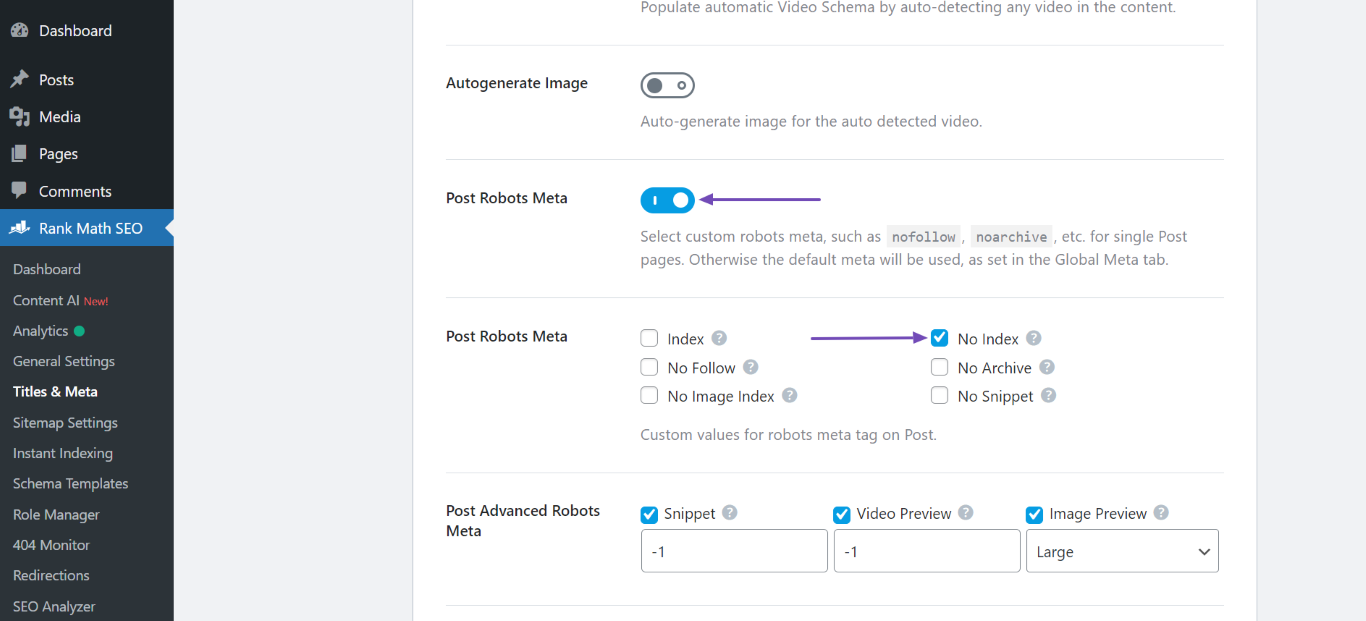
Now, scroll down and enable the robots meta option of the post type or taxonomy you just selected.
For example, if you clicked the Posts post type, scroll down to find the Post Robots Meta option. When you enable the option, all Post Robots Meta options will display underneath. Next, choose the No Index option.
Note: Enable the Page Robots Meta option for pages and the Media Robots Meta option for attachments.
Similarly, if you chose Categories or Tags, scroll down and enable Category Archives Robots Meta (for categories) or Tag Archives Robots Meta (for tags).
Once done, the archives robots meta options will display underneath. Select No Index.
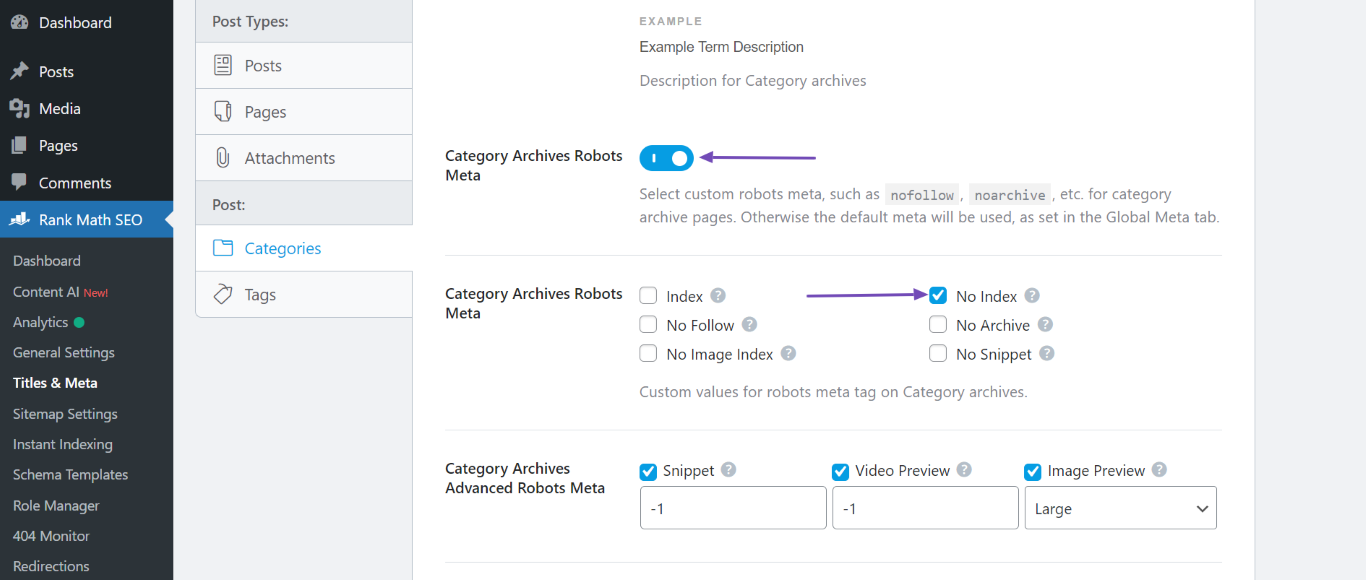
Now, click the Save Changes button at the bottom of the screen to reflect the changes.
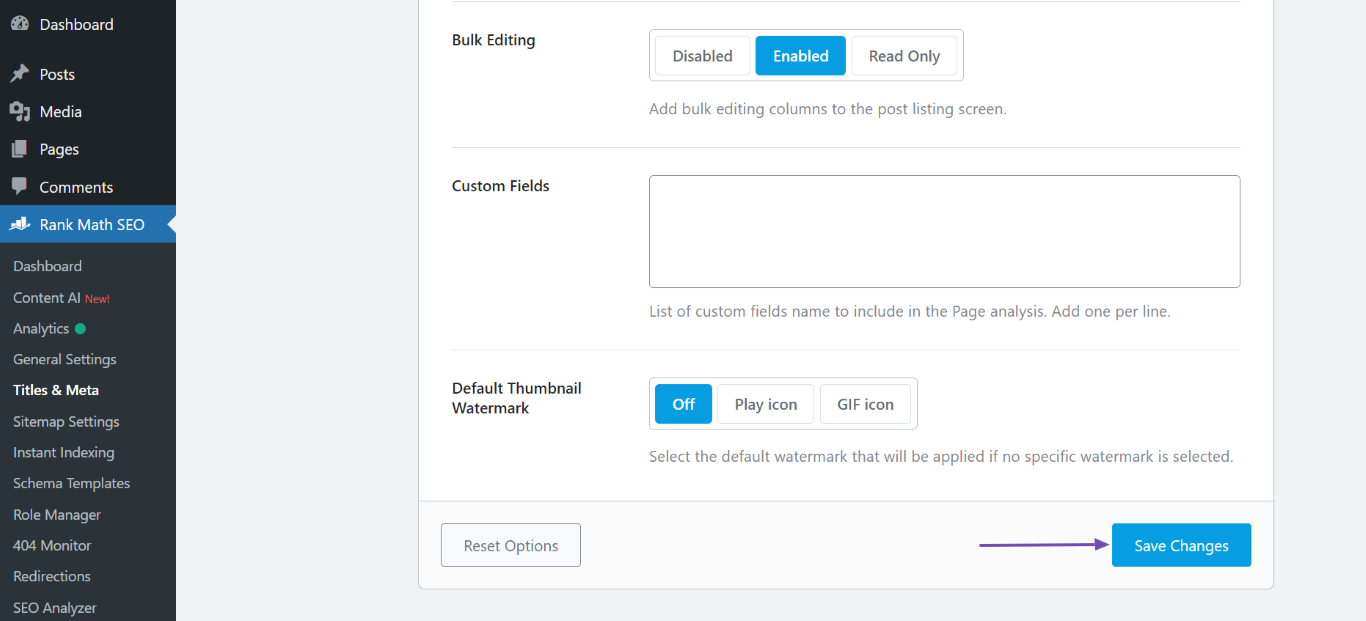
Note: The Robots Meta configured under the Titles & Meta settings are global settings, but still, they can be inherited by a single post. Meaning, despite setting No Index in Titles & Meta settings, if you manually set an individual post to Index, then the post’s Robots Meta will be overridden and set to Index.
2 Noindex Posts & Pages in the Classic Editor
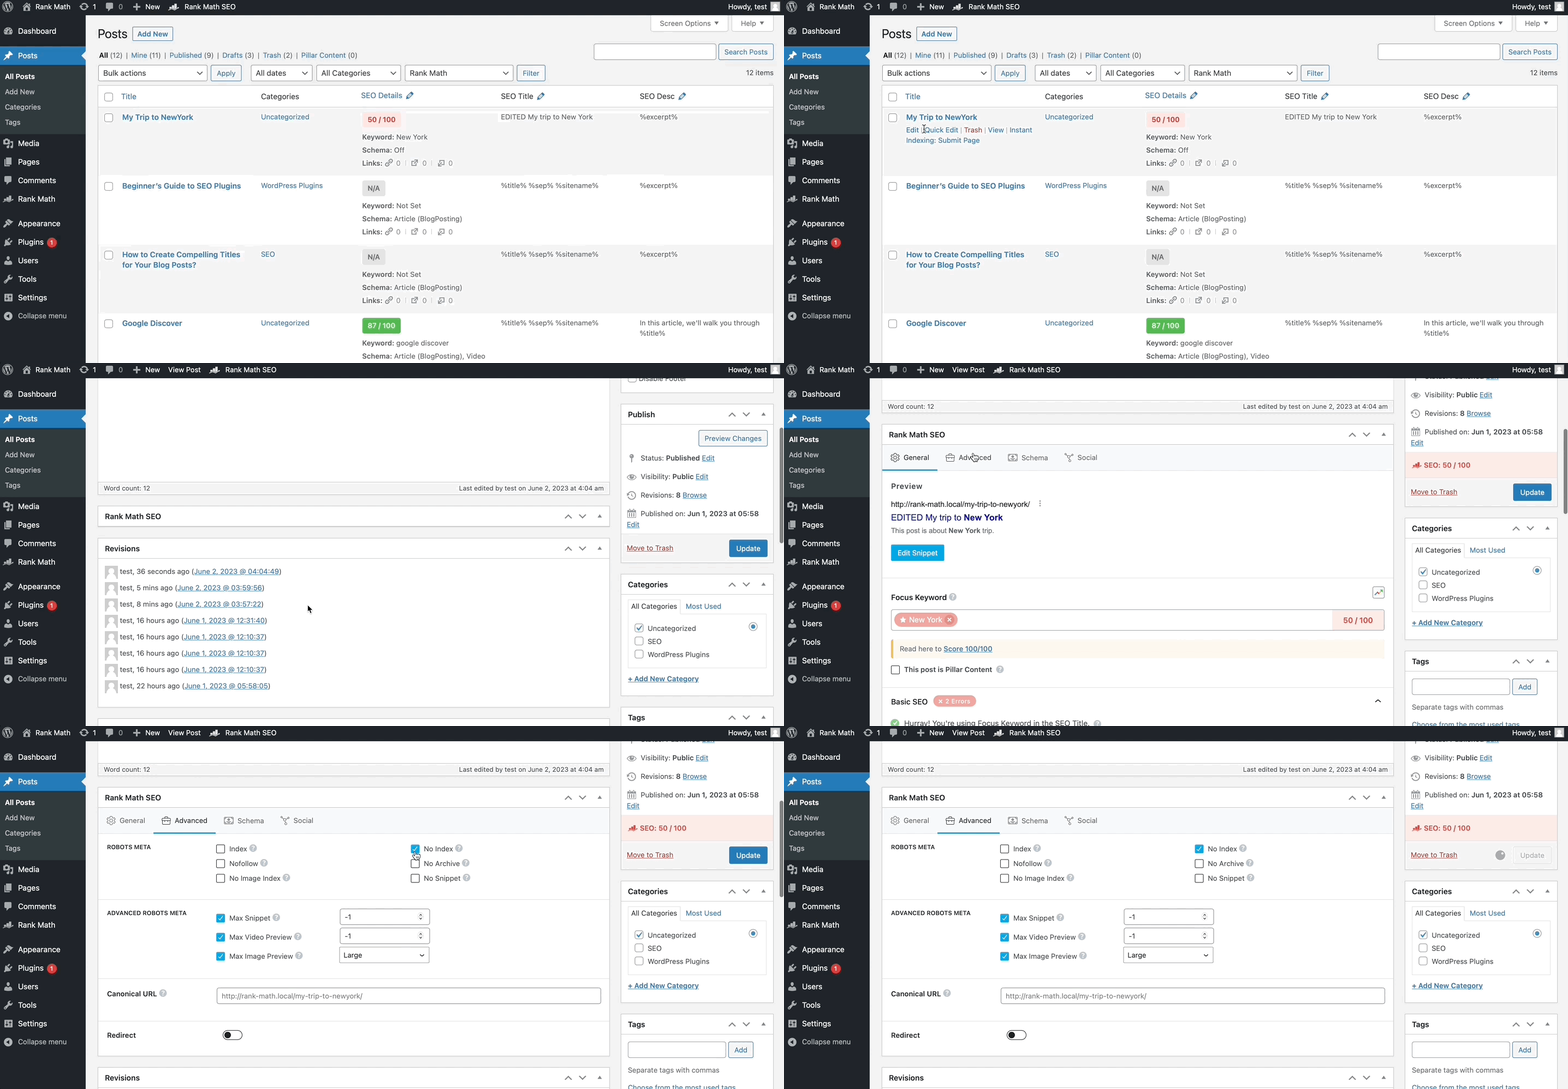
To set No Index for a specific post or page, you need to edit your post and then scroll down to find Rank Math SEO settings below your post. Click on the Advanced tab.
In the Robots Meta section, you will find the No Index check-box. No Index will prevent the post from being indexed and displayed in search engine result pages.
By default, Rank Math allows you to Index your posts. If you don’t want to index your post then you simply need to click on the No Index check-box as shown below.
3 Noindex Posts & Pages in Gutenberg
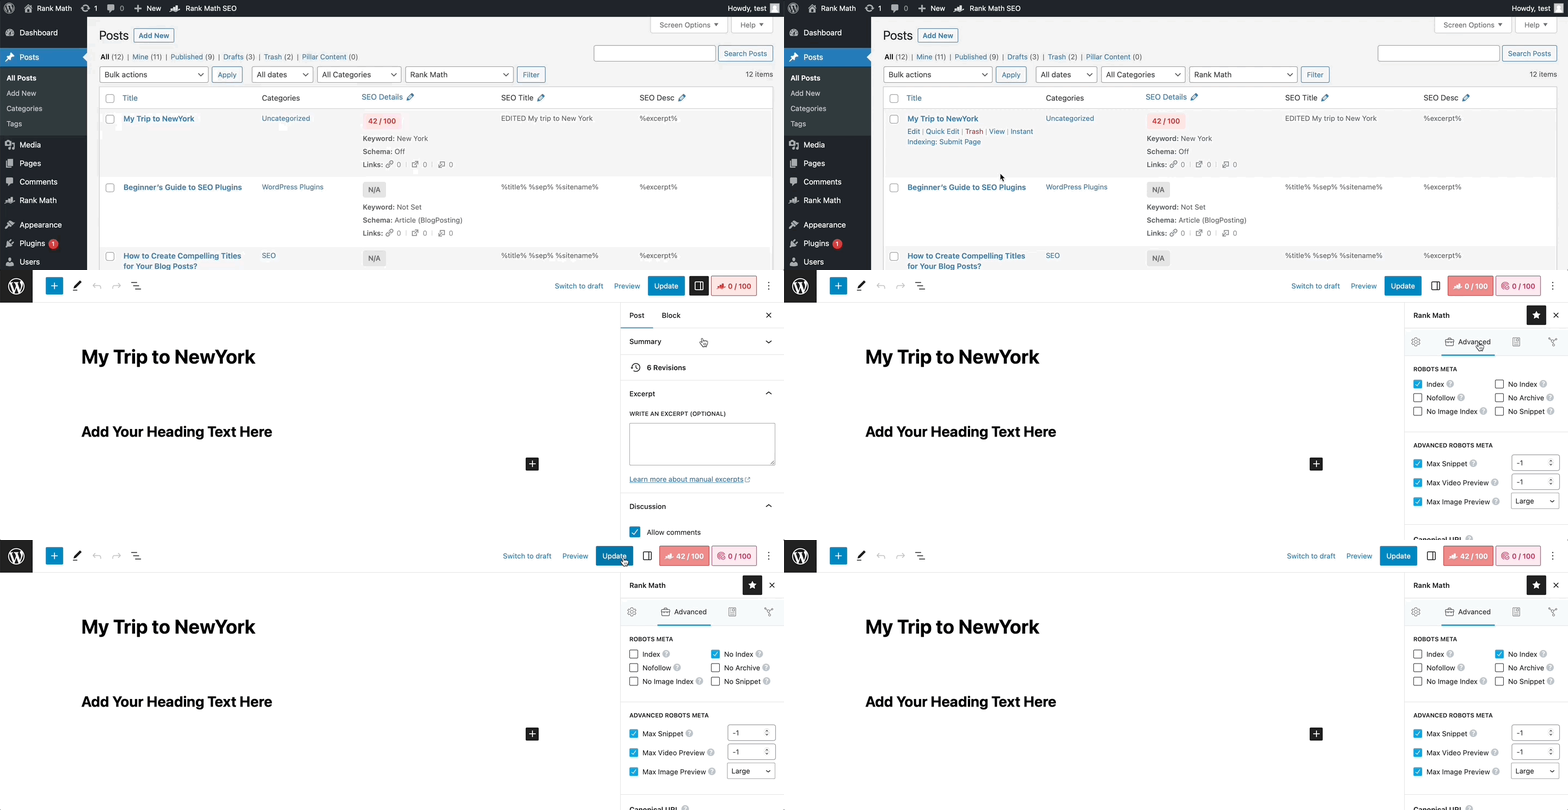
In Gutenberg Editor, you need to edit a post that you want to set as No Index. Then head over to the Advanced tab and then click on the No Index check box.
4 Noindex Posts & Pages in Elementor
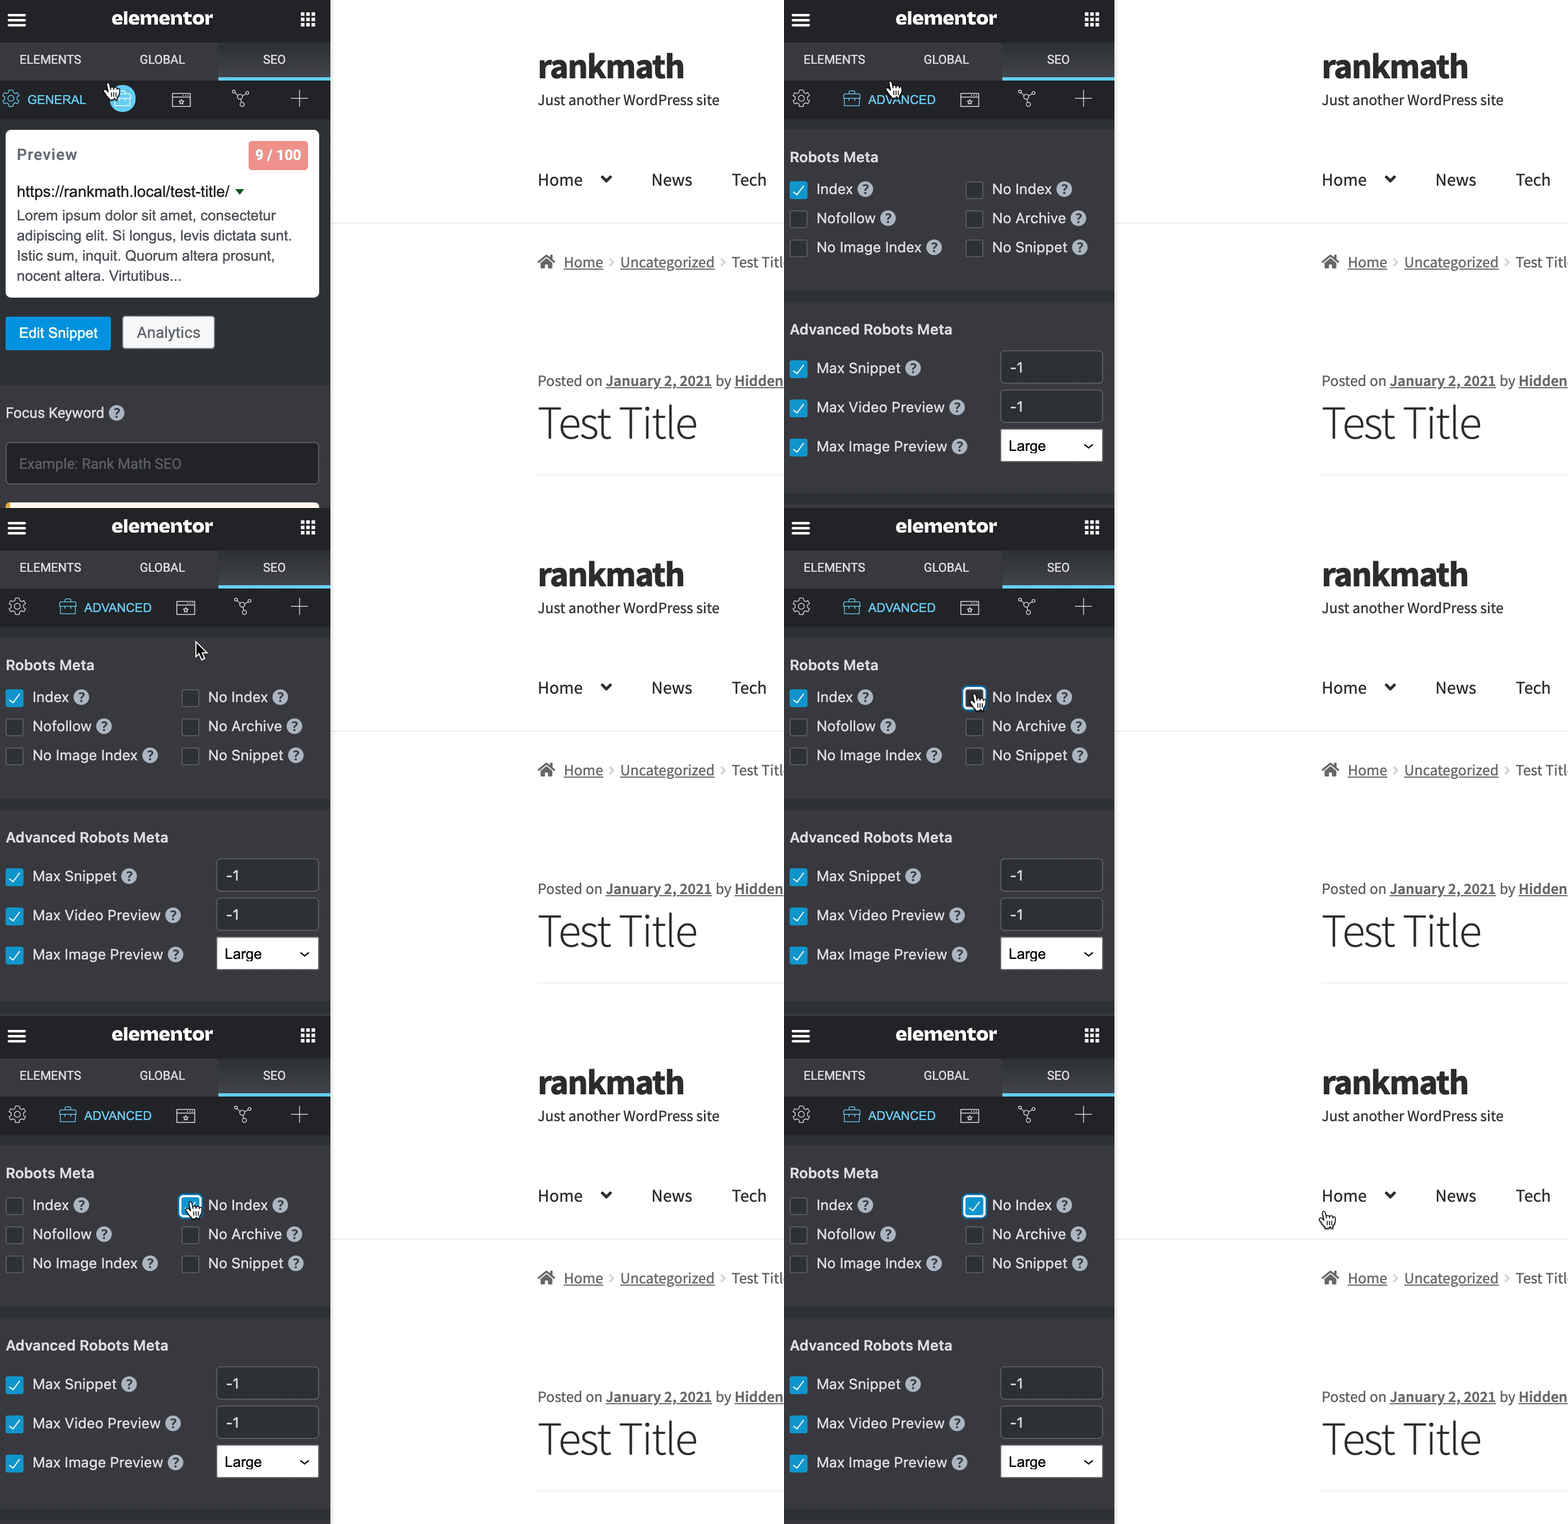
If you use Elementor, you need to edit a post first. Then simply navigate to SEO → Advanced tab. Here – as shown below – you’ll be able to select the No Index option…
5 Noindex Posts & Pages in Divi Builder
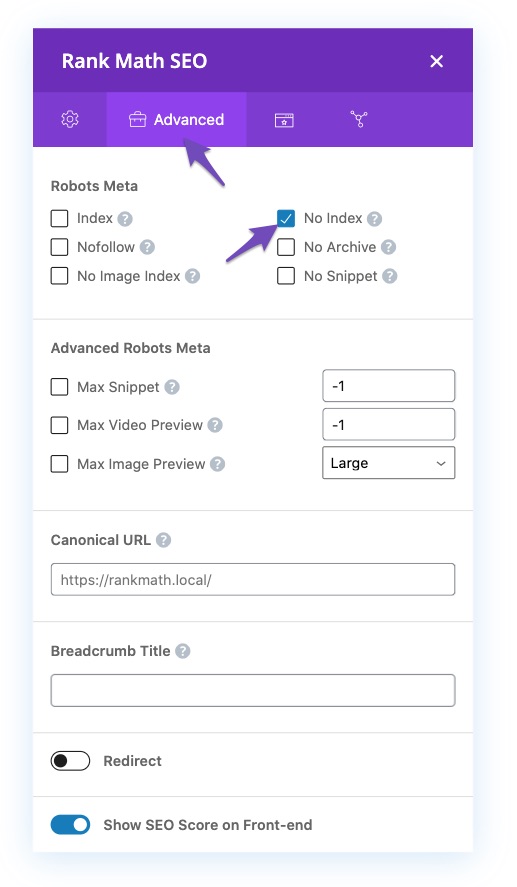
If you’re using Divi Builder to edit your post, then click the Rank Math SEO icon and navigate to the Advanced tab in the Rank Math SEO settings. You will be able to set the post to No Index as shown below.
6 Mark Webpages as Noindex Using Quick Edit PRO
By default, the Quick Edit interface includes fields to change the slug, title, taxonomy, and other post metadata, without opening the full post editor.
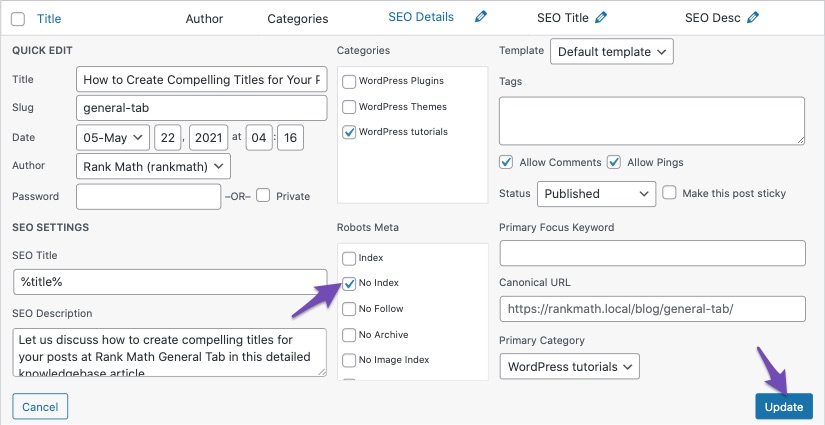
Rank Math PRO has got the Robots Meta settings inside the Quick Edit interface so that users can set a post to No Index without opening the post editor. To set No Index for a post, open the posts section and click the Quick Edit option underneath the post title.

Under the Robots Meta settings, select No Index and then click the Update button.
7 Mark Webpages as Noindex Using Bulk Actions PRO
Since the Quick Edit option can only set No Index to posts one by one, you can use bulk actions for setting No Index to one or many posts at a time. Rank Math PRO users can take advantage of this feature under the posts sections in the WordPress admin menu bar.
From the list of posts, select the ones that need to be set with the No Index robots meta. The checkbox at the top left corner can be used for selecting all the visible posts while the checkbox in front of each post title can be used for selecting the specific post.
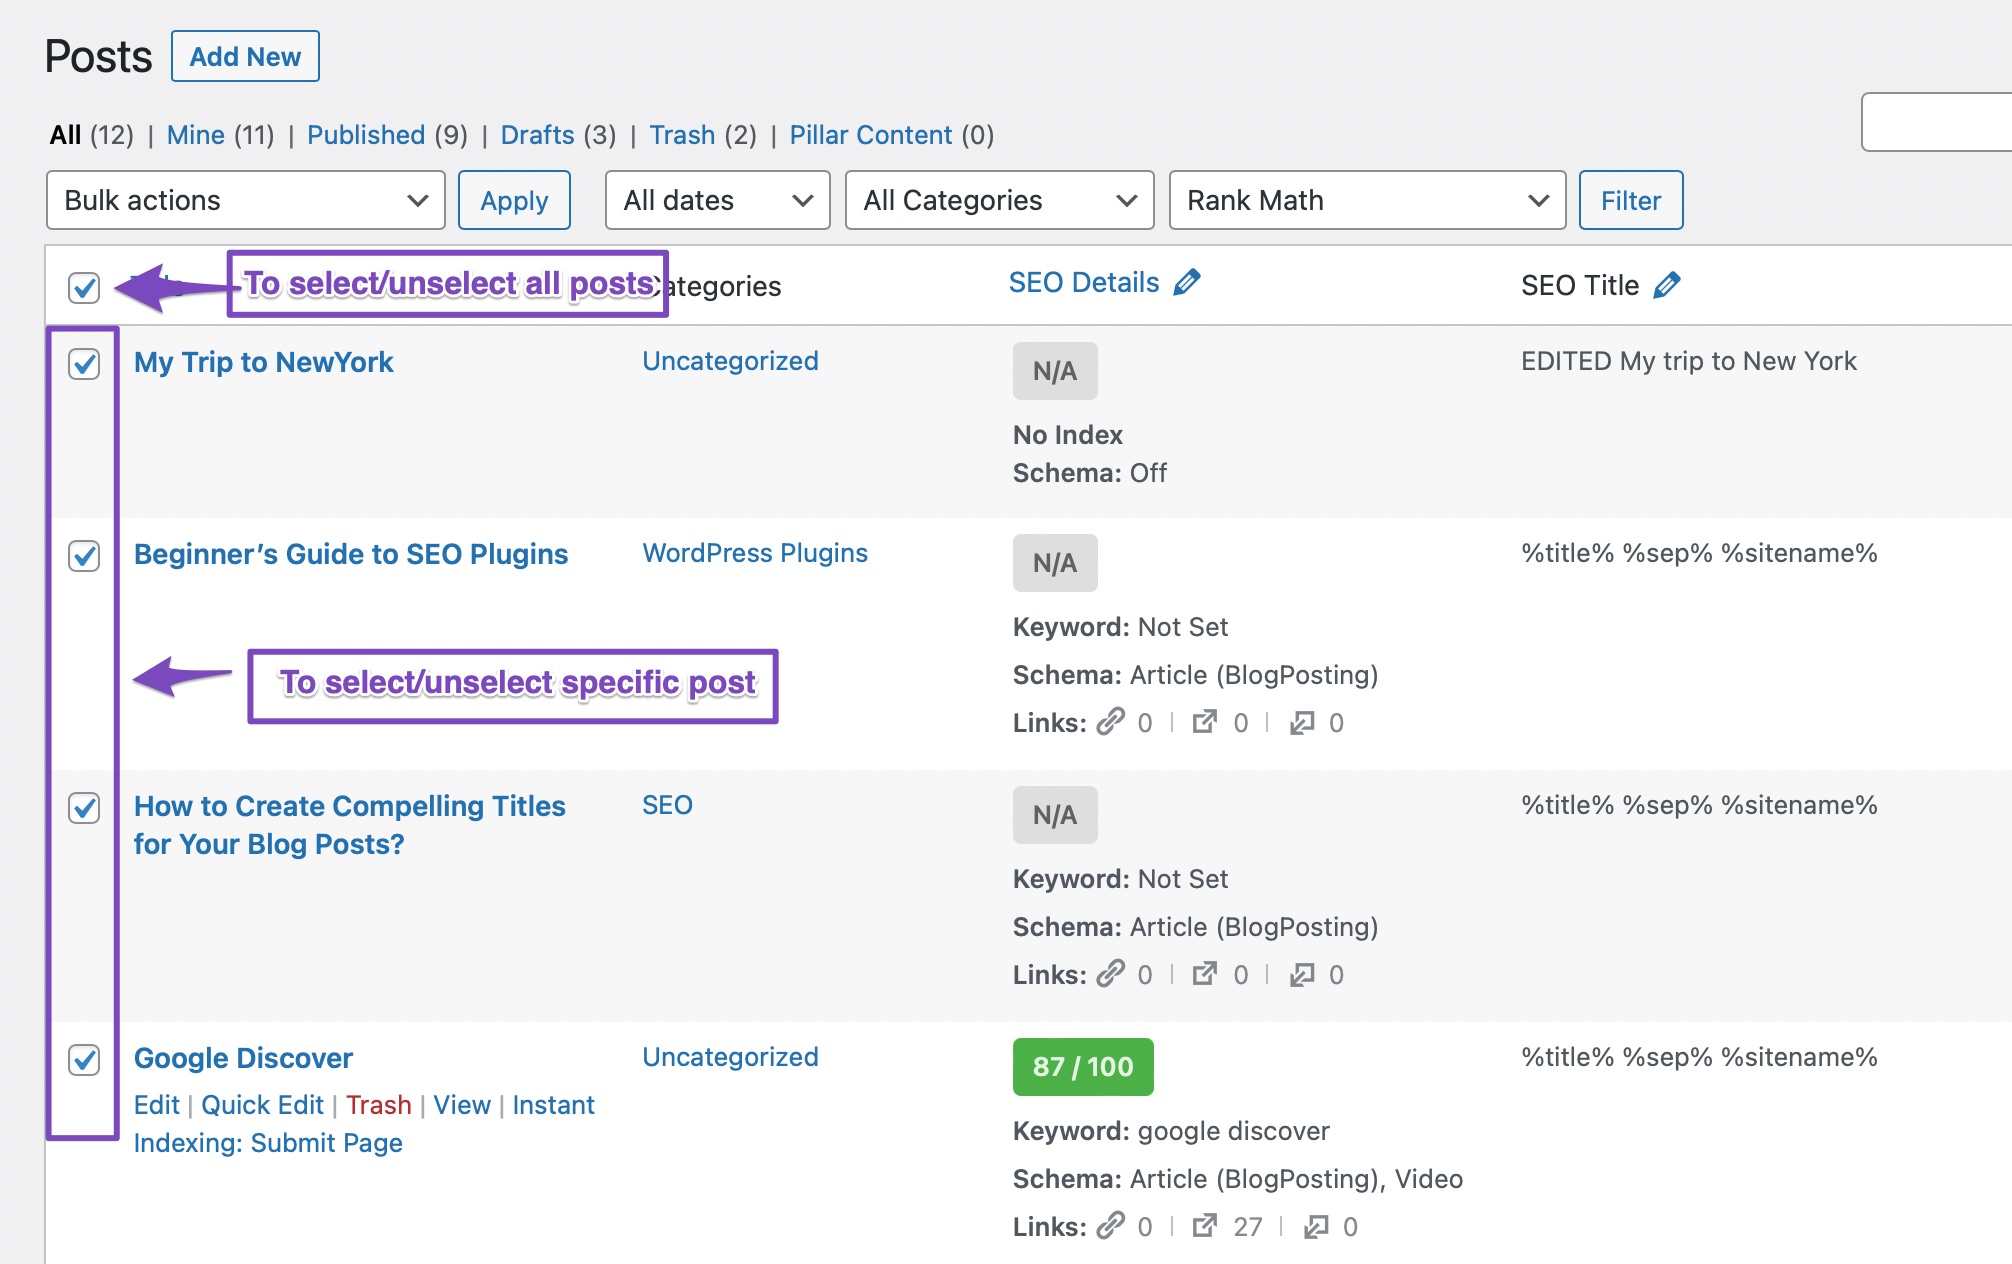
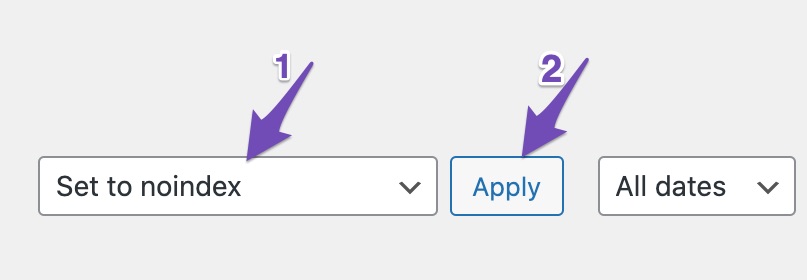
Once you’ve selected the posts, choose the Set to noindex option from the drop-down menu and then click the Apply button.
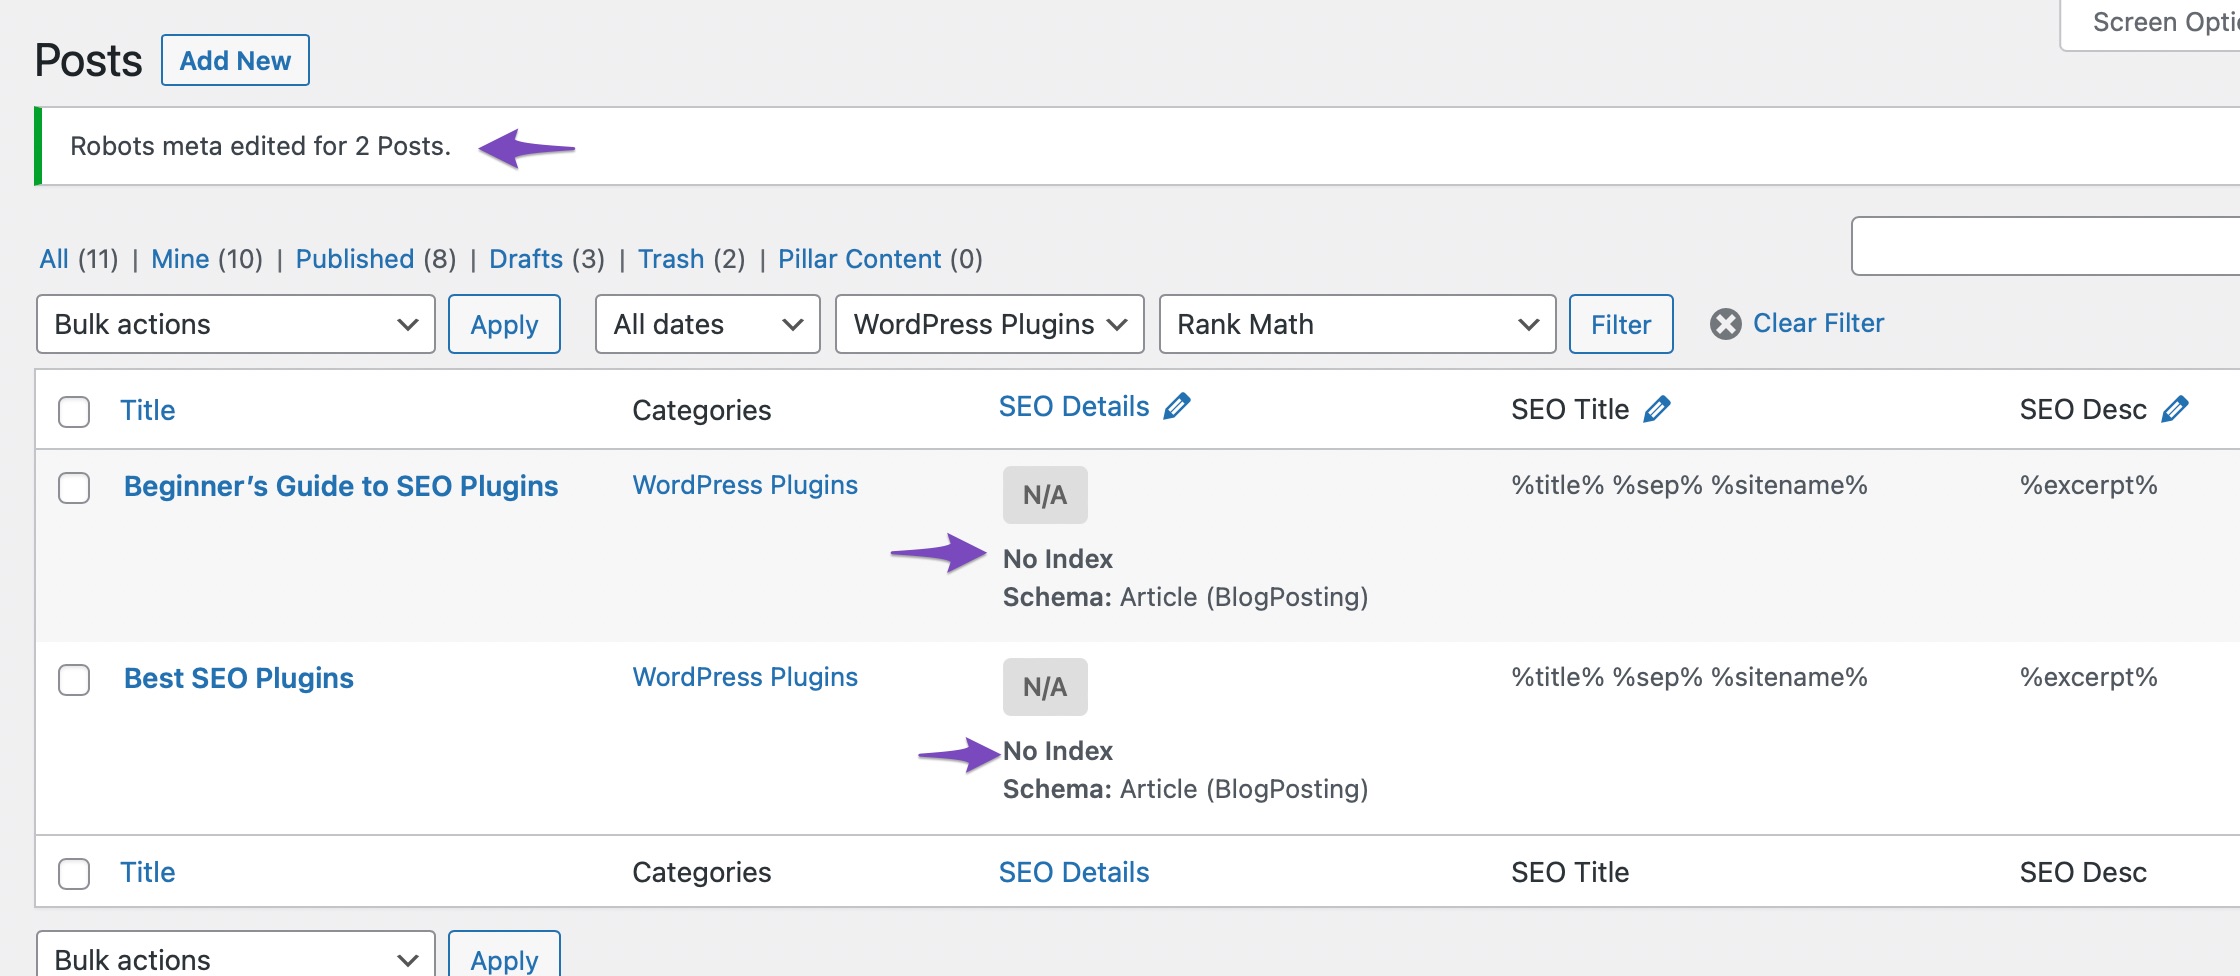
Now, all the selected posts will be set with No Index robots meta.
8 Mark Webpages as Noindex Using the Admin Menu Bar
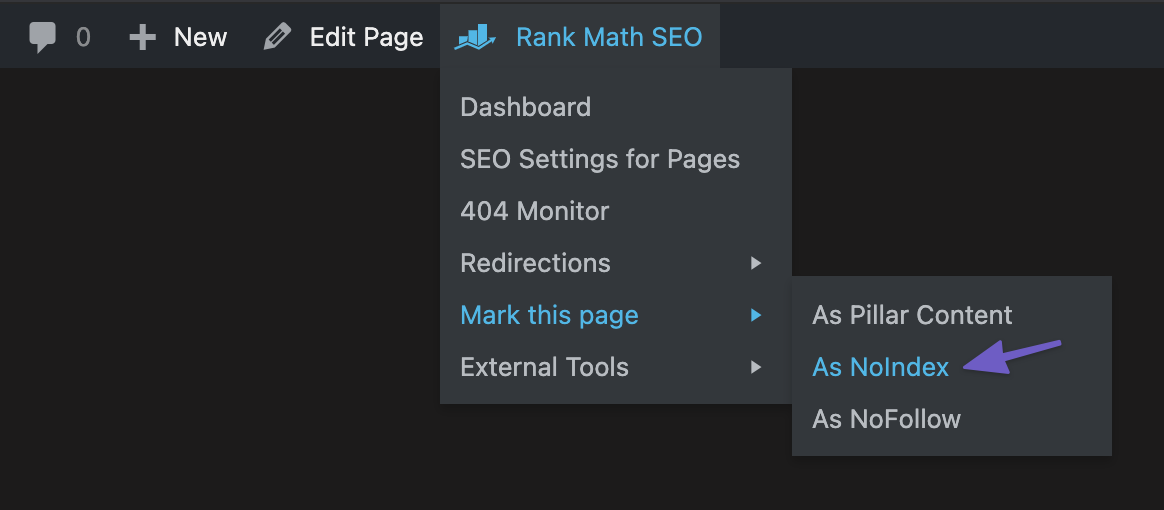
You can also set a post to No Index by using the admin menu bar. In order to do this, simply navigate to Rank Math SEO → Mark this page and then select the As NoIndex option.
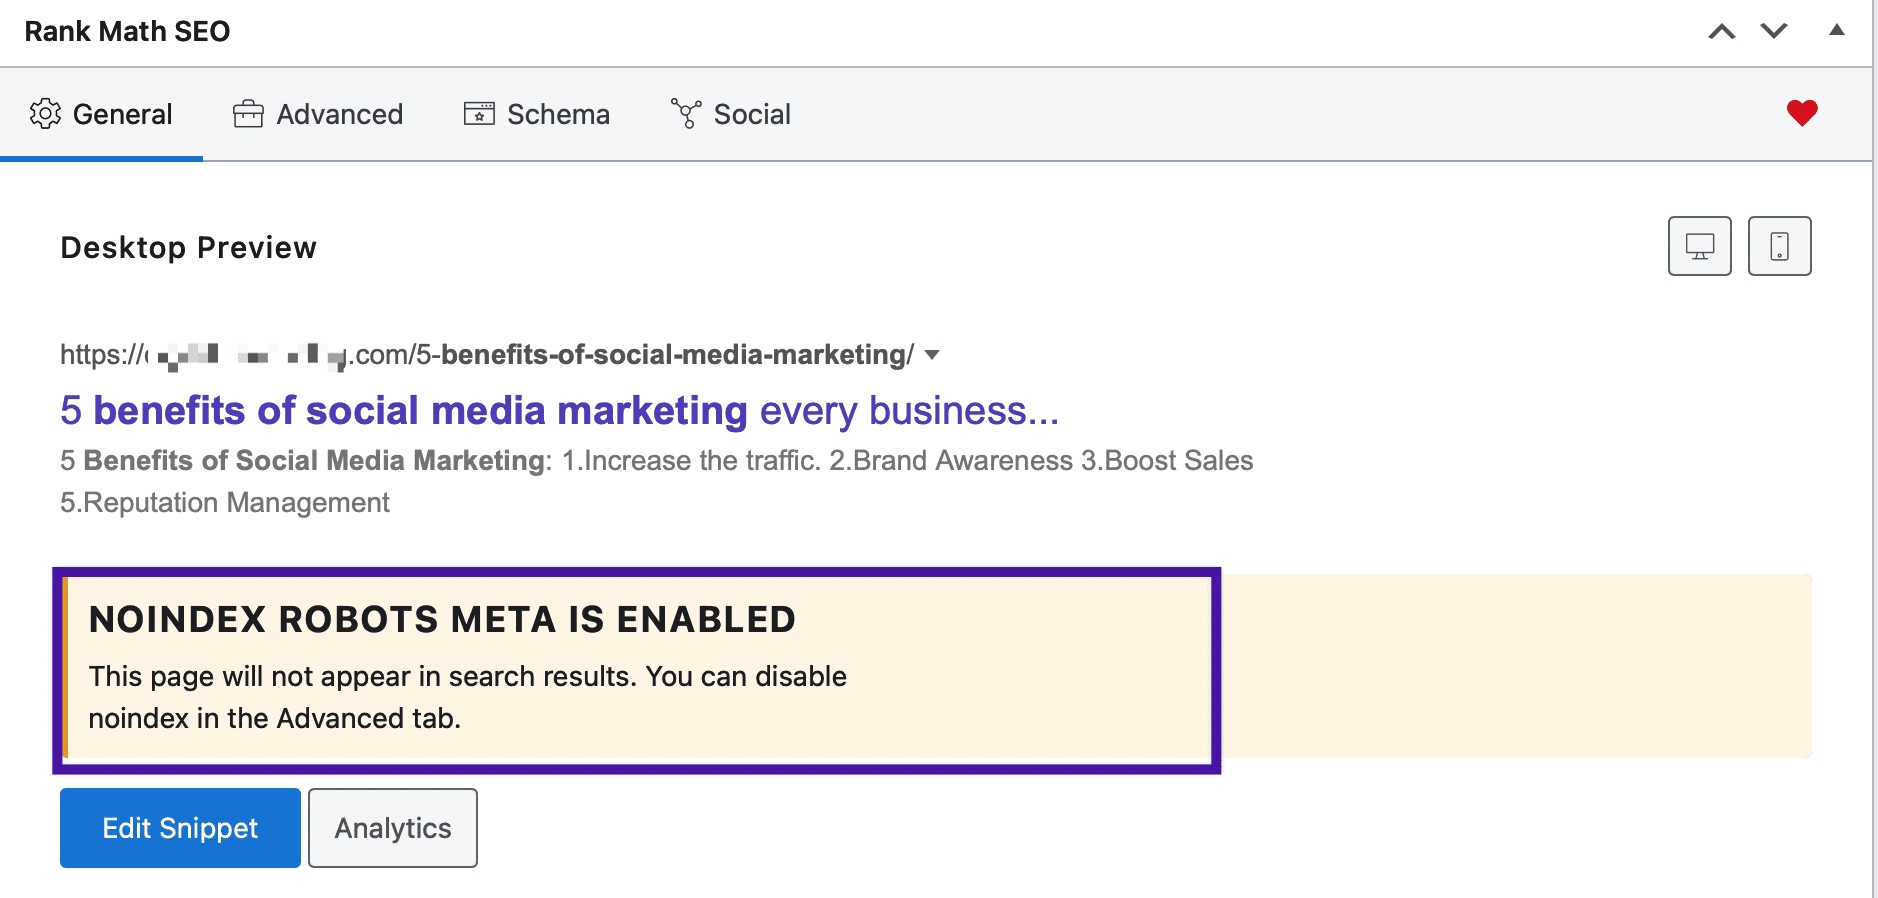
Then come back to the general settings of your post and you can confirm that the settings are correct.
This is the best & easiest way to mark posts and pages as “noindex”.
To get started – if you aren’t already – download and install the Rank Math WordPress SEO plugin to get started…
If you’ve absolutely any questions on getting Rank Math installed on your website or using No Index robots meta with Rank Math, feel free to reach our support team, as we’re always here to help.