Have you ever seen an image online and wanted to know more about it? Perhaps you’re curious about the source of the image or want to see if it’s being used elsewhere on the Internet.
Whatever the reason, a reverse image search can help you find the answers you’re looking for.
In this knowledgebase article, we’ll explain how to perform reverse image searches on desktop and mobile devices.
We’ll cover everything from uploading your image to using handy browser tools, making the process quick and easy.
So, are you ready? Let’s dive in!
Table Of Contents
1 What Is a Reverse Image Search?
A reverse image search is a technique used to find information about an image or its origin using the image rather than keywords or text.
Instead of entering text-based queries, you upload an image or provide a URL link to an image, and the search engine analyzes the image to find similar or matching images.

A reverse image search can help you discover:
- Original Size: Discover the image’s true dimensions.
- Alternative Sizes: Find variations of the same image.
- Other Appearances: Locate where else the image pops up online.
- Visually Similar Images: Identify related visuals.
2 Utilizing Reverse Image Search for SEO
Reverse image search can also be a valuable tool for SEO. Here are three ways you can use it to improve your search engine rankings and stay ahead of the competition:
- Backlink Building: You can utilize reverse image search to identify websites using your images and reach out to them. Request that they mention or link back to your site, enhancing your backlink profile and authority.
- Discover New Keywords and Content Ideas: By using reverse image search to analyze an image, you can locate similar images and explore their titles and associated content. This can help you generate content ideas and identify relevant keywords for your blog posts or product descriptions, ultimately improving your SEO.
- Analyze Competitors: You can also use reverse image search to analyze your competitors’ websites. By searching for their images, you can find out where they are getting them and what types of images they use.
- Optimize Image Metadata: A reverse image search helps ensure your images have optimized file names, alt text, captions, and other metadata. This helps search engines better understand the content and context of your images, improving their visibility in image search results.
3 How to Do a Reverse Image Search on a Desktop
Performing a reverse image search on your desktop is a simple task that can be done using different search engines.
Let’s guide you through two reverse image search methods on your desktop computer – Google Lens and Bing Visual Search.
3.1 How to Reverse Image Search on Desktop With Google Lens
To begin, make sure you have Google Chrome installed on your computer. Open Google in your browser and click the Search by image icon, as illustrated below.

This will open up a field with two options to provide the image you want to search for.
- Upload a file: This option allows you to drag and drop an image from your computer to use as the search item.
- Paste image link: This option allows you to use the URL of an image you have found on the internet.
You can choose any method based on your preference.

For this guide, we will use the Paste image link method. To do so, simply right-click on the desired image on a website and select Copy image address.
Then, paste the URL into the Paste image link field and click the Search button.

Google will analyze the image you provided and display similar images from the internet.

You can also click the Find image source link at the top to see more images and their sources.

Moreover, you can also directly search for an image you come across on a website using Google Chrome.
To do this, visit the website containing the desired image and right-click on the image. A context menu will appear. Then, select the Search Image with Google option.

The Google Lens panel will appear on the right side of the page, displaying various search results.
To see more search results, click Find image source at the top of the image and access additional information and sources.

3.2 How to Reverse Image Search on Desktop With Bing Visual Search
First, ensure that you use Microsoft Edge as your desktop browser. Open it and navigate to Bing. Look for the Search using an image icon and click on it to proceed.

After clicking on the icon, it will present three options to provide the image for the search:
- Upload: Simply drag an image from your computer and drop it into the upload box. You can upload multiple images simultaneously if needed.
- URL: Paste the URL of the image you want to search for.
- Take a photo: You can use your webcam to take a picture and directly use it for the reverse image search.

You’re free to select any option that works for you, but for this guide, we’ll proceed by pasting the same image URL we previously used.
After you input the image URL, Microsoft Bing will show visually similar images, related pages, and associated content.
Additionally, you can hover over displayed images to see their sizes and links to their sources.

Like Google, you can also perform a reverse image search on Bing directly from the website where you found the image.
But Bing offers two methods:
1. Look for the ‘Visual Search’ icon associated with the image on the webpage. When you see the image you want to search for, click its visual search icon.

2. Also, you can right-click on the image and choose the ‘Visual Search’ option from the context menu.

After choosing the ‘Visual Search’ option, the visual search results will display on the right side of your page. These results will show similar images, links to their sources, and image sizes.
To see the complete image search result, click the Open in new tab button below the visual search results.

4 How to Do Reverse Image Search on Mobile Device
Now, let’s explore how to conduct a reverse image search on your mobile devices.
4.1 How to Do a Google Reverse Image Search on a Mobile Device
Now, let’s discuss how to do a Google Reverse Image Search on iOS and Android devices. This guide will assist you whether you have an iPhone or Android.
First, install the Google Chrome app on your Android device. If you’re using an iOS device, you can download and install it from the App Store.
Once installed, open the Google Chrome app and go to Google. Then, tap the Search by Image icon to begin the reverse image search.
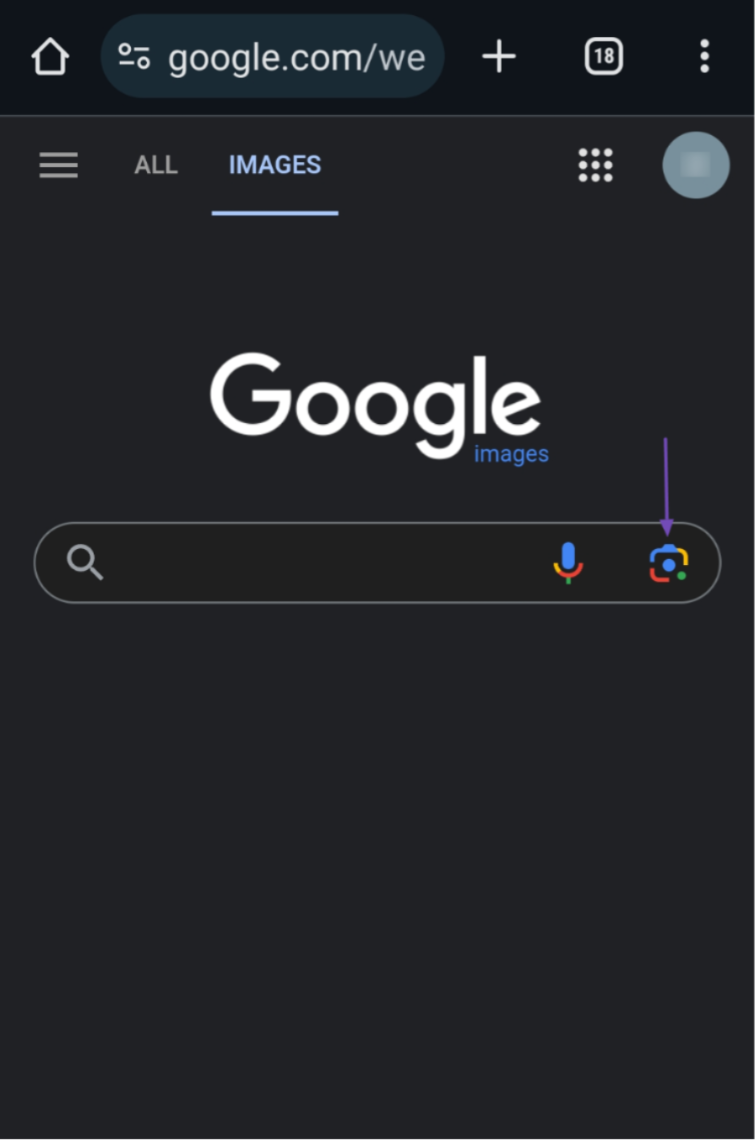
This will open Google Lens, which offers various options, such as selecting an image from your phone’s gallery or taking a photo using the large white circle with a search icon.
The choice is yours to select the preferred option for providing the image to search for.

When you provide an image, Google Lens will scan it and generate search results that include similar images sourced from the internet.

You may view additional results by scrolling down the screen for more content and source links.

4.2 Google Image Search on Mobile Devices for an Image on a Website
Like desktop devices, you may come across an image on a website where you wish to find similar images or discover other instances of the image appearing on the internet.

To do this, long press on the image you want to search. This action will trigger a context menu to appear. Select the Search image with Google Lens from the context menu.
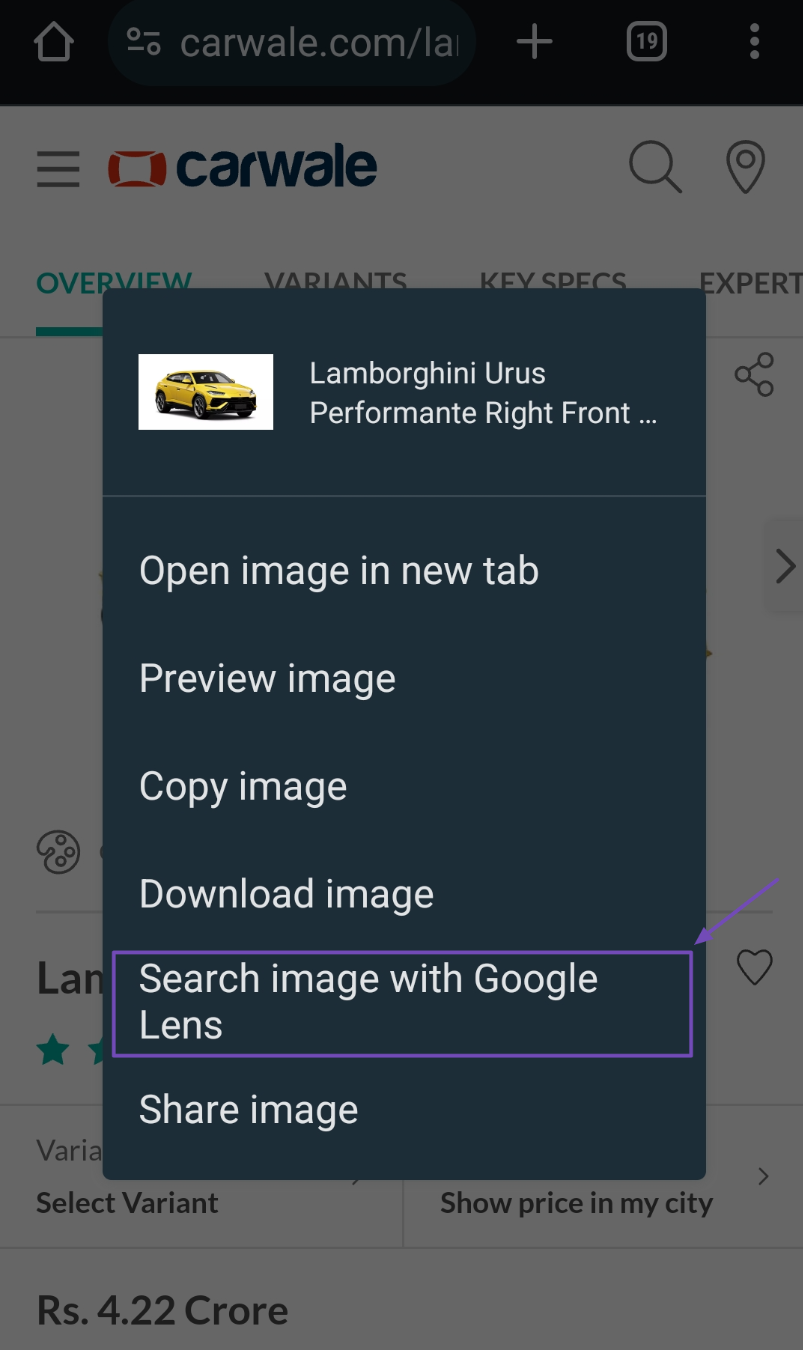
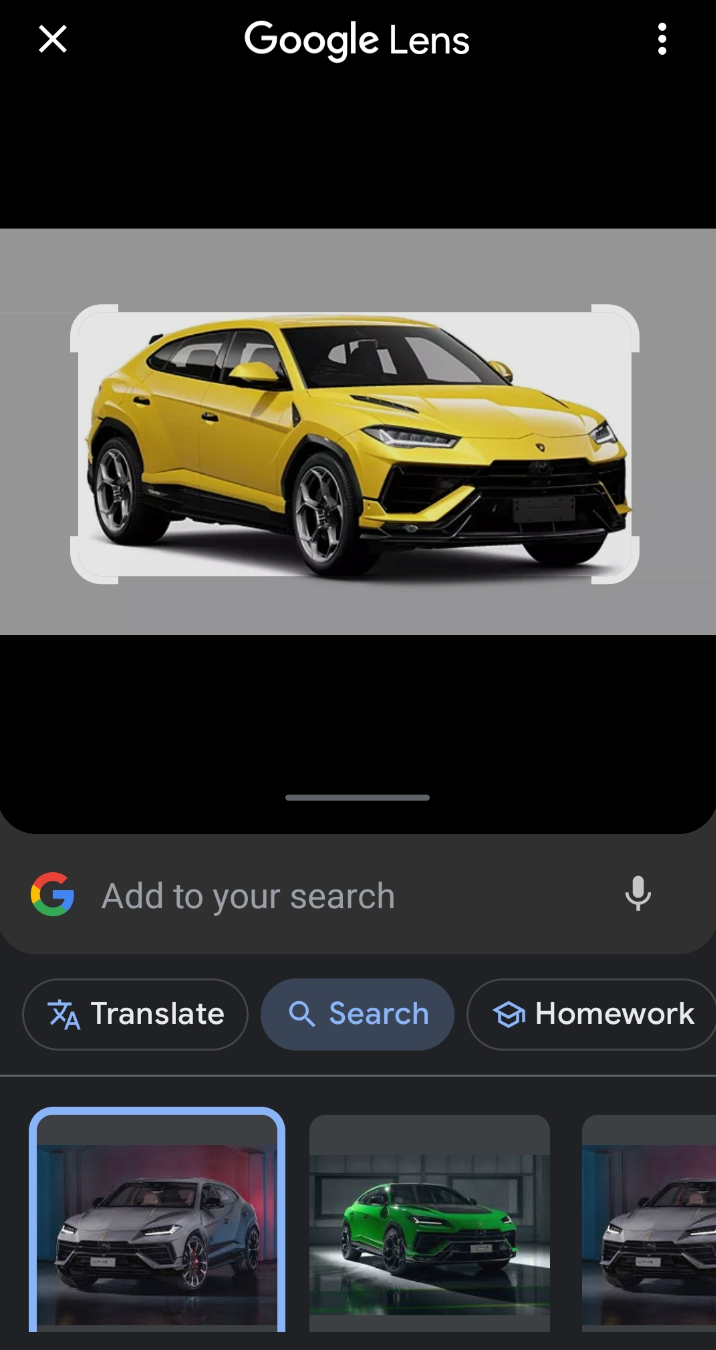
Google Lens will scan the image and present you with similar images from the internet. You can then browse through these images, explore their sources, and examine their accompanying content.
The same method applies when using the Bing app on your mobile phone. Simply open the app and select the Visual Search icon. From there, follow the queue.
That’s it! We hope this guide has helped you perform a reverse image search. If you have any further questions, please don’t hesitate to contact our support team—we’re available to assist you anytime.